Summer White Toe Nail Designs 25 Ideas: A Fresh Pedi on the Block
With the mercury rising and sandals becoming the footwear du jour, isn’t it time we talked about the unsung hero of summer style: our toenails? Often hailed as summer’s brightest color, white brings with it an air of sophistication and a canvas for creativity. But how do you elevate a basic white to a summery symphony on your toes? Let’s discover the secrets to turning your pedicure into a fashion statement.
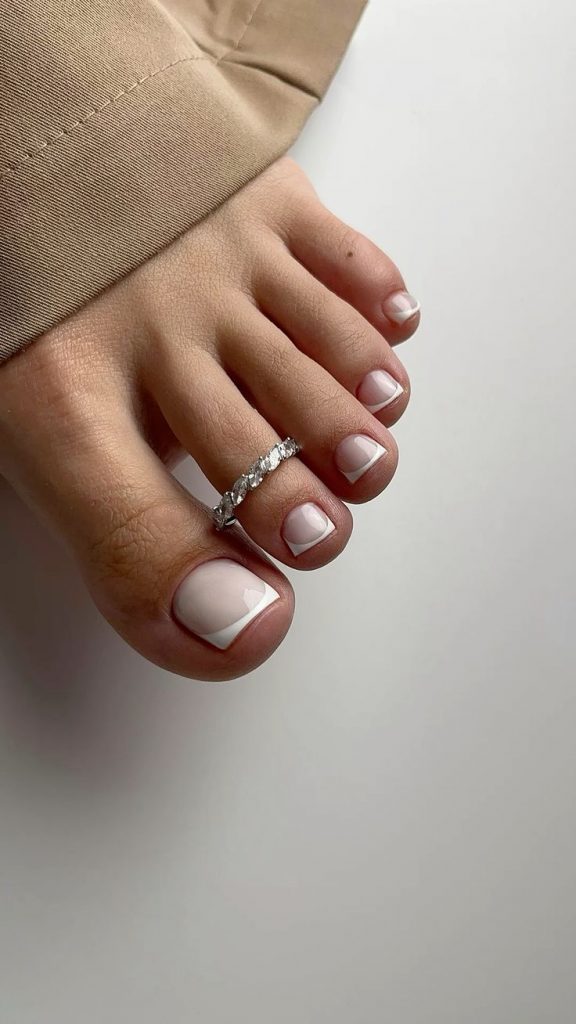
The typical French Pedi: a galaxy on your toes
There’s a certain je ne sais quoi about a French pedicure, don’t you think? The image here takes the traditional approach to the next level with a milky white base complemented by a soft, square tip. It’s not just a nail design; it is an ode to understated elegance. The simplicity of the color and the precision of the lines speak volumes about the sophistication of the wearer.
- Consumables:
- Base coat: L’Oréal Paris Color Riche Milky Way
- White tip polish: OPI Alpine Snow
- Top layer: Seche Vite Dry Fast
Each element plays its role: the base layer for a creamy foundation, the Alpine Snow for that fresh edge, and the Seche Vite to seal the deal with a glossy fortress.
To replicate this toenail design at home, start with a clean, shaped nail. Apply the milky base and let it dry. With a steady hand or striping tape, define the tip with white paint. Finish with a top coat for a shiny summer look.
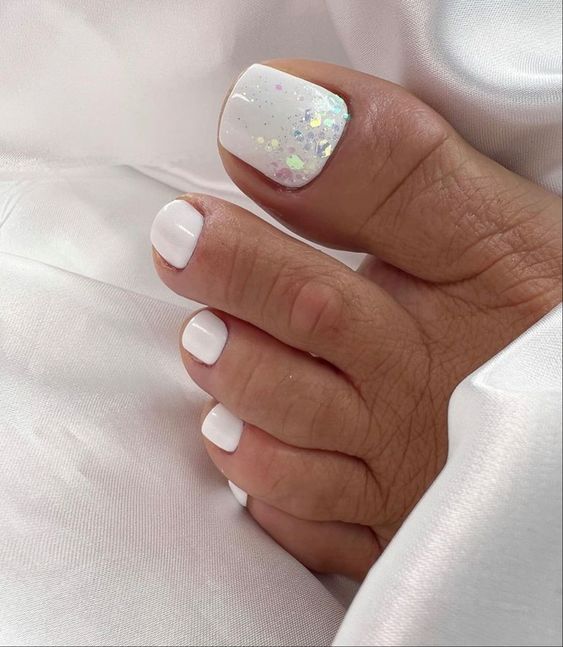
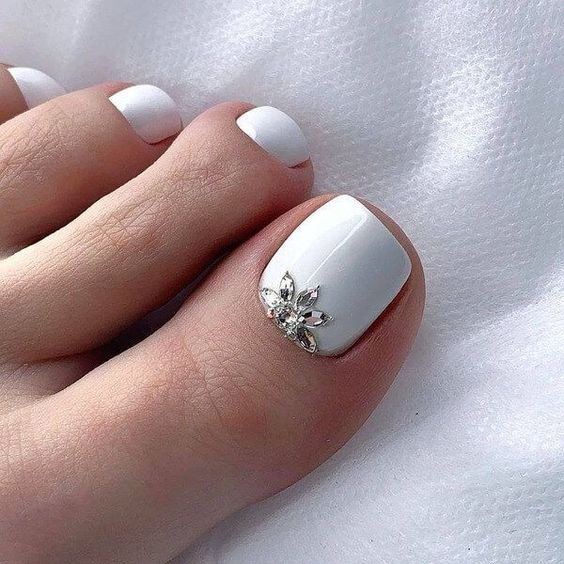
White with a touch of bling
Dive into a soft, sculpted wonder that whispers class with every step. This design features a flawless white polish, a nail shape that reflects the elegance of ballet slippers, and a touch of bling with a single rhinestone. It is a harmonious balance of gel and glamor that is perfect for summer designs.
- Consumables:
- White gel polish: Gelish Arctic Freeze
- Stones: Swarovski clear crystal
- Adhesive: Nail glue
Apply two coats of Arctic Freeze and cure each coat under UV light. Place the rhinestone on the base with a dab of nail glue. It’s a conversation starter, a twinkling star on a clear night.
Creamy canvas with a hint of lace
White can be whimsical, especially when combined with the intricate details of lace. This look is a nod to traditional craftsmanship, combining cream tones with delicate lace patterns for a matching idea that is both timeless and romantic.

- Consumables:
- Cream polish: Essie ballet slippers
- Lace sticker: Nail Art Lace sticker
- Top coat: Sally Hansen Insta-Dri
Gently apply the lace emblem to the base of the Essie Ballet Slippers, smoothing out any bubbles for a seamless fit. A swipe of Insta-Dri topcoat will ensure your artwork stays in place during summer adventures.
Speckled with Summer: A Polka Dot Affair
Summer is synonymous with fun, and what’s more fun than polka dots? A matching base with playful polka dots gives any ensemble a carefree vibe, making it an ideal choice for toenail ideas.
- Consumables:
- White paint: China Glaze White on White
- Points tool
- Top coat: Sally Hansen Miracle Gel
Polka dots are a piece of cake to achieve. Place small dots in a random pattern over the white polish using a dotting tool. Seal it with the Miracle Gel topcoat for longevity.
Diamonds on your feet: the ultimate summer treat
When summer white toenail designs and nail type meet luxury, you get a pedicure that is nothing short of fabulous.
- Consumables:
- Base layer: Essie First Base
- White polish: Chanel Pure White
- Top coat: CND Vinylux Weekly Topcoat
Start with a base coat and then apply two coats of Chanel Pure White. CND Vinylux topcoat ensures that everything stays in place while you go to summer parties.
Neon stripes of summer joy
Imagine the pure joy of summer captured on a white canvas; that’s what this design evokes with its playful neon stripes. It’s a bold statement of summer fun, a perfect match for the vibrant soul ready to enjoy the sun.
- Consumables:
- Basecoat: Sally Hansen White On
- Neon paints: Orly Neon Earth Collection
- Top layer: INM Out The Door
Starting with a fresh white base, take any neon color and use a thin brush to sweep a curve across each toenail. It’s like painting with the rays of a setting sun. Seal the art with a quick-drying top coat to keep the colors vibrant.
Pink blossoms and crystals
There’s something about the combination of soft pink and the sparkle of crystals that exudes summer romance. It’s a gentle nod to the beauty of nature’s flowers, with a bling factor that’s perfect for both day and night.
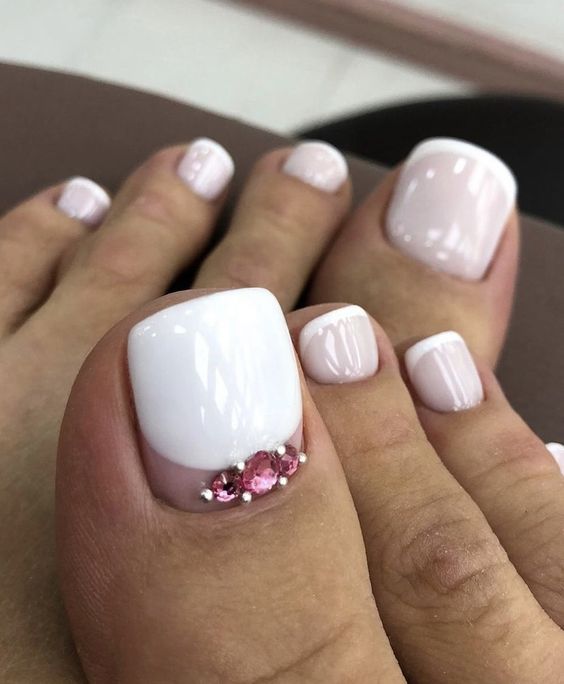
- Consumables:
- Basecoat: Essie Blanc
- Pink Crystals: Preciosa Flatback in Rose
- Adhesive: Gem Tac glue
- Top coat: Essie Gel Setter
Apply the white base, add a drop of glue where you want the crystals to bloom and gently press them into place. The Gel Setter top coat gives it a gel-like finish without the hassle of UV light.
Blue and glitter gradient: summer sky on your toes
The gradient from blue to white is reminiscent of the clear summer sky meeting the white sandy beach. It’s an invitation to dip your toes in the ocean, metaphorically speaking of course.

- Consumables:
- Basecoat: OPI Funny Bunny
- Blue glitter: Blue My Mind by Holo Taco
- Sponge for gradient effect
- Top layer: Butter London Hardwear PD Quick
Start with your white base and then use a sponge to apply the blue glitter from the tip, then work your way down for a soft gradient. Finish with a top coat that adds shine and durability.
Constellation Sparkle: a universe at your feet
For those evenings when you want your toes to sparkle like the night sky, this design is a must. It’s a celebration of glitter that makes you feel like you’re wearing a piece of the cosmos.
- Consumables:
- Basecoat: China Glaze White on White
- Glitter polish: Starrily Neutrino
- Top coat: ILNP Absolute Topcoat
After your white base, apply the glitter polish, concentrating on the tip for a dense star effect. The ILNP top coat is perfect for smoothing out the glitter texture.
Silver flora: elegance defined
If you want a touch of luxury without going overboard, adorn your white toes with silver floral accents. It is subtle, elegant and completely summery.
- Consumables:
- Basecoat: Essie Tuck It In My Tux
- Silver Nail Decals: Born Pretty Floral Decals
- Top coat: Glistening and shiny top coat
Apply your white paint, place the silver decals with precision and protect your design with a top coat that promises longevity.
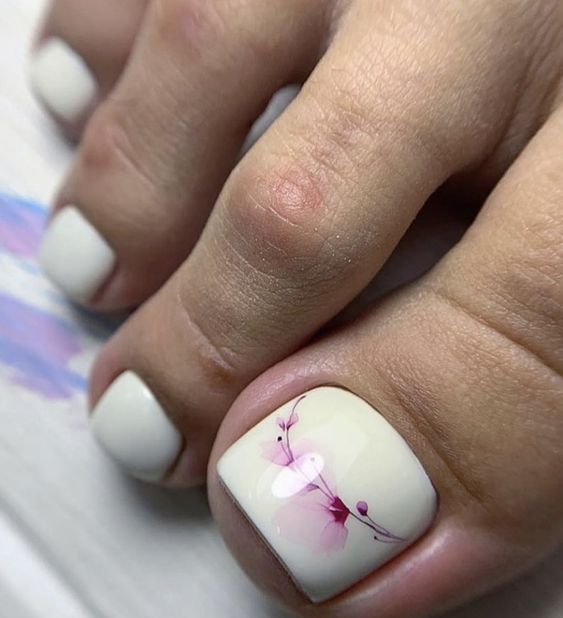
Delicate floral whisper
In this serene design, the white canvas is graced by the soft touch of pink flowers, evoking the gentle caress of a summer breeze. It is a design that exudes grace and a delicate strength, just like the summer flowers that inspire it.
- Consumables:
- Basecoat: Essie Marshmallow
- Pink nail art paint: Kiss Brush-On Nail Art Paint
- Detailing brush
- Top coat: OPI Start to Finish
After you’ve laid the foundation, use the detail brush to hand-paint the flowers with art paint. The result? A masterpiece on your toes. Finish with a top coat to protect your delicate design.
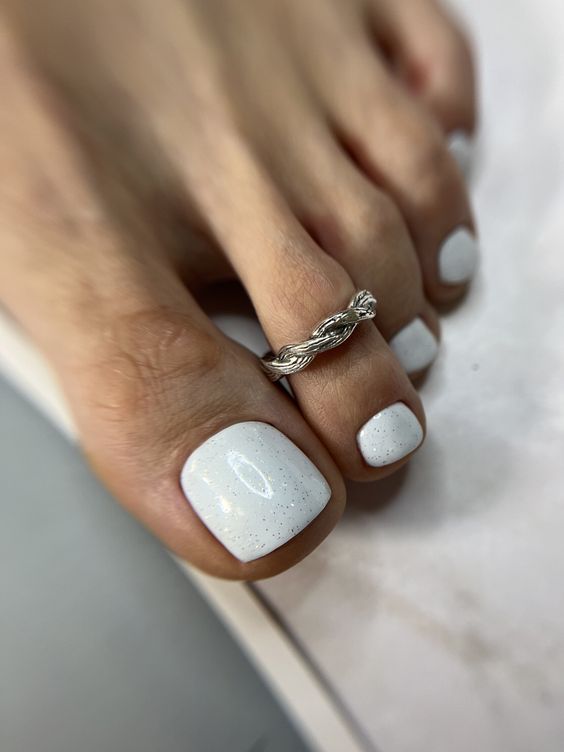
Milky Way speckled with stardust
This design takes the simplicity of white to the next level with a speckled effect, reminiscent of a night sky dotted with stars. It is an invitation to dream, a cosmic dance at your feet.
- Consumables:
- Basecoat: Sally Hansen White Out
- Speckled Polish: Cirque Colors Speckled Hen
- Top coat: Essie Good To Go
One coat of speckle lacquer over the white base is enough to achieve this look. Finish with a top coat for a smooth feel.
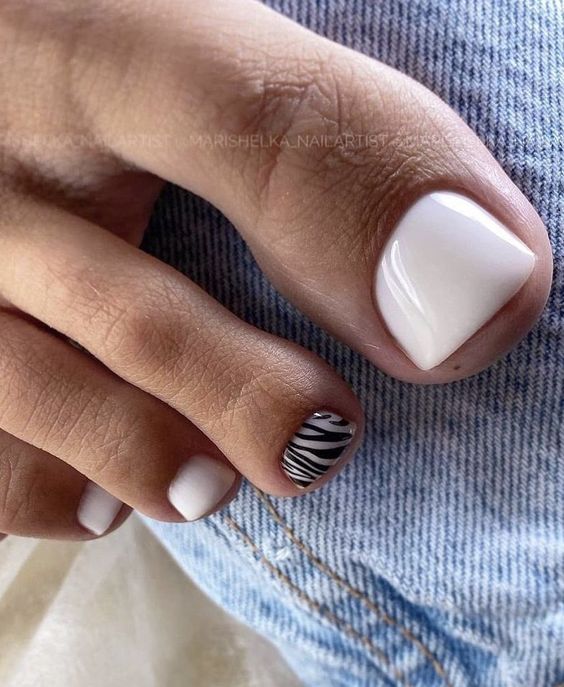
Zebra stripes: unleash the wild side
Black and white never looked so chic. These zebra stripes bring out the wild side of summer, a bold contrast to the serene white. It is a powerful statement that indicates that you are ready to enter the summer with confidence.
- Consumables:
- Basecoat: OPI Alpine Snow
- Black strip paint: Stripe Rite in Black
- Top coat: Seche Vite Dry Fast Topcoat
Using the striping polish, create thin zebra stripes over the white base. Every nail becomes a work of art. Seal your design with Seche Vite for a durable finish.
Safari Chic: Stripes of adventure
Inspired by the majestic patterns of the African savannah, this zebra stripe design offers an adventurous twist on classic summer white. It is a mix of sophistication and the call of the wild.

- Consumables:
- Basecoat: ORLY White Tips
- Black nail art pen: Sally Hansen I Heart Nail Art Pen
- Top layer: INM Out The Door quick-drying top layer
The black nail art pen is the hero here, allowing precise freehand strokes. A quick swipe of the INM top coat will have your safari-chic nails ready for the day’s journey.
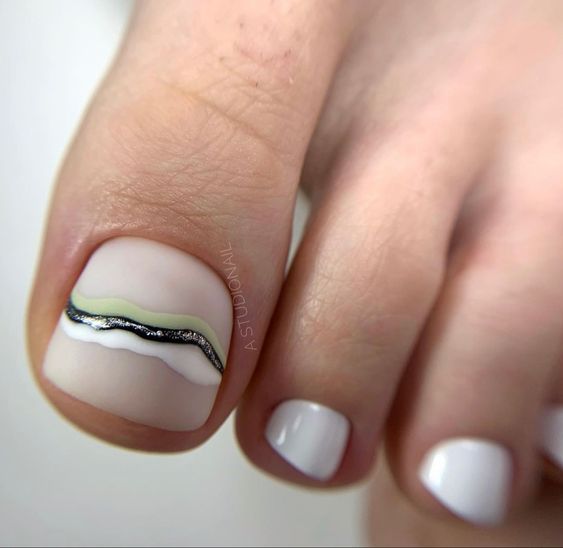
Ethereal elegance: silver linings
This look embodies the ethereal elegance of summer, with a flowing silver line that adds a modern twist to the classic white. It’s like capturing a single, beautiful cloud on a perfect summer day.
- Consumables:
- Basecoat: CND Shellac in Cream Puff
- Silver striping tape
- Top coat: OPI Topcoat
After the Shellac base, place the silver tape in the desired pattern. Apply the OPI top coat to ensure the silver line blends seamlessly into your ethereal design.
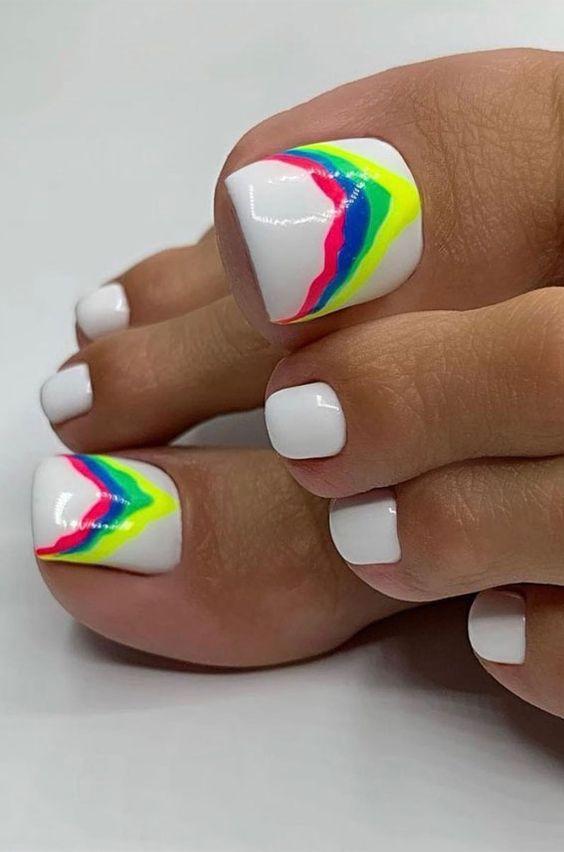
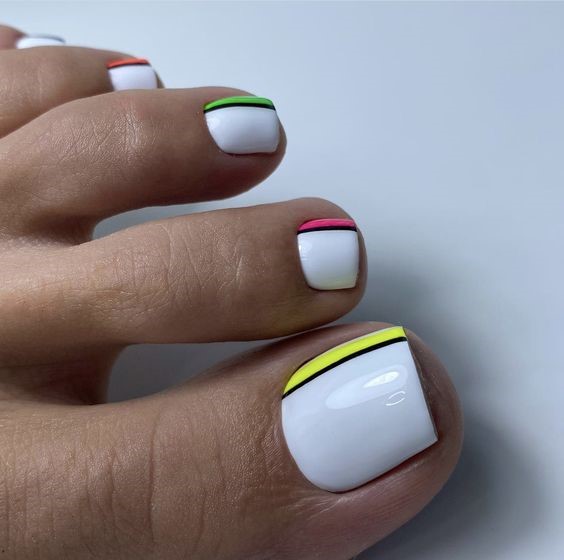
A touch of neon on pure white
Here’s a summer epiphany: Neon and white make a powerful statement. A summery white toenail design with neon accents isn’t just a style, it’s an exclamation. The sharp lines of the neon testify to playfulness and impeccable chic. The square, clean white base is a canvas for summer creativity, and each toe can be painted a different neon shade.
Supplies for creation
- White polish: “Snow Me White” by Sinful Colors for the base.
- Neon paint: Choose shades from China Glaze’s Neon collection for the accents.
- Detailing brush: to get sharp, clean lines.
DIY manicure steps
After a base coat, apply two coats of white lacquer. Let it dry completely. Dip your detailing brush in neon polish and, with a steady hand, paint the bright lines at the tip. Finish with a transparent top coat for a long-lasting glossy effect.
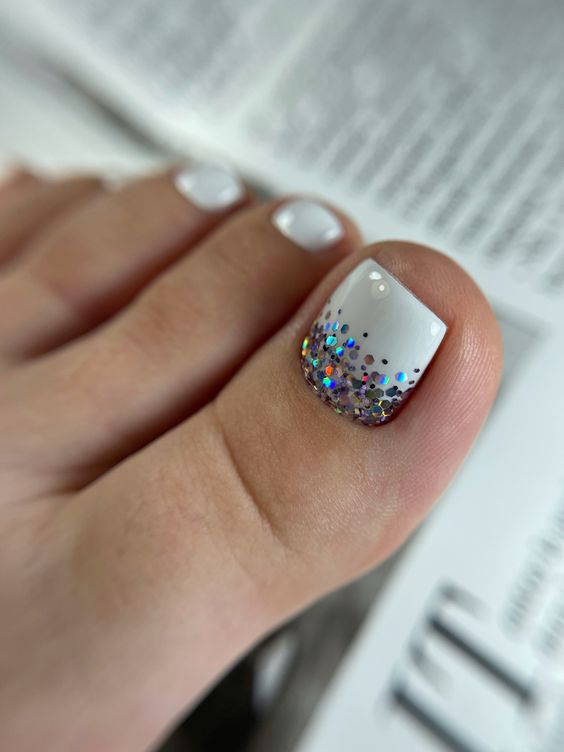
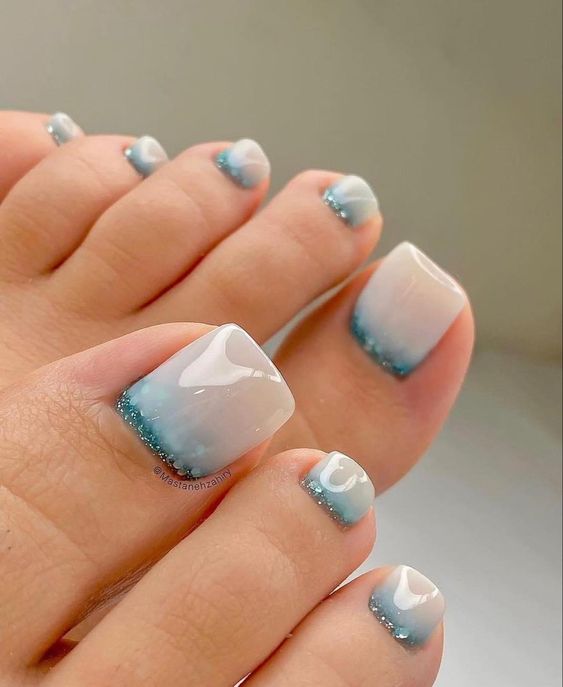
Ocean kissed tips
A subtle ode to the ocean’s edge, this design conveys the essence of waves kissing the shore. The milky white color gradient, which turns into a soft sky blue, covered with glitter like scattered sea foam, makes these square toenails a summer dream. The design whispers stories of tranquility and a soft summer breeze.
Supplies for creation
- Milky white polish: “Ballet Slippers” from Essie for the base.
- Blue gradient polish: “Bikini So Teeny” by Essie for the tip.
- Glitter: A pinch of “Set in Stones” from Essie to simulate sea foam.
DIY manicure steps
Start with the milky base and let it dry. Gently sponge on the blue polish, creating a gradient effect. While it’s still sticky, you can add a touch of glitter. Finish with a top coat for a smooth transition, as if waves are fading away.
Terrazzo trend
The terrazzo floor that adorns chic Italian homes has danced its way onto toenails. This design features dots in black, blue and cream, creating a playful yet elegant design on a soft white base. The square shape adds a modern touch to this classic art form, reinvented for your summer white toenail designs.
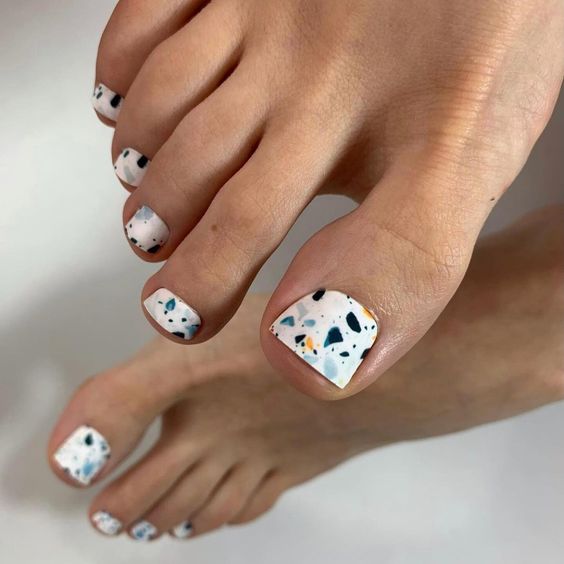
Supplies for creation
- Soft white polish: Try Essie’s “Marshmallow” as a starting point.
- Terrazzo flakes: Use small pieces of nail foil in different colors to achieve the look.
- Tweezers: to accurately place your terrazzo pieces.
DIY manicure steps
Once your white base has set, apply a tacky base coat where you want your flakes to adhere. Use tweezers to place each piece, then finish with a clear top coat for a smooth, pebble-like finish.
The French twist
A new version of the classic with a design that is both timeless and modern: gel polish ensures a long life of this updated French manicure. The square tips are not only bright white, but also have the perfect nail shape to match any summer style, whether it’s a casual outing or a stylish soiree.
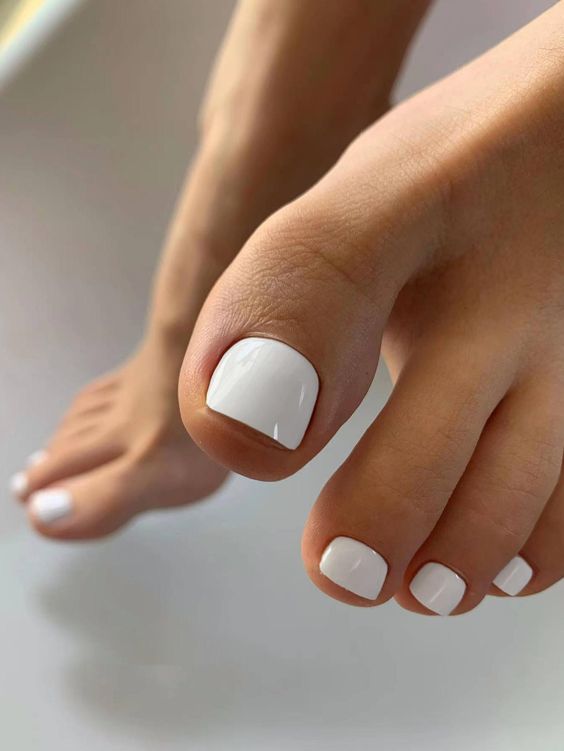
Supplies for creation
- Gel polish: Use CND Shellac’s “Cream Puff” for the white tip.
- Gel top coat: for a lasting soft shine and durability.
- Gel lamp: To harden your nail polish to perfection.
DIY manicure steps
Paint the tip with your white gel polish, let it harden and then apply your gel top coat. Let it harden again under the lamp and you’re ready to wave your toes in the summer air.
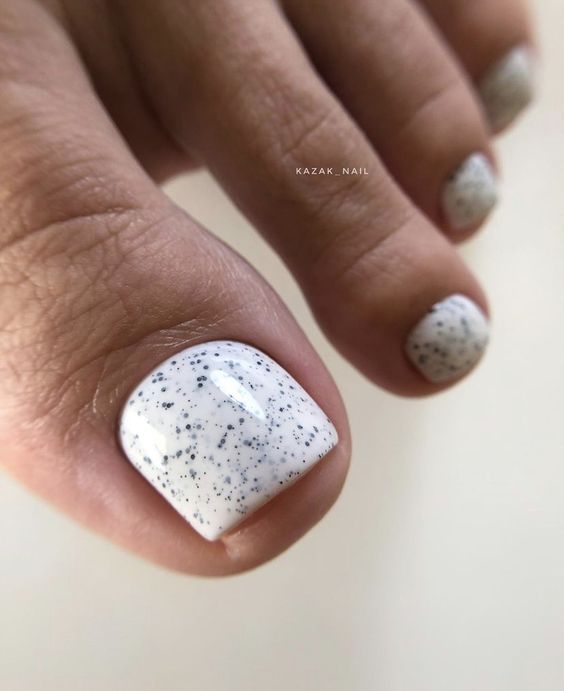
Speckled refinement
Minimal yet enchanting, this design takes summer white toenail designs to a place of subtle sophistication. The milky white base, sprinkled with multicolored confetti-like dots, exudes a carefree yet composed vibe, ideal for both summer fun and serious engagements.
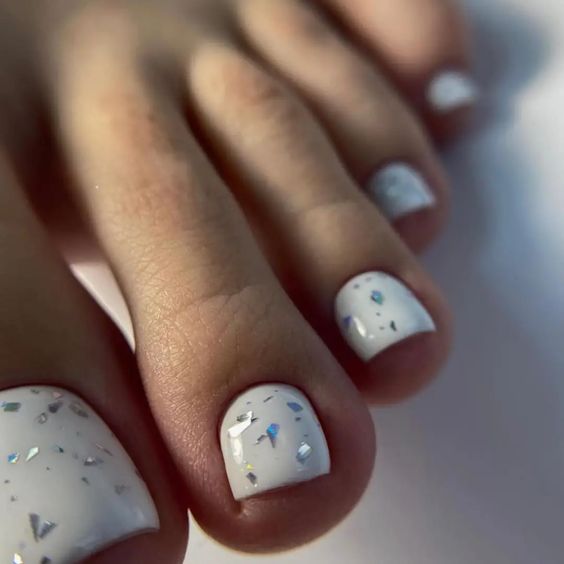
Supplies for creation
- Milky white polish: “Funny Bunny” from OPI creates a sheer yet impressive base.
- Confetti polish: “Party of Five Glitters” from Wet n Wild for that speckled look.
- A fine-tipped brush: to strategically place glitter if you prefer precision.
DIY manicure steps
Apply your milky base and let it dry. Then dab on your confetti polish for a random speckled pattern or use a fine-tipped brush to place each glitter piece where you want it. Finish with a high-gloss top coat for a long-lasting and protective seal.
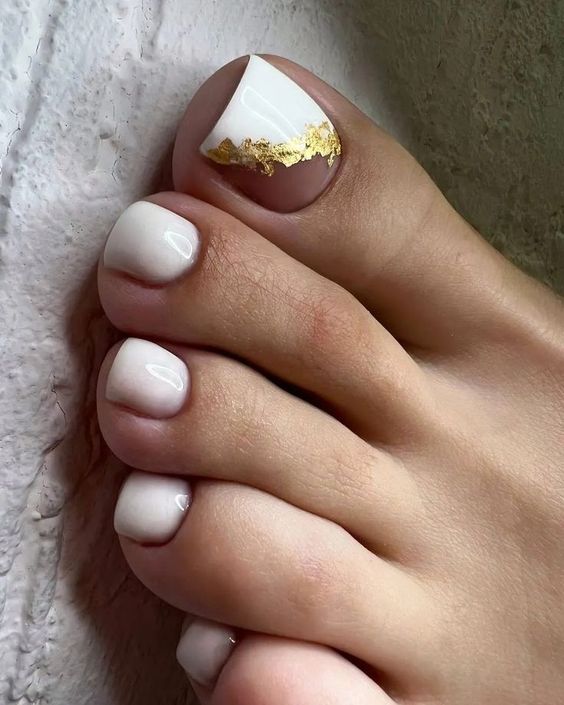
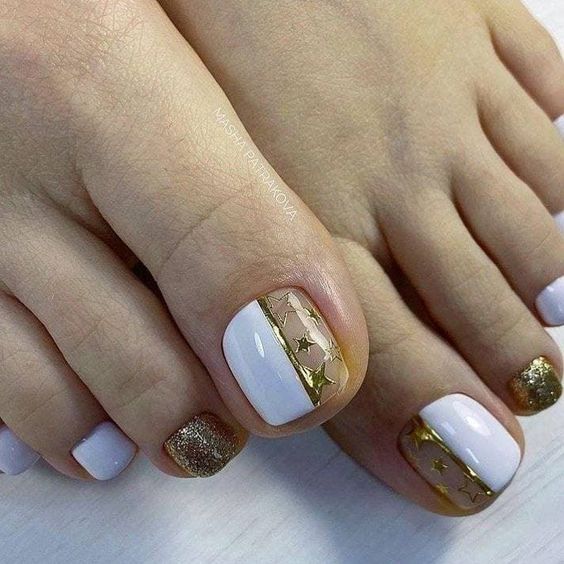
Gilded elegance
In the header photo, the toes are decorated with a sublime combination of soft white and luxurious gold. This design is a nod to luxurious yet understated summer glamour. A simple white base on most nails creates a sleek look, while accent nails shine with gold foil patterns against a creamy background, evoking the splendor of summer parties.
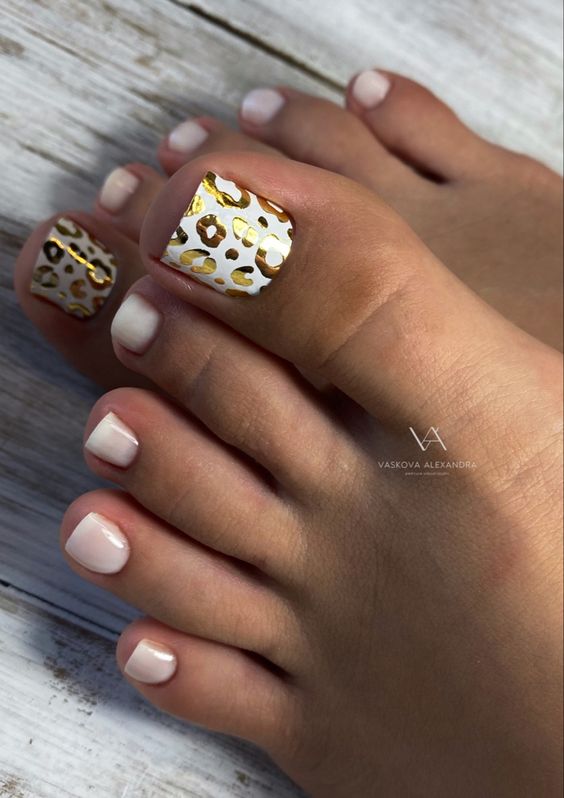
Supplies for creation
- Creamy white polish: Essie’s “Tuck It In My Tux.”
- Gold foil: Craft nail art foil for decoration.
- Foil adhesive: A clear foil adhesive for perfect adhesion.
DIY manicure steps
After your cream white base, apply the foil glue to the accent nails and wait for it to clear. Gently press the gold foil onto the nails and seal everything with a durable top coat for a gel-like finish.
Dots and pastel colors
The image presents a playful approach to summer nail art. Classic polka dots parade across the pure white background, creating a playful and airy design, perfect for a breezy summer day. The matte finish of the dot pattern gives a modern twist and reflects a carefree spirit.

Supplies for creation
- Translucent white polish: “Private Weekend” by Essie.
- Dotting tool: for the perfect dots.
- Matte top coat: “Matte About You” from Essie for the contrasting finish.
DIY manicure steps
Apply two coats of pure white polish. Once it’s dry, dip your dotting tool into the same polish and create the dots. For a twist, only apply a matte top coat over the dots, so that the rest remains shiny.
Geometric gold
Gold lines cross over a white background in the photo, creating a geometric wonder. This nail design embodies the chic, clean lines of summer fashion. It is an artistic expression that is both precise and playful, combining the classic white with a hint of metallic shine.
Supplies for creation
- White paint: “White Page” by Sally Hansen.
- Gold striping tape: for clean, straight lines.
- Transparent top layer: to ensure that the tape stays in place.
DIY manicure steps
Once the white base is dry, apply the striping tape in the desired pattern. Trim excess material and seal it with a top coat for a design that is both eye-catching and durable during summer adventures.
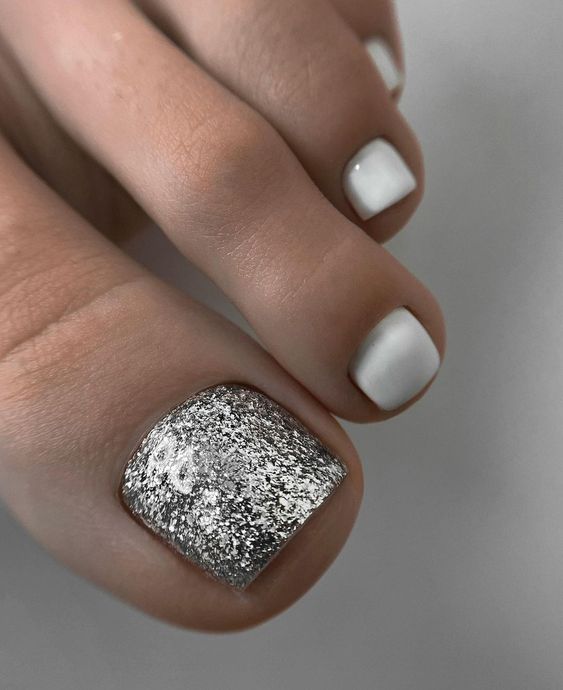
Silver splendor
Captures a sharp yet elegant nail design. One nail is completely covered in silver glitter and stands out among the plain white, reminiscent of summer evenings illuminated by glittering stars. The contrast of textures between the creamy white and the metallic glitter creates an alluring display.
Supplies for creation
- White polish: “Blanc” by Essie for the base.
- Silver glitter polish: “Rock at the Top” from Essie for the feature nail.
- A sponge: to apply the glitter for full coverage.
DIY manicure steps
Apply your base color. For the glitter nail, apply a coat of silver glitter polish and then use a sponge to apply a second coat for dense coverage. Seal with a glossy top coat for extra shine.
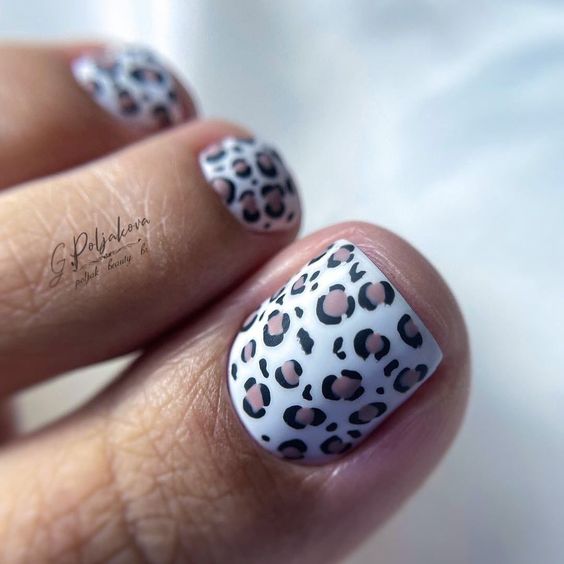
Leopard Luxury
Finally, it showcases a bold and trendy twist on the white nail theme with a leopard print design. It’s a mix of bold and classic style, perfect for the fashion-conscious person who wants to make a statement during the summer months.
Supplies for creation
- White polish: Start with “Blanc” from Essie.
- Black and tan polishes: For the leopard spots.
- Detailing Brush: For precision when creating the leopard pattern.
DIY manicure steps
With a white base set, use a detail brush to create uneven brown blobs for the base of the leopard. Then add the characteristic contours with black lacquer. Finish with a top coat for a design that bursts with style.
Save pin

Namie O, a talented writer at Willtiptop, conveys her passion for fashion and beauty in every word she writes. With a keen eye for detail and a deep insight into the latest trends, Namie’s articles and insights captivate readers and provide them with valuable knowledge and inspiration. Through her engaging and informative writing style, Namie aims to empower individuals to explore their style, experiment with beauty techniques, and embrace their unique sense of self.