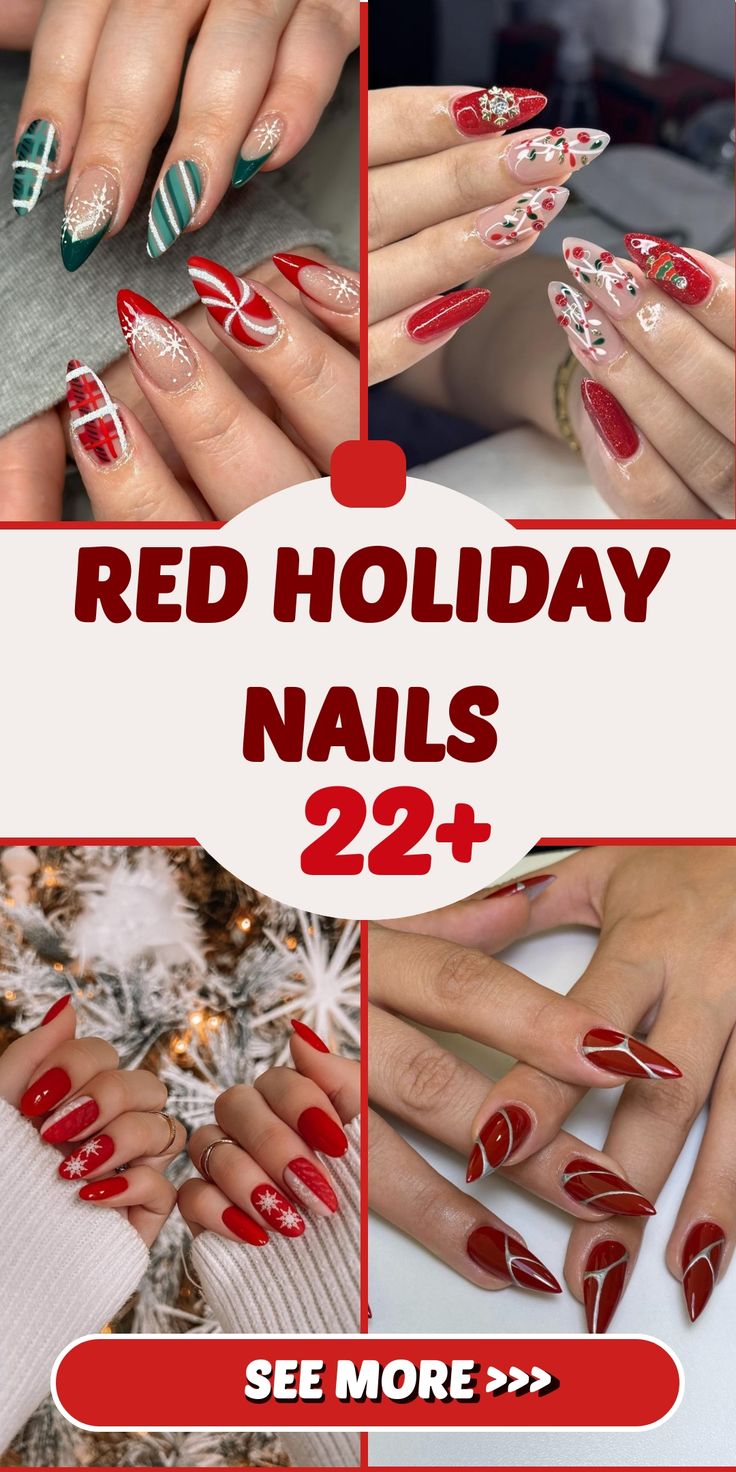
Simple Fall Nail Designs 25 Ideas: Embrace Autumn Elegance
When it comes to fall, nail designs become an exciting part of the seasonal transformation. From the vibrant hues of fall leaves to the cozy atmosphere of cooler weather, your nails can reflect the beauty of the season. Let’s explore some simple fall nail designs that are both trendy and easy to create at home. Whether you prefer short nails or almond shapes, there is something for everyone.
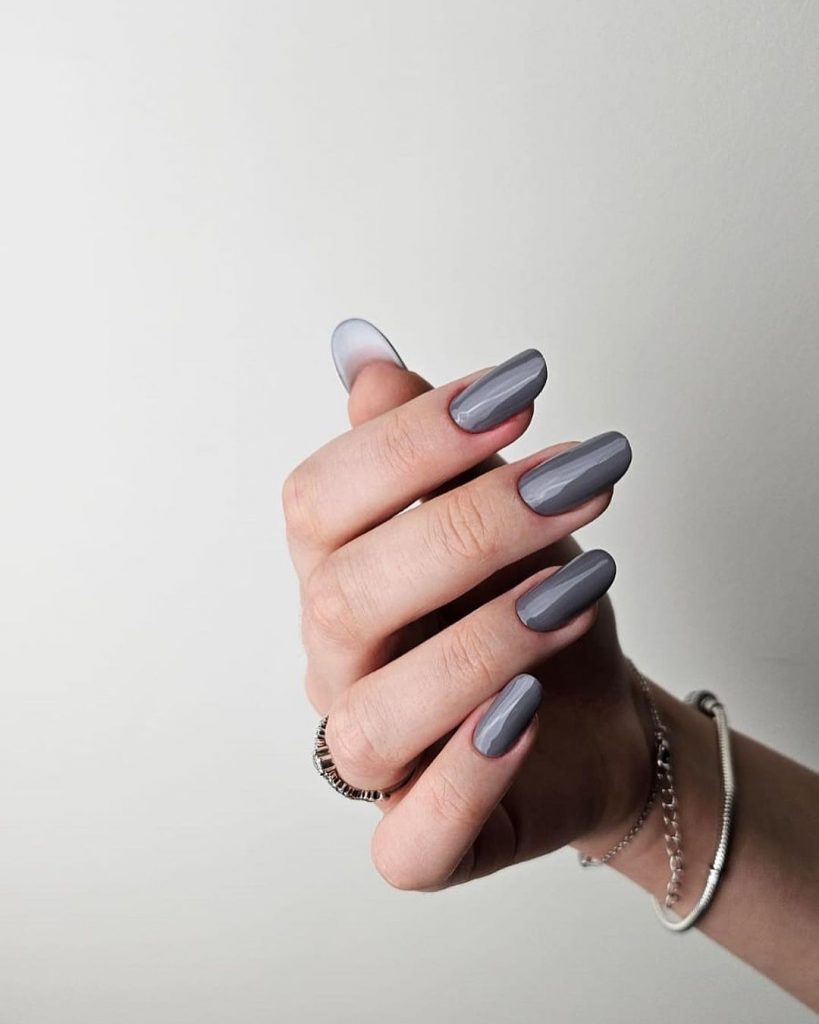
Gray elegance
Gray nails are a perfect choice for fall. They offer a neutral yet sophisticated look that will match any outfit. The design in the image has a sleek, glossy gray with a subtle ombré effect on the accent nail. This design is both stylish and versatile, suitable for both casual and formal occasions. The choice of a glossy finish adds a touch of elegance, making it stand out as a timeless fall favorite.
Supplies for gray elegance:
- Base coat: OPI Nail Envy
- Gray nail polish: Essie in “Chinchilly”
- Top coat: Seche Vite Dry Fast Topcoat
- Ombré sponge: Nail art sponge set
DIY instructions
- Start with a base coat to protect your nails.
- Apply two coats of gray polish for full coverage.
- For the ombré accent nail, use a sponge to apply a lighter shade at the tip and blend it downward.
- Finish with a top coat for a long-lasting finish.
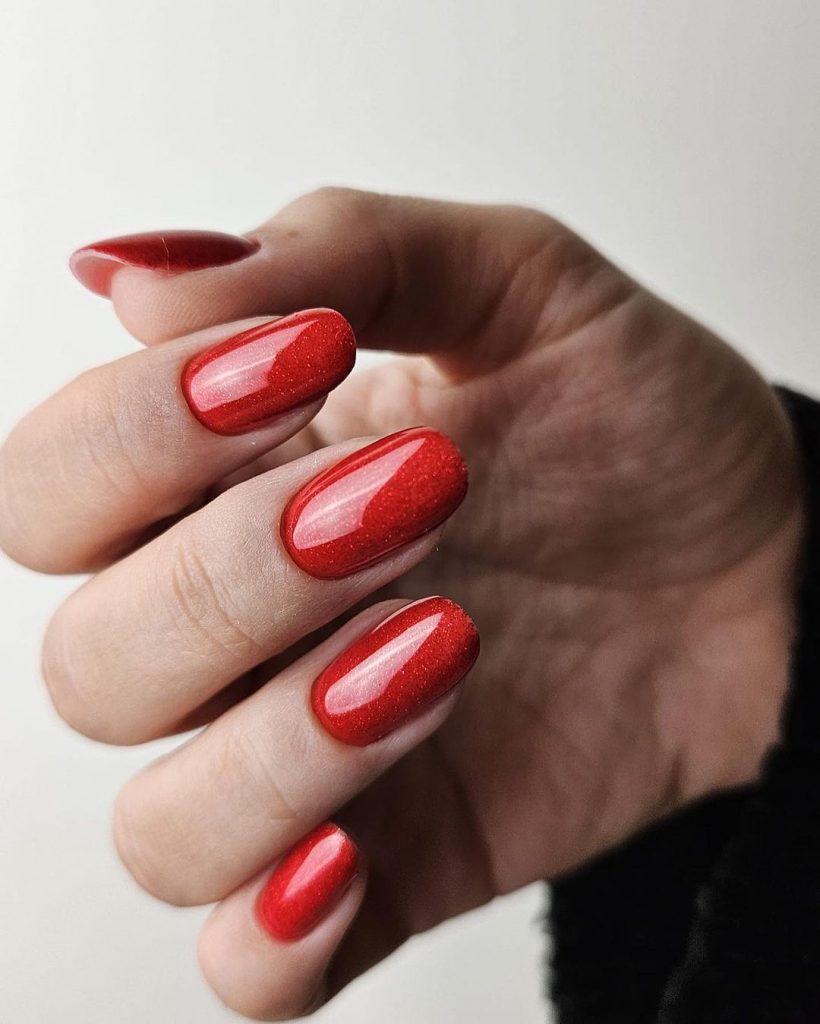
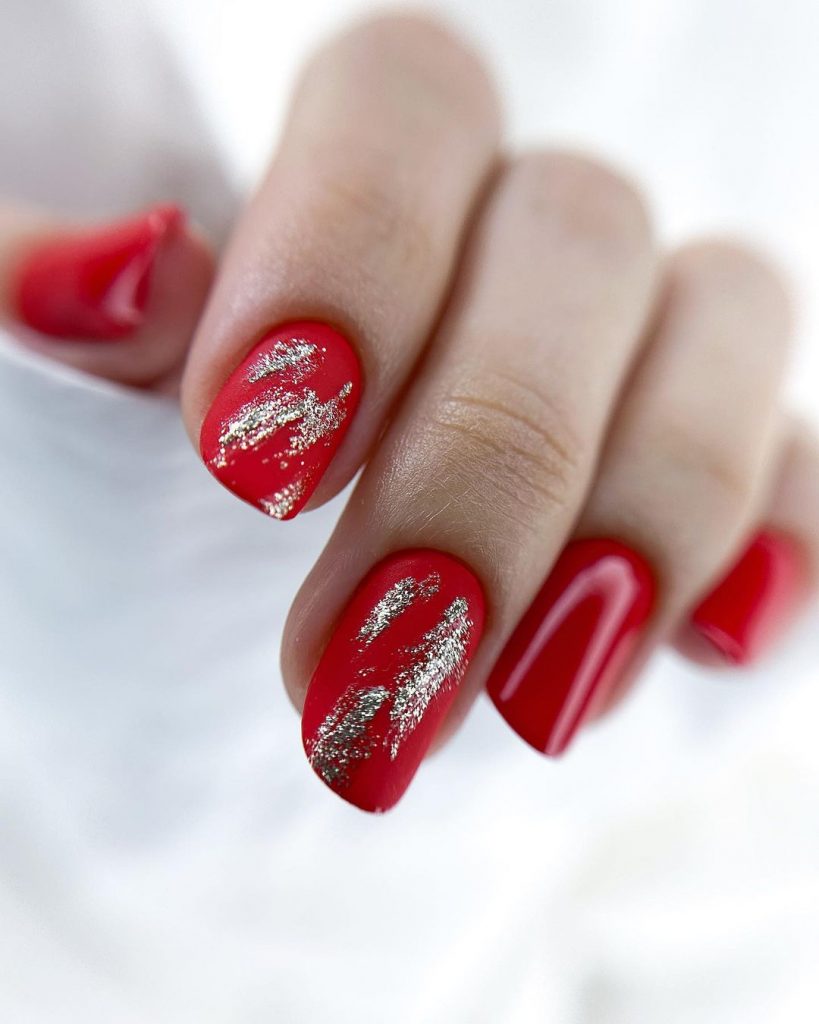
Bright red with glitter
Red nails make a bold statement, and adding glitter takes this classic look to new heights. The bright red base with a subtle glitter overlay is perfect for making a statement. It’s a fun and trendy choice for those who want to stand out this fall. The glossy finish adds a vibrant shine that catches the light beautifully, making it an excellent choice for both day and night.
Supplies needed for striking red with glitter:
- Base layer: Essie First Base
- Red nail polish: OPI in “Big Apple Red”
- Red glitter polish: China Glaze in “Ruby Pumps”
- Top coat: Sally Hansen Miracle Gel
DIY instructions
- Apply a base coat to your nails.
- Paint two coats of red lacquer for an opaque finish.
- Add a coat of red glitter polish, focusing on the ends for a gradient effect.
- Finish with a top coat to lock in the shine and glitter.
Matte green mix
Green is a typical autumn color and a matte finish can give it a modern twist. The image shows a beautiful mix of green tones in a matte finish, creating a unique and elegant look. This design is perfect for those who love earth tones and want a manicure that stands out without being too flashy. The variety of greenery adds depth and interest, making it a stylish choice for the season.

Requirements for Matte Green Mix:
- Base layer: Zoya Anchor base layer
- Green Nail Polishes: Essie in ‘Mojito Madness’, OPI in ‘Stay Off the Lawn’
- Matte top coat: Butter London Matte Finish Shine Free
DIY instructions
- Start with a base coat to protect your nails.
- Apply different green polishes to each nail for a varied look.
- Once the paint is dry, apply a matte top coat for a modern finish.
- Make sure each layer is completely dry before applying the next to avoid staining.
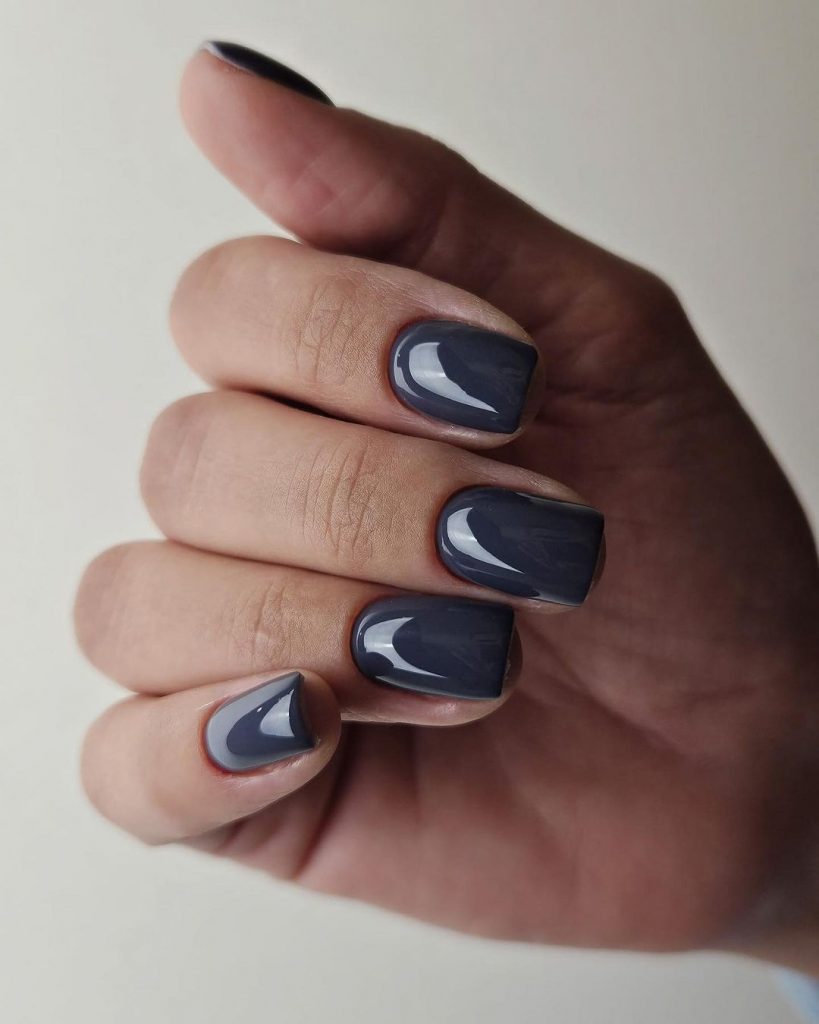
Chic short squares
Short square nails are both practical and stylish. The glossy dark gray paint in the image is perfect for fall and offers a sleek and polished look. This design is simple yet sophisticated, ideal for those who prefer minimalist elegance. The short square shape is easy to maintain and versatile, making it an excellent choice for everyday use.
Supplies needed for chic short squares:
- Base layer: Deborah Lippmann Hard Rock
- Dark gray polish: Chanel Le Vernis in “Gris Obscur”
- Top coat: Essie Gel Setter Topcoat
DIY instructions
- Apply a base coat to strengthen your nails.
- Paint two coats of dark gray lacquer for a rich color.
- Finish with a top coat to add shine and extend wear time.
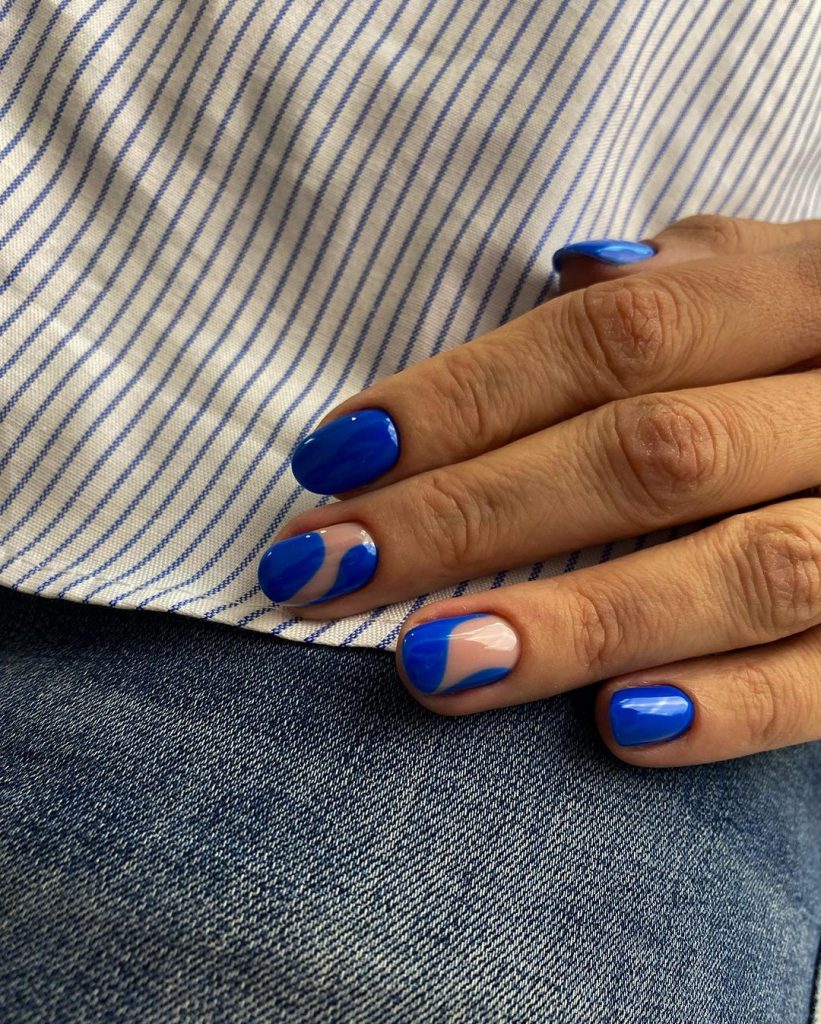
Vibrant blue accents
Blue nails can be incredibly striking, especially with unique accent designs. The image shows a vibrant blue polish with playful accents, perfect for adding a pop of color to your fall look. This design is trendy and fun, ideal for those who like to experiment with bold colors. The glossy finish enhances the vibrancy of the blue, making it a striking choice.
Supplies needed for vibrant blue accents:
- Base coat: OPI Nail Envy
- Blue nail polish: Essie in “Butler Please”
- Nail Art Brush: Winstonia Fine Line Brush Set
- Top coat: Seche Vite Dry Fast Topcoat
DIY instructions
- Start with a base coat to prepare your nails.
- Apply two coats of blue polish for a vibrant base color.
- Use a fine brush to create accent designs with a contrasting color.
- Seal with a top coat to protect your design and add shine.
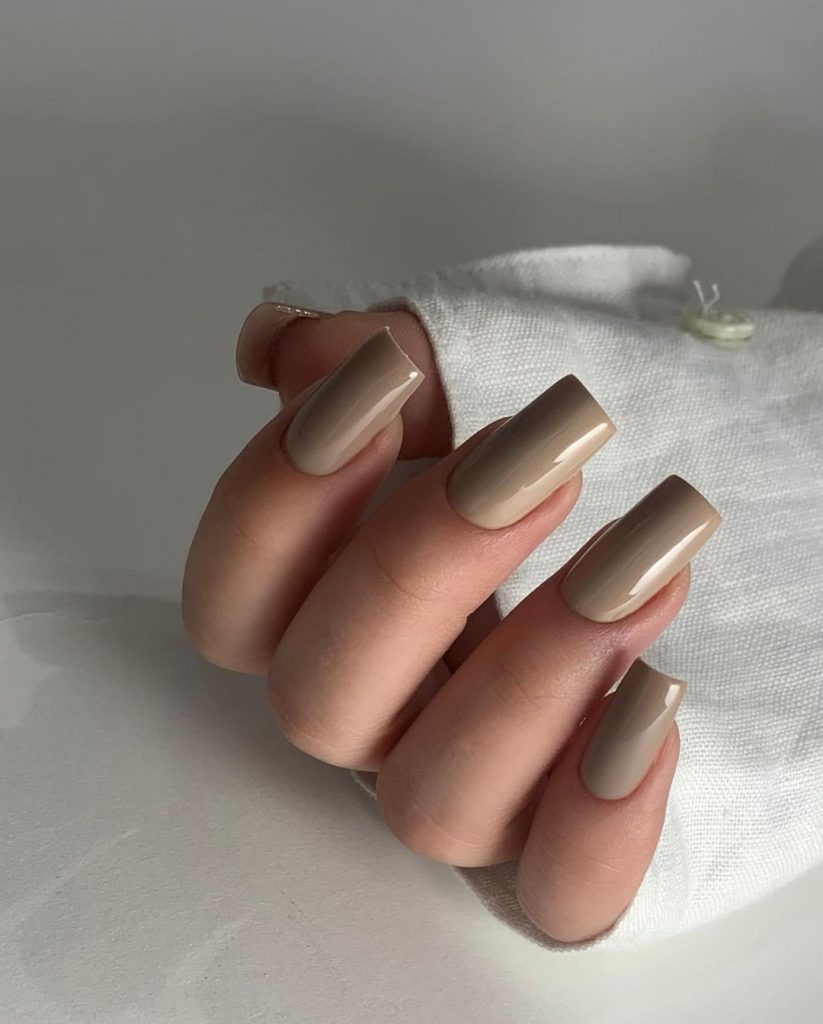
Neutral Beige Elegance
Beige nails are an example of stylish and understated elegance, perfect for autumn. This manicure features a smooth, shiny beige polish on short square nails, creating a sophisticated and neutral look that will match any outfit. The glossy finish adds a polished touch, making this design suitable for both professional and casual environments.
Supplies needed for neutral beige elegance:
- Base coat: OPI Nail Envy
- Beige nail polish: Essie in “Sand Tropez”
- Top coat: Seche Vite Dry Fast Topcoat
DIY instructions
- Start with a base coat to protect your nails.
- Apply two coats of beige lacquer, making sure each coat is completely dry before applying the next.
- Finish with a top coat for a glossy, long-lasting finish.
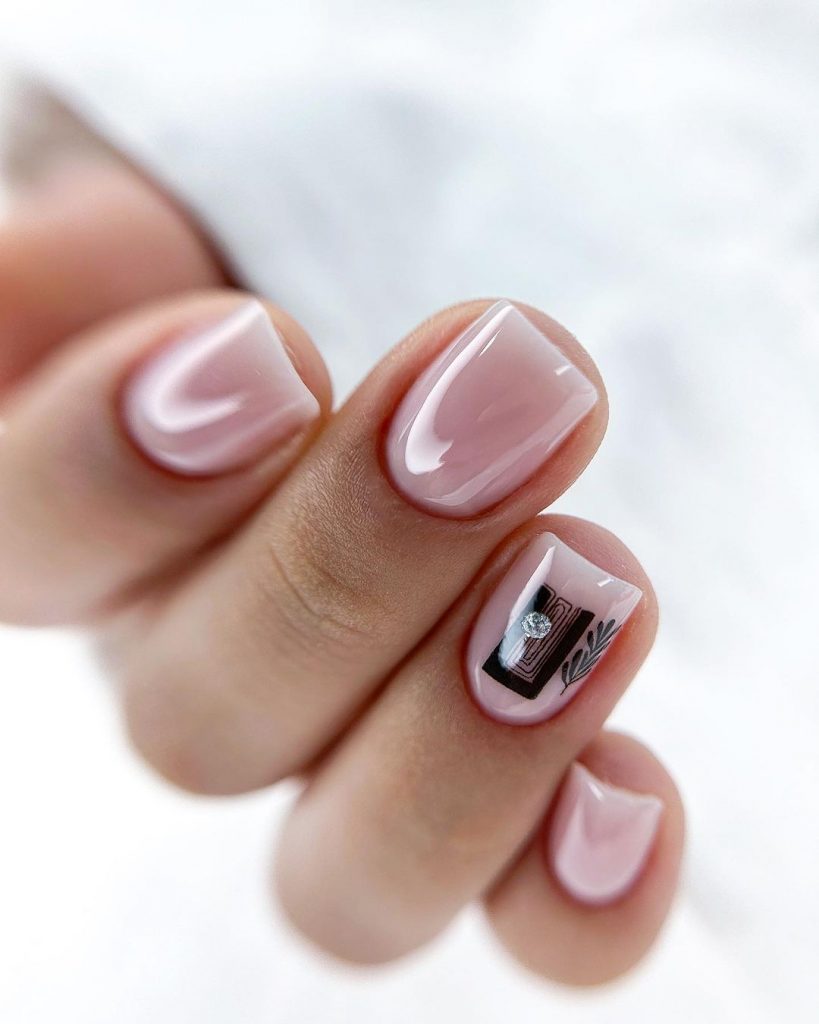
Minimalist pink with accent art
This minimalist pink nail design features a soft pink polish with a delicate nail art accent. The combination of a subtle pink base and a single accent nail with black and white geometric patterns makes this design elegant and unique. The small gemstone adds a touch of sparkle, perfect for adding a little flair to an otherwise simple design.
Supplies needed for minimalist pink with accent art:
- Base layer: Essie First Base
- Pink nail polish: OPI in “Bubble Bath”
- Black and White Nail Art Pen: Sally Hansen I Heart Nail Art Pen
- Small rhinestones: Born Pretty Store
- Top coat: Essie Gel Setter Topcoat
DIY instructions
- Apply a base coat to prepare your nails.
- Paint two coats of pink polish for a smooth, even base.
- Use a nail art pen to draw geometric patterns on one nail.
- Add a small rhinestone for extra shine.
- Seal the design with a top coat to ensure longevity.
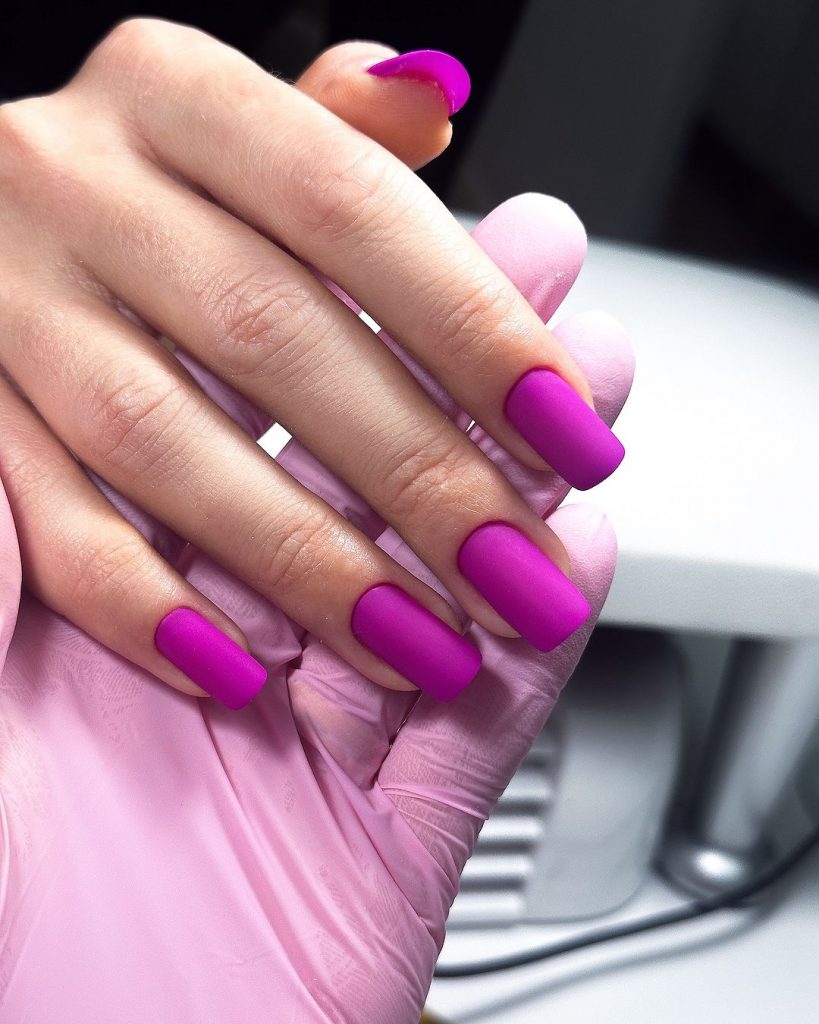
Vibrant matte fuchsia
This bold fuchsia manicure has a vibrant matte finish, making it a striking choice for fall. The bright color and matte texture create a striking look that is perfect for those who like to make a statement. This design is both trendy and fun and offers a fresh take on traditional fall nail colors.
Requirements for vibrant matte fuchsia:
- Base layer: Zoya Anchor base layer
- Fuchsia nail polish: Essie in “Fuchsia Fever”
- Matte top coat: OPI Matte Topcoat
DIY instructions
- Start with a base coat to protect your nails.
- Apply two coats of fuchsia polish and allow each coat to dry completely.
- Finish with a matte top coat for a modern, matte look.
Red and gold glamour
This glamorous red and gold nail design is perfect for those who want to add a little luxury to their fall look. The red base is decorated with gold foil accents, creating a beautiful and festive manicure. This design is ideal for special occasions or to simply add a touch of elegance to your everyday style.
Supplies needed for red and gold glamour:
- Base layer: Deborah Lippmann Hard Rock
- Red nail polish: OPI in “Big Apple Red”
- Gold Foil: Gold Nail Art Foil
- Top coat: Seche Vite Dry Fast Topcoat
DIY instructions
- Start with a base coat to protect your nails.
- Apply two coats of red polish for a rich color base.
- Use tweezers to apply gold foil accents while the polish is still tacky.
- Finish with a top coat to secure the foil and add shine.
Naked elegance with silver accent
This nude manicure is both simple and elegant, with a glossy nude base with a delicate silver accent. The design is minimalist yet sophisticated, making it perfect for any occasion. The addition of a thin silver line adds a modern twist to this classic look.

Essentials for nude elegance with a silver accent:
- Base coat: OPI Nail Envy
- Nude nail polish: Essie in “Ballet Slippers”
- Silver Nail Tape: Born Pretty Store
- Top coat: Sally Hansen Miracle Gel
DIY instructions
- Apply a base coat to your nails.
- Apply two layers of nude polish to ensure even coverage.
- As an accent, apply a thin silver tape to one nail.
- Finish with a top coat to secure the tape and add a glossy finish.
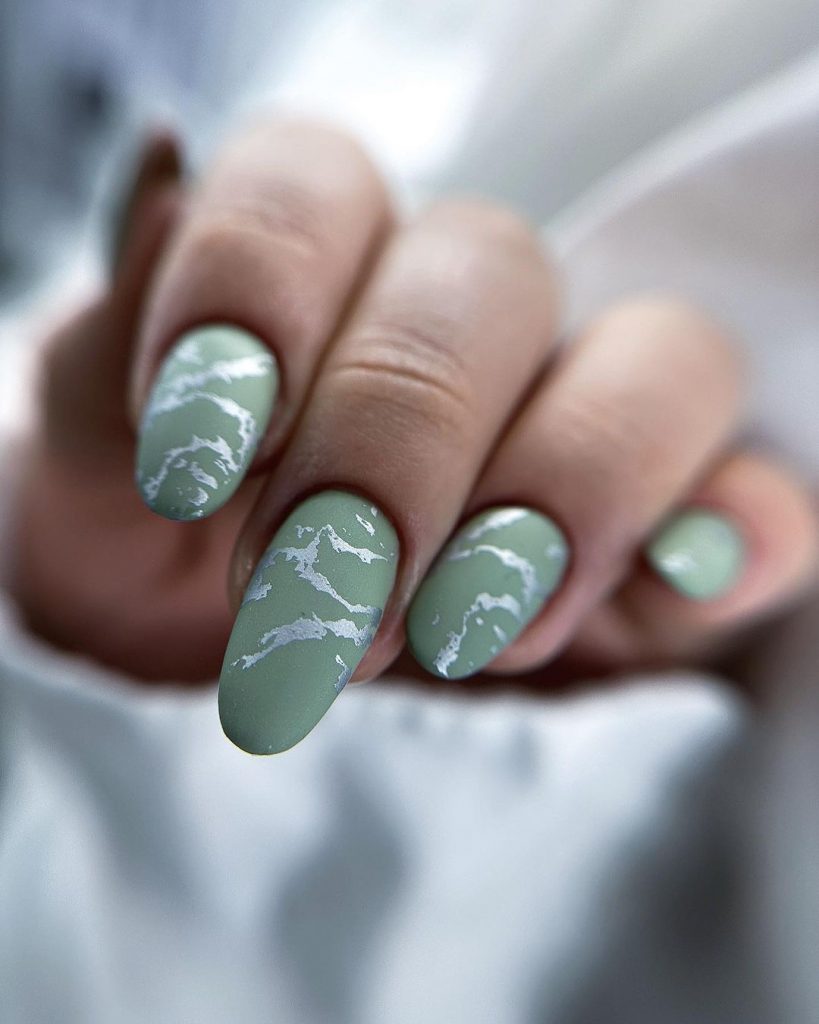
Sage green with marble effect
This sage green nail design has a beautiful marble effect, perfect for fall. The soft green color is soothing and earthy, while the white marble accents add a sophisticated and unique touch. This design is ideal for those who want a natural yet elegant look.
Requirements for sage green with marble effect:
- Base layer: Zoya Anchor base layer
- Sage green nail polish: Essie in “Going Guru”
- White nail polish: Sally Hansen in “White On”
- Nail art brush with marble effect: Winstonia Nail Art Brush Set
- Matte top coat: OPI Matte Topcoat
DIY instructions
- Start with a base coat to protect your nails.
- Apply two coats of sage green nail polish for a solid base.
- Use a thin nail art brush to create marble-like stripes with white nail polish.
- Finish with a matte top coat to enhance the marble effect.
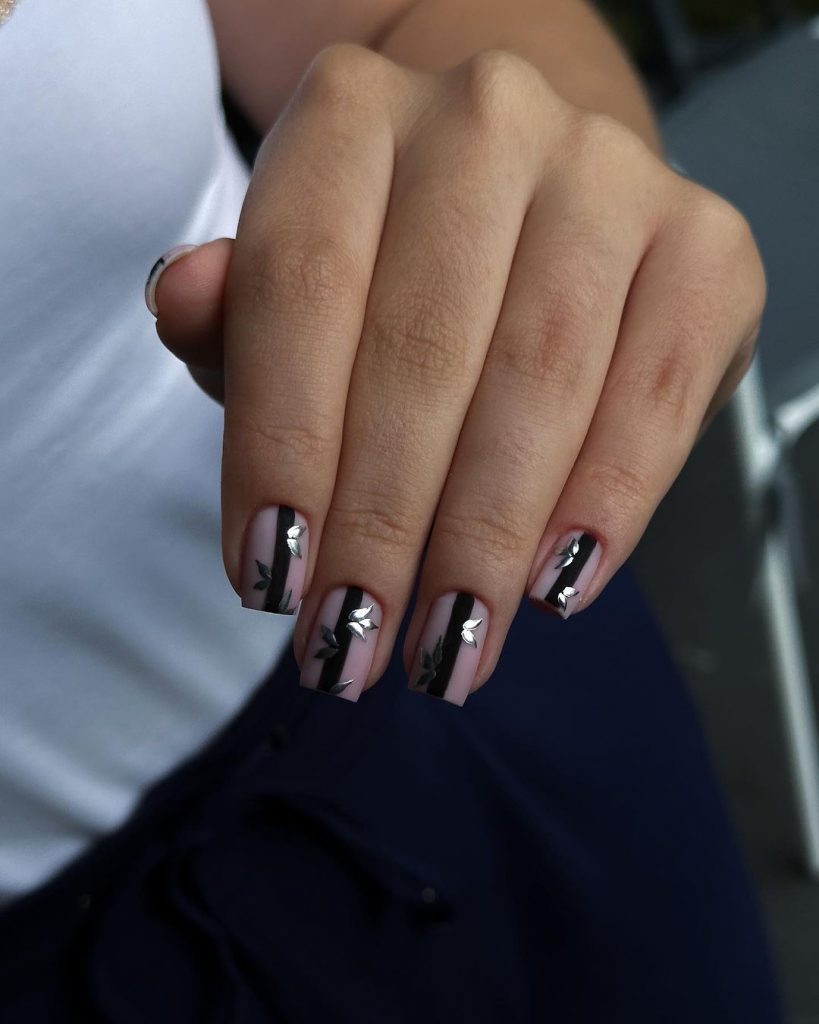
Black and silver botanical art
This black and silver botanical nail design is perfect for a chic fall look. The black stripes and silver leaf accents on a nude base provide a striking contrast, making this design both stylish and modern. It is ideal for lovers of intricate nail art.
Black and Silver Botanical Art Supplies:
- Base layer: Essie First Base
- Nude nail polish: OPI in “Samoan Sand”
- Black nail polish: Essie in “Licorice”
- Silver nail art stickers: Born Pretty Store
- Top coat: Seche Vite Dry Fast Topcoat
DIY instructions
- Apply a base coat to protect your nails.
- Paint two coats of nude polish for a smooth base.
- Use a strip brush to create black vertical lines.
- Add silver leaf stickers for the botanical accents.
- Seal with a top coat to protect the design.
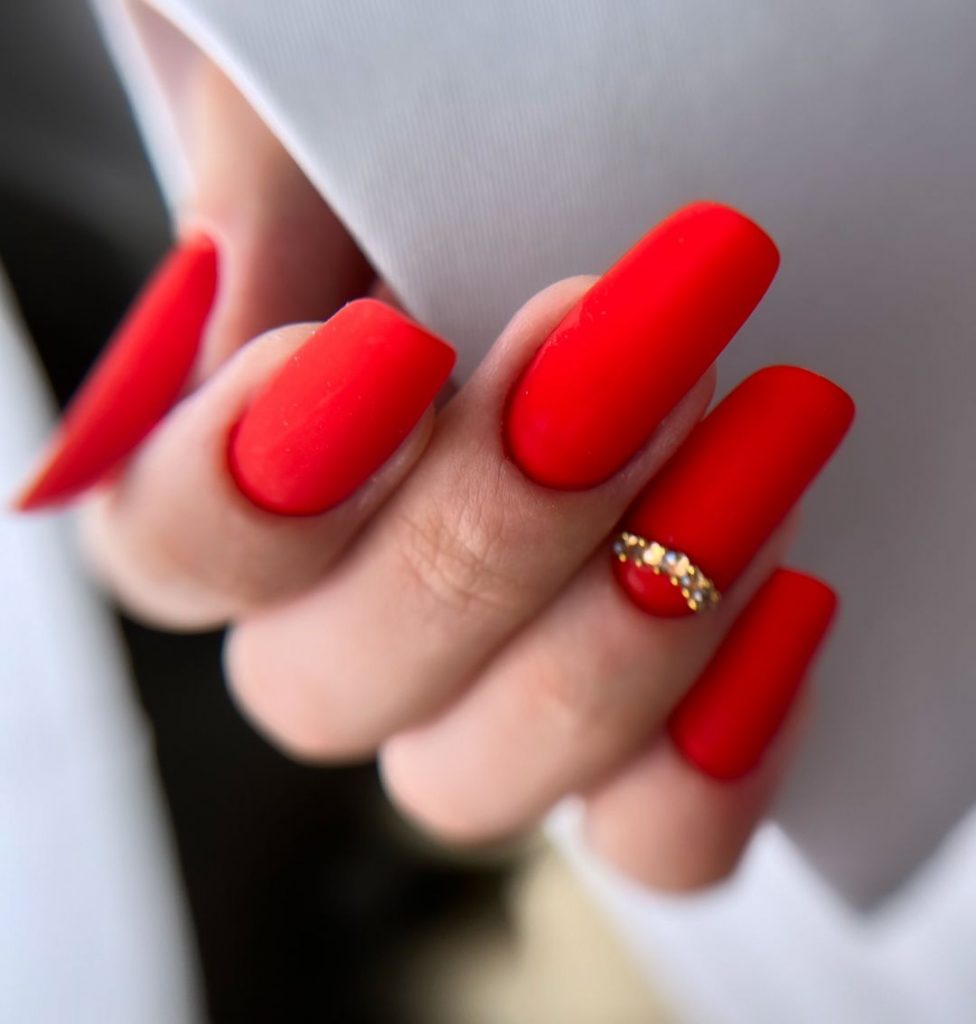
Striking red with gold band
This striking red nail design features a striking matte finish with a gold band accent on one nail. The vibrant red color is perfect for fall and the gold band adds a touch of luxury. This design is perfect for special occasions or when you want to make a statement.
Requirements for striking red with gold band:
- Base layer: Deborah Lippmann Hard Rock
- Red nail polish: OPI in “Big Apple Red”
- Gold Nail Tape: Born Pretty Store
- Matte top coat: OPI Matte Topcoat
DIY instructions
- Start with a base coat to protect your nails.
- Apply two coats of red polish for a striking color.
- Add a gold band with nail tape on one accent nail.
- Finish with a matte top coat for a modern look.
Elegant waves of ivory and gold
This elegant ivory nail design features delicate gold wave accents, creating a sophisticated and luxurious look. The combination of ivory and gold is perfect for autumn and offers a warm and stylish design. This look is ideal for those who prefer a subtle yet chic manicure.

Supplies needed for elegant ivory and gold waves:
- Base coat: OPI Nail Envy
- Ivory nail polish: Essie in “Marshmallow”
- Gold nail art brush: Winstonia Nail Art Brush Set
- Top coat: Essie Gel Setter Topcoat
DIY instructions
- Apply a base coat to your nails.
- Paint two coats of ivory varnish for an even base.
- Use a fine brush to create gold wave accents on each nail.
- Seal with a top coat to protect the design and add shine.
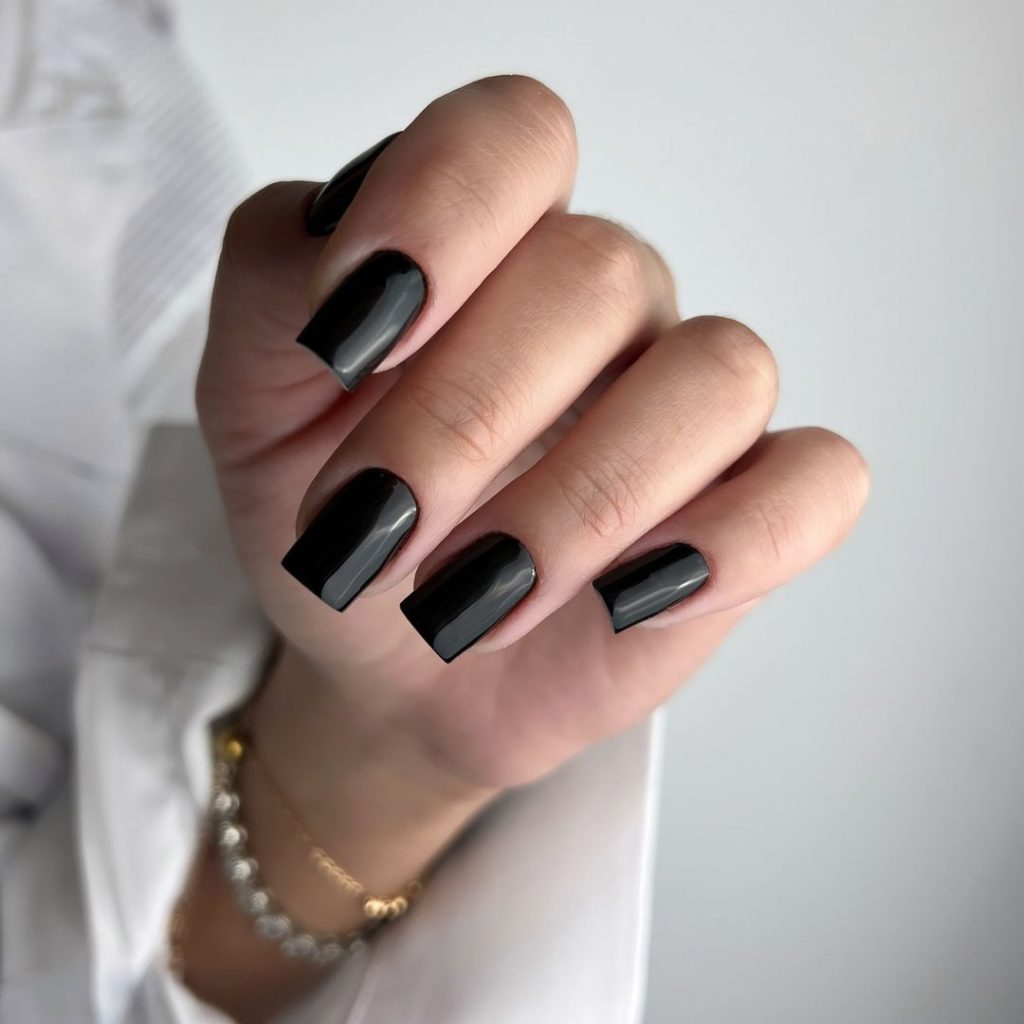
Shiny black elegance
This glossy black nail design is both cool and elegant, perfect for the fall season. The short square shape with a high-gloss finish creates a sophisticated look that can be worn on any occasion. This design is timeless and versatile, making it a must-have for fall.
Requirements for glossy black elegance:
- Base layer: Essie First Base
- Black nail polish: OPI in “Black Onyx”
- Top coat: Seche Vite Dry Fast Topcoat
DIY instructions
- Start with a base coat to protect your nails.
- Apply two coats of black polish for full coverage.
- Finish with a top coat for a glossy, long-lasting finish.
Matte brown with marble accents
This matte brown nail design features a sophisticated marble accent on a few nails. The combination of matte brown and marble creates a unique and elegant look, perfect for autumn. This design is ideal for those who love a modern twist on classic styles.
Supplies needed for matte brown with marble accents:
- Base coat: OPI Nail Envy
- Brown nail polish: Essie in “Chinchilly”
- White and Black Nail Polishes for Marble: Sally Hansen in “White On” and “Black Out”
- Matte top coat: OPI Matte Topcoat
DIY instructions
- Start with a base coat to protect your nails.
- Apply two coats of brown polish for a solid base.
- Create marble accents with a thin brush dipped in white and black lacquer.
- Finish with a matte top coat for a sleek look.
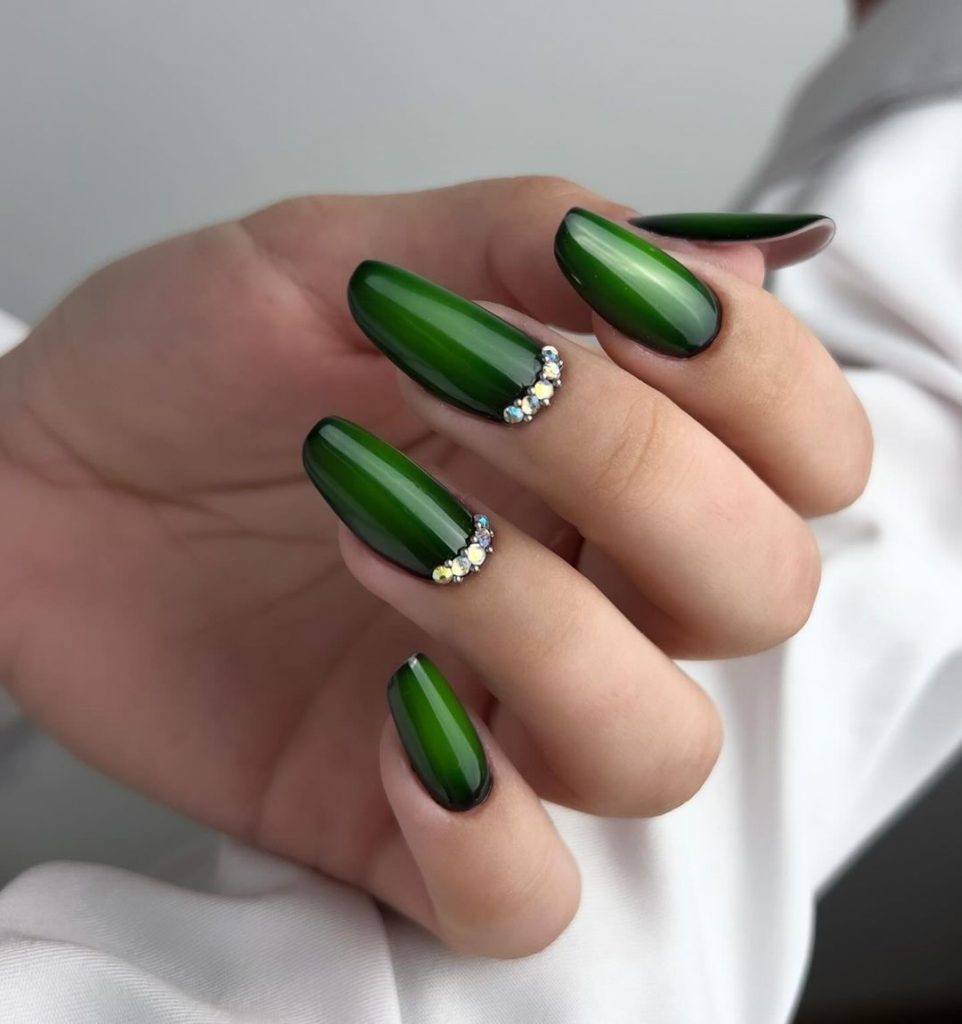
Green gemstone elegance
This green nail design is decorated with small gemstones, creating an elegant and striking look. The deep green polish is perfect for fall and the gemstones add a touch of glamour. This design is great for special occasions or when you want to add a little sparkle to your look.
Requirements for Green Gem Elegance:
- Base layer: Essie First Base
- Green Nail Polish: OPI in “Keep Off the Lawn”
- Little Gems: Born Pretty Store
- Top coat: Seche Vite Dry Fast Topcoat
DIY instructions
- Apply a base coat to prepare your nails.
- Paint two coats of green lacquer for a rich color.
- Place small gemstones near the cuticle of each nail.
- Finish with a top coat to ensure the gemstones stay in place.
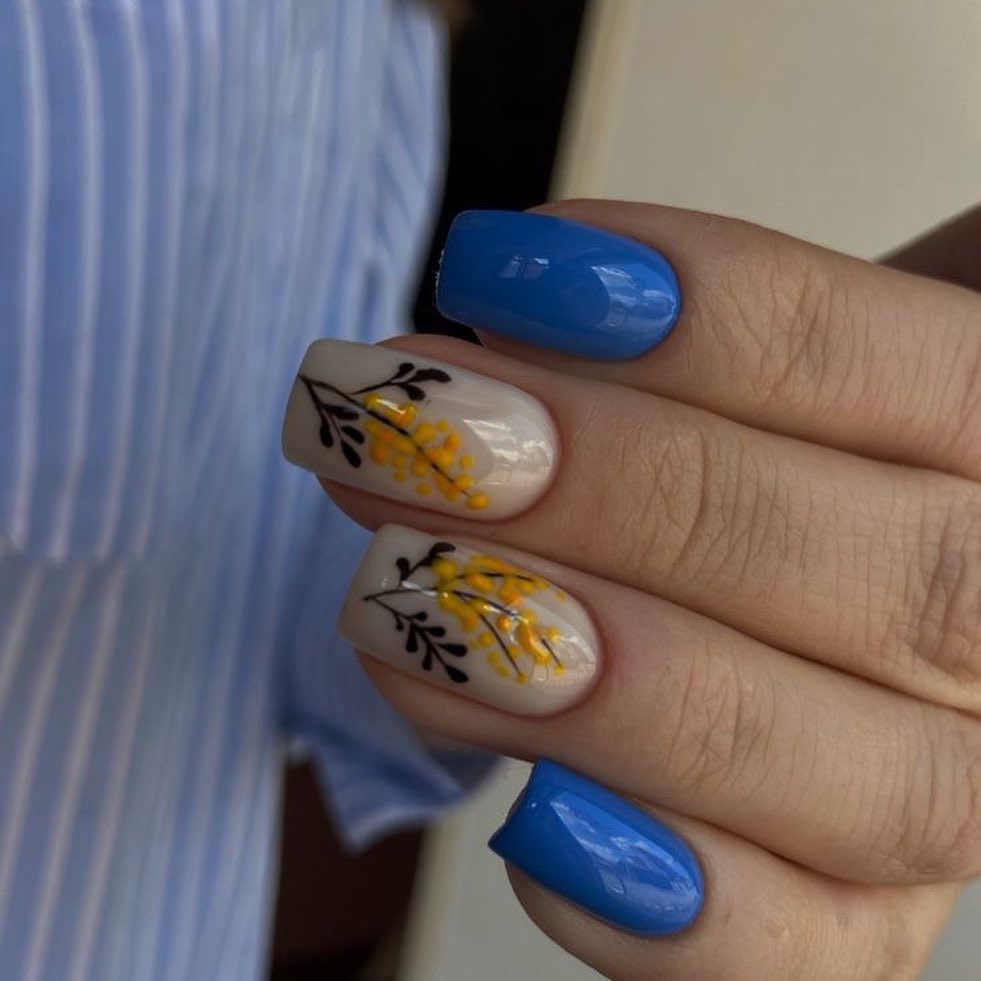
Blue and yellow floral art
This vibrant design features blue and nude nails with delicate yellow floral art. The combination of bright blue and soft nude with intricate flower details makes this design both cool and beautiful. It is a perfect choice for lovers of colorful and artistic nails.
Supplies needed for blue and yellow floral arrangements:
- Base layer: Deborah Lippmann Hard Rock
- Blue nail polish: Essie in “Butler Please”
- Nude nail polish: OPI in “Samoan Sand”
- Yellow and Black Nail Art Pens: Sally Hansen I Heart Nail Art Pen
- Top coat: Essie Gel Setter Topcoat
DIY instructions
- Apply a base coat to protect your nails.
- Paint some nails blue and others naked for a varied look.
- Use nail art pens to draw yellow floral designs on the naked nails.
- Finish with a top coat to protect the design and add shine.
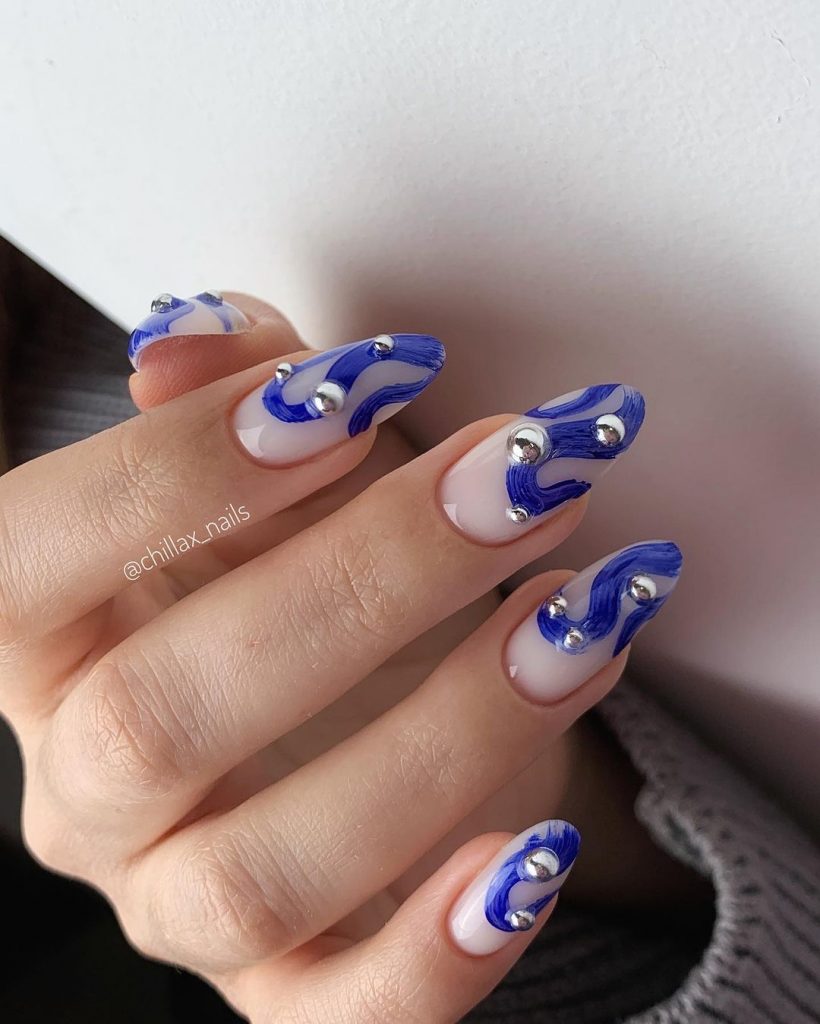
Abstract blue and silver swirls
This abstract nail design features blue and silver swirls with metallic accents, creating a modern and artistic look. The combination of nude base and striking blue swirls makes this design stand out. It’s a fun and trendy choice for fall.
Supplies needed for abstract blue and silver swirls:
- Base coat: OPI Nail Envy
- Nude nail polish: Essie in “Ballet Slippers”
- Blue Nail Polish: OPI in “My Pal Joey”
- Silver metallic paint: China Glaze in “Silver Lining”
- Top coat: Seche Vite Dry Fast Topcoat
DIY instructions
- Apply a base coat to prepare your nails.
- Paint a nude base on all nails.
- Use a thin brush to create abstract blue swirls.
- Add silver accents for a metallic touch.
- Finish with a top coat to complete the look.
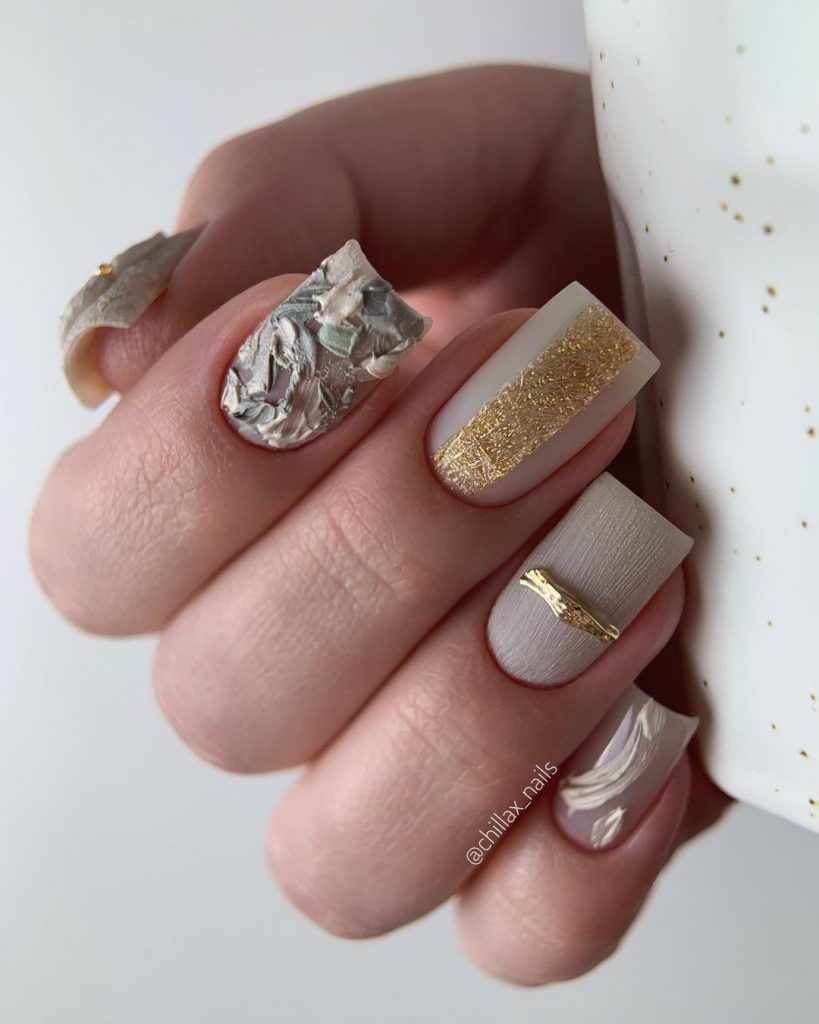
Textured white and gold
This textured nail design combines white and gold elements to create a luxurious and artistic look. The use of different textures and finishes adds depth and interest to the design, making it perfect for lovers of unique and elegant nails.
Supplies needed for textured white and gold:
- Base layer: Essie First Base
- White nail polish: OPI in “Alpine Snow”
- Gold Glitter Lacquer: China Glaze in “Gold Digger”
- Textured nail art: Winstonia Nail Art Brush Set
- Top coat: Seche Vite Dry Fast Topcoat
DIY instructions
- Start with a base coat to protect your nails.
- Apply two coats of white polish for a clean base.
- Use a thin brush to add gold glitter accents.
- Create texture effects with a nail art brush.
- Finish with a top coat to protect the design and add shine.
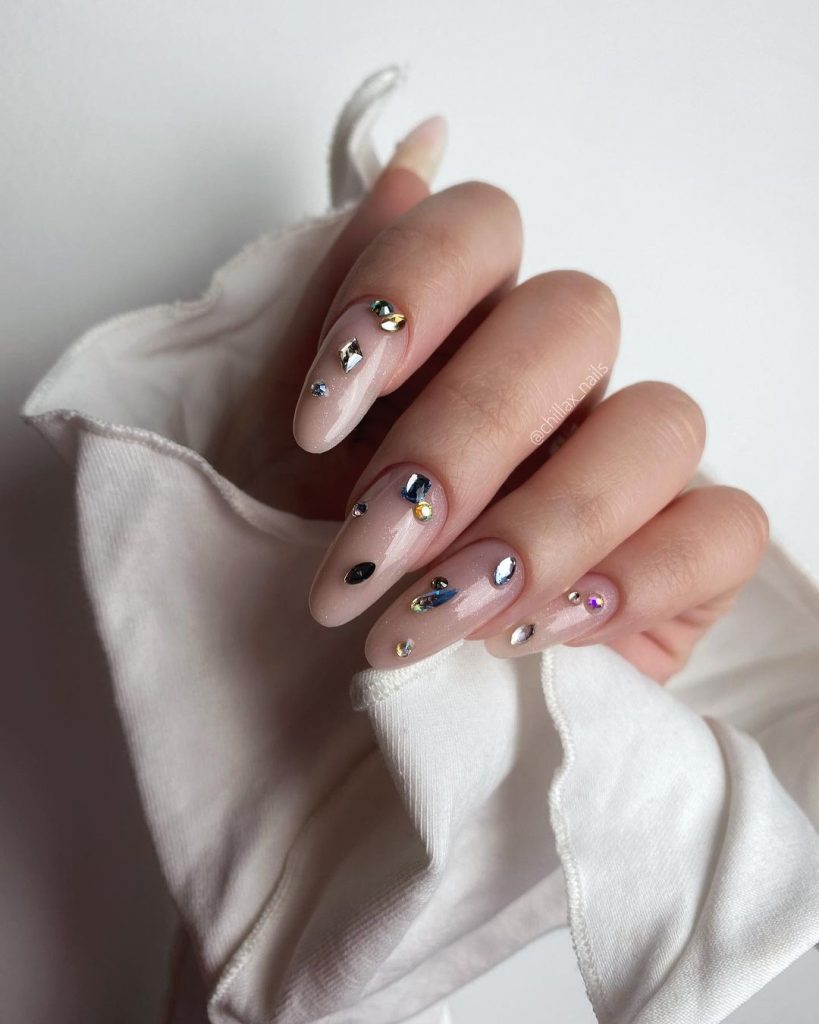
Nude with multicolored gemstones
This nude nail design is adorned with multi-colored gemstones, creating a glamorous and eye-catching look. The simple nude base allows the colorful gemstones to stand out, making this design perfect for special occasions or anytime you want to add some sparkle to your look.
Supplies needed for nude with multicolored gemstones:
- Base coat: OPI Nail Envy
- Nude nail polish: Essie in “Ballet Slippers”
- Multicolored Gemstones: Born Pretty Store
- Top coat: Seche Vite Dry Fast Topcoat
DIY instructions
- Apply a base coat to protect your nails.
- Paint two coats of nude polish for a smooth base.
- Place multicolored gemstones on your nails with tweezers.
- Finish with a top coat to ensure the gemstones stay in place and add shine.
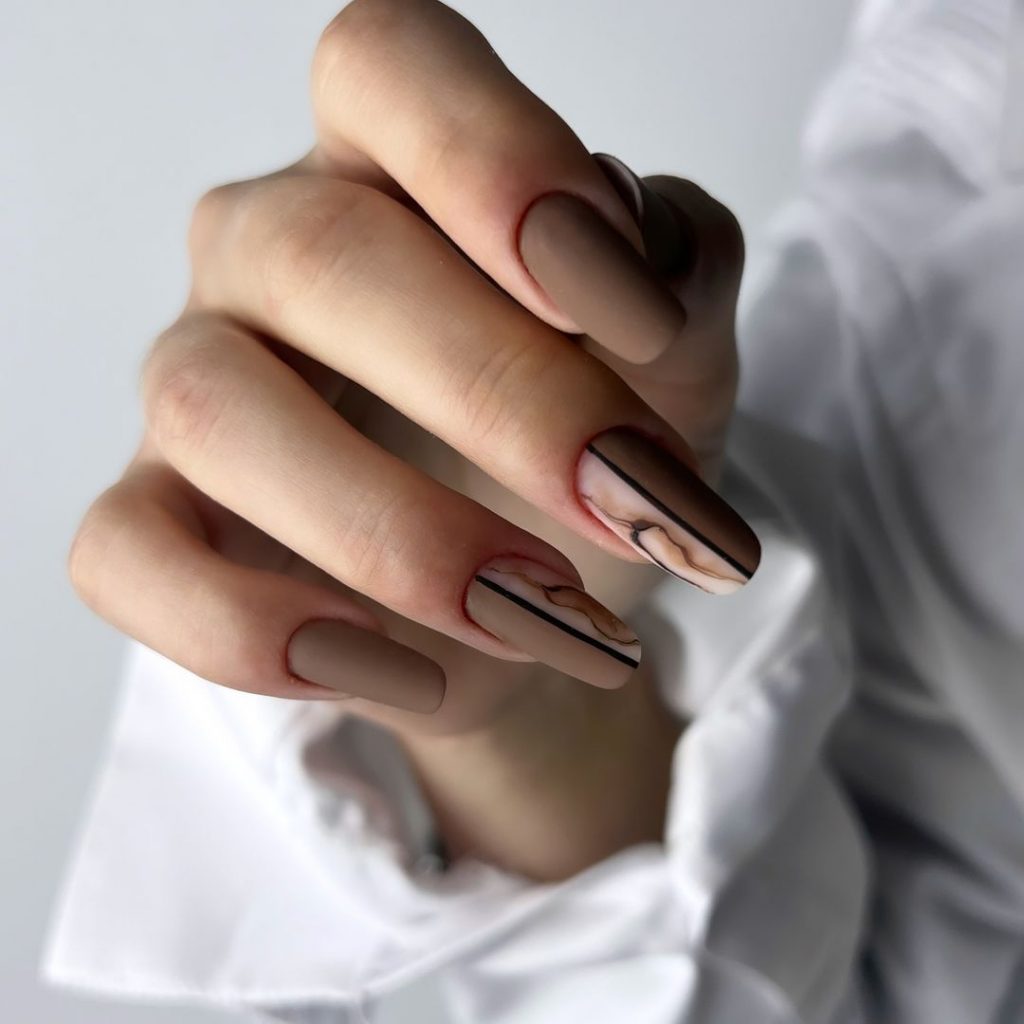
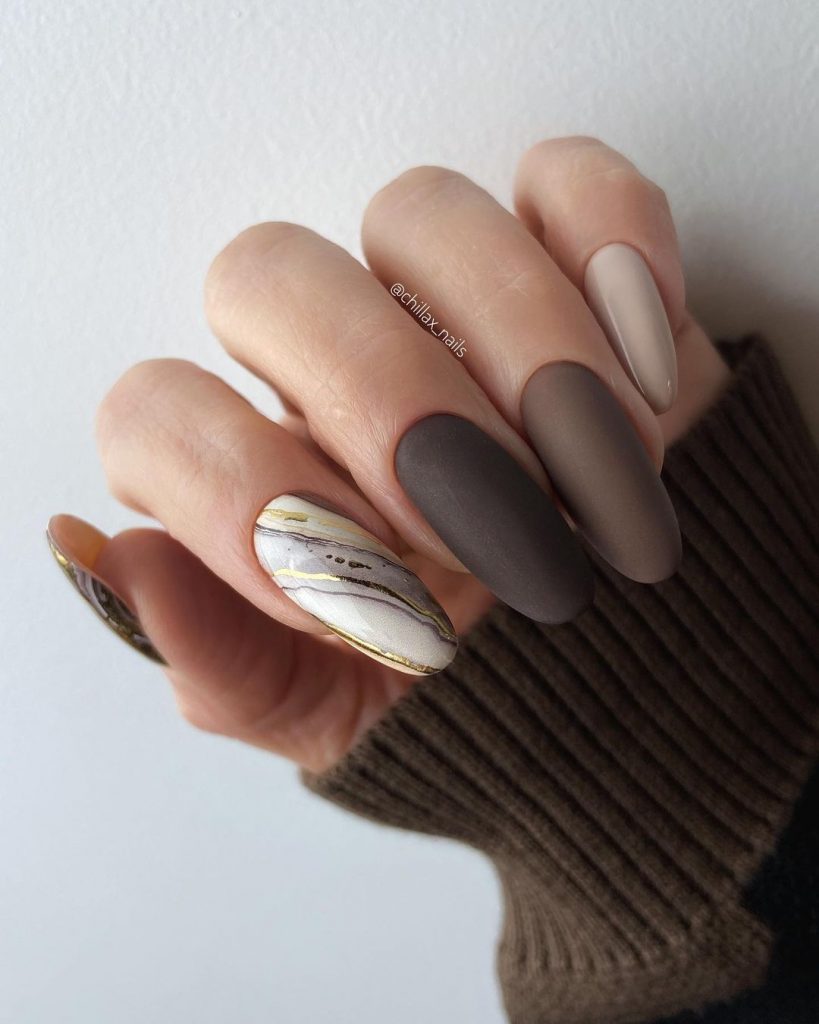
Matte brown with marble accent
This design features a combination of matte brown tones with a beautiful marble accent nail. The mix of textures and neutral tones creates a sophisticated and elegant look, perfect for the autumn season. The marble accent adds a modern twist to the classic matte finish.
Supplies needed for matte brown colors with marble accent:
- Base layer: Essie First Base
- Brown nail polishes: OPI in “You don’t know Jacques!” and Essie in “Chinchilly”
- White and Black Nail Polishes for Marble: Sally Hansen in “White On” and “Black Out”
- Matte top coat: OPI Matte Topcoat
DIY instructions
- Start with a base coat to protect your nails.
- Apply two layers of brown polish, alternating shades on different nails.
- Create the marble effect on one nail with white and black polishes.
- Finish with a matte top coat for a refined look.
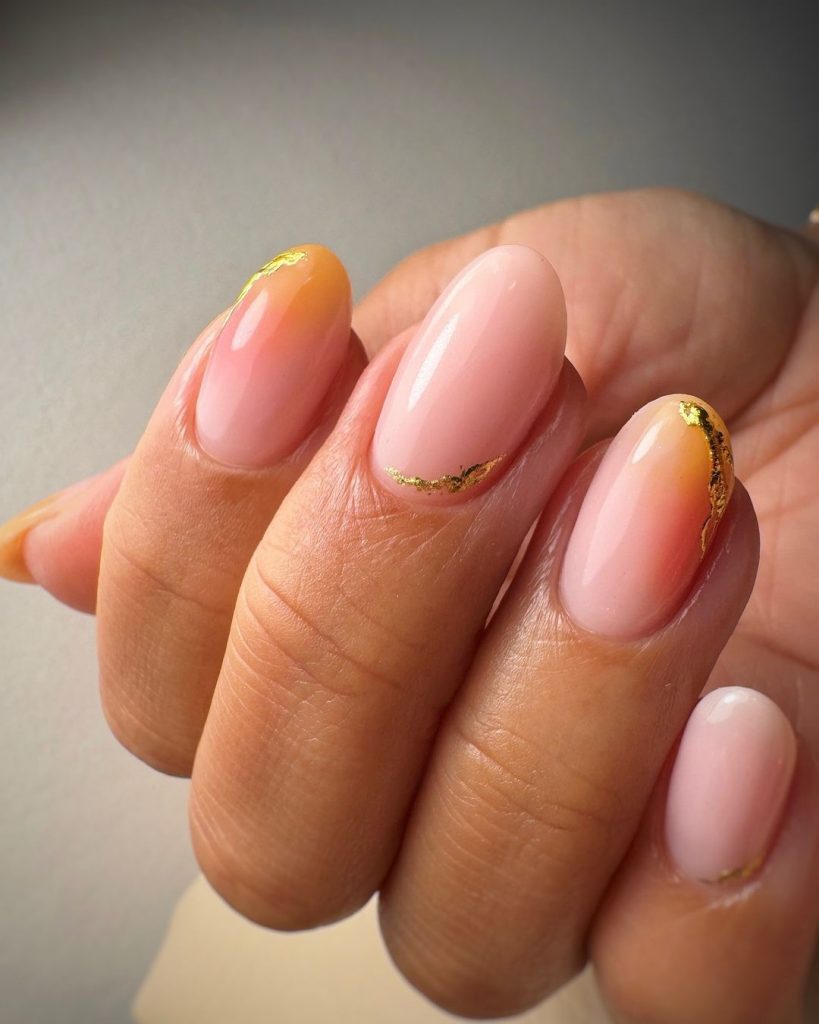
Pink with gold leaf accents
This elegant pink nail design features delicate gold leaf accents, perfect for adding a touch of luxury to your fall look. The combination of soft pink and gold is timeless and chic, making this design suitable for both everyday use and special occasions.
Supplies needed for pink with gold leaf accents:
- Base coat: OPI Nail Envy
- Pink nail polish: Essie in “Fiji”
- Gold Leaf: Gold Nail Art Foil
- Top coat: Seche Vite Dry Fast Topcoat
DIY instructions
- Apply a base coat to your nails.
- Paint two coats of pink polish for a smooth base.
- Apply gold leaf accents near the tips of your nails.
- Seal with a top coat to protect the design and add shine.
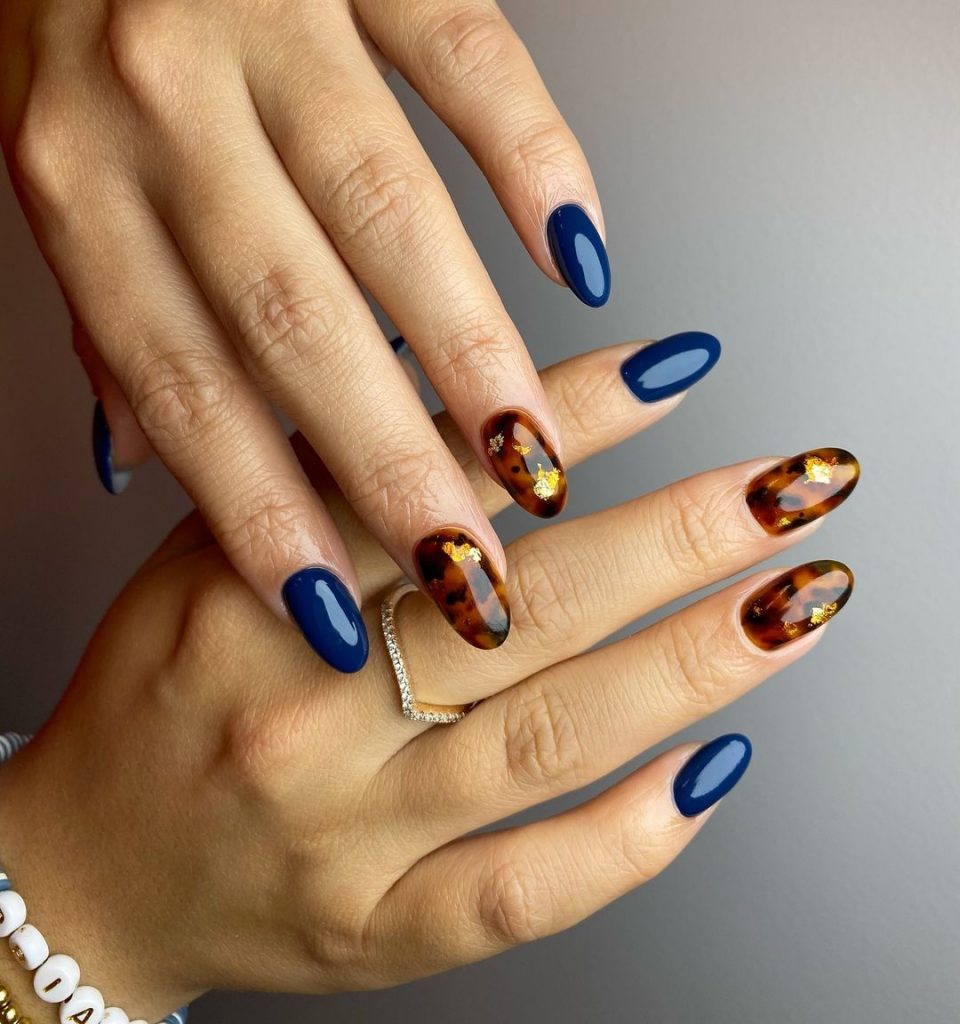
Marine and turtle combo
This unique design combines navy blue nails with tortoiseshell accents, creating a sophisticated and trendy look. The deep navy blue contrasts beautifully with the warm tortoiseshell pattern, making this design perfect for fall.
Supplies needed for a navy blue and tortoiseshell combination:
- Base layer: Deborah Lippmann Hard Rock
- Navy blue nail polish: OPI in “Russian Navy”
- Brown and Black Polishes for Tortoiseshell: Sally Hansen in “Expresso” and “Black Out”
- Top coat: Essie Gel Setter Topcoat
DIY instructions
- Start with a base coat to protect your nails.
- Paint some nails navy blue and others with a tortoiseshell pattern using brown and black polish.
- Seal with a top coat to ensure a glossy finish and long-lasting design.
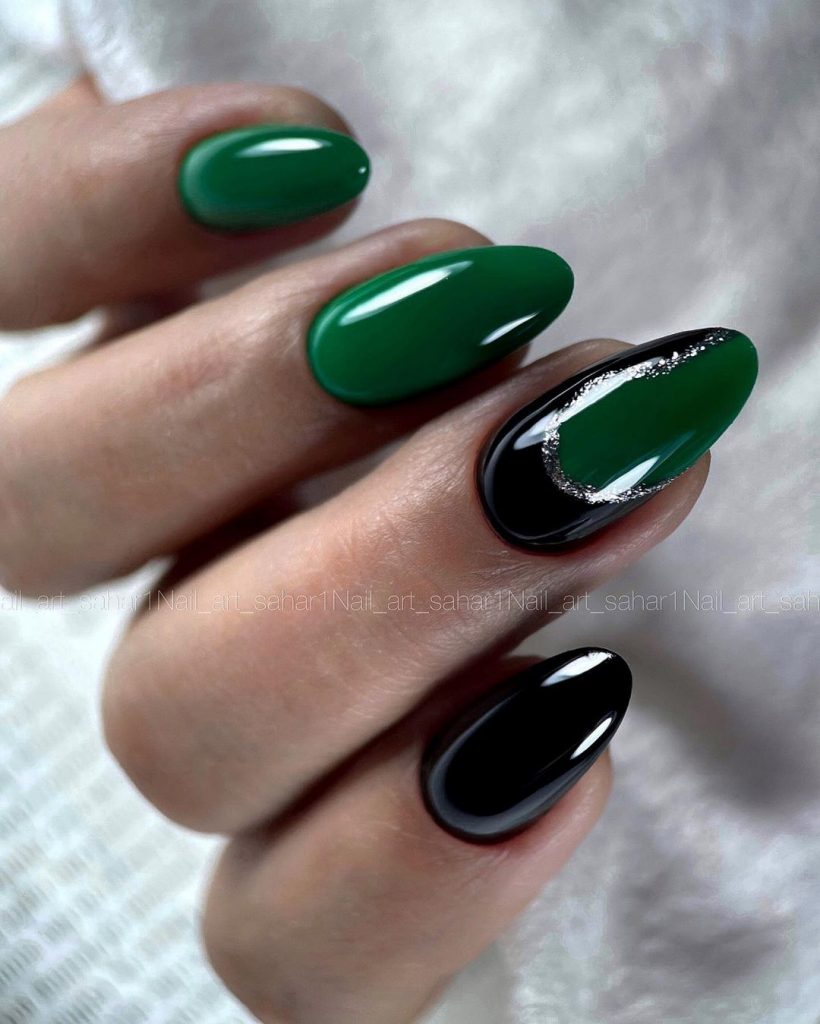
Black and green elegance
This design features a combination of glossy black and green nails, with a touch of silver glitter for extra elegance. The deep colors are perfect for autumn and create a cool and refined look.
Supplies for black and green elegance:
- Base layer: Essie First Base
- Black nail polish: OPI in “Black Onyx”
- Green nail polish: Essie in “Off Tropic”
- Silver Glitter Lacquer: China Glaze in “Silver Lining”
- Top coat: Seche Vite Dry Fast Topcoat
DIY instructions
- Apply a base coat to your nails.
- Paint alternate nails with black and green nail polish.
- Add a touch of silver glitter to one of the green nails.
- Finish with a top coat for a glossy, long-lasting finish.

Namie O, a talented writer at Willtiptop, conveys her passion for fashion and beauty in every word she writes. With a keen eye for detail and a deep insight into the latest trends, Namie’s articles and insights captivate readers and provide them with valuable knowledge and inspiration. Through her engaging and informative writing style, Namie aims to empower individuals to explore their style, experiment with beauty techniques, and embrace their unique sense of self.