Fall Season Nails 26 Ideas: Stunning Designs to Try This Autumn
Fall is the season of warm tones, cozy textures and endless possibilities to refresh your personal style. As the leaves turn into brilliant shades of red, orange and gold, this is the perfect time to reflect that same rich beauty in your nail designs. Fall nails are all about combining elegance with creativity. Whether you’re drawn to soft neutrals, deep jewel tones, or fun, seasonal art, there’s something enchanting about the way a perfect manicure can capture the spirit of the season.


From classic red shades that never go out of style to modern takes with caramel browns, burnt oranges and muted greens, this year’s nail trends celebrate both sophistication and self-expression. Add a touch of sparkle to mimic golden sunlight, or experiment with playful pumpkin motifs, plaid patterns and cozy sweater textures for a fun seasonal vibe. No matter your nail type or shape (almond, square, stiletto or oval) there’s a design that will flatter your hands and effortlessly take your fall look to the next level.


In this article, we explore 27 stunning fall nail ideas designed for every preference and personality. Whether you love acrylic, dip powder, gel finishes or short natural nails, these designs will help you embrace the essence of fall in style. So grab your favorite hot drink, unwind in the cozy atmosphere of the season and prepare to find your perfect fall manicure that is as unique and beautiful as you are.
Autumn leaf and orange nail design
This beautiful nail design captures the essence of fall with its earthy tones and leafy accents. The combination of brown, orange and a soft nude base with delicate leaf art creates a warm and inviting appearance. The short, round nails are practical and chic, making them perfect for everyday use.

Consumables needed
- Nail Polishes: OPI in “Chocolate Moose”, OPI in “My Paprika is Hotter Than Yours!”, Essie in “Ballet Slippers”
- Nail Art Tools: Brush with fine details for leaf design
- Base and top coat: Seche Vite Dry Fast Top Coat
- Extras: Orange and yellow nail art pens for the leaf design
DIY instructions
- Prep your nails: Start with clean, filed nails and apply a base coat.
- Basic colors: Apply two coats of brown nail polish on some nails, orange on others, and the nude nail polish on the accent nail.
- Leaf Art: Use a fine detail brush and the nail art pens to draw delicate leaves on the accent nail.
- Top Coat: Seal the design with a top coat to ensure longevity and shine.
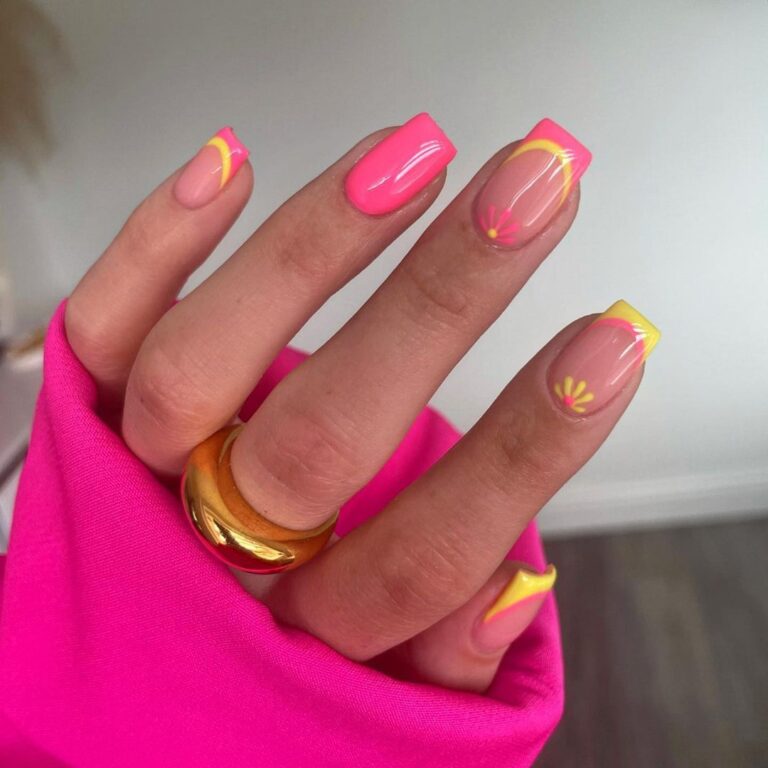
Playful fall nail design
These nails are a delightful mix of fall colors and intricate designs. The almond shaped nails have a mix of teal and nude base colors with colorful leaf patterns, which gives a fun and quirky vibe. The matte teal paint contrasts beautifully with the glossy leaf designs, adding depth and interest to the look. This design is both unique and trendy.
Consumables needed
- Nail Polishes: Essie in “Teal Time,” Sally Hansen in “Nude Now”
- Nail Art Tools: Fine detail brush for painting the leaf designs
- Base and top coat: Essie Gel Setter Topcoat
- Extras: Multicolored leaf nail stickers
DIY instructions
- Prep your nails: Start with clean, filed nails and apply a base coat.
- Basic colors: Apply two coats of nude polish to all nails except the index and pinky fingers, which will be painted teal.
- Leaf Design: Use the fine detail brush to paint small leaf designs in different colors on the nude nails. You can also use multi-colored leaf stickers.
- Top Coat: Seal the design with a top coat to ensure longevity and shine.
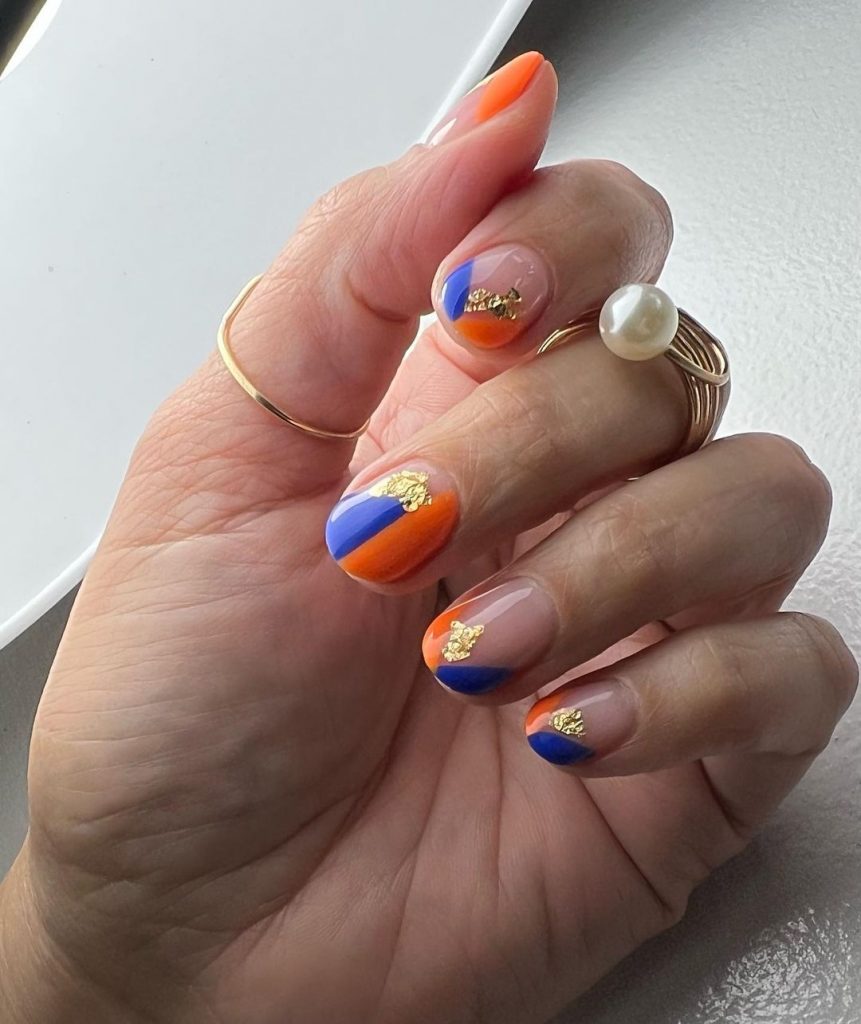
Bold and bright nail design
This nail design is a perfect example of how you can use bold colors and designs to make a statement. The nails have a striking combination of orange and blue, with each nail divided into blocks of color, accented with gold foil. The short, square shape adds a modern touch, making these nails both stylish and sophisticated.
Consumables needed
- Nail Polishes: OPI in “Brights Power”, Essie in “Butler Please”
- Nail Art Tools: Striping tape for precise lines
- Base and top coat: Sally Hansen Insta-Dri Topcoat
- Extras: Gold foil flakes
DIY instructions
- Prep your nails: Start with clean, filed nails and apply a base coat.
- Basic colors: Apply two coats of orange nail polish to the entire nail. Once it’s dry, use striping tape to cut off sections of the nail and paint the blue polish on the indicated areas.
- Gold Foil Accent: Apply a small amount of clear polish to the area where you want to place the gold foil, then gently press the foil onto the nail.
- Top Coat: Seal the design with a top coat to ensure longevity and shine.
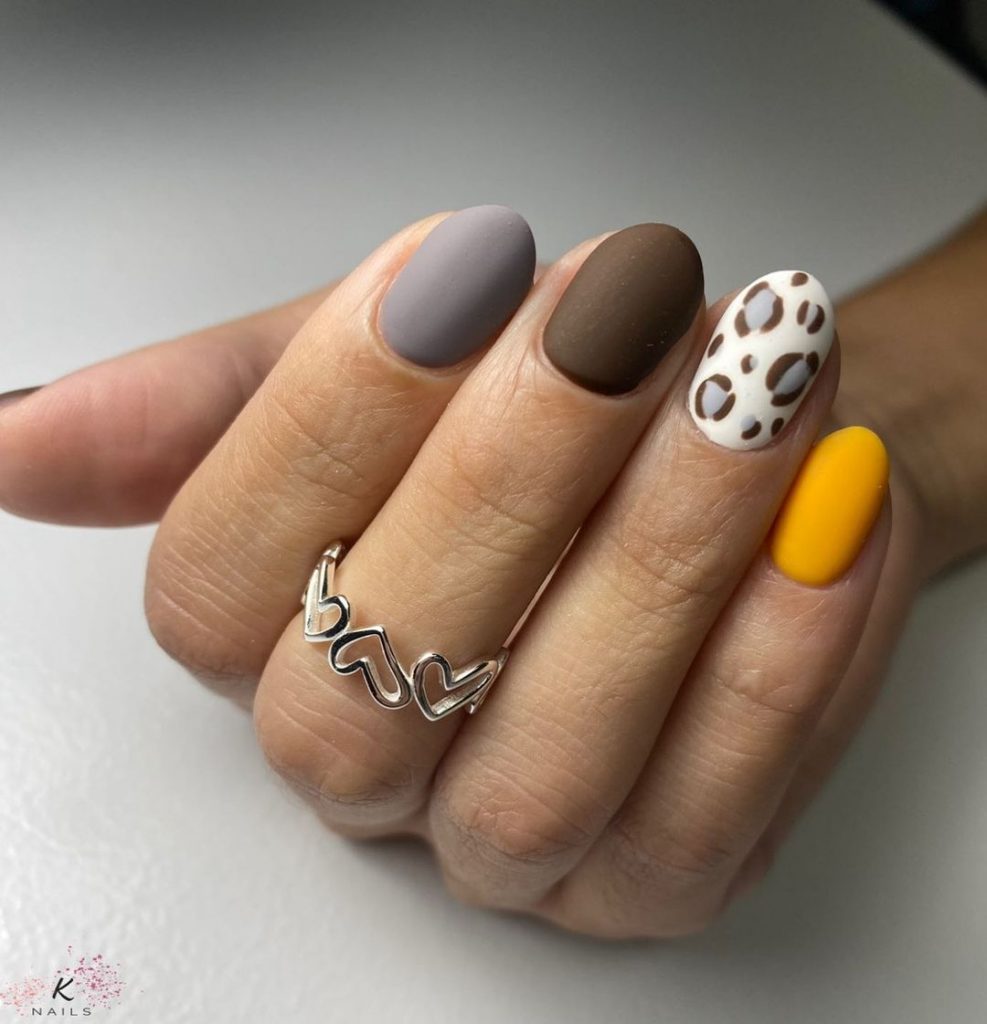
Muted elegance nail design
This nail design uses soft, muted shades of gray, brown and mustard, with a chic leopard print accent nail. The matte finish adds a sophisticated touch, making this design ideal for both everyday use and special occasions. The short almond shape is practical and trendy and provides a refined look that suits any outfit.
Consumables needed
- Nail Polishes: OPI in “Taupe-less Beach”, Essie in “Chinchilly”, Sally Hansen in “Mustard the Courage”
- Nail Art Tools: Dotting tool for creating the leopard print
- Base and top coat: OPI Matte Topcoat
- Extras: Nail art brush for detailing
DIY instructions
- Prep your nails: Start with clean, filed nails and apply a base coat.
- Basic colors: Apply two coats of gray polish to all nails except the ring finger. Apply the brown polish to the ring finger. Paint the middle finger with the mustard polish.
- Leopard print: Make irregular spots with the brown polish on the ring finger with a dotting tool. Outline some areas with a small brush and black polish for a more defined look.
- Top Coat: Seal the design with a matte top coat to ensure longevity and a chic finish.
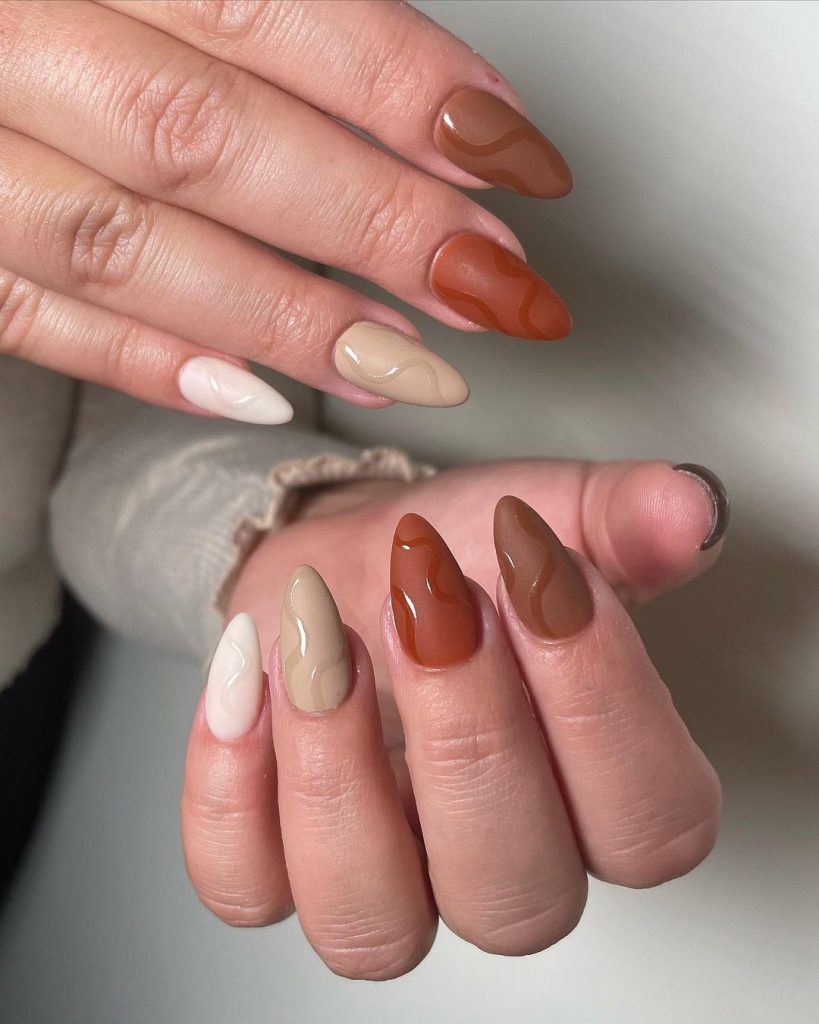
Modern brown swirl nail design
This nail design features a variety of brown shades that swirl together on each nail, creating a fluid and dynamic look. The almond shape adds elegance, while the gradient effect gives the nails depth and dimension. This design is perfect for lovers of a refined yet artistic manicure.
Consumables needed
- Nail Polishes: OPI in “Espresso Your Style”, Essie in “Chocolate Cakes”, Sally Hansen in “Caramel”
- Nail Art Tools: Fine detail brush for creating swirls
- Base and top coat: Seche Vite Dry Fast Top Coat
DIY instructions
- Prep your nails: Start with clean, filed nails and apply a base coat.
- Base colours: Apply two coats of the lightest brown polish to all nails as a base colour.
- Swirl Design: Using a fine detail brush, create swirls with the different shades of brown on each nail and blend them lightly for a smooth transition.
- Top Coat: Seal the design with a top coat to ensure longevity and a glossy finish.
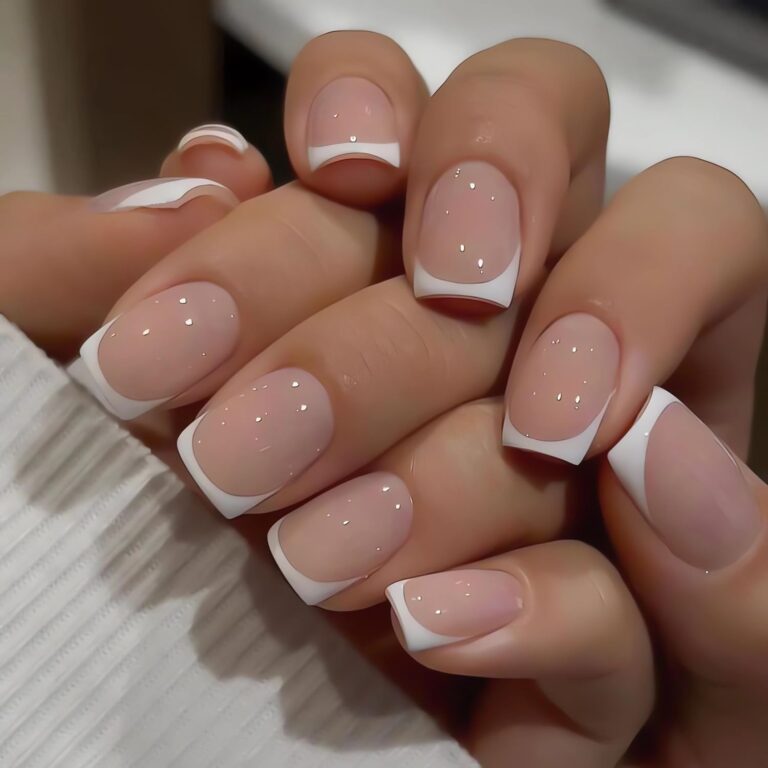
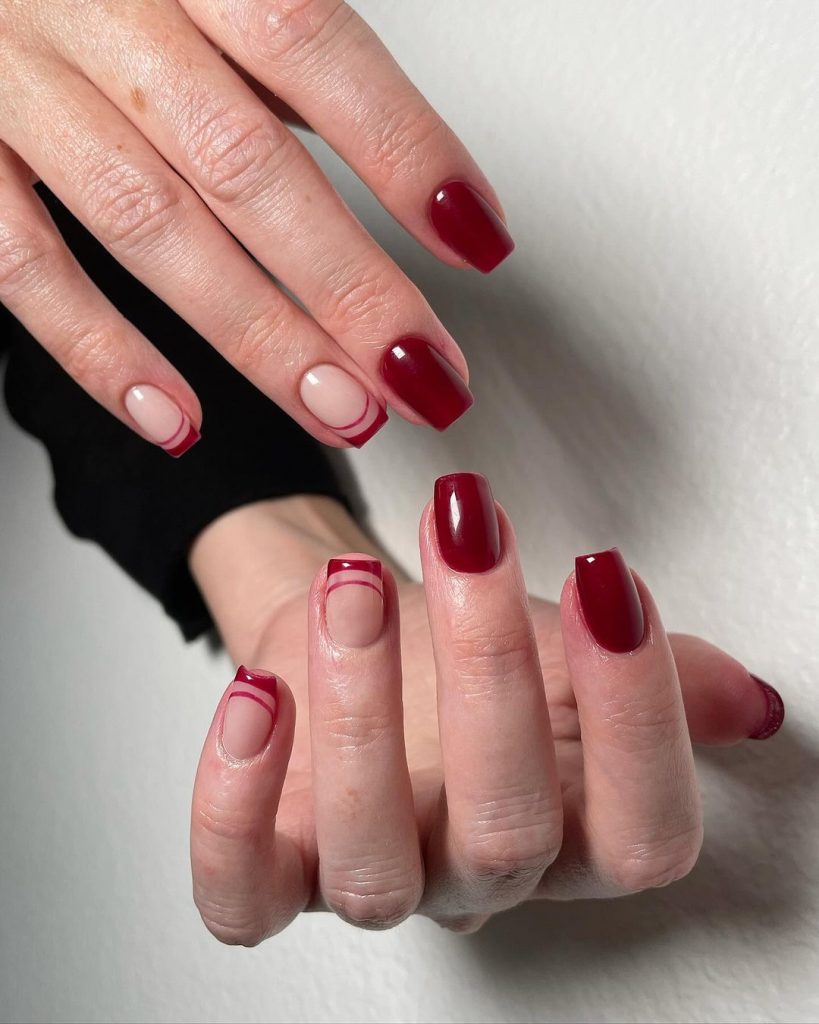
Chic red French nail design
This nail design features a sophisticated mix of deep red and nude, perfect for making a bold statement. The short square shape is trendy and practical. The classic red polish is complemented by a modern twist on the French manicure, with thin red lines on a nude base on some nails. This design is perfect for both everyday use and special occasions.
Consumables needed
- Nail Polishes: OPI in “Big Apple Red”, Essie in “Bare With Me”
- Nail Art Tools: Striping brush for the fine red lines
- Base and top coat: OPI Start to Finish Base & Top Coat
- Extras: Nail art stickers (optional for precision)
DIY instructions
- Prep your nails: Start with clean, filed nails and apply a base coat.
- Basic colors: Apply two coats of nude polish to all nails except the ring finger, which will be painted red.
- French tips: Using a striping brush, carefully draw thin red lines along the tips of the nude nails.
- Top Coat: Seal the design with a top coat to ensure longevity and shine.
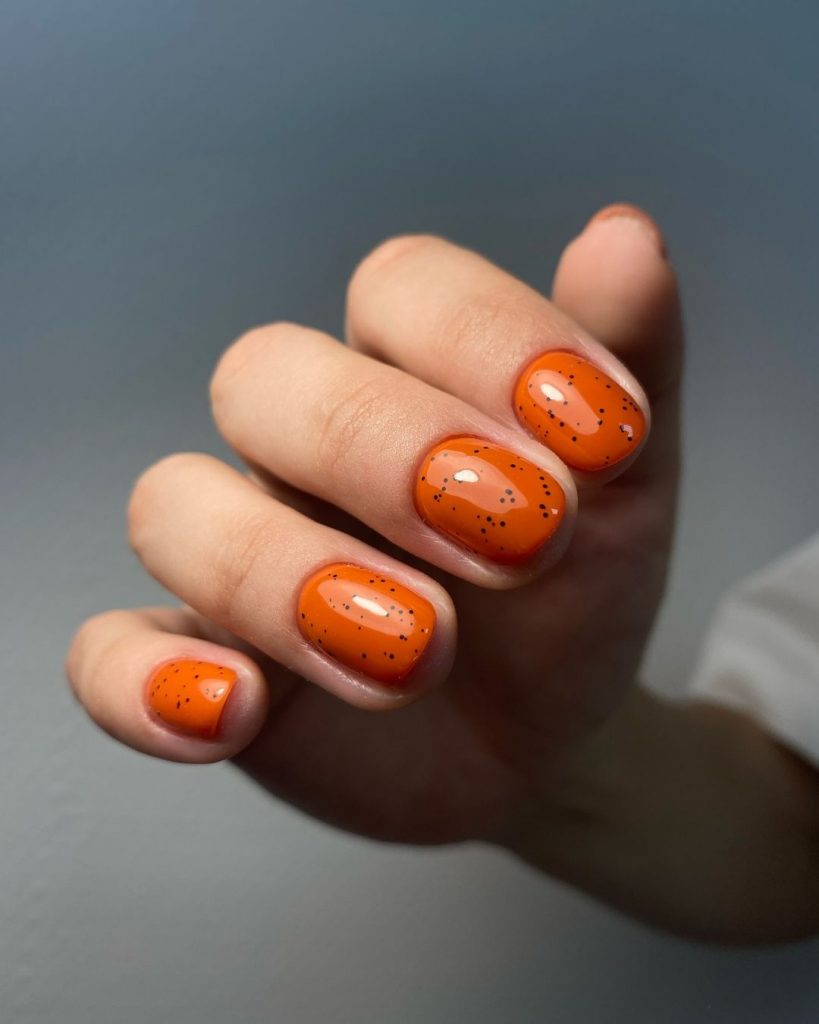
Playful pumpkin nail design
This nail design is a fun and vibrant option for the fall season, featuring a bright orange nail polish with black speckles that resemble pumpkin seeds. The short, round shape is cute and easy to maintain, making this design both playful and practical.
Consumables needed
- Nail Polishes: OPI in “Pumpkin Spice”, Sally Hansen in “Black Out”
- Nail Art Tools: Dotting tool for the speckles
- Base and top coat: Essie Gel Setter Topcoat
DIY instructions
- Prep your nails: Start with clean, filed nails and apply a base coat.
- Base color: Apply two coats of orange nail polish to all nails.
- Speckle Design: Apply small black dots randomly over the orange paint with a dotting tool.
- Top Coat: Seal the design with a top coat to ensure longevity and shine.
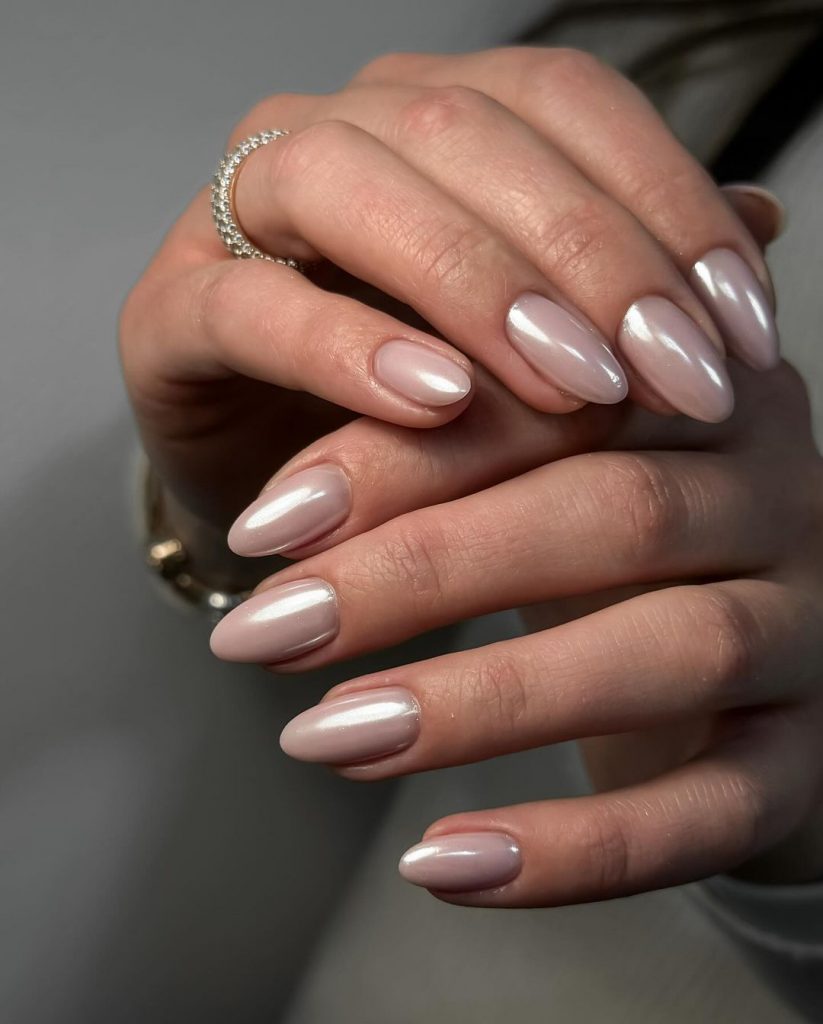
Elegant pearl shine nail design
This elegant nail design features a subtle mother-of-pearl polish that gives a stylish and sophisticated look. The almond shape adds to the overall elegance, making this design perfect for formal events or chic everyday style.
Consumables needed
- Nail Polishes: OPI in “Pearl of Wisdom”
- Base and top coat: Seche Vite Dry Fast Top Coat
DIY instructions
- Prep your nails: Start with clean, filed nails and apply a base coat.
- Base color: Apply two coats of pearl polish to all nails.
- Top Coat: Seal the design with a top coat to ensure longevity and a glossy finish.
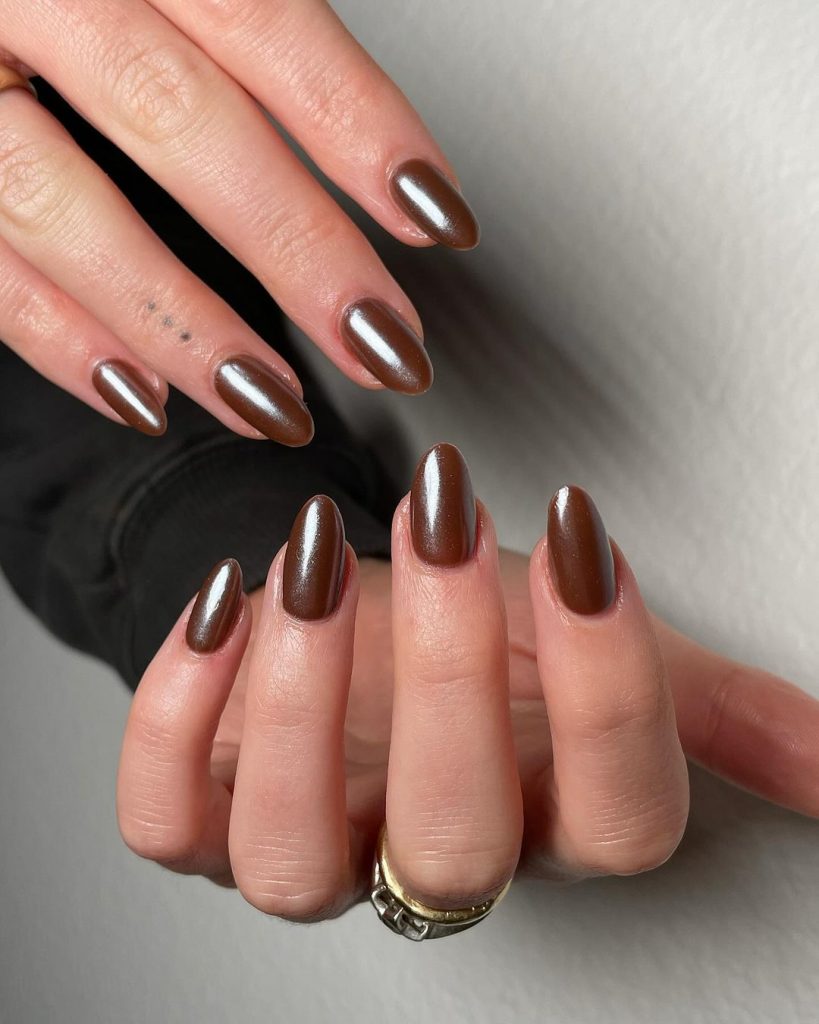
Rich brown almond nail design
This nail design uses a deep brown polish that radiates richness and warmth, perfect for the fall season. The almond shape is both trendy and elegant, making this design suitable for both professional and casual settings.
Consumables needed
- Nail Polishes: Essie in “Chocolate Cakes”
- Base and top coat: OPI Start to Finish Base & Top Coat
DIY instructions
- Prep your nails: Start with clean, filed nails and apply a base coat.
- Base color: Apply two coats of brown polish to all nails.
- Top Coat: Seal the design with a top coat to ensure longevity and shine.
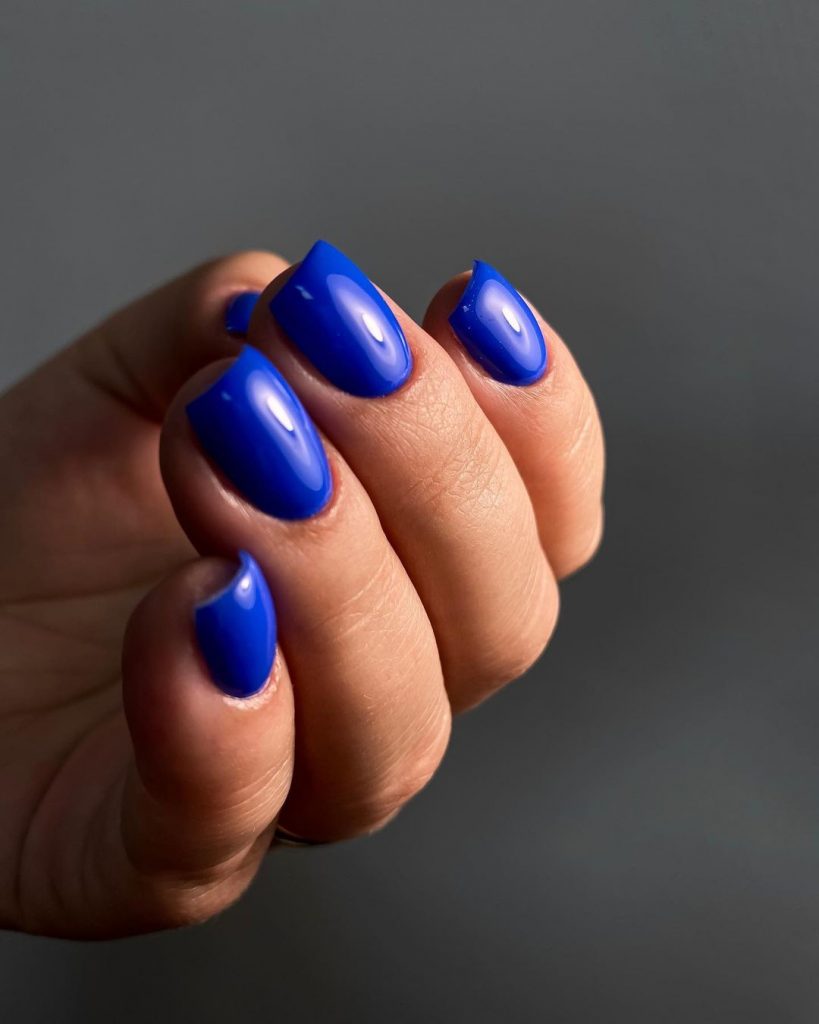
Bold blue nail design
This striking nail design features a vibrant blue polish that makes a bold statement. The short, round shape is practical and chic, making this design a striking choice for lovers of vibrant colours.
Consumables needed
- Nail Polishes: OPI in “Blue My Mind”
- Base and top coat: Essie Gel Setter Topcoat
DIY instructions
- Prep your nails: Start with clean, filed nails and apply a base coat.
- Base color: Apply two coats of blue polish to all nails.
- Top Coat: Seal the design with a top coat to ensure longevity and shine.
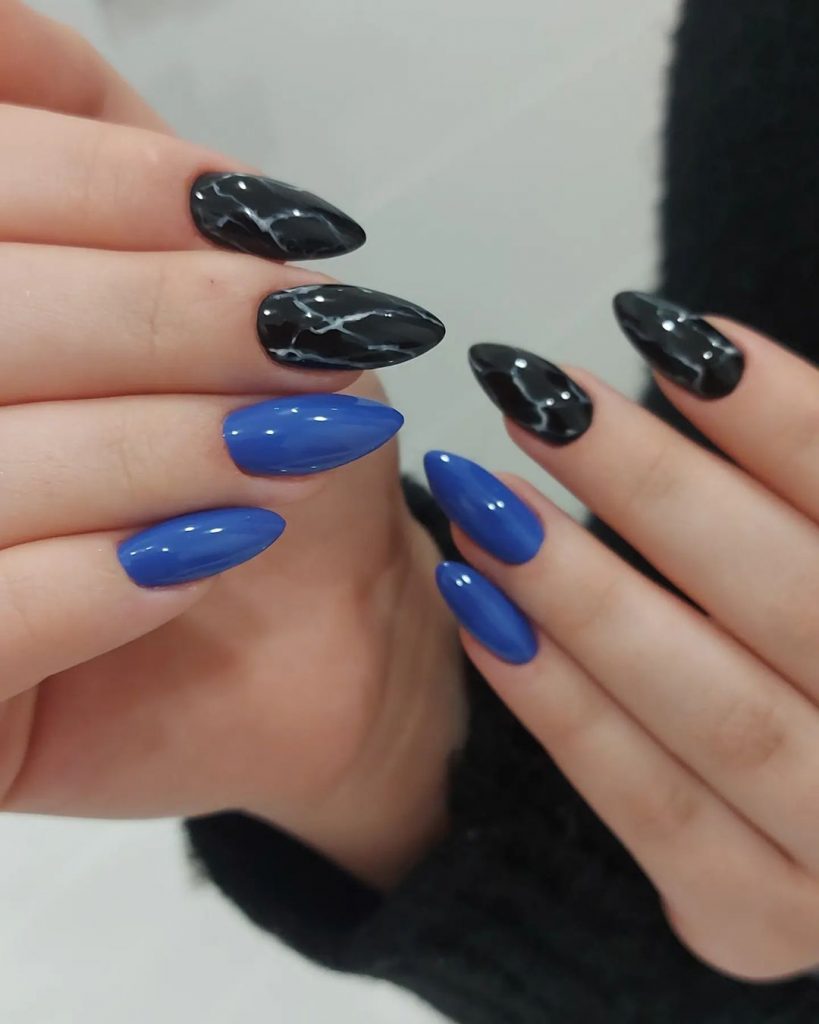
Striking marble and blue nail design
This nail design combines a striking black marble effect with a striking royal blue polish. The almond-shaped nails are both elegant and striking. The marble effect has been carefully crafted with fine white veins running through the black lacquer, creating a refined and luxurious look. The vibrant blue adds a pop of color, making the design stand out.
Consumables needed
- Nail Polishes: OPI in “Black Onyx”, OPI in “Blue My Mind”
- Nail Art Tools: Fine detail brush for marble effect
- Base and top coat: Seche Vite Dry Fast Top Coat
- Extras: White nail art pen or thin brush for the veining
DIY instructions
- Prep your nails: Start with clean, filed nails and apply a base coat.
- Basic colors: Apply two coats of black polish to the nails you want to marble, and two coats of blue polish to the rest.
- Marble effect: Use a fine detail brush or white nail art pen to draw thin, irregular veins on the black nails.
- Top Coat: Seal the design with a top coat to ensure longevity and shine.
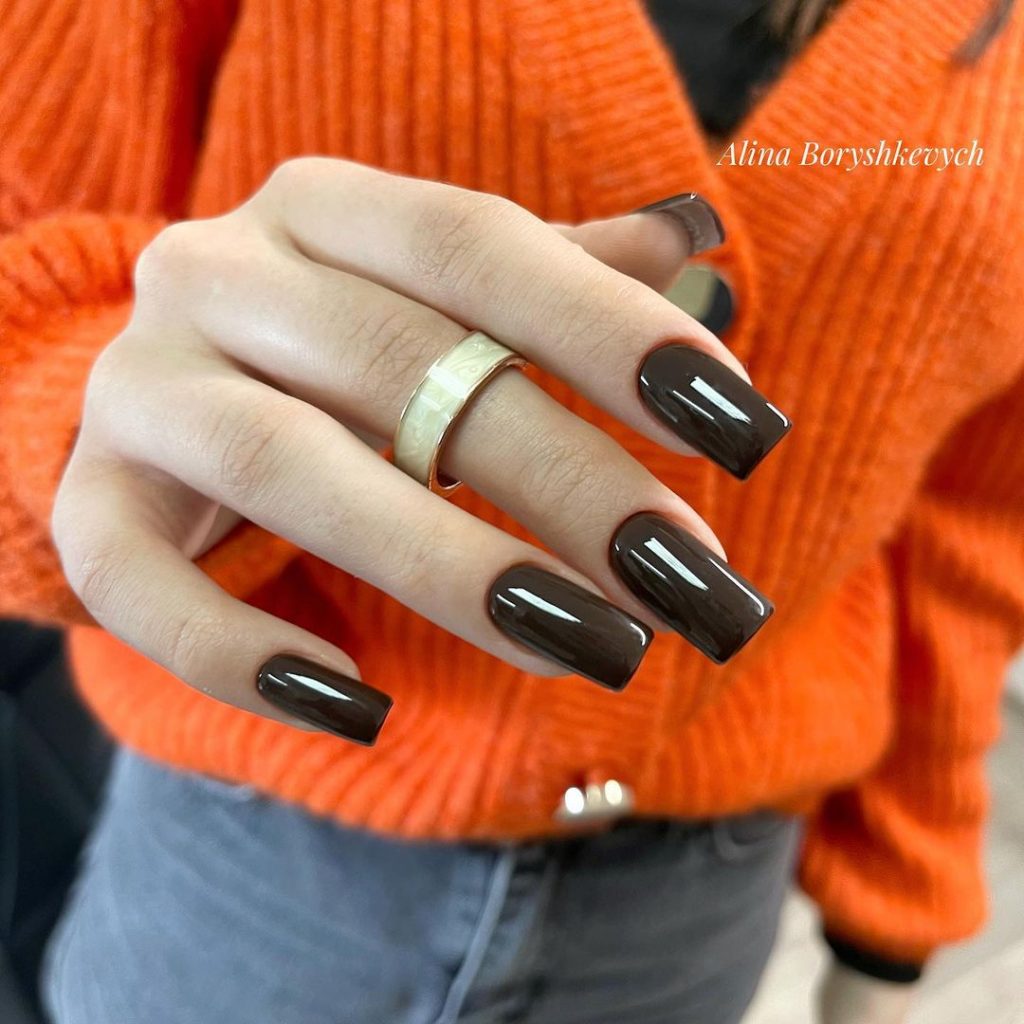
Classic chocolate brown square nail design
This design shows a rich, dark brown polish on short, square nails. The deep chocolate shade is perfect for the fall season and adds warmth and sophistication to your look. The square shape is both modern and practical, making it suitable for everyday use as well as for special occasions.
Consumables needed
- Nail Polishes: Essie in “Chocolate Cakes”
- Base and top coat: OPI Start to Finish Base & Top Coat
DIY instructions
- Prep your nails: Start with clean, filed nails and apply a base coat.
- Base color: Apply two coats of dark brown polish to all nails.
- Top Coat: Seal the design with a top coat to ensure longevity and shine.
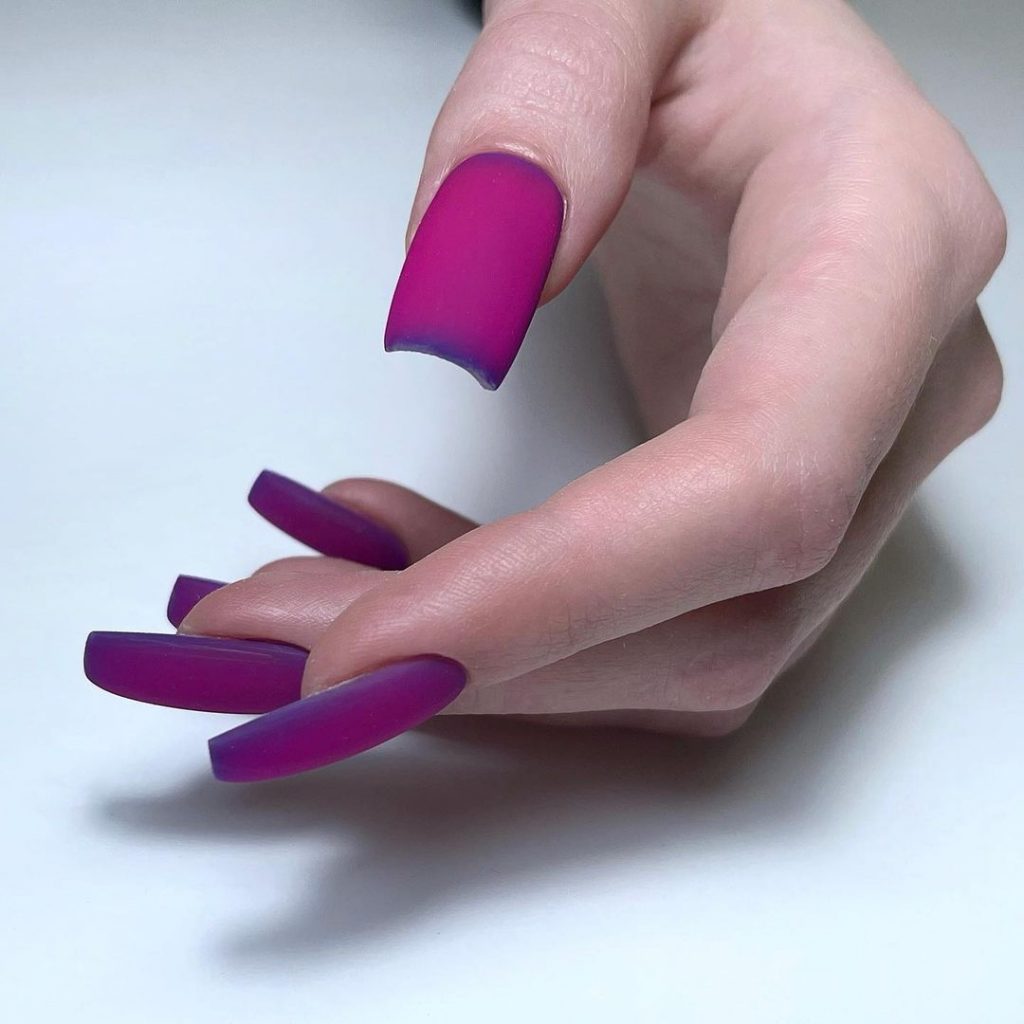
Matte purple acrylic nail design
This nail design features a striking matte purple polish on long, square acrylic nails. The striking purple color is both trendy and vibrant, making it a perfect statement for the fall season. The matte finish adds a refined touch and gives the nails a chic and modern look.
Consumables needed
- Nail Polishes: OPI in “Purple Palazzo Pants”
- Matte top coat: OPI Matte top coat
- Acrylic nails: preformed acrylic nails for easy application
DIY instructions
- Prepare your nails: Start with clean, filed nails and apply the acrylic nails.
- Base color: Apply two coats of purple nail polish to all nails.
- Matte finish: Apply a matte top coat to give the nails a chic, matte look.
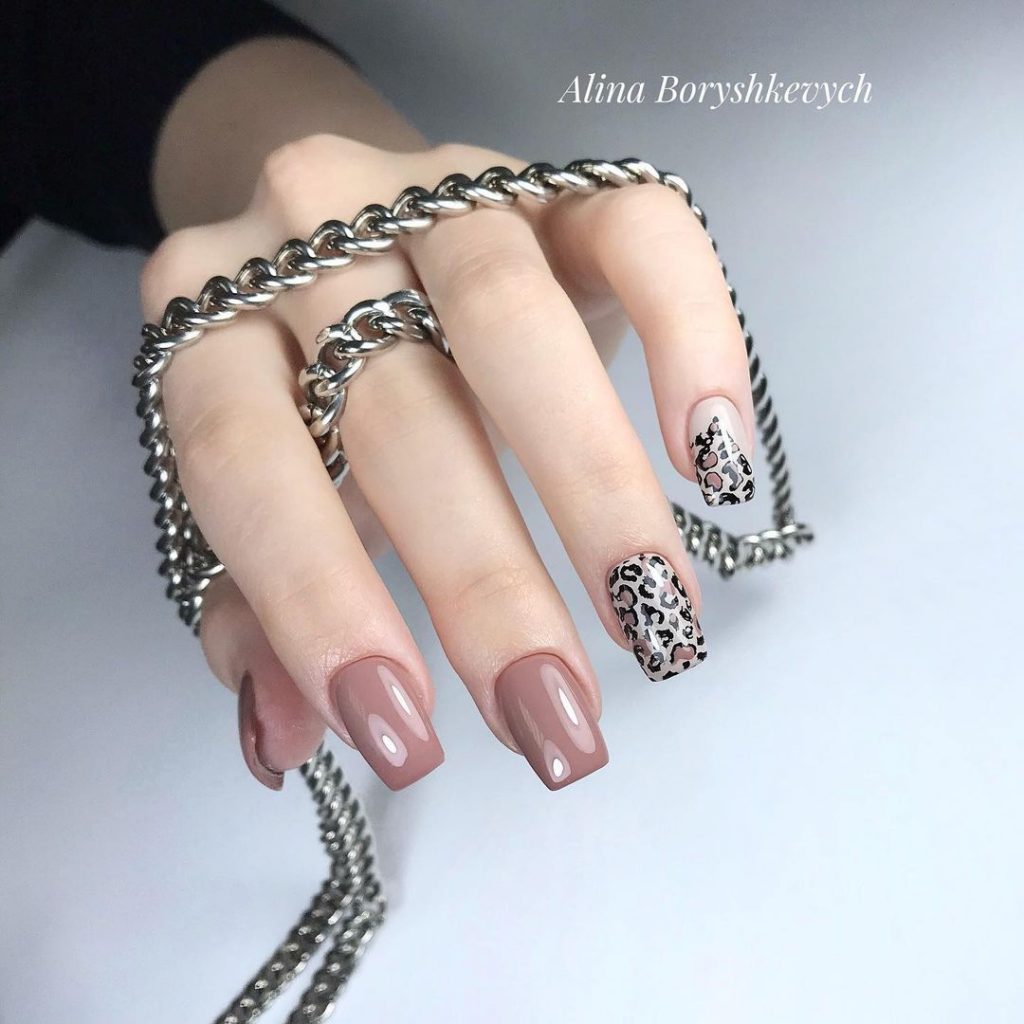
Nail design with nude and leopard print
This elegant design combines nude polish with a striking leopard print accent. The short, square shape provides a modern touch, while the leopard print provides a playful and trendy element. This design is perfect for those who want to add a little flair to their everyday look.
Consumables needed
- Nail polish: OPI in “Samoan Sand”, Essie in “Licorice” for the spots
- Nail Art Tools: Dotting tool and thin brush for the leopard print
- Base and top coat: Essie Gel Setter Topcoat
DIY instructions
- Prep your nails: Start with clean, filed nails and apply a base coat.
- Basic colors: Apply two coats of nude polish to all nails except the accent nail.
- Leopard print: Use a dotting tool to create black spots on the accent nail, then use a thin brush to outline some of the spots with black polish.
- Top Coat: Seal the design with a top coat to ensure longevity and shine.
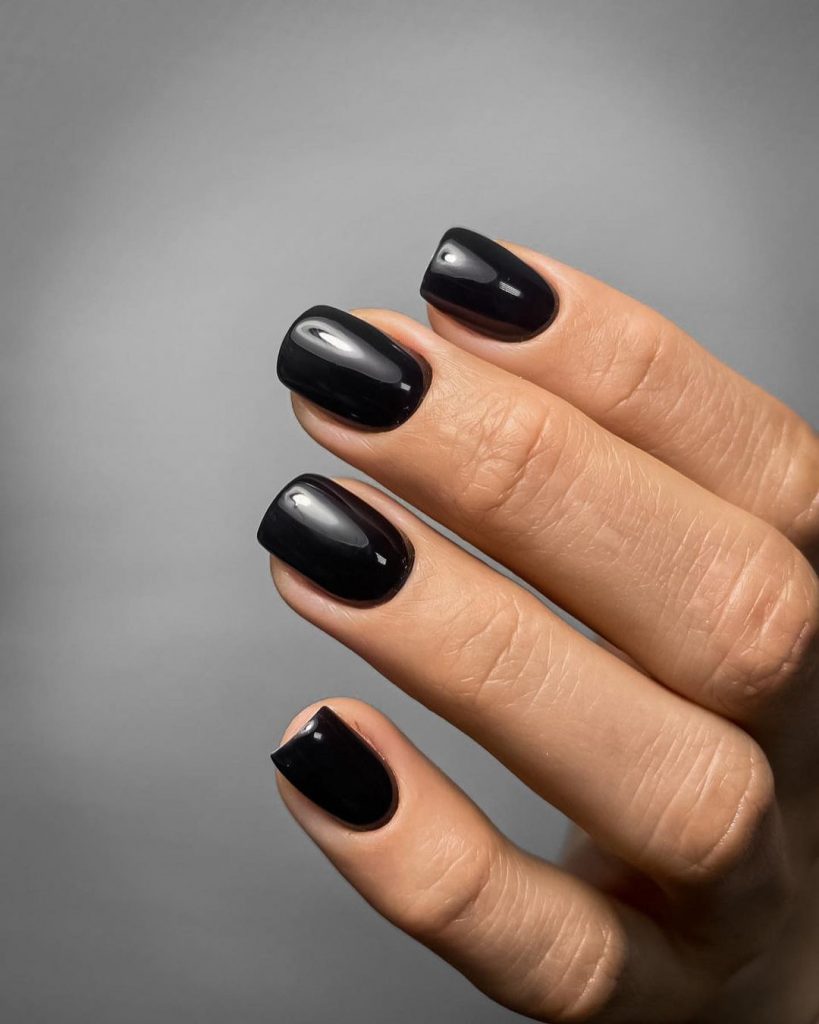
Shiny black short square nail design
This classic nail design features a high-gloss black polish on short, square nails. The sleek and glossy finish gives the nails a polished and sophisticated look, perfect for both casual and formal occasions.
Consumables needed
- Nail Polishes: OPI in “Black Onyx”
- Base and top coat: Seche Vite Dry Fast Top Coat
DIY instructions
- Prep your nails: Start with clean, filed nails and apply a base coat.
- Base color: Apply two coats of black polish to all nails.
- Top Coat: Seal the design with a top coat to ensure longevity and shine.
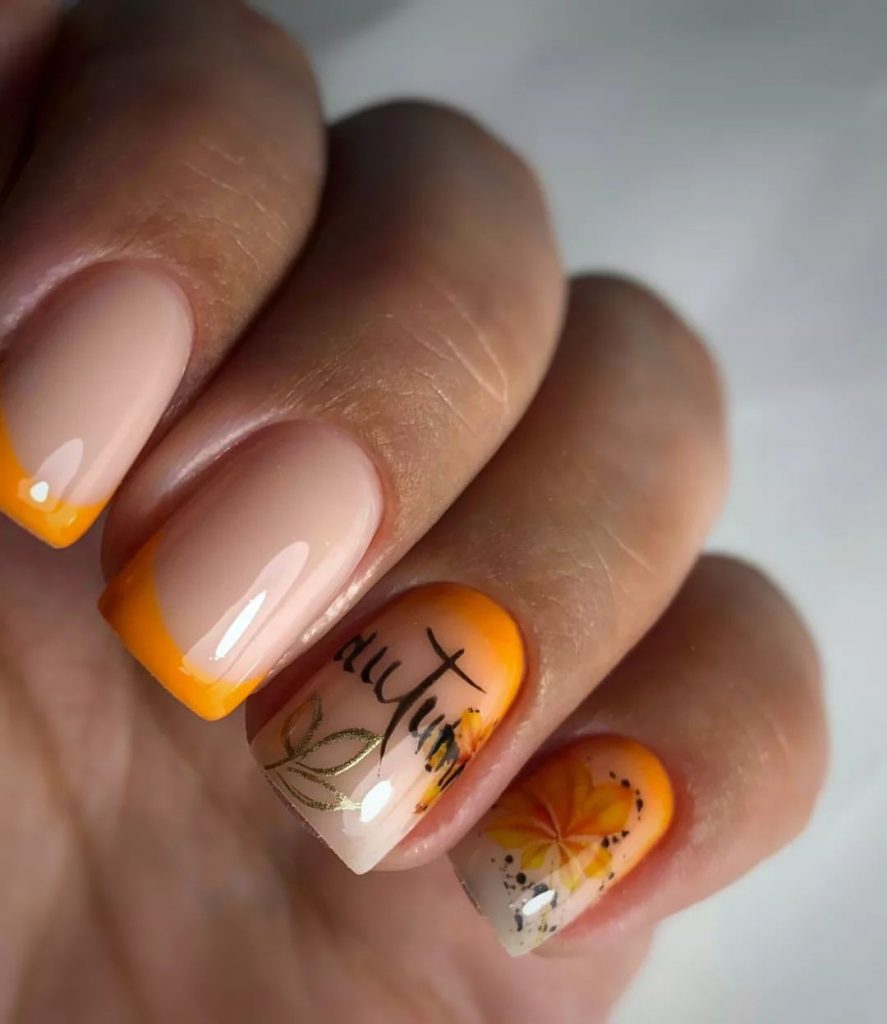
Nail Design with Autumn Leaf and Orange French Tip
This nail design beautifully captures the essence of fall with its orange French tips and intricate leaf art. The short square nails are perfect for a practical yet stylish look. The accent nails feature delicate leaves and the word ‘autumn’, adding a personal touch to the design.
Consumables needed
- Nail Polishes: OPI in “A Good Man-darin is Hard to Find”, Essie in “Ballet Slippers”
- Nail Art Tools: Fine detail brush for the leaf design
- Base and top coat: Seche Vite Dry Fast Top Coat
- Extras: Nail stickers for leaves and letters
DIY instructions
- Prep your nails: Start with clean, filed nails and apply a base coat.
- Basic colors: Apply two coats of nude polish to all nails.
- French tips and art: Use the orange nail polish to paint the tips of the nails. Use a fine detail brush to create leaf designs and apply nail stickers with the word “autumn.”
- Top Coat: Seal the design with a top coat to ensure longevity and shine.
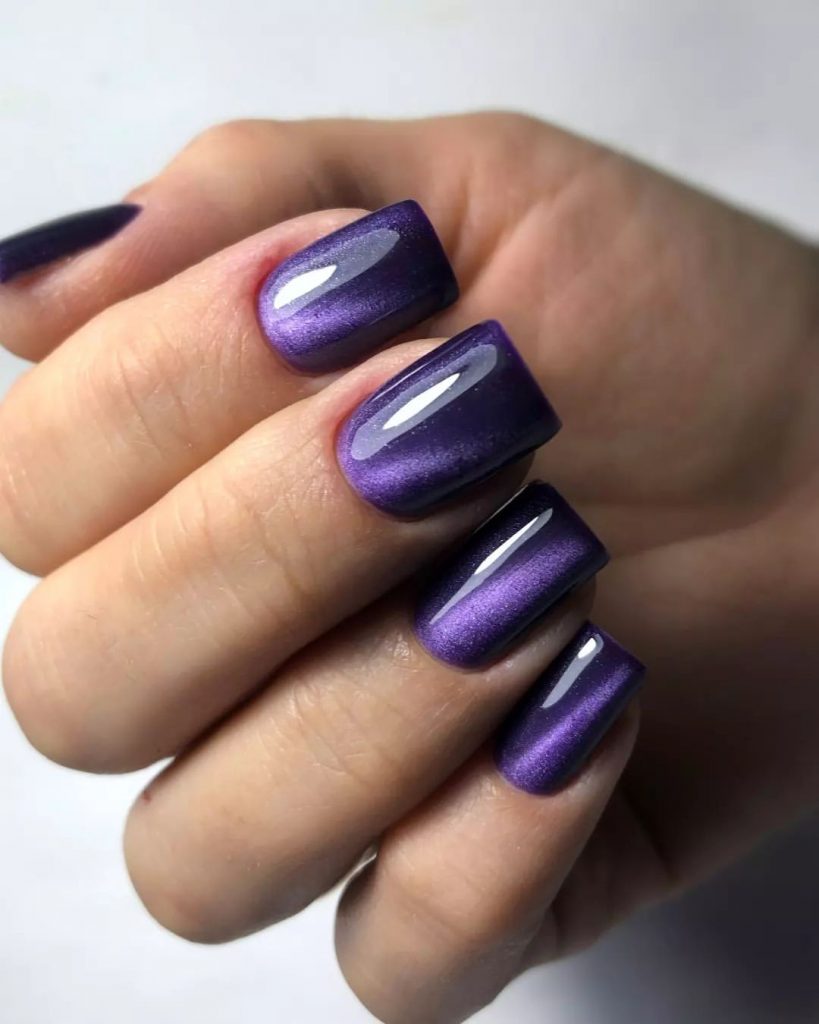
Metallic purple square nail design
This design features a beautiful metallic purple polish on short square nails, creating a chic and modern look. The reflective finish adds depth and dimension, making this design perfect for a night out or a special event.
Consumables needed
- Nail Polishes: OPI in “Turn on the Northern Lights!”
- Base and top coat: Seche Vite Dry Fast Top Coat
DIY instructions
- Prep your nails: Start with clean, filed nails and apply a base coat.
- Base color: Apply two coats of the metallic purple polish to all nails.
- Top Coat: Seal the design with a top coat to ensure longevity and shine.
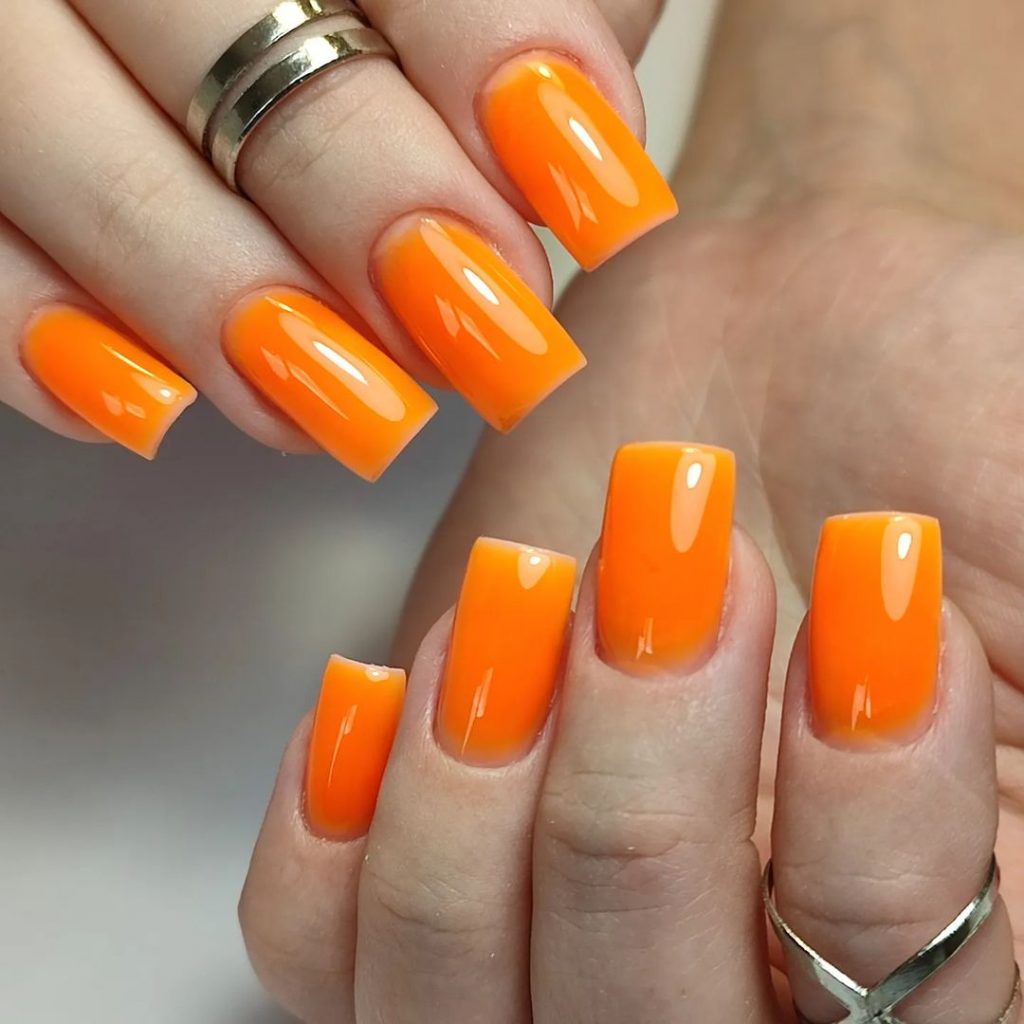
Neon orange square nail design
This vibrant nail design features a striking neon orange polish on square nails. The bright color is perfect for making a statement and adds a fun and energetic vibe to your look.
Consumables needed
- Nail Polishes: OPI in “Orange You Glad It’s Summer”
- Base and top coat: Essie Gel Setter Topcoat
DIY instructions
- Prep your nails: Start with clean, filed nails and apply a base coat.
- Base color: Apply two coats of neon orange nail polish to all nails.
- Top Coat: Seal the design with a top coat to ensure longevity and shine.
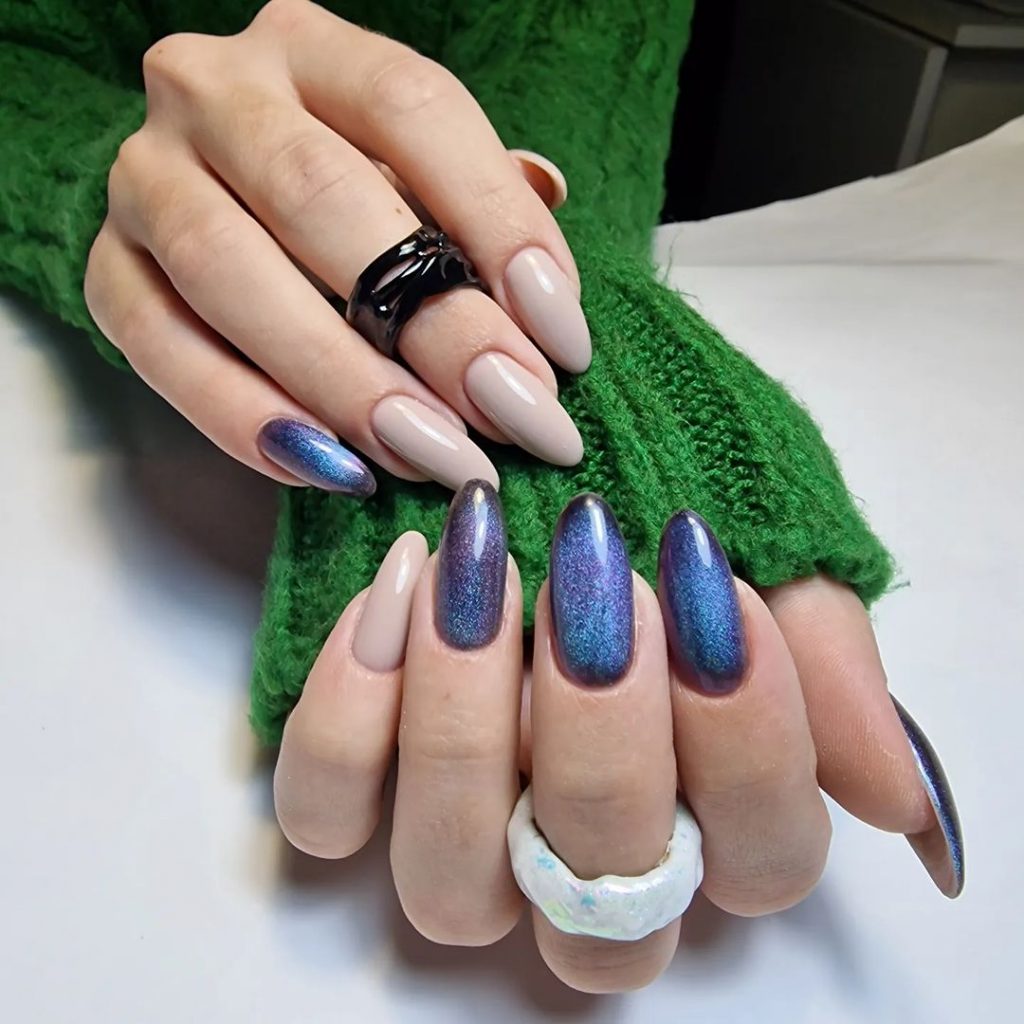
Holographic and nude almond nail design
This elegant design features a mix of nude and holographic polishes on almond-shaped nails. The holographic polish adds a mesmerizing, reflective quality, while the nude polish keeps the design refined and versatile.
Consumables needed
- Nail Polishes: Essie in “Bare With Me”, ILNP in “Mega (X)”
- Base and top coat: Seche Vite Dry Fast Top Coat
DIY instructions
- Prep your nails: Start with clean, filed nails and apply a base coat.
- Basic colors: Apply two coats of nude polish to some nails and two coats of holographic nail polish to others.
- Top Coat: Seal the design with a top coat to ensure longevity and shine.
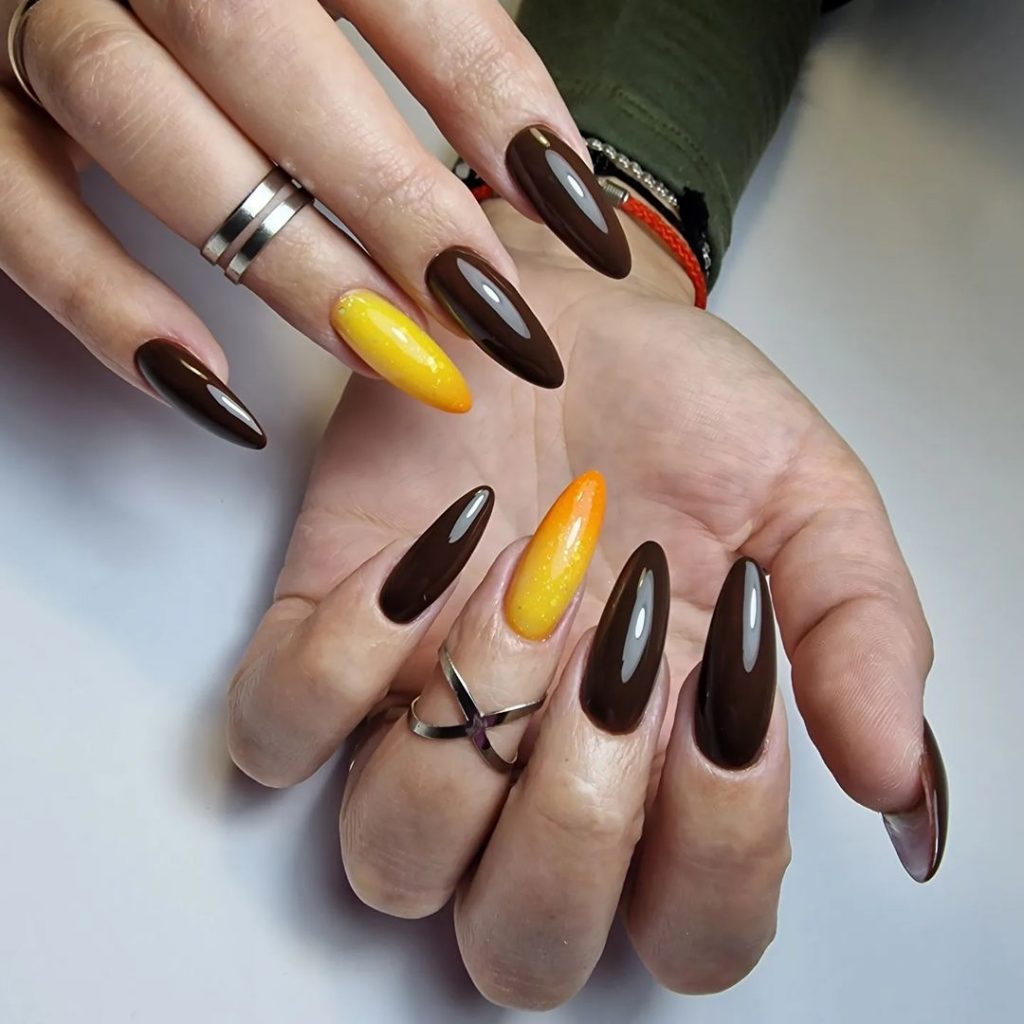
Brown and Yellow Ombre Almond Nail Design
This vibrant nail design features a mix of deep brown and bright yellow in a beautiful ombre effect. The almond shape adds sophistication and elegance. The gradient transition from yellow to brown creates a striking visual effect, perfect for the fall season.
Consumables needed
- Nail polishes: OPI in “Espresso Your Style”, OPI in “Sun, sea and sand in my pants”
- Base and top coat: Seche Vite Dry Fast Top Coat
- Extras: Make-up sponge for blending the ombre effect
DIY instructions
- Prep your nails: Start with clean, filed nails and apply a base coat.
- Ombre effect: Apply a small amount of both polishes to a makeup sponge and dab onto the nails to create a gradient effect.
- Top Coat: Seal the design with a top coat to ensure longevity and shine.
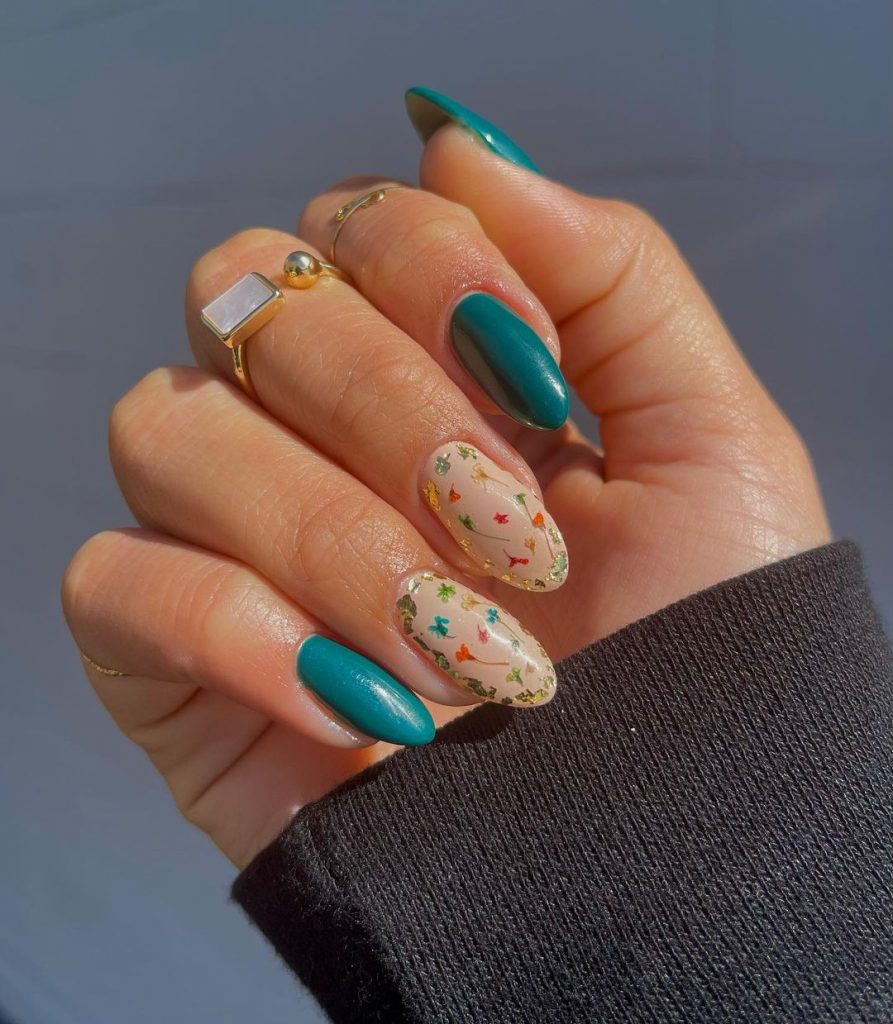
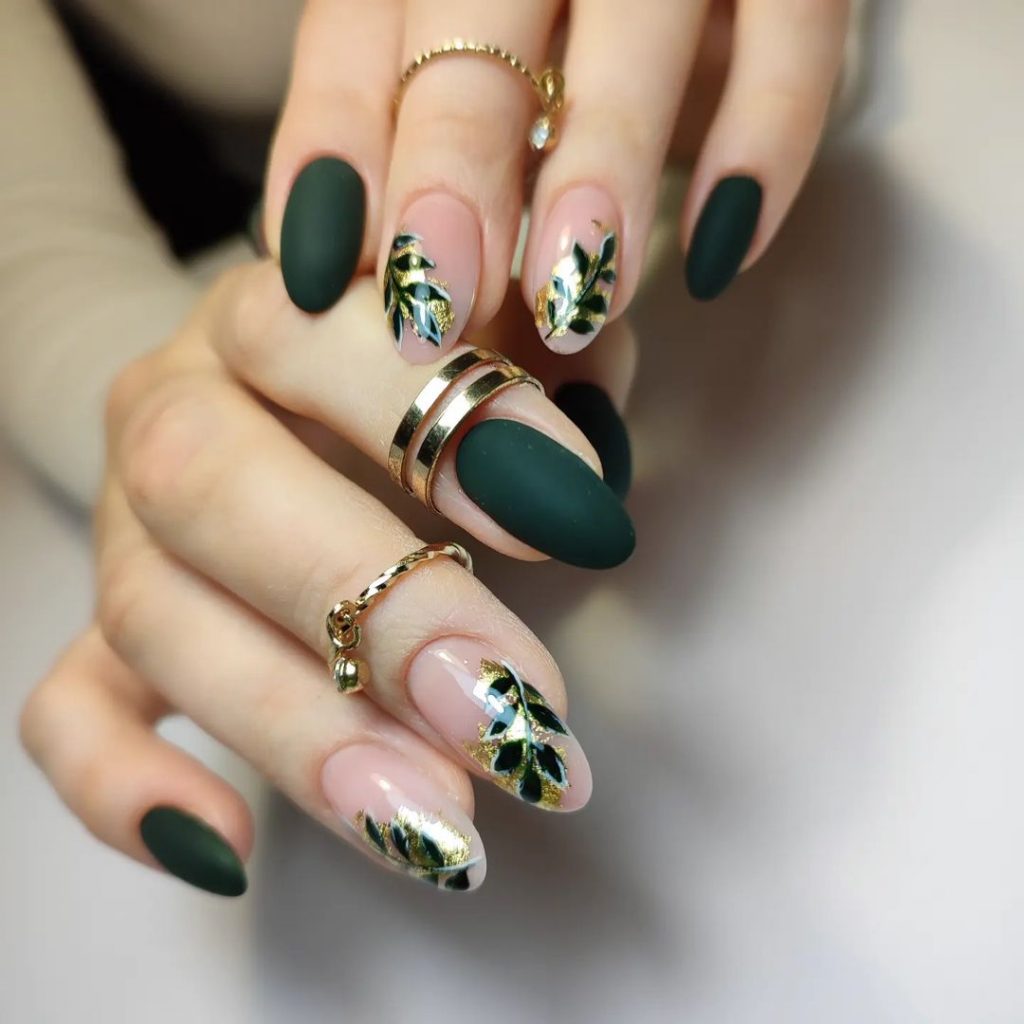
Green and gold leaf nail design
This nail design features a sophisticated mix of matte green and gold leaf accents on almond-shaped nails. The matte finish adds a modern touch, while the gold leaves give a luxurious look to the design. This look is perfect for fall and adds elegance to any outfit.
Consumables needed
- Nail Polishes: Essie in “Off Tropic”, OPI in “Gold Digger”
- Base and top coat: OPI Matte Topcoat
- Extras: nail stickers with gold leaf, fine detail brush
DIY instructions
- Prep your nails: Start with clean, filed nails and apply a base coat.
- Basic colors: Apply two coats of green polish to some nails and nude polish to others.
- Leaf Design: Apply gold leaf stickers or use a fine detail brush to paint gold leaf on the bare nails.
- Top Coat: Finish the design with a matte top coat for a chic finish.
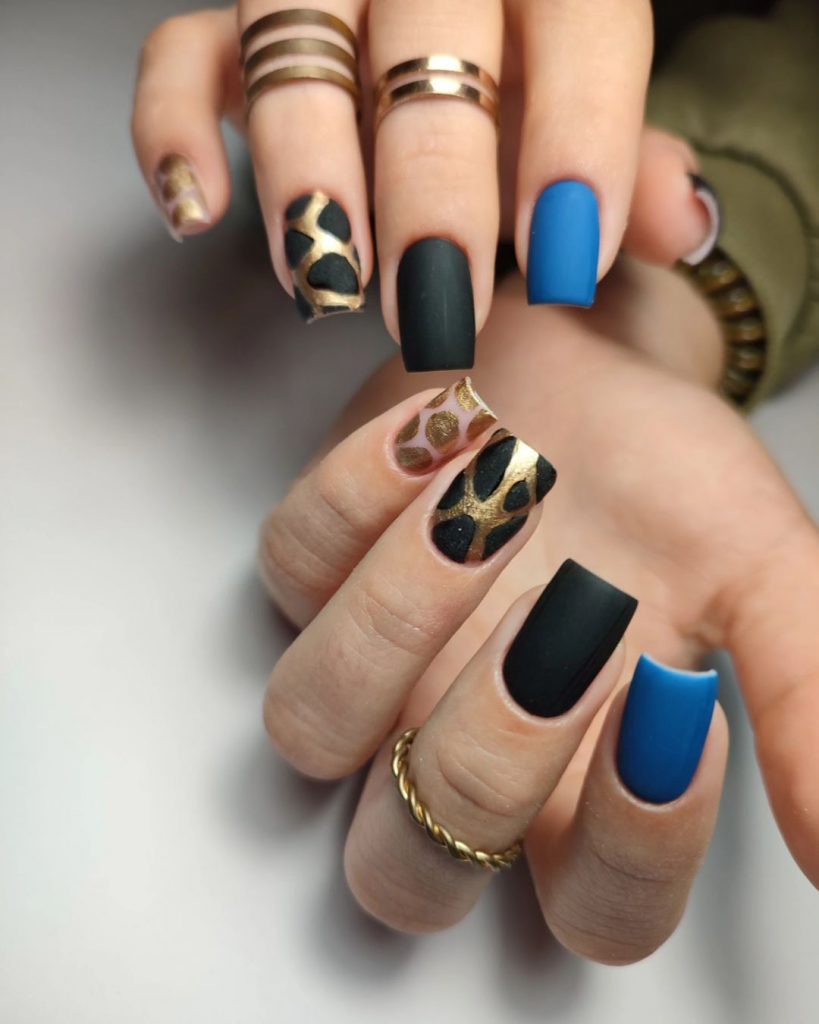
Blue and black leopard print nail design
This trendy nail design combines matte blue and black with a striking leopard print accent. The short square shape is both practical and stylish, perfect for making a statement this fall. The leopard print adds a playful element to the overall look.
Consumables needed
- Nail Polishes: Essie in “Butler Please”, OPI in “Black Onyx”
- Base and top coat: Essie Matte About You Topcoat
- Extras: Dotting tool and thin brush for leopard print
DIY instructions
- Prep your nails: Start with clean, filed nails and apply a base coat.
- Basic colors: Apply two coats of blue nail polish to some nails and black nail polish to others.
- Leopard print: Use a dotting tool to create black spots on the accent nails, then sketch a leopard effect with a thin brush.
- Top Coat: Seal the design with a matte top coat to ensure longevity and a chic finish.
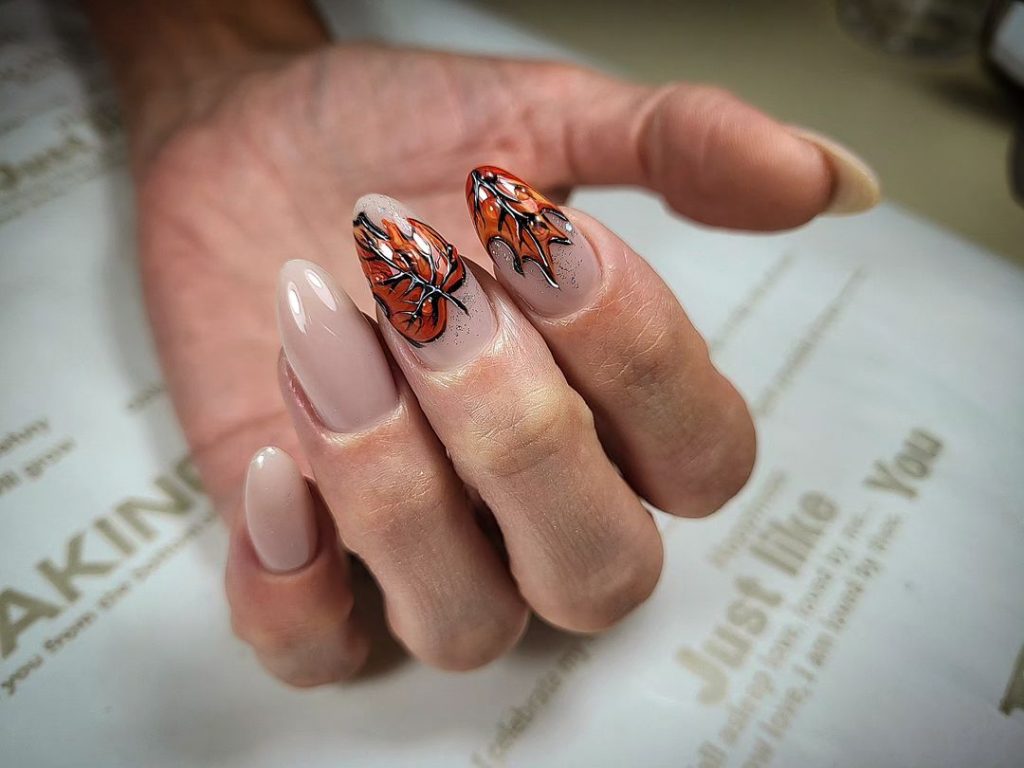
Nude and orange leaf nail design
This elegant design features a nude base with detailed orange leaf art on almond-shaped nails. The fall leaves add a seasonal touch, making this design perfect for fall. The soft, natural tones are complemented by the vibrant leaf art.
Consumables needed
- Nail Polishes: OPI in “Samoan Sand”, Essie in “Playing Koi”
- Base and top coat: Seche Vite Dry Fast Top Coat
- Extras: Fine detail brush for leaf art
DIY instructions
- Prep your nails: Start with clean, filed nails and apply a base coat.
- Basic colors: Apply two coats of nude polish to all nails.
- Leaf Art: Using a fine detail brush, paint detailed orange leaves on accent nails.
- Top Coat: Seal the design with a top coat to ensure longevity and shine.
Matte orange and zebra print nail design
This striking design features a matte orange polish with black and white zebra print accents on short square nails. The combination of bright orange and striking zebra print makes this design stand out, perfect for those who like to make a statement.
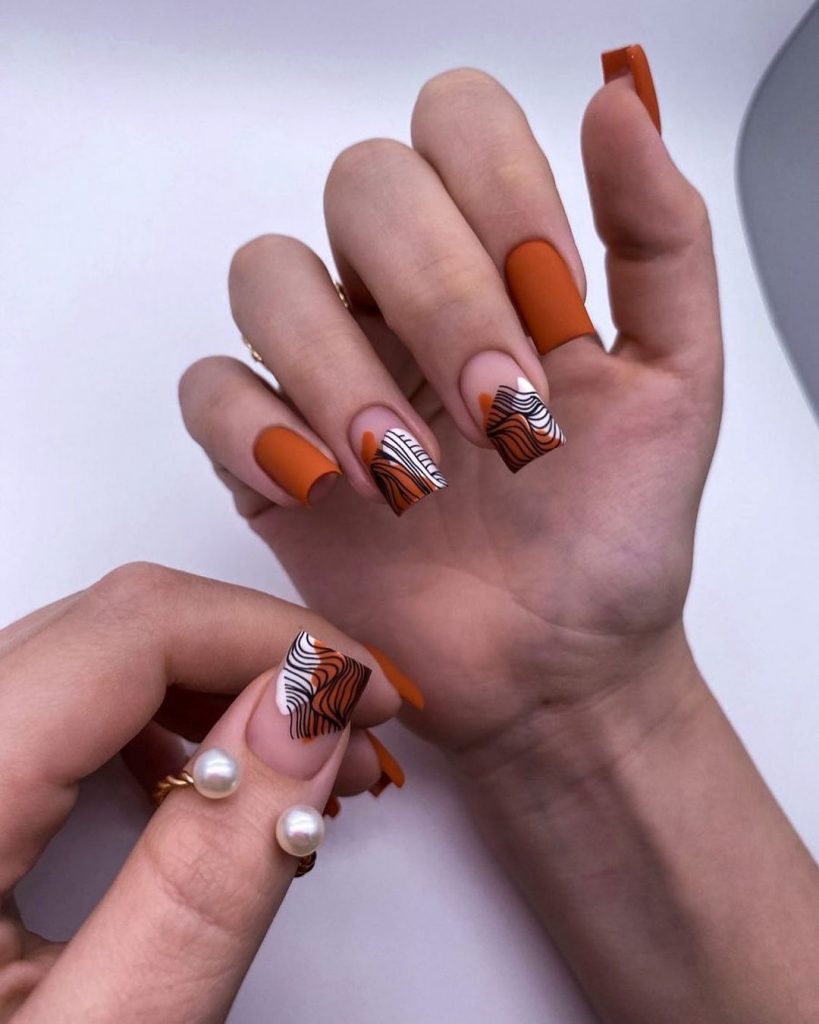
Consumables needed
- Nail Polishes: OPI in “No Tan Lines”, Essie in “Licorice”, Essie in “Blanc”
- Base and top coat: OPI Matte Topcoat
- Extras: Thin brush for zebra print
DIY instructions
- Prep your nails: Start with clean, filed nails and apply a base coat.
- Basic colors: Apply two coats of orange nail polish to all nails.
- Zebra Print: Using a thin brush, paint black and white zebra stripes on the accent nails.
- Top Coat: Seal the design with a matte top coat to ensure longevity and a chic finish.
Soft blue almond nail design
This elegant and understated design features a soft blue polish on almond-shaped nails. The light blue color is perfect for a subtle yet sophisticated look, ideal for any occasion.
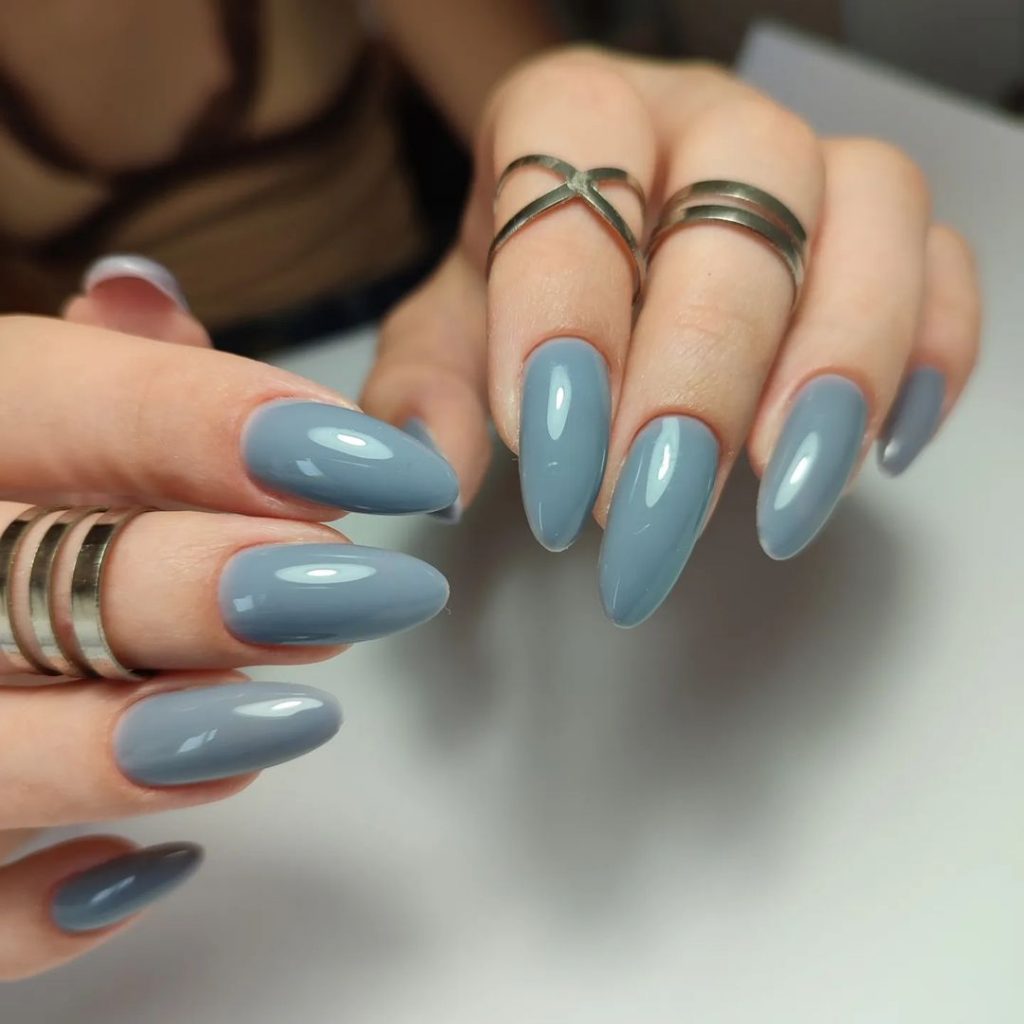
Consumables needed
- Nail Polishes: OPI in “It’s a Boy!”
- Base and top coat: Seche Vite Dry Fast Top Coat
DIY instructions
- Prep your nails: Start with clean, filed nails and apply a base coat.
- Base color: Apply two coats of the soft blue nail polish to all nails.
- Top Coat: Seal the design with a top coat to ensure longevity and shine.
Autumn raccoon nail design
This cute nail design has a fall theme with a cute raccoon on almond shaped nails. The mustard yellow and beige shades are perfect for fall, while the raccoon adds a whimsical and whimsical touch.
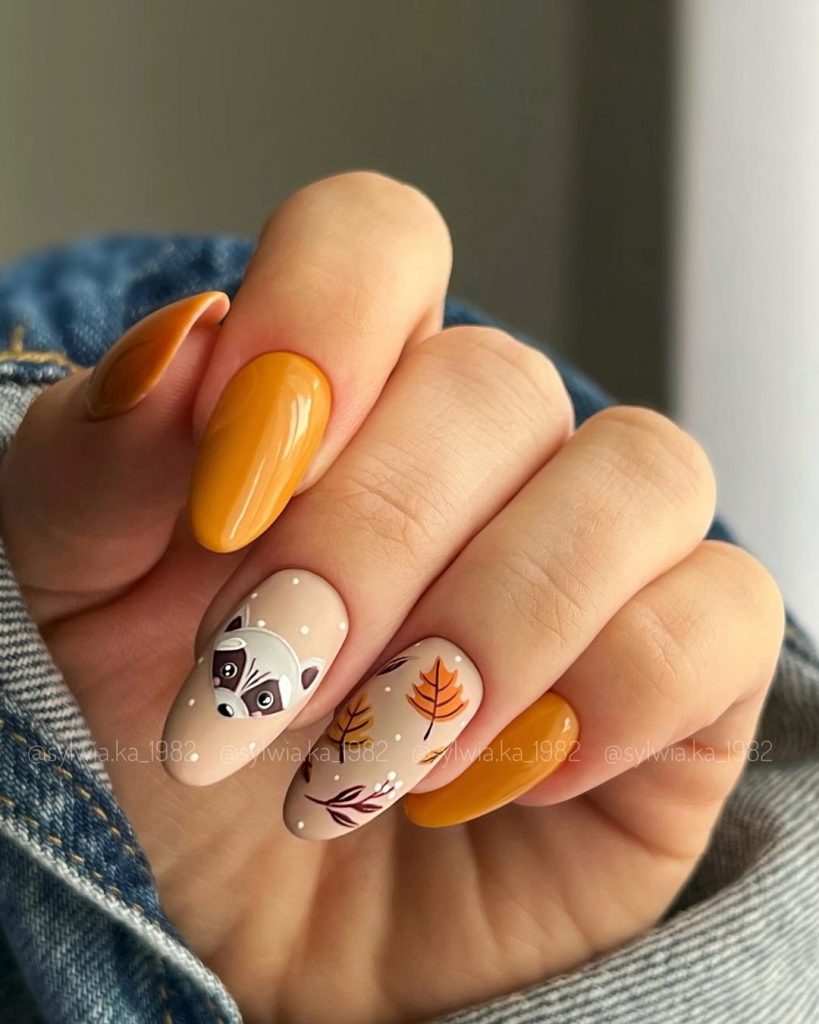
Consumables needed
- Nail Polishes: Essie in “Urban Jungle”, OPI in “Mustard the Courage”
- Base and top coat: Seche Vite Dry Fast Top Coat
- Extras: Finely detailed brush for raccoon and leaf art
DIY instructions
- Prep your nails: Start with clean, filed nails and apply a base coat.
- Basic colors: Apply two coats of beige nail polish to some nails and mustard yellow nail polish to others.
- Raccoon and Leaf Art: Use a fine detail brush to paint a raccoon and fall leaves on accent nails.
- Top Coat: Seal the design with a top coat to ensure longevity and shine.

Namie O, a talented writer at Willtiptop, conveys her passion for fashion and beauty in every word she writes. With a keen eye for detail and a deep insight into the latest trends, Namie’s articles and insights captivate readers and provide them with valuable knowledge and inspiration. Through her engaging and informative writing style, Namie aims to empower individuals to explore their style, experiment with beauty techniques, and embrace their unique sense of self.