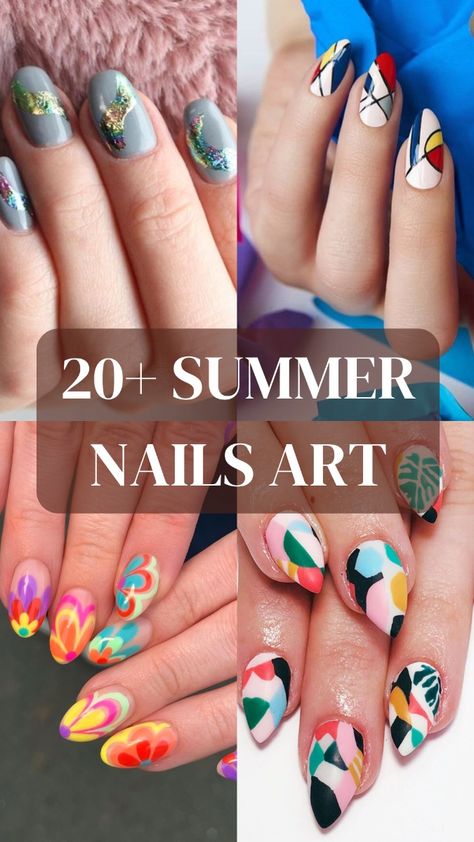
Fall Wedding Nails 2025 25 Ideas: The Ultimate Guide to Gorgeous Manicures
Planning a fall wedding involves many decisions, and one of the most exciting is choosing the perfect nail designs for the big day. From the bride to the bridesmaids and even the mother of the bride, having beautiful fall wedding nails in 2025 is essential. Let’s explore some fantastic nail ideas that will make your fall wedding unforgettable.
Elegant almond nails with marble design
For a sophisticated and elegant look, these almond shaped nails have a beautiful marble design. The neutral base color with delicate marble accents in white and gold provides a touch of luxury. This manicure is perfect for a bride who wants to keep it classy yet interesting. The long almond shape elongates the fingers, making them look graceful and balanced.

Bulleted consumables list
- Base coat: OPI Nail Envy
- Neutral nail polish: Essie ballet slippers
- White marble polish: Sally Hansen White On
- Gold foil: gold leaf nail foil
- Top coat: Seche Vite Dry Fast Topcoat
DIY instructions
- Prep your nails: Start by filing your nails into an almond shape and pushing back the cuticles.
- Base Coat: Apply a base coat to protect your natural nails.
- Base color: Apply two coats of neutral nail polish and allow to dry completely.
- Marble effect: Use a thin brush to create marble lines with the white lacquer and then add gold foil accents.
- Top Coat: Seal the design with a top coat for a glossy finish.
Soft Pink Ombre Nails
These soft pink ombre nails are the epitome of romance and subtlety. The progression from light pink to a slightly deeper shade creates a delicate and feminine look, perfect for a bridesmaid or a bride who likes understated elegance. The smooth transition of colors is not only trendy, but also timeless.

Bulleted consumables list
- Base layer: Zoya Anchor base layer
- Light pink polish: OPI bubble bath
- Deeper pink polish: Essie Mademoiselle
- Sponge: Make-up sponge for ombre effect
- Top Coat: Essie Gel Setter Top Coat
DIY instructions
- Prep your nails: Shape your nails and push back the cuticles.
- Base coat: Apply a base coat.
- Ombre effect: Dab the light pink and deeper pink polishes on a sponge and press it gently on your nails to create the gradient.
- Blend: Repeat until you achieve the desired ombre effect.
- Top Coat: Apply a top coat to fade the colors and add shine.
Classic French manicure with a twist
The classic French manicure gets a modern update with this design. The traditional white tips are combined with a subtle shimmering base, making it ideal for a guest or mother of the bride. The short, square shape provides a contemporary look, while the gloss adds a touch of glamor without overpowering the look.

Bulleted consumables list
- Base layer: CND Stickey base layer
- Shimmer base coat: Orly Bare Rose
- White point polish: Essie Blanc
- Top layer: INM Out The Door Top layer
DIY instructions
- Prep your nails: Shape your nails into a square and push back the cuticles.
- Base coat: Apply a base coat.
- Shimmer base: Apply two coats of the shimmer base coat.
- White tips: Use a fine brush to paint the tips white.
- Topcoat: Finish the manicure with a topcoat for a long-lasting finish.
Artistic gold line nail design
Featuring delicate gold lines on a nude base, this nail design offers a chic and artistic touch. Perfect for a bride who wants something unique yet simple, or for a bridesmaid looking for a stylish accent. The golden lines add sophistication and are sure to catch everyone’s attention.

Bulleted consumables list
- Base layer: Butter London Nail Foundation
- Nude Polish: Deborah Lippmann Nude
- Gold nail tape: gold striping tape
- Top coat: Sally Hansen Insta-Dri top coat
DIY instructions
- Prepare your nails: Shape and clean your nails.
- Base coat: Apply a base coat.
- Nude base: Apply two coats of nude polish.
- Gold Lines: Gently place the gold striping tape on your nails to create the desired patterns.
- Top Coat: Apply a top coat to secure the tape and add shine.
Subtle glitter gradient nails
For those who love a bit of sparkle, these subtle glitter gradient nails are perfect. The neutral base with glitter effect is elegant and festive, making it ideal for the bride, bridesmaids or even wedding guests. The short, square shape is practical and stylish and suits a variety of wedding themes and styles.

Bulleted consumables list
- Base layer: Orly Bonder
- Neutral Polish: Zoya Avery
- Glitter polish: China Glaze Fairy Dust
- Sponge: Makeup sponge for gradient effect
- Top coat: Glistening and shiny top coat
DIY instructions
- Prepare your nails: File and shape your nails, pushing back the cuticles.
- Base coat: Apply a base coat.
- Neutral base: Apply two coats of neutral varnish.
- Glitter gradient: Dab the glitter polish onto a sponge and press it onto the tips of your nails, fading upwards.
- Top Coat: Finish with a top coat to smooth the glitter and add shine.
Minimalist short nails
Short nails can be just as elegant and chic as longer styles. These minimalist nails have a soft, milky white shade that is perfect for a bride looking for a simple yet sophisticated look. The sleek and glossy finish adds a touch of sophistication, making these nails ideal for any wedding setting.

- Base coat: Deborah Lippmann Gel Lab Pro
- White Polish: OPI Funny Bunny
- Top coat: Essie Good to Go
DIY instructions:
- Prep your nails: Shape your nails into a neat, short square and push the cuticles back.
- Base Coat: Apply a base coat to protect your nails.
- White lacquer: Apply two coats of milky white lacquer for an even finish.
- Top Coat: Seal the look with a glossy top coat to add shine and durability.
Shimmering pink square nails
These shimmering pink nails are perfect for bridesmaids who want to add a little sparkle to their look. The pink base with iridescent glitter catches the light beautifully, making these nails a showstopper. The short, square shape is both trendy and practical, ideal for a bridesmaid or wedding guest.

- Base layer: CND RidgeFx
- Pink Polish: Zoya Bela
- Glitter polish: ILNP, happily ever after
- Top coat: Seche Vite Dry Fast Topcoat
DIY instructions:
- Prep your nails: Shape your nails into a short square and push back the cuticles.
- Base Coat: Apply a base coat to smooth out any ridges.
- Pink polish: Apply two coats of pink polish.
- Glitter polish: Add a layer of glitter polish for a sparkling effect.
- Top Coat: Finish with a top coat to ensure longevity.
Shimmering Ombre Almond Nails
These shimmering ombre nails transition from a nude base to a glitter tip, creating a beautiful gradient effect. This design is perfect for a bride who wants a bit of glamor without being too flashy. The almond shape lengthens the nails and adds elegance to the overall look.

- Base layer: Orly Bonder
- Naked Polish: Essie Bare with Me
- Glitter polish: China Glaze Fairy Dust
- Sponge: Makeup sponge for gradient effect
- Top coat: Glistening and shiny top coat
DIY instructions:
- Prep your nails: Shape your nails into an almond shape and push back the cuticles.
- Base coat: Apply a base coat.
- Nude polish: Apply two coats of nude polish.
- Ombre effect: Dab the glitter polish on a sponge and press it onto the tips of your nails, fading upwards.
- Top Coat: Finish with a top coat to smooth the glitter and add shine.
Floral French manicure
A classic French manicure gets a floral touch with delicate floral motifs on the ends. This nail design is perfect for a bride or bridesmaid who loves traditional styles with a modern twist. The short, square shape keeps it practical, while the floral accents add a feminine touch.

- Base layer: CND Stickey base layer
- Pink polish: Essie Mademoiselle
- White point polish: Essie Blanc
- Flower nail stickers: different designs
- Top layer: INM Out The Door Top layer
DIY instructions:
- Prep your nails: Shape your nails into a short square and push back the cuticles.
- Base coat: Apply a base coat.
- Pink base: Apply two coats of pink polish.
- White tips: Use a fine brush to paint the tips white.
- Flower stickers: Apply flower nail stickers to the tips.
- Top Coat: Finish with a top coat to secure the design and add shine.
Luxury gold accent nails
These luxurious nails have a nude base with elegant gold accents, perfect for a mother of the bride or a bride who loves a touch of luxury. The short, square shape is refined and practical, while the gold details add a rich, opulent feel.

- Base layer: Butter London Nail Foundation
- Nude Polish: Deborah Lippmann Nude
- Gold foil: gold leaf nail foil
- Top coat: Sally Hansen Insta-Dri top coat
DIY instructions:
- Prep your nails: Shape your nails into a short square and push back the cuticles.
- Base coat: Apply a base coat.
- Nude base: Apply two coats of nude polish.
- Gold accents: Use a thin brush to add gold leaf or foil accents to your nails.
- Top Coat: Finish with a top coat to set the gold accents and add shine.
Matte pink almond nails
These matte pink almond nails are perfect for a bride or bridesmaid looking for a soft, romantic look. The matte finish gives a modern touch to the classic pink shade, making the nails look elegant and chic. The almond shape elongates the fingers and provides a graceful appearance that is both timeless and trendy.

- Base layer: Orly Bonder
- Pink Polish: OPI Mod about you
- Matte top coat: Essie Matte About You
DIY instructions:
- Prep your nails: Shape your nails into an almond shape and push back the cuticles.
- Base Coat: Apply a base coat to protect your nails.
- Pink polish: Apply two coats of pink polish and allow each coat to dry thoroughly.
- Matte finish: Apply a matte top coat to achieve the desired matte effect.
White and gold striped nails
These white and gold striped nails give a modern twist to the classic wedding manicure. The sleek white base is decorated with intricate gold stripes, creating a sophisticated and stylish look. Perfect for a bride or guest who loves minimalist nail art with a touch of luxury.

- Base layer: Zoya Anchor base layer
- White lacquer: Essie Blanc
- Gold striping tape: gold nail art tape
- Top coat: Seche Vite Dry Fast Topcoat
DIY instructions:
- Prep your nails: Shape your nails into a square shape and push back the cuticles.
- Base Coat: Apply a base coat to make your nail polish last longer.
- White base: Apply two coats of white polish and allow to dry completely.
- Gold Stripes: Carefully place the gold striping tape in the desired pattern.
- Top Coat: Seal the design with a top coat for a glossy finish.
Classic French manicure
A classic French manicure is always in style, and this version with a soft pink base and fresh white tips is perfect for any bride or bridesmaid. The short, square shape is elegant and practical, making it suitable for a variety of wedding themes and personal styles.

- Base layer: CND Stickey base layer
- Pink polish: OPI bubble bath
- White point polish: Essie Blanc
- Top coat: Sally Hansen Insta-Dri top coat
DIY instructions:
- Prep your nails: Shape your nails into a square shape and push back the cuticles.
- Base Coat: Apply a base coat to protect your nails.
- Pink base: Apply two coats of pink polish.
- White tips: Use a thin brush to paint the tips white.
- Topcoat: Finish the manicure with a topcoat for a long-lasting finish.
Soft pink square nails
These soft pink square nails are ideal for a bride or guest looking for a subtle yet stylish manicure. The creamy pink shade is both delicate and elegant, perfect to complement any wedding attire. The short, square shape is timeless and chic, making it a versatile choice for any fall wedding.

- Base layer: Butter London Nail Foundation
- Pink polish: Essie ballet slippers
- Top layer: INM Out The Door Top layer
DIY instructions:
- Prep your nails: Shape your nails into a square shape and push back the cuticles.
- Base Coat: Apply a base coat to smooth and protect your nails.
- Pink polish: Apply two coats of pink polish for an even finish.
- Top Coat: Apply a top coat to add shine and durability.
Blue and white marble french nails
These blue and white marble French nails are perfect for a bride who wants something unique and eye-catching. The white marble base with blue glitter tips provides a beautiful contrast, making these nails a striking feature of any wedding look. The square shape is modern and elegant and adds to the overall sophistication of the design.

- Base layer: Orly Bonder
- White Polish: Zoya purity
- Blue Glitter Polish: China Glaze Blue Year’s Eve
- Top Coat: Essie Gel Setter Top Coat
DIY instructions:
- Prep your nails: Shape your nails into a square shape and push back the cuticles.
- Base Coat: Apply a base coat to protect your nails.
- White base: Apply two coats of white polish and allow to dry completely.
- Marble effect: Use a thin brush to create marble lines with the white paint.
- Blue tips: Apply the blue glitter polish to the tips of your nails.
- Top Coat: Seal the design with a top coat for a glossy finish.
Swirl Design Almond Nails
These almond nails feature a chic swirl design in white, adding a touch of modern elegance. The soft pink base contrasts beautifully with the white swirls, creating a sophisticated look that is ideal for a bride or bridesmaid. The long almond shape enhances the overall graceful appearance.

- Base layer: Orly Bonder
- Pink polish: OPI bubble bath
- White lacquer: Essie Blanc
- Top coat: Seche Vite Dry Fast Topcoat
DIY instructions:
- Prep your nails: Shape your nails into an almond shape and push back the cuticles.
- Base Coat: Apply a base coat to protect your nails.
- Pink polish: Apply two coats of pink polish and let it dry completely.
- Swirl Design: Use a thin brush to create the white swirl design.
- Top Coat: Seal the design with a top coat for a glossy finish.
Matte nude nails with heart accent
These matte nude nails are simple yet elegant, with a small heart accent on one nail. This design is perfect for a bridesmaid or guest who prefers a minimalist look with a touch of cuteness. The short square shape is practical and stylish.

- Base layer: Butter London Nail Foundation
- Nude Polish: Deborah Lippmann Nude
- Matte top coat: Essie Matte About You
- Heart accent: silver nail studs
DIY instructions:
- Prep your nails: Shape your nails into a short square and push back the cuticles.
- Base coat: Apply a base coat.
- Nude polish: Apply two coats of nude polish.
- Matte finish: Apply a matte top coat.
- Heart Accent: Apply the silver heart stud to one nail before the top coat is completely dry.
Gold glitter lined stiletto nails
These beautiful stiletto nails are decorated with delicate gold glitter lines on a white base, perfect for a bride who wants to make a statement. The combination of white and gold creates a luxurious look, making these nails ideal for a glamorous wedding.
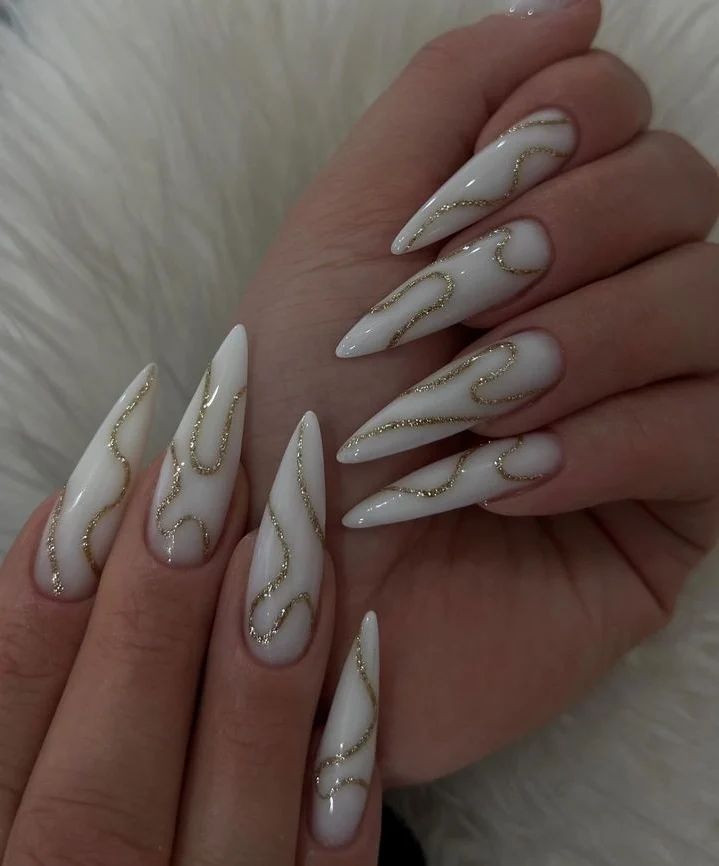
- Base layer: CND Stickey base layer
- White Polish: Zoya purity
- Gold Glitter: Gold glitter nail polish or liner
- Top layer: INM Out The Door Top layer
DIY instructions:
- Prepare your nails: Shape your nails into a stiletto shape and push the cuticles back.
- Base coat: Apply a base coat.
- White base: Apply two coats of white polish.
- Gold Lines: Use a thin brush to create the gold glitter lines.
- Top Coat: Seal the design with a top coat for a glossy finish.
Minimalist blue outlined nails
These minimalist nails have thin blue lines on a nude base, creating a modern and chic look. Perfect for a bride or guest who appreciates sleek and contemporary designs. The short square shape is elegant and easy to maintain.

- Base layer: Zoya Anchor base layer
- Naked Polish: Essie Bare with Me
- Blue Liner: Blue nail art pen or polish
- Top coat: Seche Vite Dry Fast Topcoat
DIY instructions:
- Prep your nails: Shape your nails into a short square and push back the cuticles.
- Base coat: Apply a base coat.
- Nude base: Apply two coats of nude polish.
- Blue lines: Use a nail art pen or a thin brush to draw the blue lines.
- Top Coat: Apply a top coat to protect the design.
Classic white square nails
These classic white square nails are perfect for any wedding occasion. The pure white color is timeless and elegant, making it an excellent choice for a bride, bridesmaid or guest. The short square shape is practical and universally flattering.

- Base layer: Butter London Nail Foundation
- White paint: OPI Alpine Snow
- Top layer: INM Out The Door Top layer
DIY instructions:
- Prep your nails: Shape your nails into a short square and push back the cuticles.
- Base Coat: Apply a base coat to smooth and protect your nails.
- White lacquer: Apply two coats of white lacquer for an even, opaque finish.
- Top Coat: Apply a top coat to add shine and durability.
Nude Ombre Almond Nails
These nude ombre almond nails are a beautiful and subtle choice for a bride or guest. The gradient from soft nude to light beige provides a refined and elegant look. The glossy finish adds a touch of class, making these nails perfect for any wedding setting.

- Base coat: OPI Nail Envy
- Nude Polish: Essie ballet slippers
- Light beige paint: Zoya Chantal
- Top coat: Seche Vite Dry Fast Topcoat
DIY instructions:
- Prep your nails: Shape your nails into an almond shape and push back the cuticles.
- Base Coat: Apply a base coat to protect your nails.
- Ombre effect: Use a sponge to apply the nude and beige polishes, creating a gradient effect.
- Top Coat: Seal with a top coat for a glossy finish.
Pink nails with heart accents
These pink nails with heart accents are perfect for a bridesmaid or guest who wants a cute and playful look. The soft pink base is decorated with delicate white hearts, adding a touch of whimsy. The short square shape is practical and stylish.

- Base layer: CND Stickey base layer
- Pink Polish: OPI Mod about you
- White lacquer: Essie Blanc
- Top coat: Sally Hansen Insta-Dri top coat
DIY instructions:
- Prep your nails: Shape your nails into a short square and push back the cuticles.
- Base coat: Apply a base coat.
- Pink base: Apply two coats of pink polish.
- Heart Accents: Use a thin brush to paint white hearts on the nails.
- Top coat: Finish the design with a top coat.
Silver Swirl Design Nails
These silver swirl design nails feature delicate silver lines on a nude base, creating an elegant and modern look. Perfect for a bride or guest who loves minimalist yet sophisticated designs. The short square shape adds a contemporary look.

- Base layer: Butter London Nail Foundation
- Nude Polish: Deborah Lippmann Nude
- Silver Liner: Silver nail art pen or polish
- Top layer: INM Out The Door Top layer
DIY instructions:
- Prep your nails: Shape your nails into a short square and push back the cuticles.
- Base coat: Apply a base coat.
- Nude base: Apply two coats of nude polish.
- Silver Swirls: Use a nail art pen or a thin brush to create silver swirls.
- Top Coat: Apply a top coat to protect the design.
Glitter French Tip Nails
These glitter French tip nails are a glamorous choice for a bride or bridesmaid. The nude base is completed with gold glitter tips, adding a touch of sparkle and luxury. The short square shape is elegant and practical.

- Base layer: Zoya Anchor base layer
- Naked Polish: Essie Bare with Me
- Gold glitter polish: China Glaze Gold Digger
- Top coat: Seche Vite Dry Fast Topcoat
DIY instructions:
- Prep your nails: Shape your nails into a short square and push back the cuticles.
- Base coat: Apply a base coat.
- Nude base: Apply two coats of nude polish.
- Glitter Tips: Use a thin brush to apply gold glitter polish to the tips of your nails.
- Top coat: Finish the design with a top coat.
Speckled almond nails
These speckled almond nails are unique and eye-catching and feature a soft pink base with delicate white speckles. Perfect for a bride or guest who wants a modern and artistic look. The long almond shape is elegant and elongates the fingers.

- Base layer: Orly Bonder
- Pink polish: OPI bubble bath
- White Speckle Polish: China Glaze White on White
- Top Coat: Essie Gel Setter Top Coat
DIY instructions:
- Prep your nails: Shape your nails into an almond shape and push back the cuticles.
- Base Coat: Apply a base coat to protect your nails.
- Pink base: Apply two coats of pink polish.
- Speckle effect: Use a sponge or brush to apply white speckles to the nails.
- Top Coat: Seal the design with a top coat for a glossy finish.
Save pin


Namie O, a talented writer at Willtiptop, conveys her passion for fashion and beauty in every word she writes. With a keen eye for detail and a deep insight into the latest trends, Namie’s articles and insights captivate readers and provide them with valuable knowledge and inspiration. Through her engaging and informative writing style, Namie aims to empower individuals to explore their style, experiment with beauty techniques, and embrace their unique sense of self.