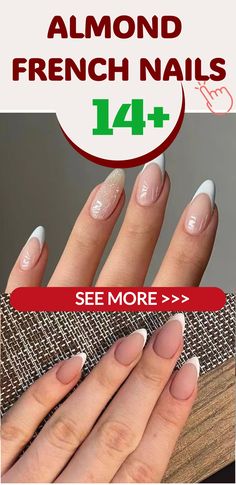
Brown Fall Nails 27 Ideas: The Ultimate Guide to Chic and Cozy Autumn Manicures
Fall is here, and it’s the perfect time to change up your nail game with some rich, earthy shades. Have you ever wondered how to style brown fall nails to match the fall aesthetic? Whether you like short, square designs or a bit of bling with rhinestones, we have what you’re looking for. In this article, we explore different types of nails, shapes and designs that will make your nails look stylish and seasonal.
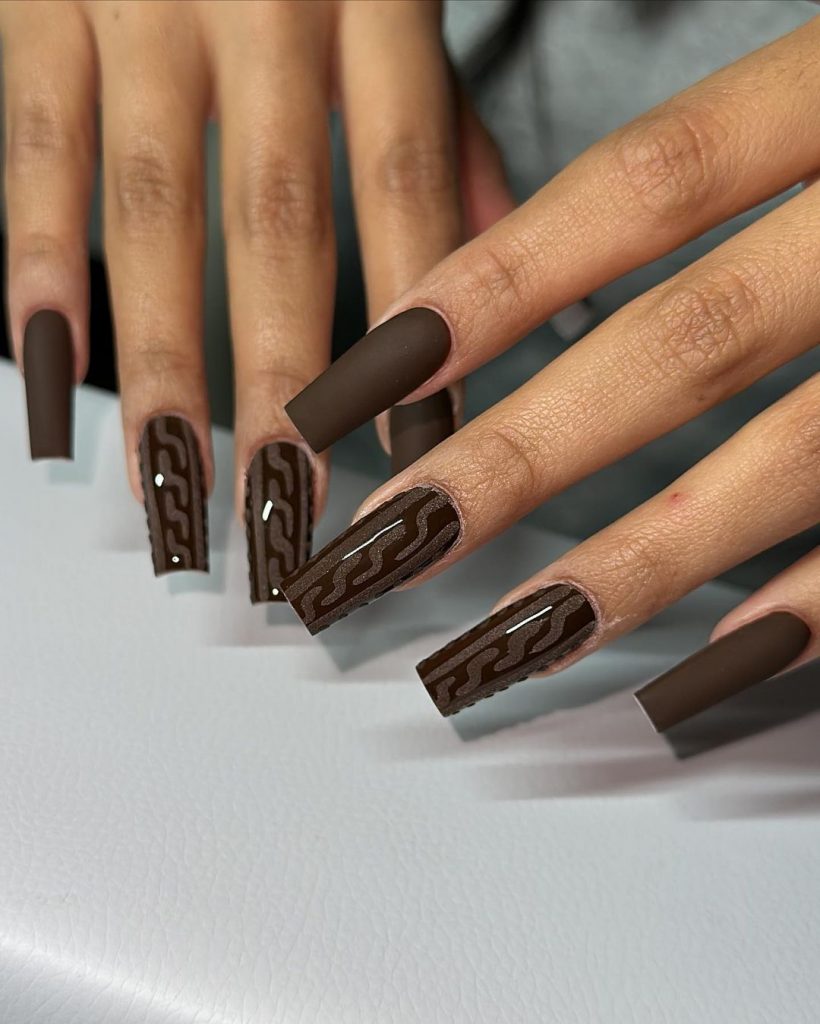
The matte and glossy combo
When it comes to brown fall nails, this design is a perfect balance between matte and glossy finishes. The coffin shape gives the nails a stylish and elongated look, making them ideal for those who prefer a long nail style. The combination of dark brown and lighter matte brown creates a sophisticated contrast that is perfect for the autumn season.

Consumables:
-
- Matte top coat (e.g. Essie Matte About You)
- Glossy top coat (e.g. Seche Vite)
- Dark brown nail polish (e.g. OPI “Brown to Earth”)
- Light brown matte varnish (e.g. Zoya “Spencer”)
DIY instructions:
-
- Start by applying a base coat to protect your nails.
- Apply two coats of dark brown nail polish to the entire nail.
- Use the light brown matte nail polish to create a crescent-shaped design at the base of each nail.
- Finish with a matte top coat on the light brown parts and a glossy top coat on the dark brown parts.
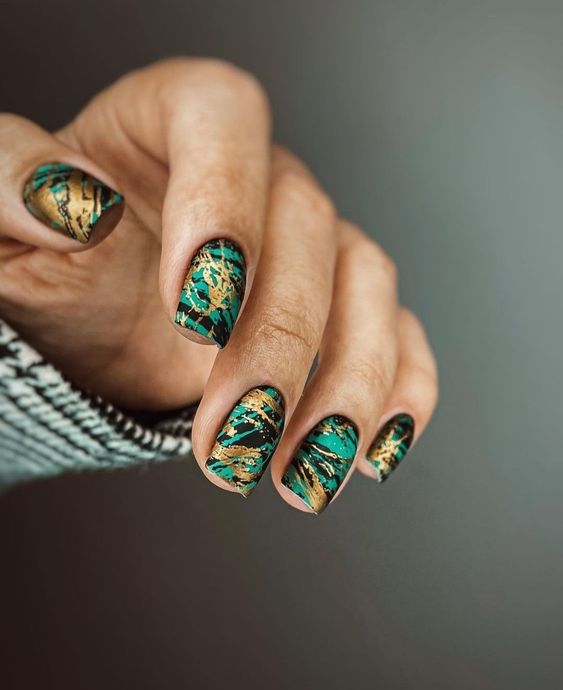
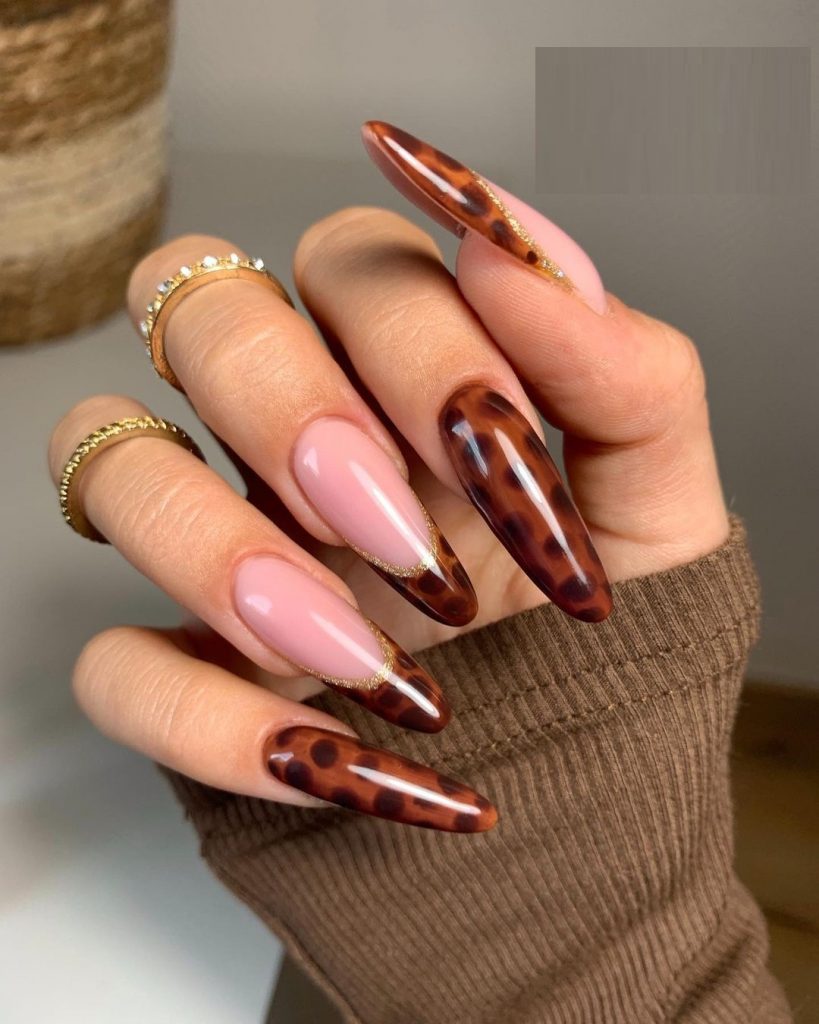
Turtle Elegance
The tortoiseshell design is a unique and trendy option for brown fall nails. This pattern exudes an aesthetic vibe that is both stylish and versatile. The mix of dark brown and black creates a striking look that is perfect for any autumn outfit.

Consumables:
-
- Tortoise shell nail wraps (e.g. ManiMe)
- Black nail polish (e.g. Essie “Licorice”)
- Top coat (e.g. Sally Hansen Miracle Gel)
DIY instructions:
-
- Apply a base coat to your nails.
- Place the turtle nail wraps on each nail and smooth out any bubbles.
- Seal with a top coat to ensure longevity.
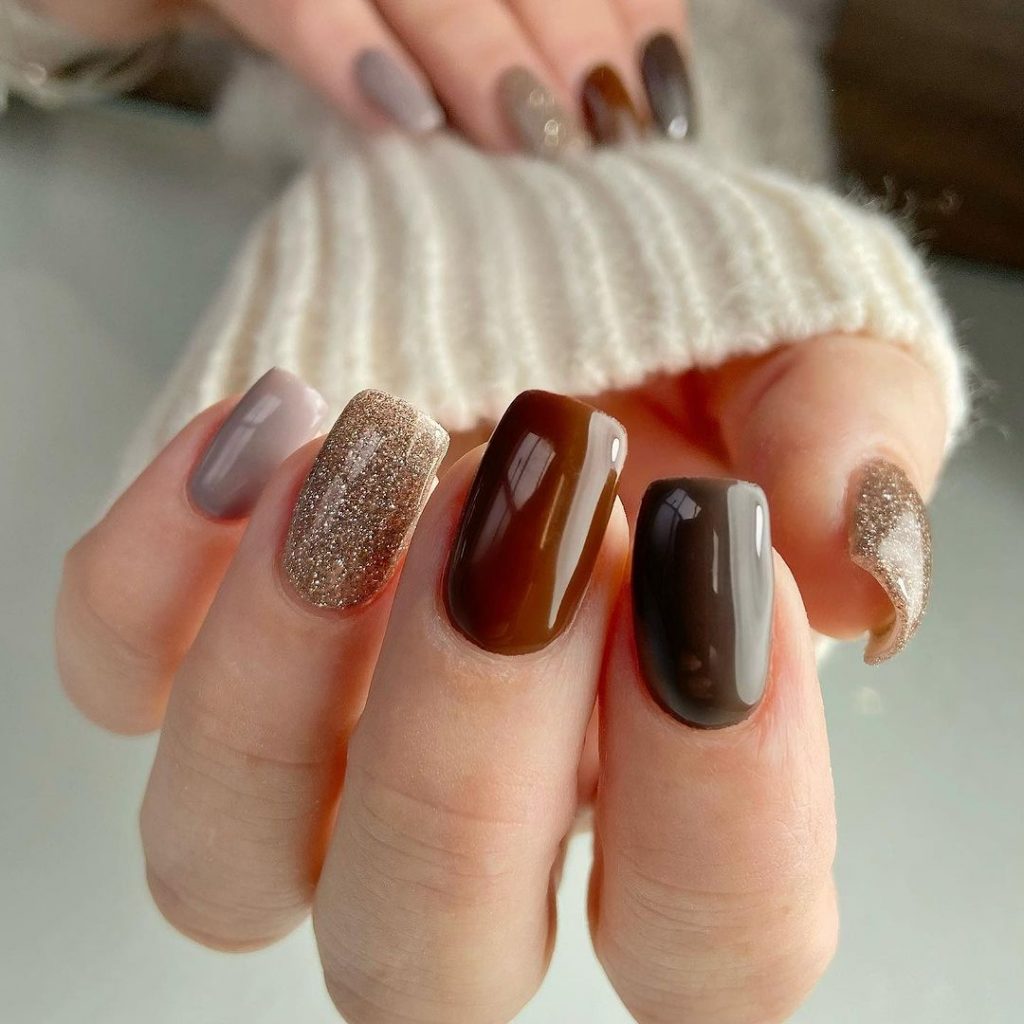
Multi-coloured glitter glamour
This short nail design features multiple shades of brown, accented with glitter for a touch of bling. It’s perfect for those who prefer a more subtle yet glittery look for their fall nails.
Consumables:
-
- Dark brown lacquer (e.g. OPI “Icelanded a Bottle of OPI”)
- Light brown polish (e.g. Essie “Clothing Optional”)
- Gold glitter polish (e.g. China Glaze “Golden Enchantment”)
DIY instructions:
-
- Apply a base coat.
- Paint each nail with two coats of dark brown polish.
- Use the light brown nail polish on one accent nail and apply the gold glitter polish on another accent nail.
- Finish with a top coat.
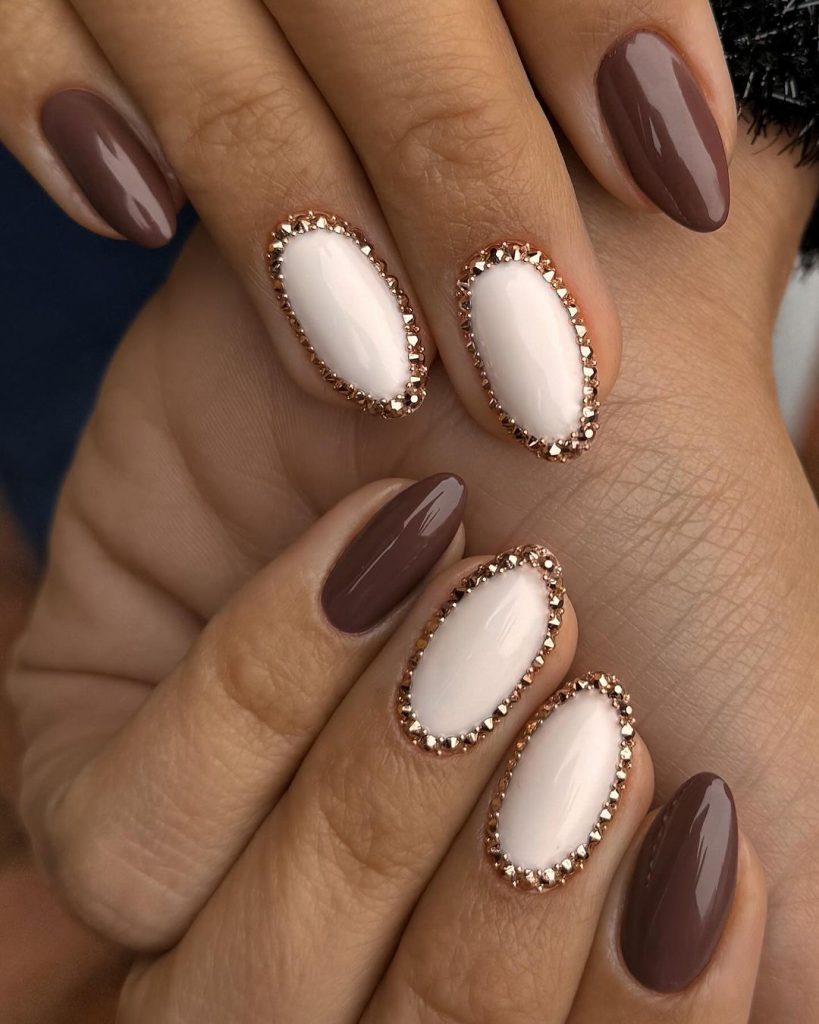
French tips with beads
For a sophisticated look, these brown fall nails have French tips accented with small beads. This design is perfect for those who love a bit of bling and want to put a unique twist on the classic French manicure.
Consumables:
-
- Brown polish (e.g. OPI “Chocolate Moose”)
- White polish for tips (e.g. Sally Hansen “White On”)
- Small nail art beads (e.g. Kiss Nail Art Beads)
- Top coat (e.g. Essie “Good to Go”)
DIY instructions:
-
- Apply a base coat.
- Paint the tips of each nail with the white polish.
- Use the brown nail polish to cover the rest of the nail.
- Carefully place the small beads along the line where the brown and white meet.
- Seal everything with a top coat.
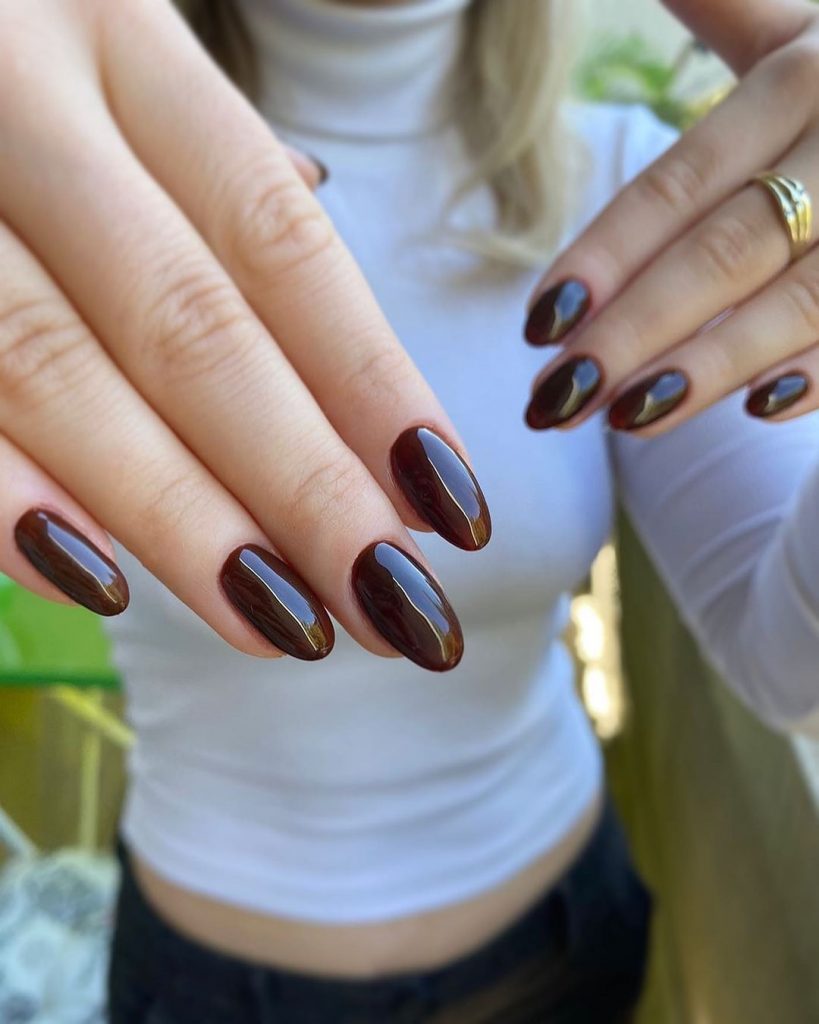
Shiny almond nails
These sleek, almond-shaped nails in a rich brown color are simple yet incredibly stylish. The glossy finish makes them look polished and perfect for any autumn occasion.
Consumables:
-
- Dark brown polish (e.g. Zoya “Louise”)
- Top layer (e.g. Seche Vite)
DIY instructions:
-
- Start with a base layer.
- Apply two coats of dark brown varnish.
- Finish with a high gloss top coat for a glossy finish.
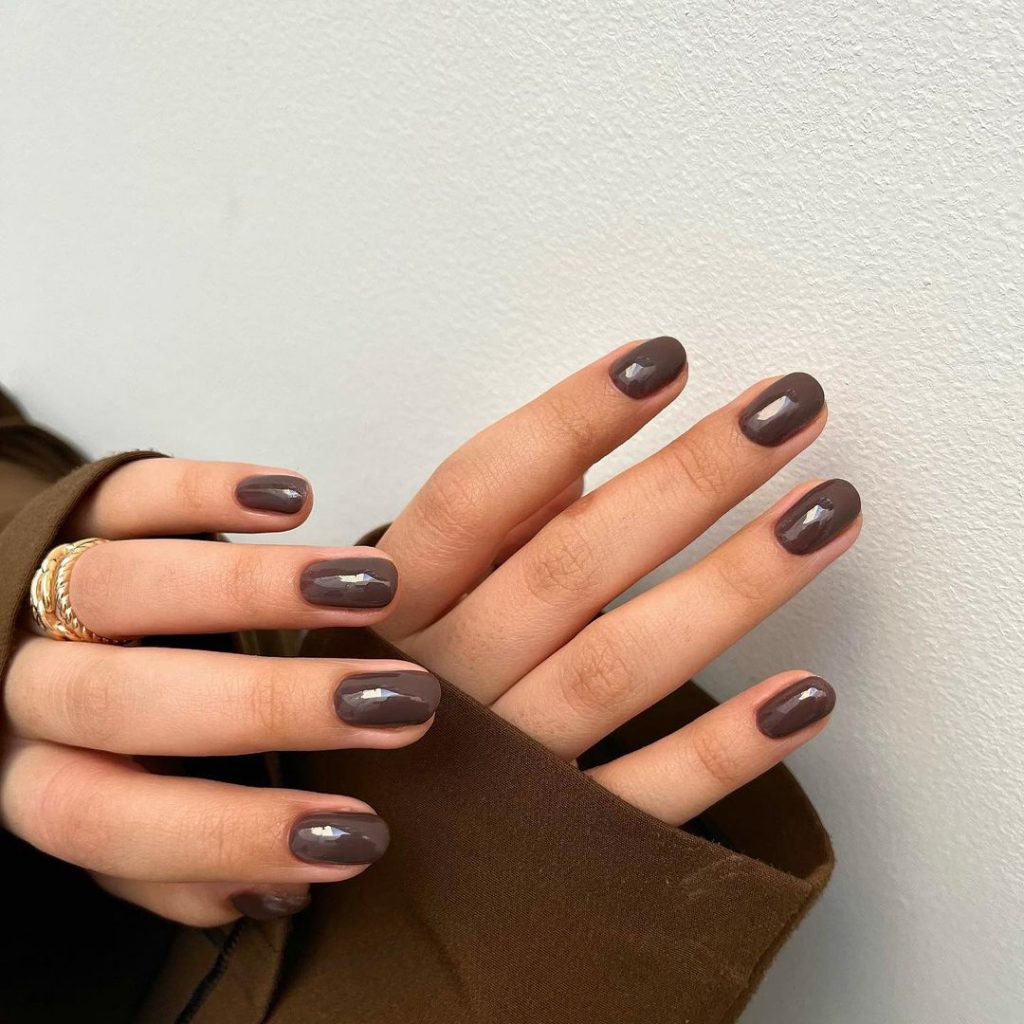
Shiny short nails
This short nail design features a rich, glossy brown that perfectly captures the essence of fall. The smooth and glossy finish adds a touch of elegance and simplicity to the overall look, making it a great option for everyday use.
Consumables:
-
- Dark brown polish (e.g. OPI “You Don’t Know Jacques!”)
- High-gloss top coat (e.g. Seche Vite)
DIY instructions:
-
- Start with a base coat to protect your natural nails.
- Apply two coats of dark brown varnish, allowing each coat to dry completely.
- Finish with a high-gloss top coat for a shiny, durable finish.
Matte and textured brown
This unique design combines matte and textured elements, creating an intriguing look. The dark brown, matte nails are accentuated with a textured pattern, adding a modern twist to a classic color.
Consumables:
-
- Matte top coat (e.g. Essie Matte About You)
- Dark brown polish (e.g. OPI “Espresso Your Inner Self”)
- Nail art brush
- Structure polish (e.g. CND Vinylux)
DIY instructions:
-
- Start with a base layer.
- Apply two coats of dark brown varnish.
- Use the nail art brush to create textured patterns on selected nails.
- Finish with a matte top coat.
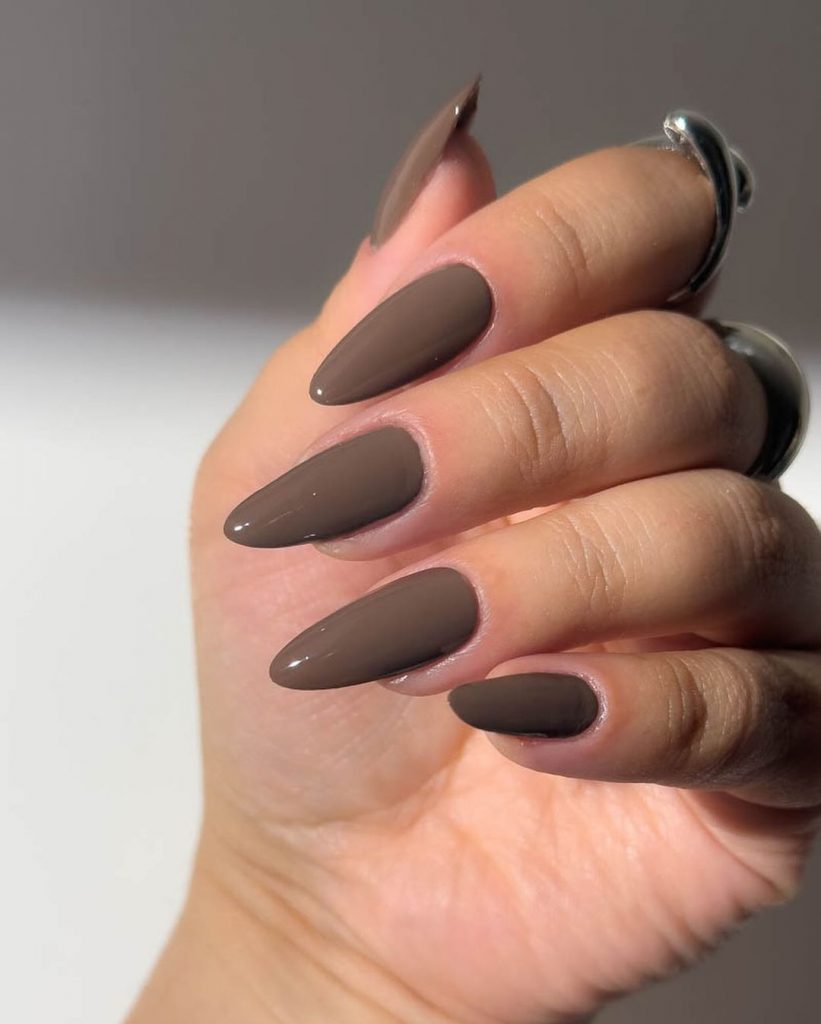
Elegant almond shape
These almond-shaped nails have a deep brown shade, ideal for a stylish and sophisticated autumn look. The glossy finish enhances the rich color, making your nails elegantly stand out.

Consumables:
-
- Deep brown polish (e.g. Sally Hansen “Bittersweet”)
- Top coat (e.g. Essie Gel Couture)
DIY instructions:
-
- Apply a base coat.
- Paint each nail with two coats of deep brown nail polish.
- Apply a top coat for a glossy finish.
Shiny almond with rich brown
Another beautiful example of brown autumn nails in a glossy almond shape. This design uses a rich brown shade that fits perfectly with fall outfits and adds a touch of warmth and sophistication.
Consumables:
-
- Rich brown polish (e.g. Butter London “Royal Navy”)
- High-gloss top coat (e.g. Sally Hansen “Dries Instantly”)
DIY instructions:
-
- Start with a base layer.
- Apply two coats of rich brown polish.
- Finish with a high-gloss top coat.
Subtle brown elegance
These sleek, almond-shaped nails in a subtle, light brown color offer a more understated yet elegant look. The glossy finish makes them perfect for both casual and formal occasions.
Consumables:
-
- Light brown polish (e.g. OPI “Taupe-less Beach”)
- Top layer (e.g. Seche Vite)
DIY instructions:
-
- Start with a base layer.
- Apply two coats of the light brown polish.
- Seal with a top coat for a glossy finish.
Two-tone brown coffin nails
This design features a striking two-tone brown look on coffin shaped nails. The mix of glossy and matte finishes adds a chic dimension, making these nails perfect for lovers of a bold yet elegant style.
Consumables:
-
- Dark brown polish (e.g. Zoya “Louise”)
- Nude pink polish (e.g. Essie “Spin the Bottle”)
- Matte top coat (e.g. OPI Matte Top Coat)
- Glossy top coat (e.g. Seche Vite)
DIY instructions:
-
- Start with a base layer.
- Paint alternating nails with dark brown and nude-pink polish.
- Apply a matte top coat to the nude pink nails and a glossy top coat to the dark brown nails.
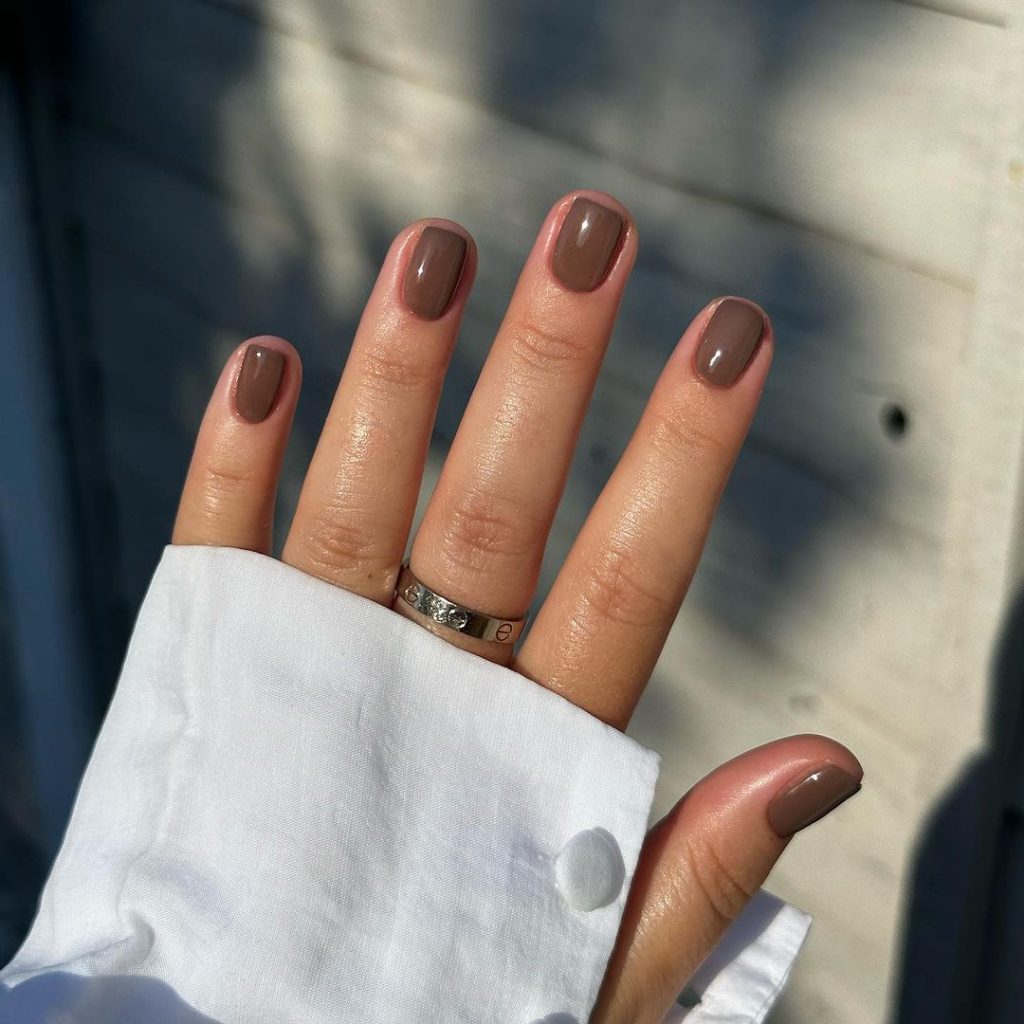
Simple and short brown nails
For those who prefer a minimalist look, these short brown nails are perfect. The taupe brown shade is subtle yet stylish, ideal for everyday use or professional environments.
Consumables:
-
- Taupe brown paint (e.g. OPI “Over the Taupe”)
- Top coat (e.g. Sally Hansen “Insta-Dri”)
DIY instructions:
-
- Start with a base layer.
- Apply two coats of taupe brown polish.
- Finish with a top coat for a glossy finish.
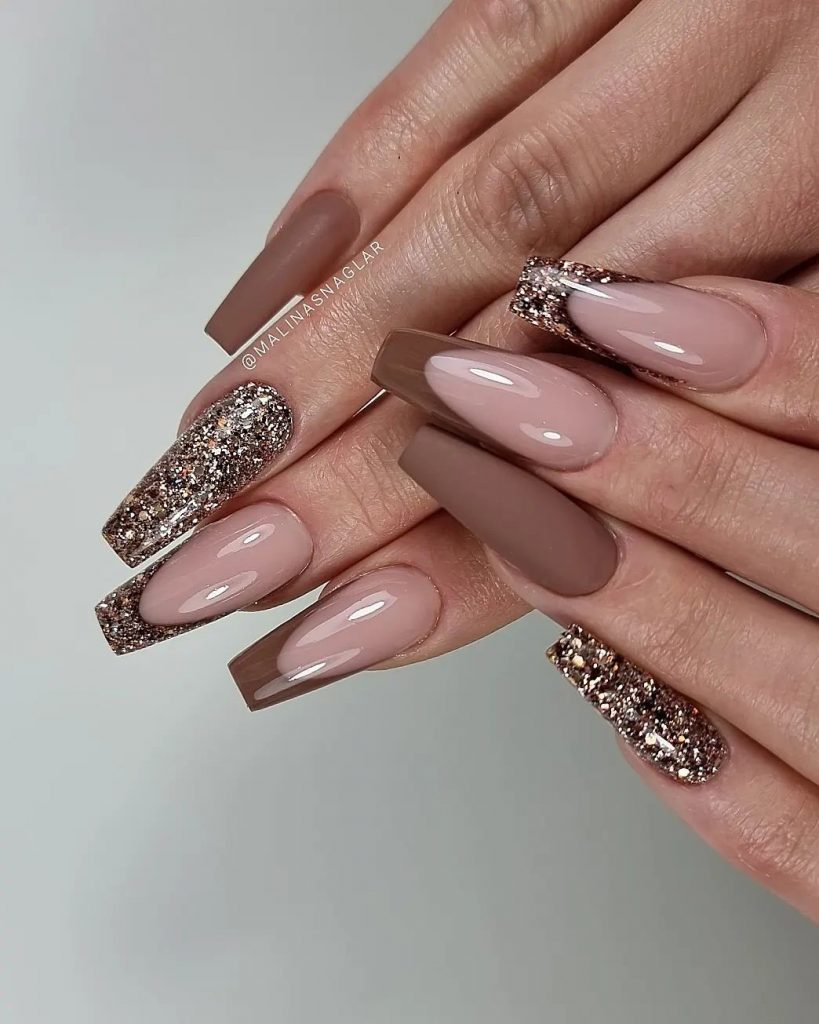
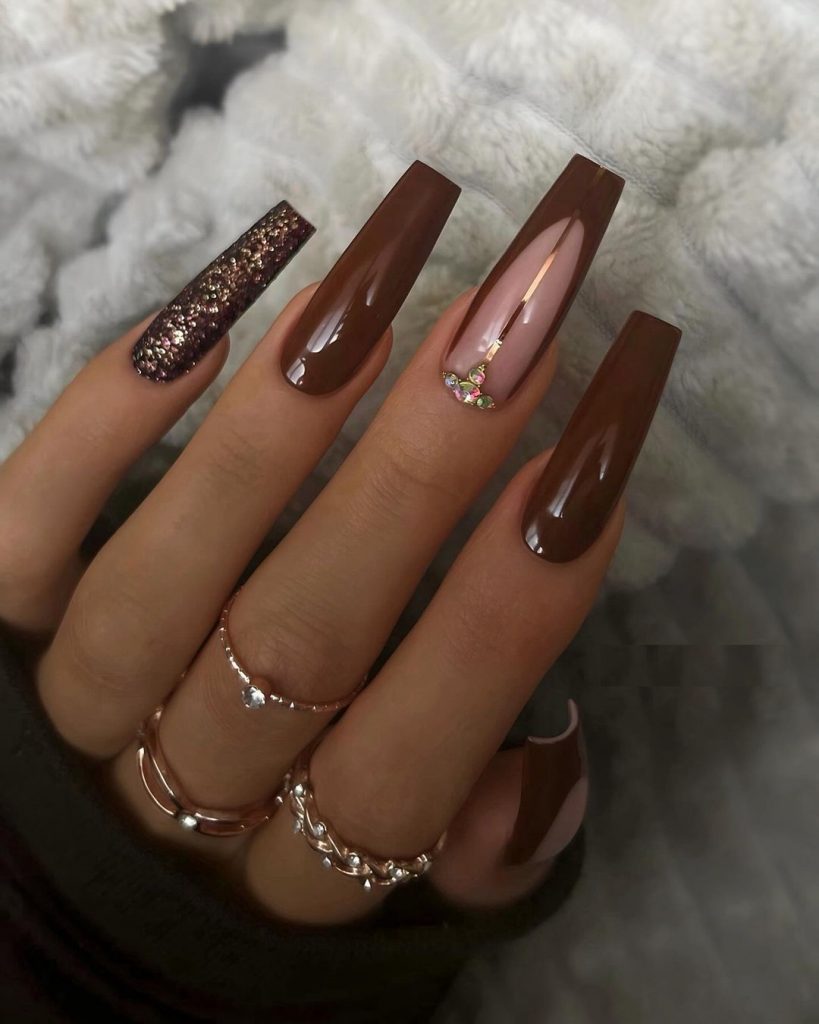
Glitter and matte brown coffin nails
These coffin-shaped nails feature a mix of glitter, matte and gloss finishes in shades of brown, creating a glamorous look that’s perfect for fall festivities.
Consumables:
-
- Dark brown polish (e.g. Essie “Partner in Crime”)
- Nude pink nail polish (e.g. OPI “Bubble Bath”)
- Brown glitter polish (e.g. China Glaze “Glistening Snow”)
- Matte top coat (e.g. Essie Matte About You)
- Glossy top coat (e.g. Seche Vite)
DIY instructions:
-
- Start with a base layer.
- Apply the dark brown polish to most nails and the nude pink polish to one or two accent nails.
- Add the brown glitter polish to the tips or full accent nails.
- Finish with a matte top coat on some nails and a glossy top coat on others.
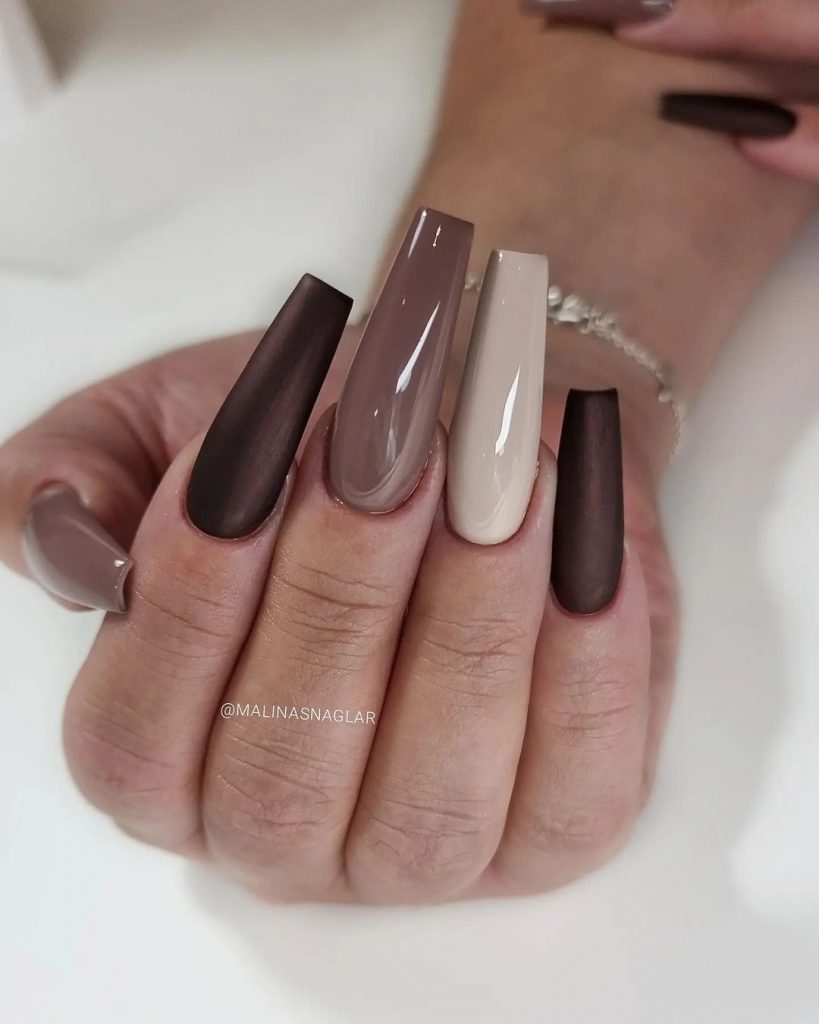
Matte and glossy brown mix
This design uses a mix of matte and gloss finishes in different shades of brown, creating a sophisticated look. The coffin shape and different shades of brown make these nails perfect for a modern and stylish look.
Consumables:
-
- Dark brown polish (e.g. OPI “Espresso Your Inner Self”)
- Light brown polish (e.g. Zoya “Flynn”)
- Matte top coat (e.g. Essie Matte About You)
- Glossy top coat (e.g. Seche Vite)
DIY instructions:
-
- Apply a base coat.
- Paint the nails alternately in dark and light brown shades.
- Use the matte top coat on some nails and the glossy top coat on others to create contrast.
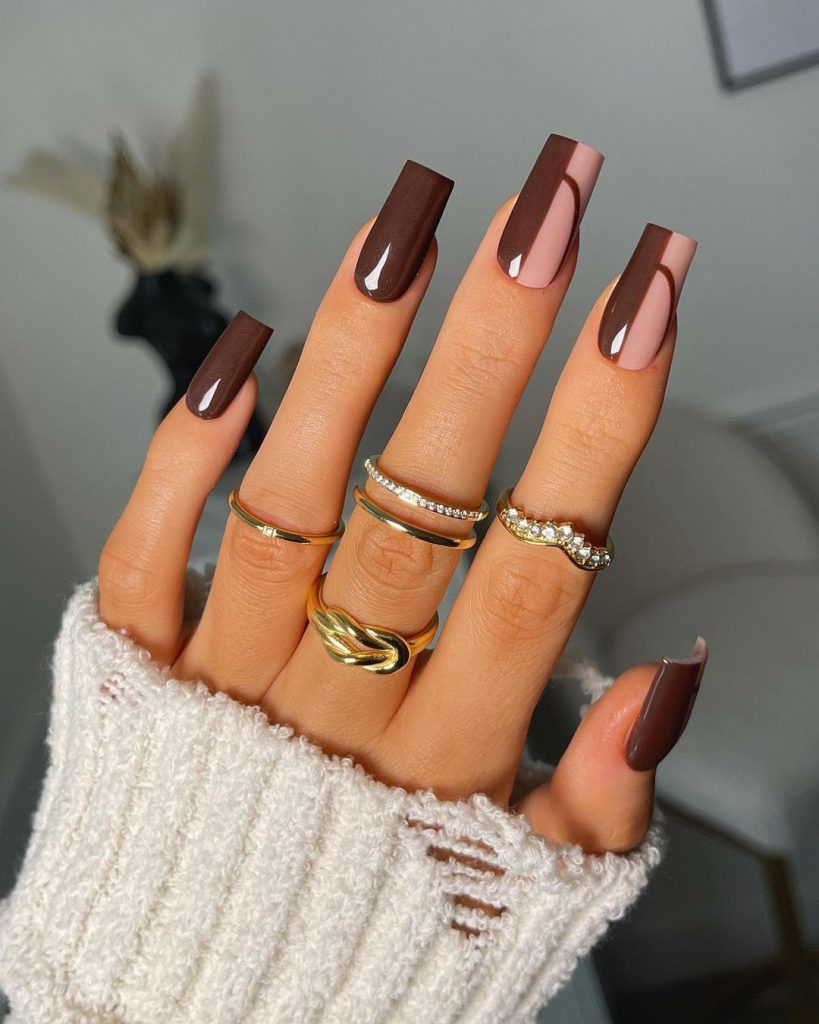
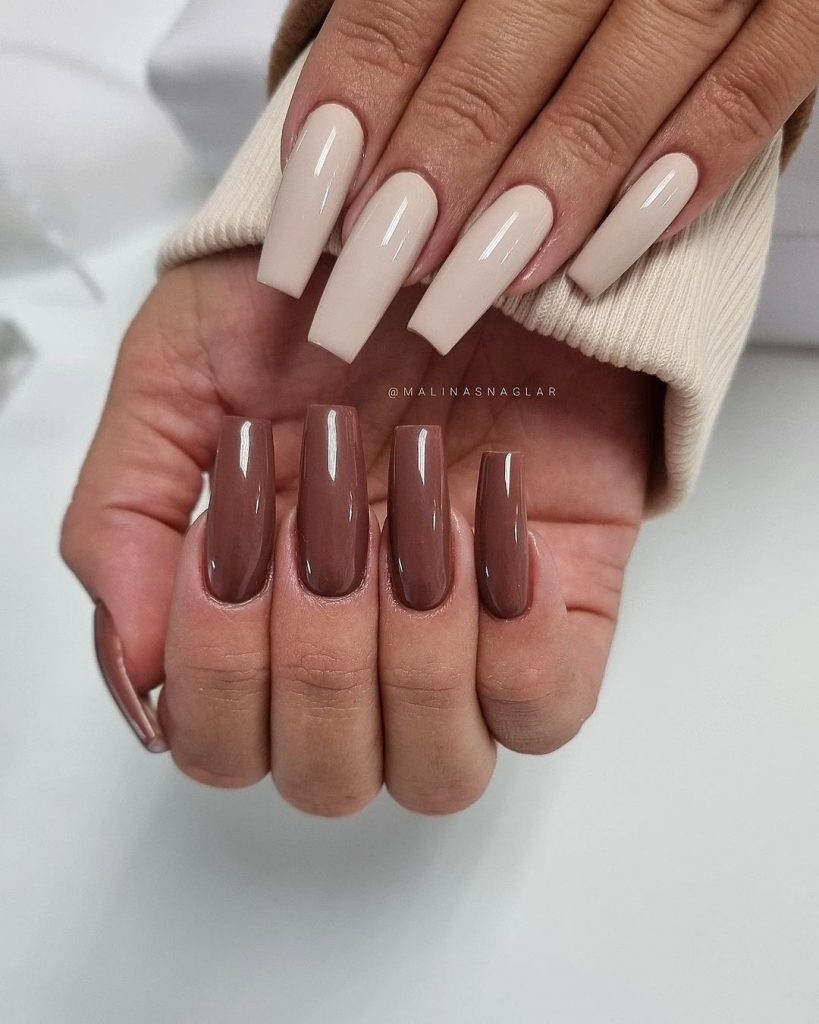
Nude and brown elegance
These nails have a mix of nude and brown shades in a coffin shape, with a high-shine finish. The combination of colors gives a polished and elegant look, perfect for any occasion.
Consumables:
-
- Nude polish (e.g. Essie “Ballet slippers”)
- Brown varnish (e.g. OPI “Samoan Sand”)
- Glossy top coat (e.g. Seche Vite)
DIY instructions:
-
- Start with a base layer.
- Paint some nails with the nude polish and others with the brown polish.
- Finish with a high gloss top coat for a glossy finish.
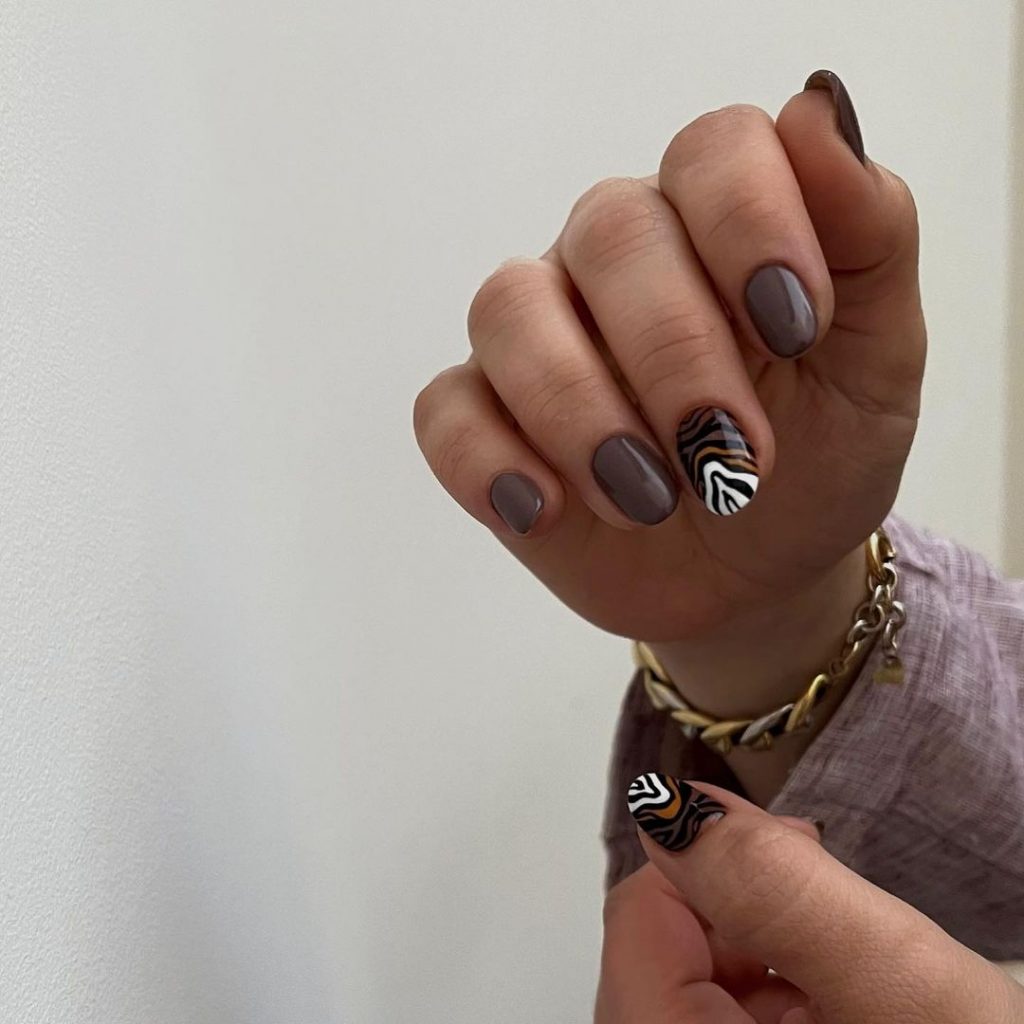
Short nails with zebra accent
This short nail design features a sophisticated taupe brown color with a striking zebra accent nail. This combination adds a fun and trendy element to a classic look, perfect for those who want a unique twist.
Consumables:
-
- Taupe brown paint (e.g. OPI “Over the Taupe”)
- Black and white nail art pens (e.g. Sally Hansen Nail Art Pens)
- Top layer (e.g. Seche Vite)
DIY instructions:
-
- Start with a base layer.
- Apply two coats of taupe brown nail polish to all nails.
- Use the black and white nail art pens to draw zebra stripes on the accent nail.
- Seal with a top coat.
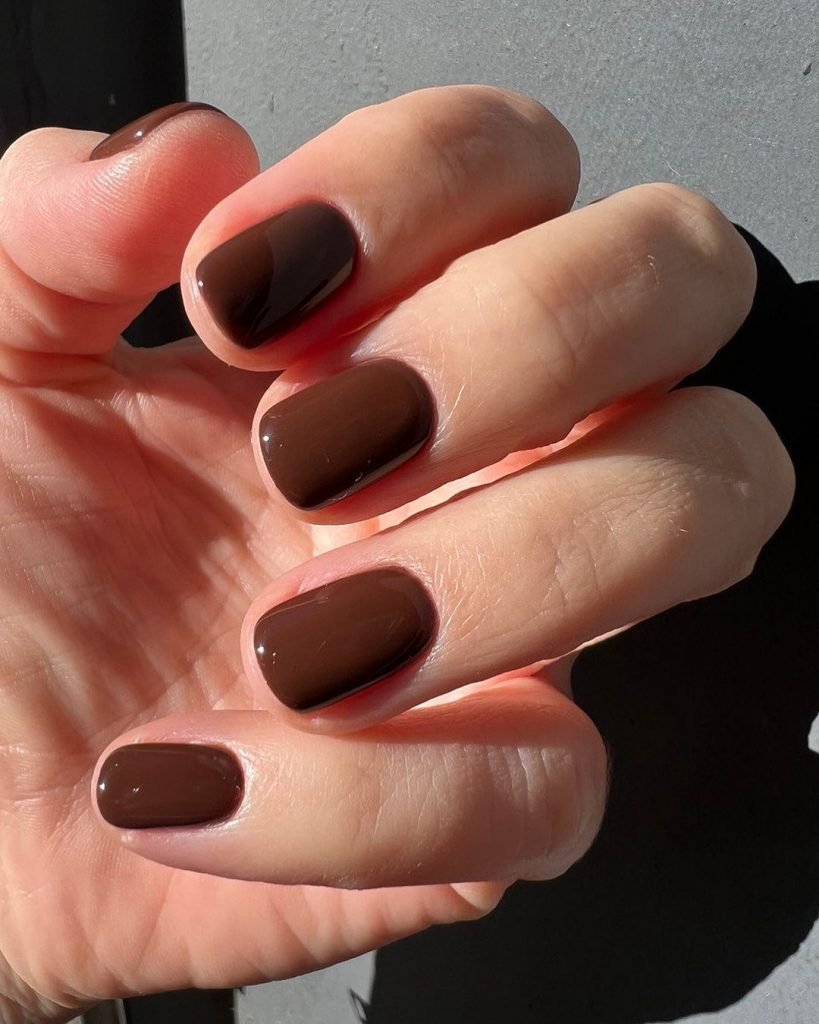
Classic brown short nails
These short nails are painted in a rich, deep brown shade, creating a timeless and elegant look. This simple yet striking design is perfect for any occasion and offers a stylish and understated style.

Consumables:
-
- Deep brown polish (e.g. Essie “Partner in Crime”)
- Top coat (e.g. Sally Hansen “Insta-Dri”)
DIY instructions:
-
- Start with a base layer.
- Apply two coats of deep brown polish.
- Finish with a top coat for a glossy finish.
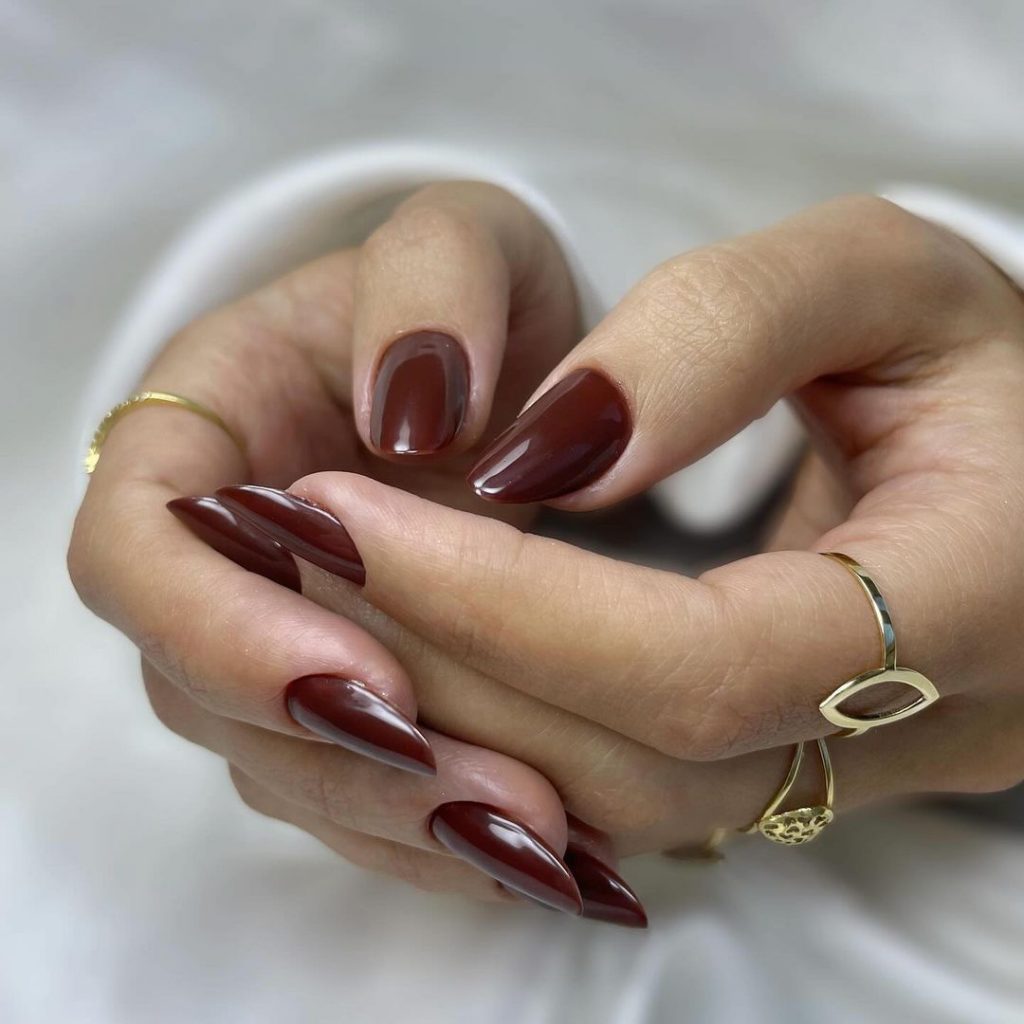
Shiny almond red brown nails
These almond shaped nails have a beautiful reddish brown shade with a high gloss finish. This color is perfect for autumn and provides a warm and sophisticated look that matches any outfit.
Consumables:
-
- Red-brown polish (e.g. OPI “Cinnamon Sweet”)
- High-gloss top coat (e.g. Seche Vite)
DIY instructions:
-
- Start with a base layer.
- Apply two coats of red-brown varnish.
- Finish with a high-gloss top coat.
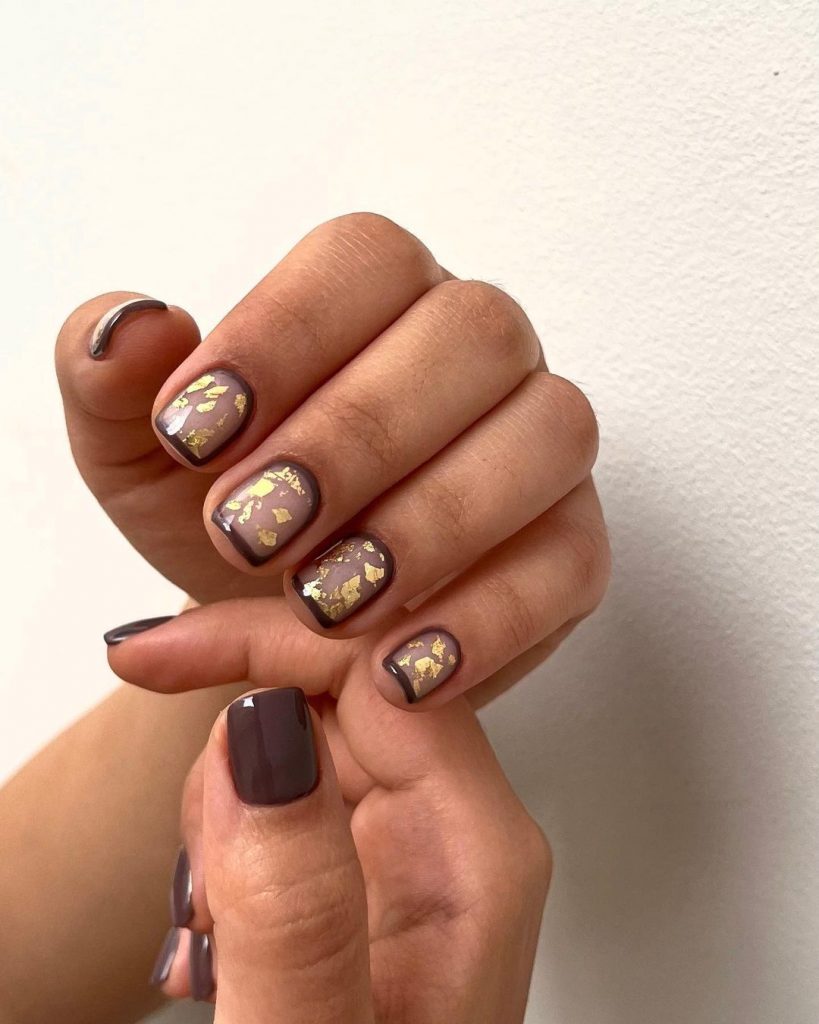
Gold flake accent nails
This nail design features a taupe brown base with gold flake accents, creating a luxurious and striking look. The gold flakes add a touch of glamor to the otherwise simple design, making these nails perfect for special occasions.
Consumables:
-
- Taupe brown paint (e.g. OPI “Berlin There Done That”)
- Nail art with gold flakes (e.g. Ciaté London Luxe Foil)
- Top coat (e.g. Essie “Good to Go”)
DIY instructions:
-
- Apply a base coat.
- Paint all nails with two coats of taupe brown polish.
- Apply gold flakes to accentuate the nails while the polish is still tacky.
- Seal with a top coat.
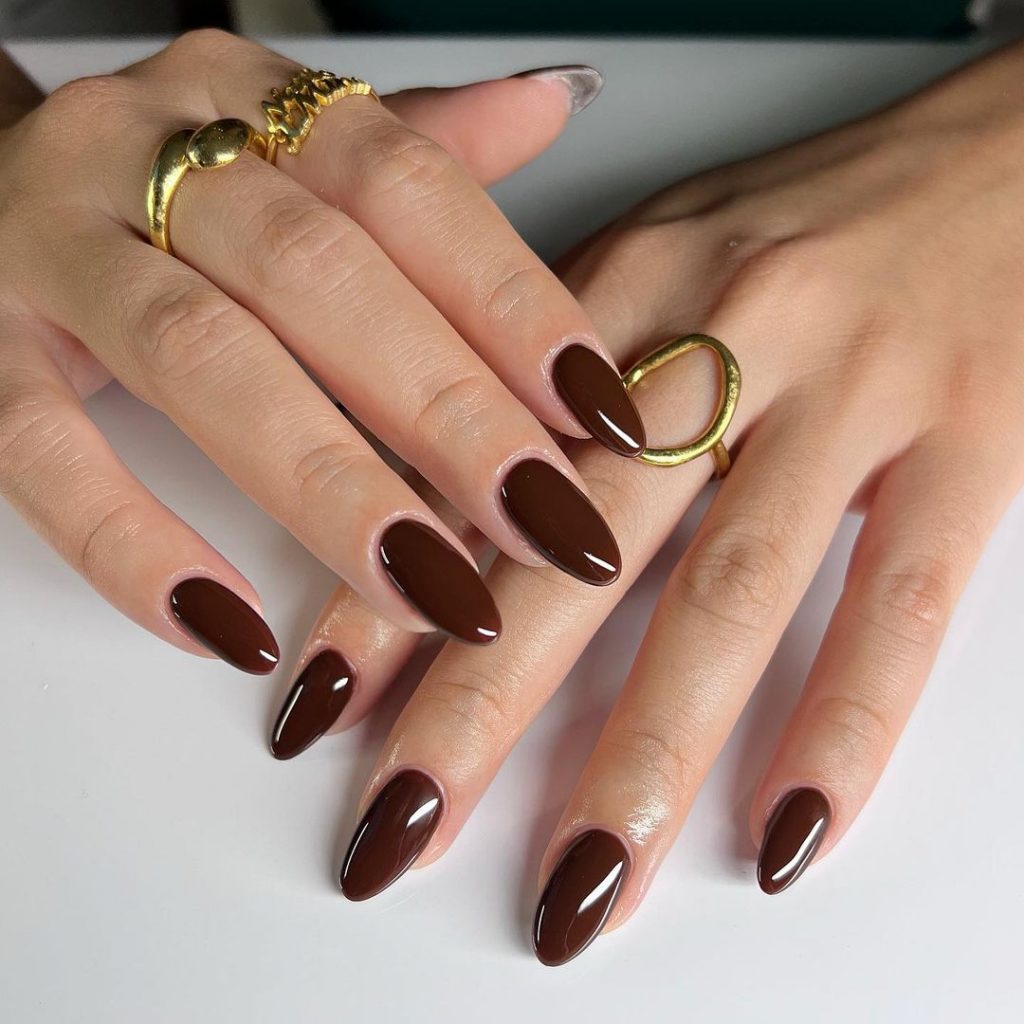
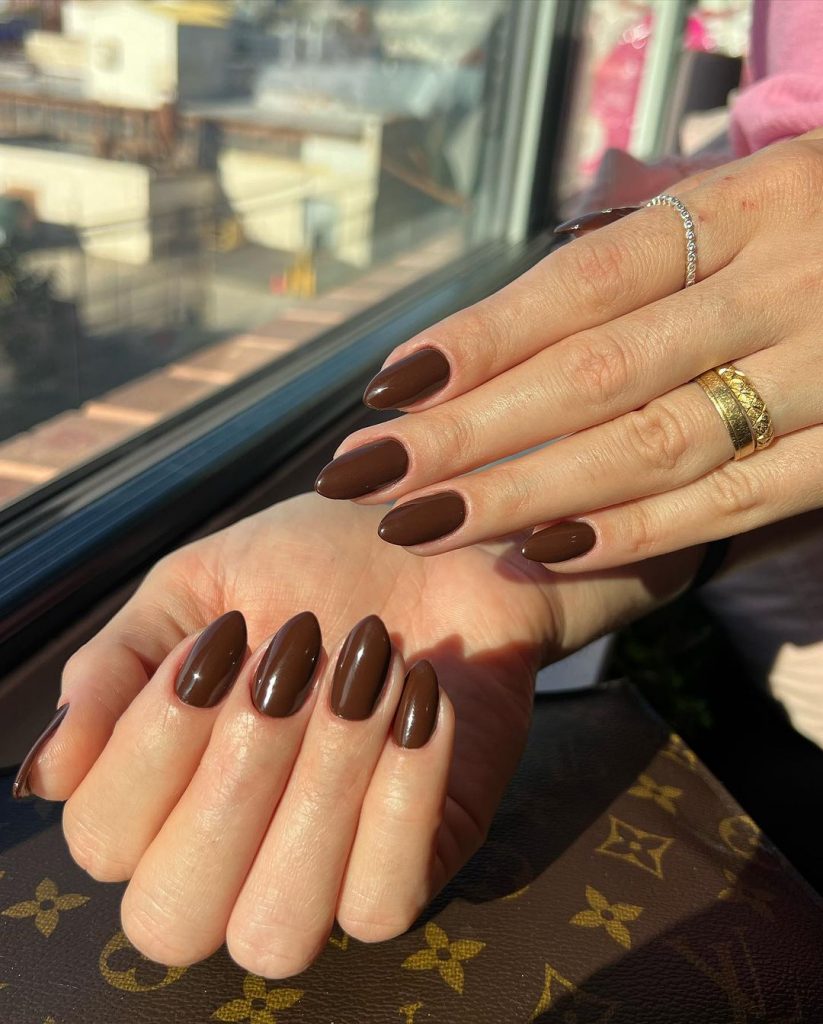
Elegant dark brown almond nails
These elegant almond-shaped nails are painted in a deep, shiny brown shade. This look is both sophisticated and versatile, making it suitable for any fall event or for everyday wear.
Consumables:
-
- Dark brown lacquer (e.g. OPI “Lincoln Park After Dark”)
- Top layer (e.g. Seche Vite)
DIY instructions:
-
- Start with a base layer.
- Apply two coats of dark brown varnish.
- Finish with a top coat for a glossy finish.
Elegant shiny short nails
This elegant design features short, glossy nails painted in a sophisticated taupe brown. The simplicity and shine of these nails make them perfect for both everyday wear and more formal occasions.
Consumables:
-
- Taupe brown paint (e.g. OPI “Berlin There Done That”)
- High-gloss top coat (e.g. Seche Vite)
DIY instructions:
-
- Start with a base layer.
- Apply two coats of taupe brown polish.
- Finish with a high gloss top coat for a smooth, shiny finish.
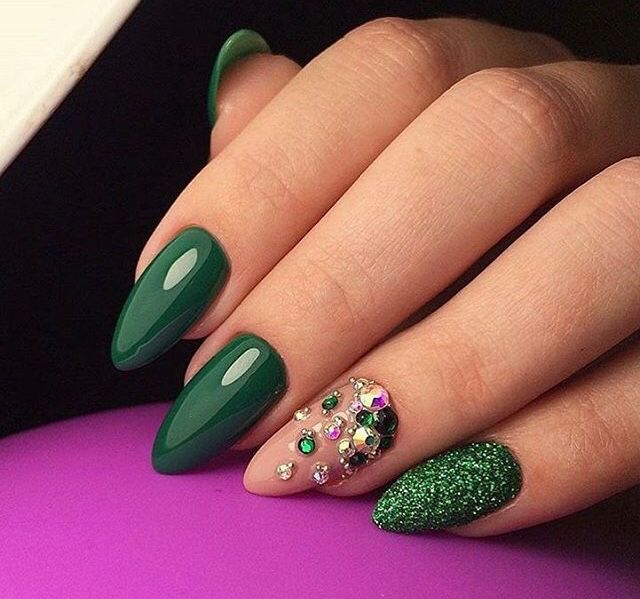
Tortoise shell and gold accent nails
These beautiful nails have a tortoise motif combined with pink and gold accents. The mix of patterns and colors creates a luxurious look, making these nails perfect for a powerful statement.
Consumables:
-
- Turtle nail wraps (e.g. Olive & June)
- Nude pink nail polish (e.g. Essie “Ballet Slippers”)
- Gold glitter polish (e.g. Ciaté London “Gold Digger”)
- Top layer (e.g. Seche Vite)
DIY instructions:
-
- Apply a base coat.
- Place tortoiseshell wraps on selected nails.
- Paint the remaining nails with nude-pink nail polish.
- Add gold glitter accents and finish with a top coat.
Coffin nails with glitter and rhinestones
This luxurious design features brown coffin nails with glitter and rhinestone accents. The mix of textures and glitter makes these nails perfect for special occasions.
Consumables:
-
- Dark brown lacquer (e.g. OPI “Lincoln Park After Dark”)
- Brown glitter polish (e.g. Essie “Summit of Style”)
- Rhinestones (e.g. Swarovski Nail Art crystals)
- Top layer (e.g. Seche Vite)
DIY instructions:
-
- Start with a base layer.
- Apply two coats of dark brown varnish.
- Add glitter polish to accentuate the nails and apply rhinestones.
- Finish with a top coat to secure the rhinestones and glitter.
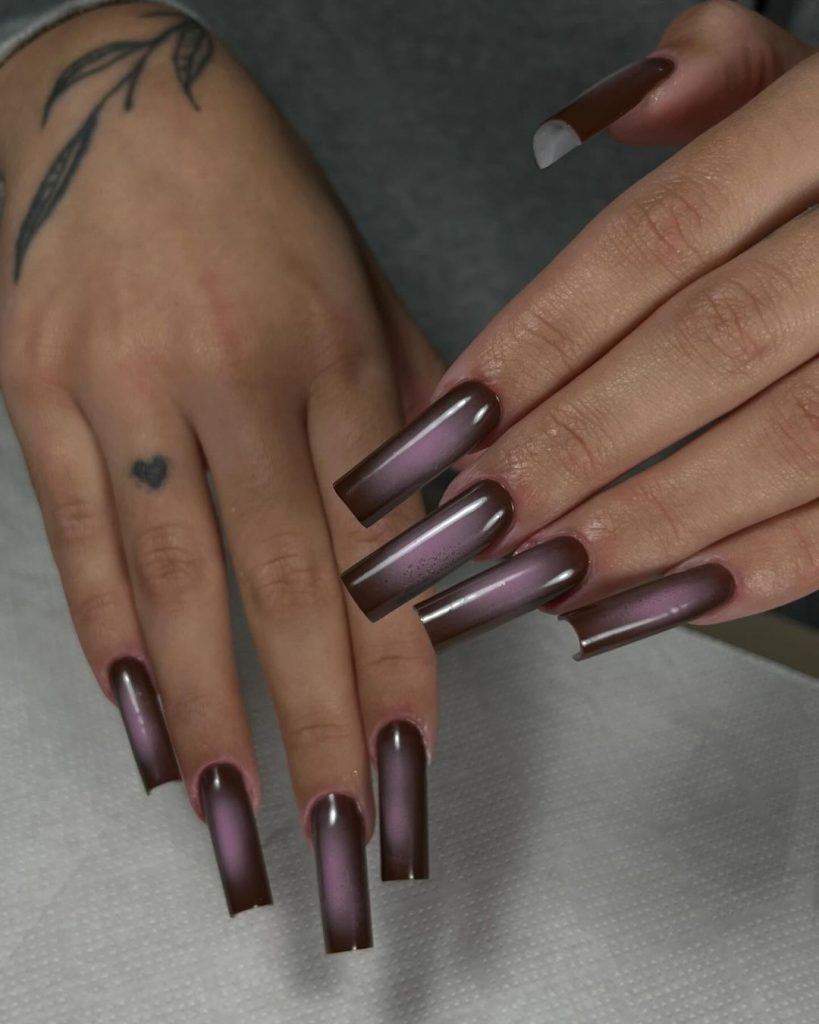
Metallic chrome brown nails
These striking nails feature a metallic chrome finish in a deep brown shade. The reflective surface gives a futuristic and cool look, perfect for those who like to stand out.
Consumables:
-
- Brown Chrome Powder (e.g. Born Pretty Chrome Powder)
- Top coat (e.g. Sally Hansen “Miracle Gel”)
DIY instructions:
-
- Apply a base coat.
- Paint nails with a dark brown polish.
- Rub the chrome powder onto the nails while the polish is still sticky.
- Finish with a top coat for a shiny, metallic finish.
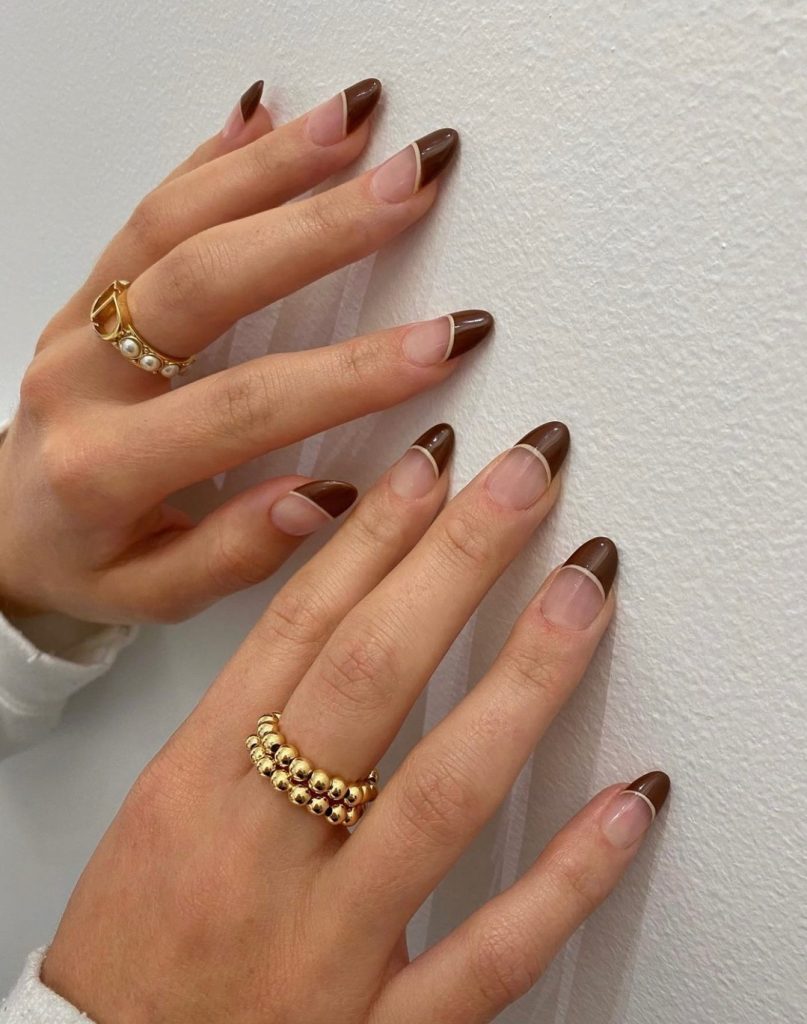
Brown French tips
This elegant design features brown French tips on almond shaped nails. The combination of natural nail color with a rich brown tip adds a chic and modern twist to the classic French manicure.
Consumables:
-
- Brown polish (e.g. Essie “Wicked”)
- Nude base coat (e.g. OPI “Bubble Bath”)
- Top layer (e.g. Seche Vite)
DIY instructions:
-
- Apply a base coat.
- Paint the tips of the nails with the brown polish, creating a French tip design.
- Seal with a top coat for a glossy finish.
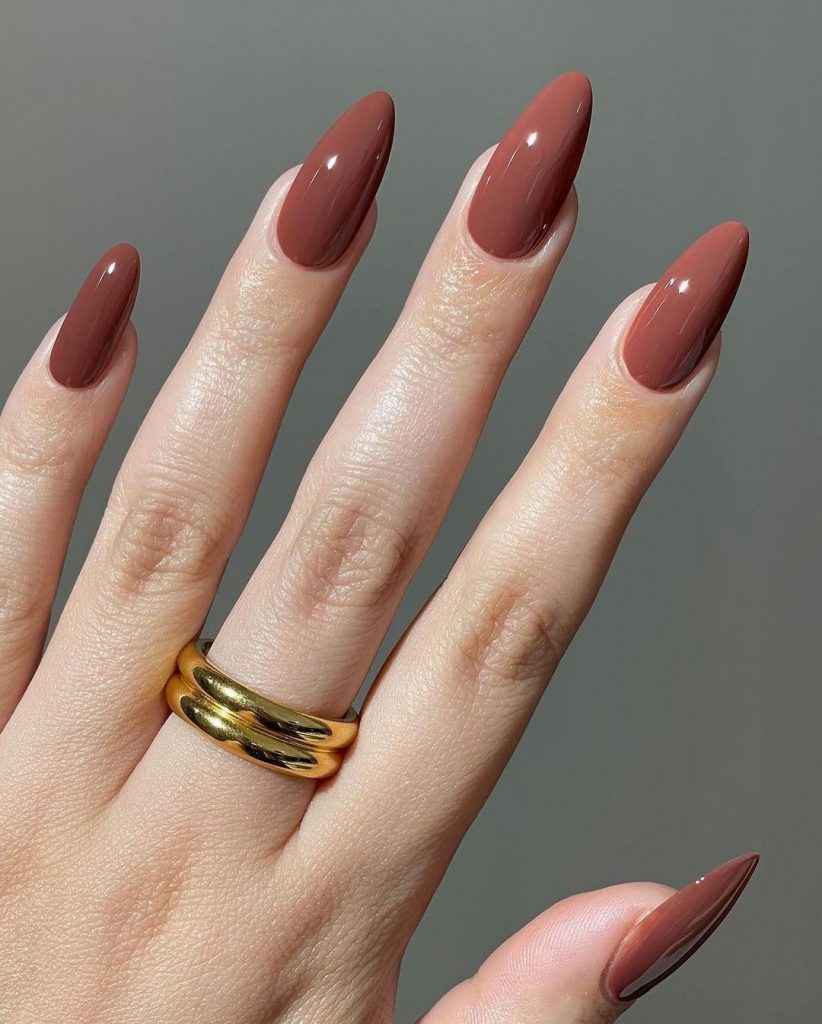
Rich terracotta almond nails
These almond-shaped nails have a rich terracotta shade that perfectly captures the essence of autumn. The glossy finish enhances the warm, earthy hue, making these nails a standout choice for this season.
Consumables:
-
- Terracotta brown polish (e.g. OPI “It’s a Piazza Cake”)
- High-gloss top coat (e.g. Seche Vite)
DIY instructions:
-
- Start with a base layer.
- Apply two coats of terracotta brown lacquer.
- Finish with a high gloss top coat for a smooth, shiny finish.
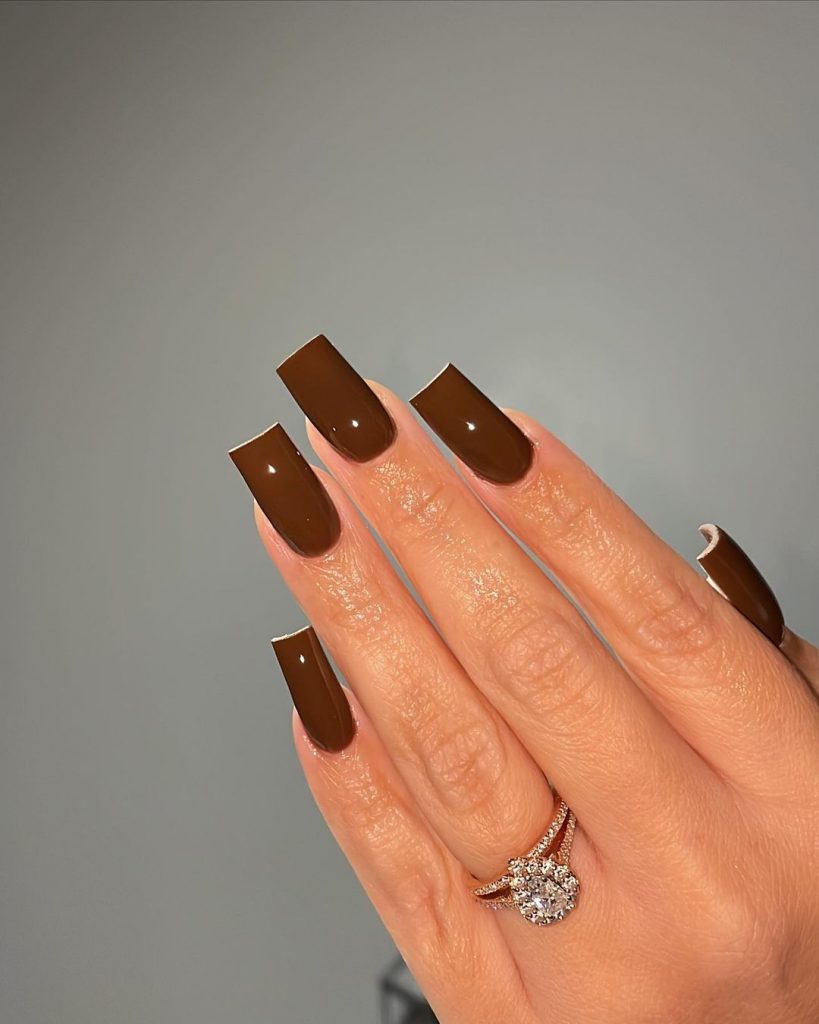
Shiny chocolate brown square nails
These square nails are painted in a deep chocolate brown shade and offer a rich and sophisticated look. The glossy finish adds a polished touch, making these nails perfect for both casual and formal occasions.
Consumables:
-
- Chocolate brown nail polish (e.g. Essie “Chocolate Cakes”)
- High-gloss top coat (e.g. Sally Hansen “Dries Instantly”)
DIY instructions:
-
- Start with a base layer.
- Apply two coats of chocolate brown polish.
- Finish with a high gloss top coat for a glossy finish.

Namie O, a talented writer at Willtiptop, conveys her passion for fashion and beauty in every word she writes. With a keen eye for detail and a deep insight into the latest trends, Namie’s articles and insights captivate readers and provide them with valuable knowledge and inspiration. Through her engaging and informative writing style, Namie aims to empower individuals to explore their style, experiment with beauty techniques, and embrace their unique sense of self.