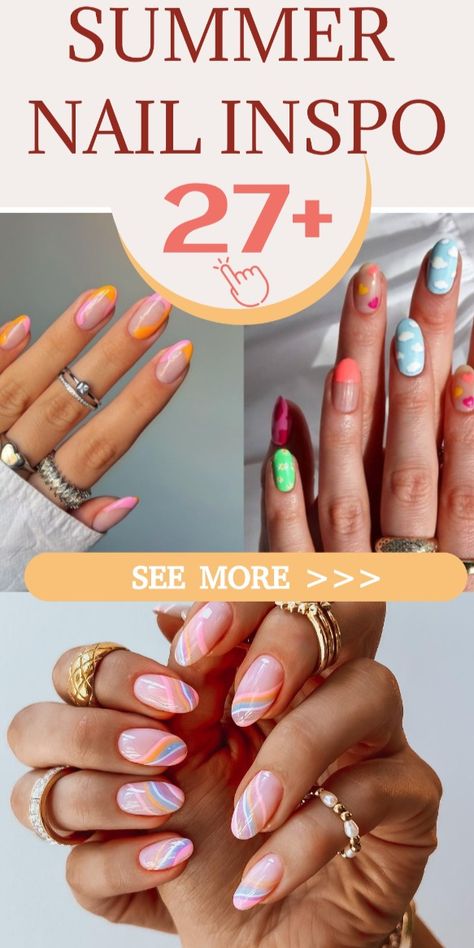
Classy Summer Nails 26 Ideas: Shades & Designs That Will Make You Stand Out
Are your nails ready for summer? When the sun is shining and the flip flops are on, will your nails show off the chic and stylish summer nail shades and designs that are turning heads this season? From the soft whisper of pink on a short nail to the bold statement of dark shades on an almond shape, the right nail design can be as refreshing as a cold lemonade on a hot day. But what are the secrets behind these enviable manicures? Which colours, designs and shapes ensure a flawless summer look? Keep reading as we dive into a palette of summer nail inspirations that combine simplicity, elegance, and a touch of fun!
Sunshine and lemonade
Bathed in the zest of yellow, these nails are like sunshine in bottles. The glossy finish reflects the bright, carefree days of summer, while the playful ombre effect, which transitions from a vibrant lemon to a soft buttercup, adds depth and character. This manicure isn’t just a color choice; it is a sunny character, captured within reach.
Materials required:
- Base Coat: OPI natural nail base coat
- Yellow Polishes: Essie’s ‘Aim to Misbehave’ and ‘Sunshine State of Mind’
- Top coat: Seche Vite Dry Fast Top nail polish
- Ombre tool: Makeup sponge
DIY instructions: To recreate this solar flare, start with a protective base coat. Apply two coats of lighter yellow and let each coat dry. For the ombre, dab alternating stripes of the two yellow shades onto a makeup sponge and press gently onto the nail until you are satisfied. Finish with a glossy top coat for a durable, summery finish.
Sky reflections
These nails whisper of cloudless skies and cool summer breezes. The blue base, as tranquil as a lagoon, is a canvas for a burst of white with flecks of blue – an abstract tribute to the summer sky dotted with fluffy clouds. Perfect for a simple casual outing or a chic evening event, these nails invite you to embrace the endless possibilities of blue horizons.
Materials required:
- Base layer: Sally Hansen Double Duty
- Blue Polish: CND Vinylux in “Creekside”
- White Polish: OPI “Alpine Snow”
- Detail brush: Winstonia Fine Liner
DIY Instructions: After priming your nails with a base coat, apply two even coats of Creekside. Then take Alpine Snow on your detail brush and create random, cloud-like dabs. Blend with a brush or sponge for that soft, heavenly feeling. A matte top layer gives the clouds their velvety finish.
Midnight shine
Dive into the depths of the ocean with these shiny dark blue nails. The high-gloss finish reflects light like soft waves under a moonlit sky. It’s a classic look that speaks of mystery and elegance, perfect for those sultry summer evenings. The beauty of this design lies in its simplicity: a single dark but trendy shade that effortlessly attracts attention.
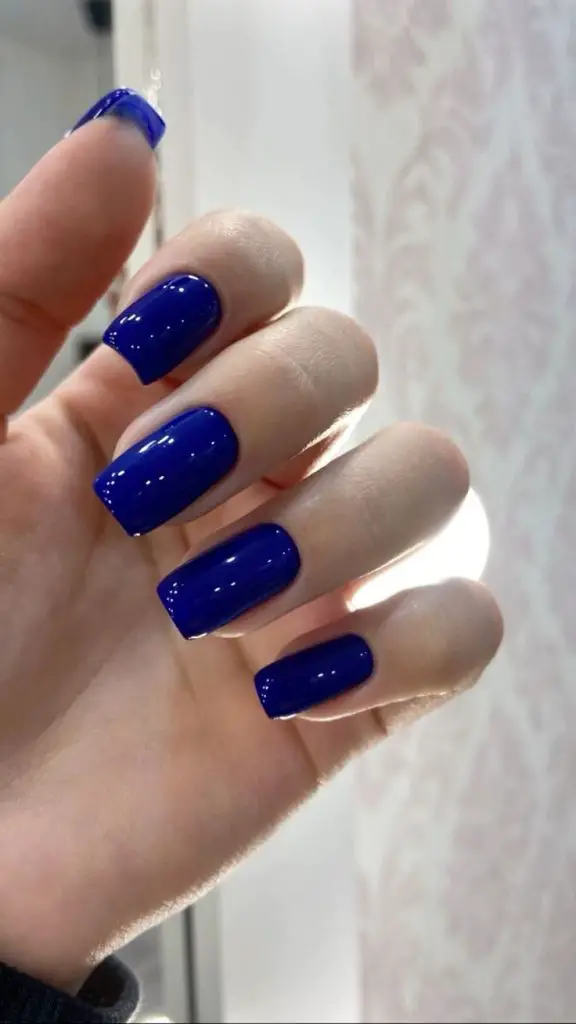
Materials required:
- Base layer: Deborah Lippmann Hard Rock
- Dark blue paint: Zoya “Neve”
- Top layer: INM Out The Door
DIY instructions: Start with a strengthening base coat to protect your nails. Apply two coats of Neve for that deep-sea charm. Finish with a coat of Out The Door topcoat for a glossy surface that lasts from dusk to dawn.
Whispers of spring
A testament to understated elegance, these nails combine soft pastel shades with delicate line drawings, evoking the essence of spring gardens into summer. Each nail is a petal in a gentle breeze, with the colors lavender, mint and rose blending seamlessly together, all connected by a whisper-thin white line.
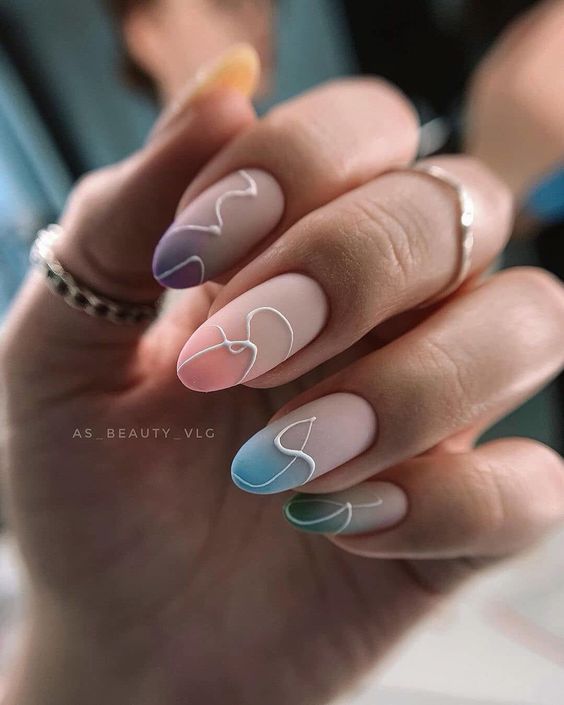
Materials required:
- Base layer: CND Stickey anchoring base layer
- Pastel polishes: Essie “Blossom Dandy”, “French Affair” and “Go Ginza”
- Detailing tool: thin nail art brush
- Top coat: Glistening and shiny top coat
DIY instructions: After applying the base coat, select one nail for each pastel shade and apply two coats for full coverage. Using your detailing tool, carefully draw a fine white curve across each nail, mimicking the natural arc of a petal. Seal your artistry with a quick-drying top coat to preserve the simple French tips and delicate details.
Aquatic dreams
This set embodies the reflective shine of a mermaid’s tail gliding through the summer sea. The chrome finish on an almond-shaped nail provides an attractive and futuristic contrast to the traditional summer palette. It’s a bold choice for the trendsetter who draws inspiration from the depths of the ocean.
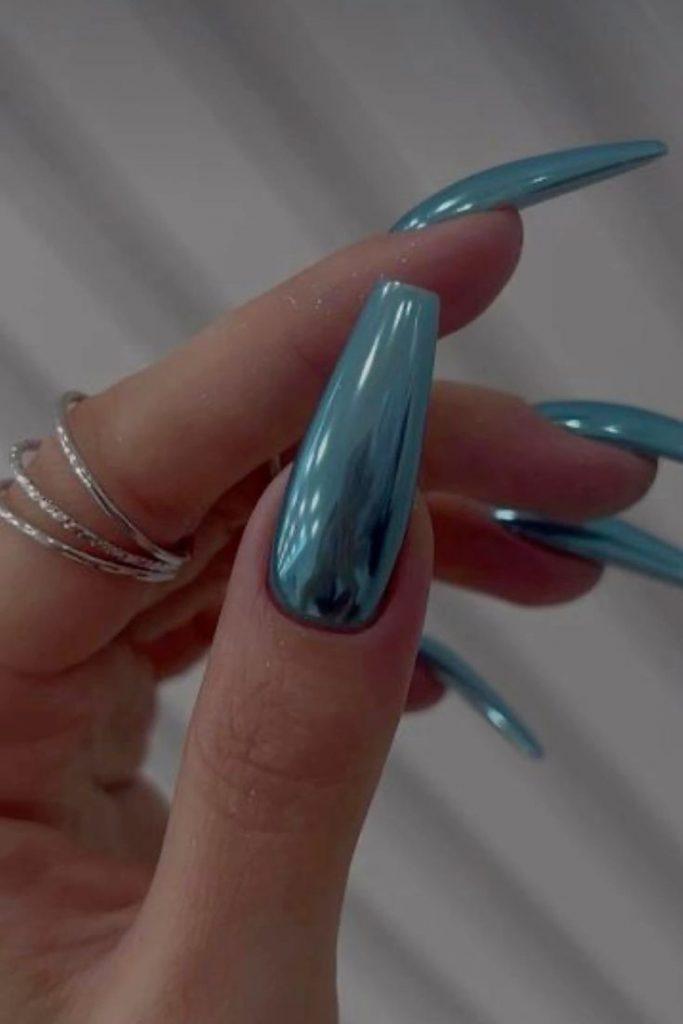
Materials required:
- Base layer: Butter London Nail Foundation
- Chrome Powder: Daily Charme Mirror Powder in “Silver”
- Gel top coat: Gelish Top It Off Sealer
- UV lamp: for curing the gel top coat
DIY instructions: Once your base coat has hardened, apply a coat of black or dark gel polish and let it harden. Gently rub the chrome powder onto the nail until you achieve the desired mirror effect. Finish with a gel top coat and cure under a UV lamp to retain that chic metallic shine.
Electric flair
Radiating a fierce energy, these nails are a bold symphony of pink and neutral tones, creating a visual pop that is both trendy and timeless. The sharp contrast between the vibrant pink and the subtle nude, accented with a hint of marbling, embodies a modern twist on the classic French point. It’s a bold yet chic choice that radiates summer fun.
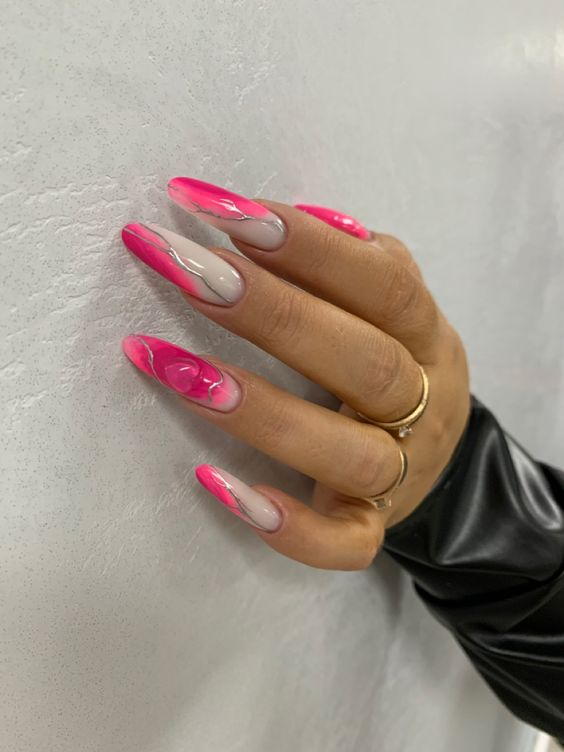
Materials required:
- Base layer: ORLY Bonder rubber base layer
- Pink polish: China Glaze “Bottoms Up”
- Nude paint: OPI “Samoan Sand”
- Marble tools: point pen or toothpick
- Top Coat: Essie Gel Setter Top Coat
DIY instructions: Start with a base coat to protect your nails. Apply two coats of Samoan Sand. Once dry, paint the points with Bottoms Up, leaving some negative space for artistic flair. Use a dotting tool dipped in both colors to marble the pink on one accent nail to nude. Finish with a top coat for that enviable shine.
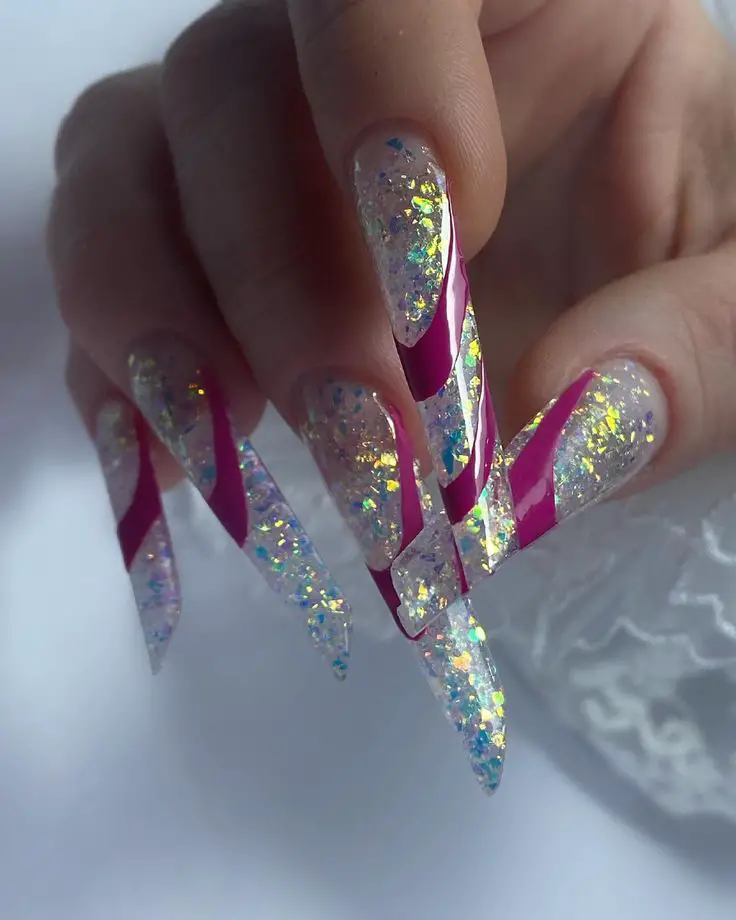
Glitter glamour
A showstopper that shimmers under the summer sun, these long nails combine the boldness of pink with the iridescence of glitter, resulting in a look that is both playful and glamorous. This design plays with negative space and designs glitter to make a trendy statement, perfect for summer evenings.
Materials required:
- Base layer: Zoya Anchor base layer
- Pink polish: Essie “The fuchsia is bright”
- Glitter: Sally Hansen Xtreme Wear in “Strobe Light”
- Strip tape
- Top Coat: ORLY Glosser Top Coat
DIY instructions: Start with a sturdy base layer. Use striping tape to cut where you want the negative space to be. Apply the pink lacquer to the untaped areas and immediately remove the tape. While the pink is still sticky, you can sprinkle the glitter on top for an enchanting effect. Finish with a glossy top coat.
Pink Gold Rush
Elegant and balanced, these short nails feature a luscious pink base with gold foil adding a luxurious touch. It is a sophisticated mix of color and metal, creating a simple, casual yet sophisticated look. The gold crackling over pink isn’t just any manicure; it’s wearable art for the discerning fashionista.
Materials required:
- Base layer: Essie Strong Start base layer
- Pink polish: OPI “Kiss me on my tulips”
- Gold leaf: Gold leaf foil
- Top layer: CND Vinylux Long Wear top layer
DIY instructions: Apply your base coat, followed by two coats of the vibrant pink polish. Once that’s dry, carefully place pieces of gold leaf in a random crackled pattern for a lush effect. A final top coat ensures that your gilded treasure remains intact during all your summer escapades.
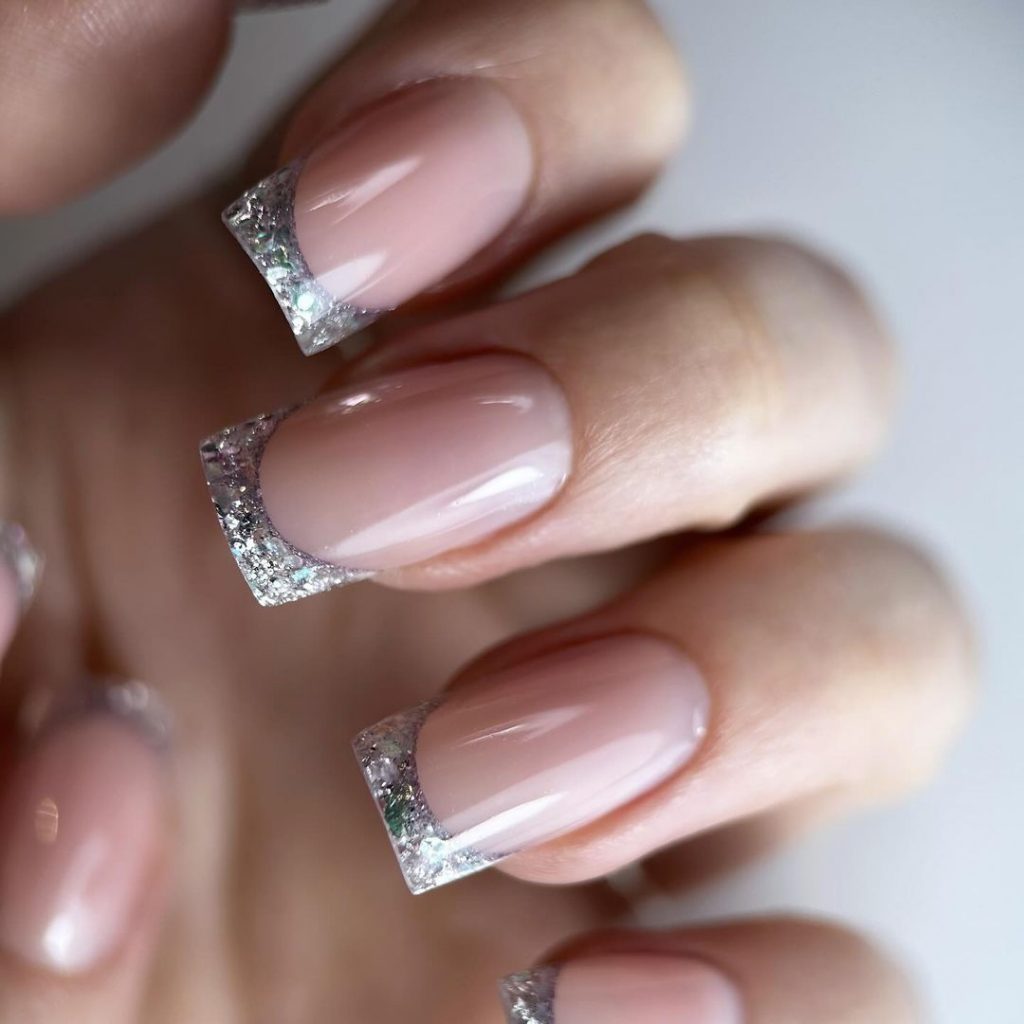
Crystal edges
For those who prefer a touch of drama, these neutral nails with sparkling silver edges are a nod to chic simplicity. The simple French tips are elevated with a line of glitter, turning a simple casual look into a trendy and cute celebration of summer glitter.
Materials required:
- Base Coat: OPI natural nail base coat
- Nude: Essie “Ballet Slippers”
- Silver glitter: OPI “This silver is mine!”
- Top coat: Deborah Lippmann Gel Lab Pro
DIY instructions: After your base coat, apply a sheer nude polish for that classic, sleek look. Once dry, gently apply a band of silver glitter to the tip of each nail, as if you were dipping them in a pool of crystals. Finish with a top coat for a shiny, long-lasting effect.
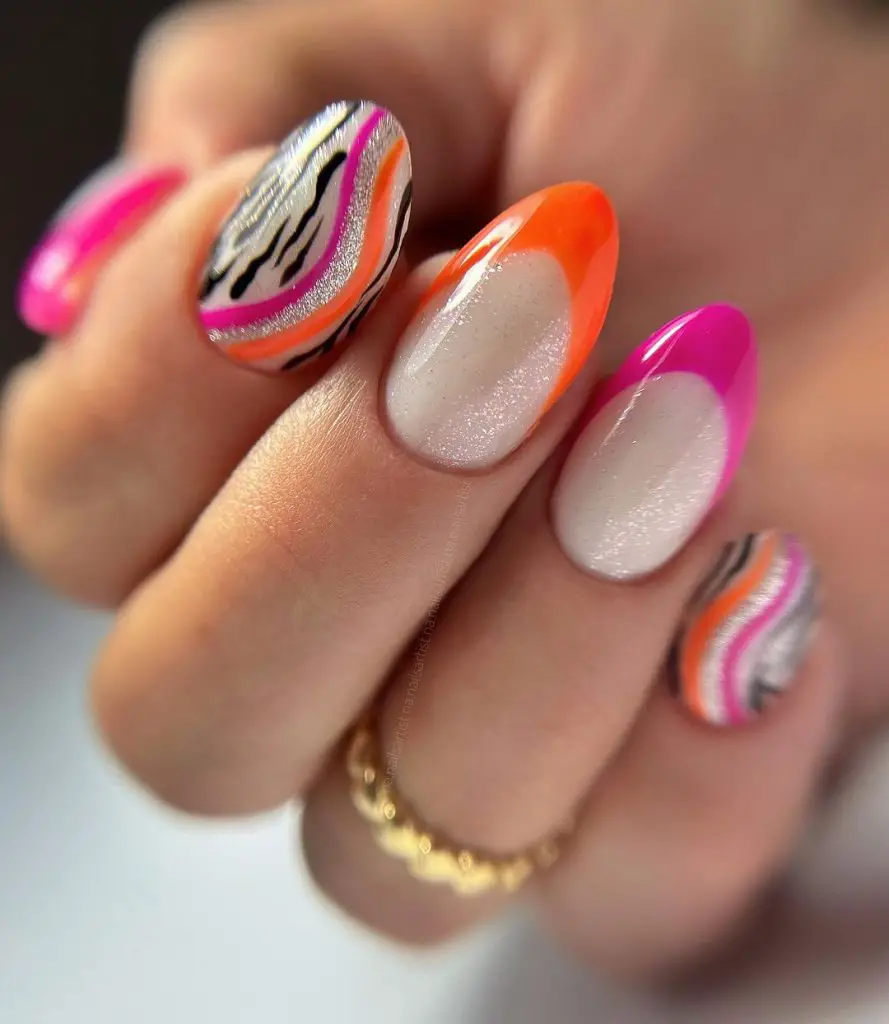
Safari sunset
Capturing the wild spirit of summer, these nails are a striking mix of orange, pink and white with an animal print for an untamed edge. They embody art ideas that speak of adventure and freedom, making them perfect for daring people ready to roam through the summer in style.
Materials required:
- Base layer: ORLY Bonder rubber base layer
- Orange Polish: Morgan Taylor “Mango-Round With Me”
- Pink Polish: Essie “B’aha Moment!”
- White Polish: OPI “Alpine Snow”
- Detailing Brush: Fine nail art liner
- Top coat: Seche Vive Instant Gel Effect Topcoat
DIY instructions: Apply your base coat to protect the nail. Use the white polish to create the base for the accent nails. Using the detail brush, draw the animal print with pink and orange polishes, with your wild side accompanying the pattern. Apply the orange and pink polish to the remaining nails. Once all the paint is dry, seal your safari-inspired design with a top coat for a glossy, durable finish.
Bold sunshine
There’s nothing like a pop of yellow to embody the essence of summer, and these nails do it with unabashed boldness. Accented with a black and white design, they reflect the playful yet trendy vibe of the season. It’s a design that says simple casual during the day and transitions to chic at night.
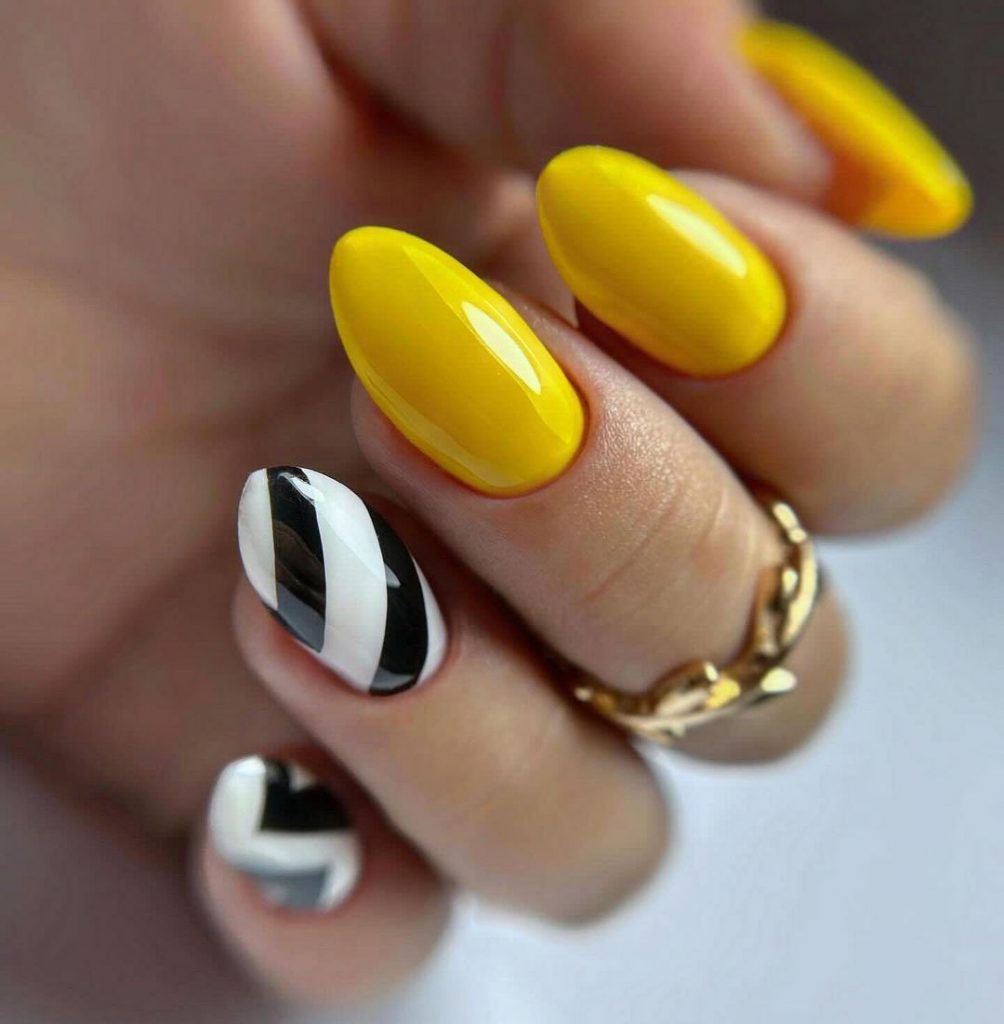
Materials required:
- Base Coat: OPI natural nail base coat
- Yellow Polish: Sally Hansen Insta-Dri in “Lightning”
- Black Polish: Sinful Colors Professional in “Black on Black”
- White Polish: Essie “Blanc”
- Detailing brush
DIY instructions: Start with a base coat to protect your nails. Apply two coats of the bright yellow polish. Use the detail brush to create the black and white designs on the accent nails and play with geometric shapes for a modern look. Finish your design with a quick-drying top layer for long-lasting comfort.
Blue Zebra Chic
Combining the vibrancy of blue with the exotic appeal of a zebra print, these nails are a testament to bold design art ideas. The trendy matte finish is sophisticated and the accent nail decorated with a pearl adds a unique touch of elegance, making these nails a beautiful accessory in their own right.
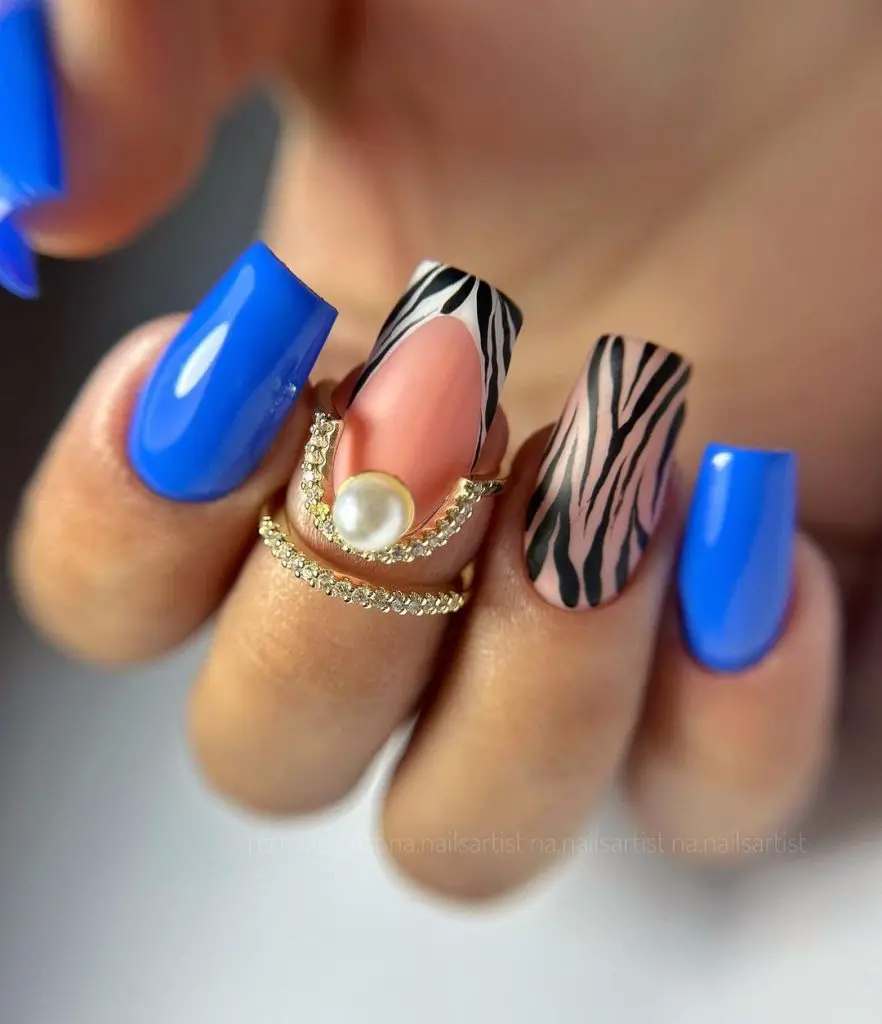
Materials required:
- Base layer: Essie Here to Stay base layer
- Blue Polish: Zoya “Ling”
- Pink polish: Essie “Mod Square”
- Matte top coat: Essie Matte About You
- Zebra print stencil
- Pearl adhesive gemstone
DIY instructions: Protect your nails with a base coat. For the zebra print, apply the pink polish as a base and use the stencil and black polish to add the stripes. Apply the blue polish to the other nails. Once dry, apply a matte top coat to all nails. As a finishing touch, add a pearl jewel to the accent nail for a touch of glamour.
Turquoise waves
Embracing the tranquility of ocean waves, these ombre nails with a turquoise marble effect are a serene nod to design color combinations. The gold accents provide a luxurious contrast, perfect for those looking for a trendy, beautiful and chic summer atmosphere.
Materials required:
- Base layer: Zoya Anchor base layer
- Turquoise Polish: China Glaze “Aquadelic”
- White Polish: OPI “Alpine Snow”
- Marble Tools: Pointed tool or toothpick
- Gold strip tape
- Top layer: INM Out The Door quick-drying top layer
DIY instructions: Apply your base coat. For the marble effect, start with a white base and add drops of turquoise polish. Use the dotting tool to gently swirl the colors. Apply the gold striping tape to the ends for an elegant detail. Finish with a quick-drying top coat to seal the design.
Flower fantasy
Delicate floral patterns bloom across these nails, creating a canvas of purple and orange against a transparent background. It’s a celebration of the natural beauty of summer, combining art ideas with a cute and sleek aesthetic.
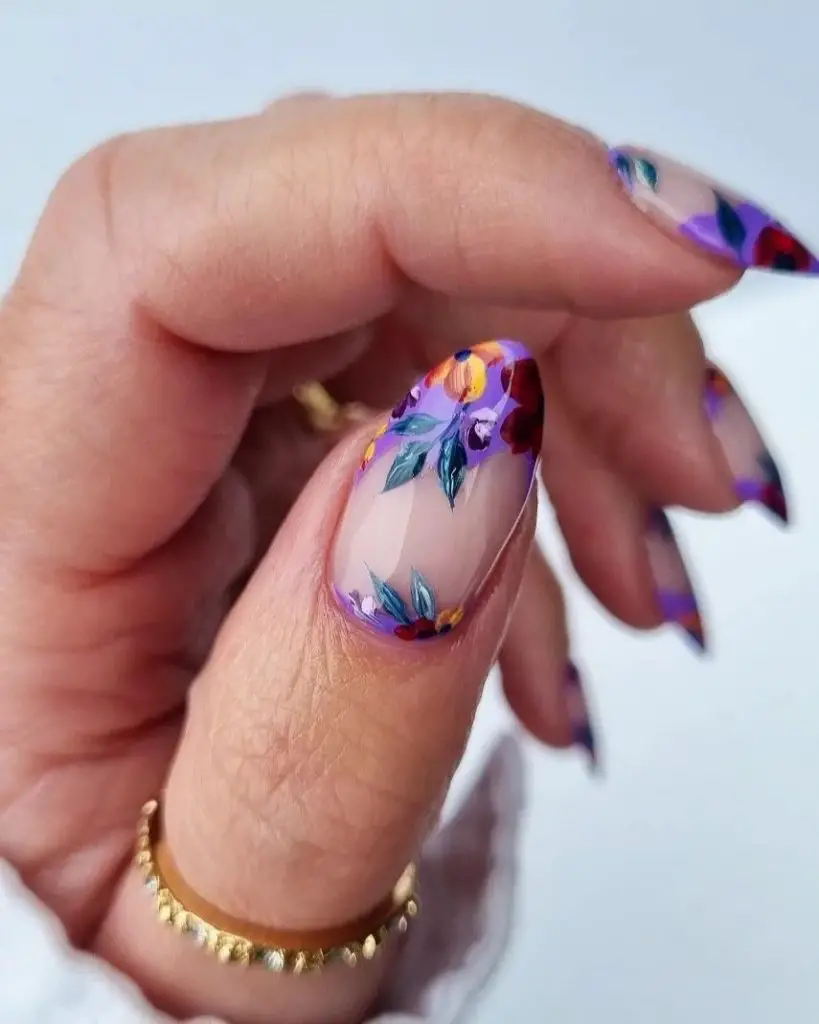
Materials required:
- Base layer: ORLY Bonder rubber base layer
- Purple Polish: OPI “Do you have this color in Stockholm?”
- Orange Polish: Essie “Sunday Funday”
- Floral nail decals or stickers
- Top coat: Seche Vite Dry Fast Topcoat
DIY instructions: Start with a protective base coat. Apply the flower stickers to your natural nail and make sure you press them down firmly. Use the purple and orange polishes on alternate fingers. Apply a top coat over the stickers and the colored nails to achieve a glass-like finish that allows the floral design to shine through.
Minty fresh
For those who love a simple, casual look with a touch of whimsy, these green pastel nails with gold flecks are a breath of fresh air. The matte finish on one and the gloss on the other offer a playful contrast and embody a simple, chic summer style.
Materials required
- Base layer: Essie All-in-One base layer
- Green Polish: Essie “Mint Candy Apple”
- Matte top layer: Matte Look from SuperChic Lacquer
- Gold leaf flakes
- Shiny top coat: Seche Vite Dry Fast Top Coat
DIY instructions: Apply a good base coat to protect your nails. Paint all nails with two coats of “Mint Candy Apple”. Apply a matte top coat to the selected nails for a velvety soft texture. Before the matte top coat dries on the nails, gently apply gold leaf flakes for a diffused, elegant look. Use the glossy top coat on the remaining nails to give them a classic shine, enhancing the contrast between matte and glossy finishes.
Neutral elegance with a touch
The combination of understated neutral nails against a vibrant blue accent nail adorned with silver beads is a testament to the versatility of summer manicures. This look combines simplicity with a bold statement, perfect for those who appreciate a touch of drama.
Materials required:
- Base coat: OPI Nail Envy
- Neutral Polish: Essie “Topless and Barefoot”
- Blue Polish: OPI “Can’t find my Czechbook”
- Silver beads
- Nail glue
- Top coat: Sally Hansen Miracle Gel Topcoat
DIY instructions: After applying a base coat, paint all but one nail with a neutral polish. For the accent nail, apply a striking blue shade. Once dry, use nail glue to attach silver beads in a descending pattern. Finish with a top coat to seal the design and ensure a longer lifespan.
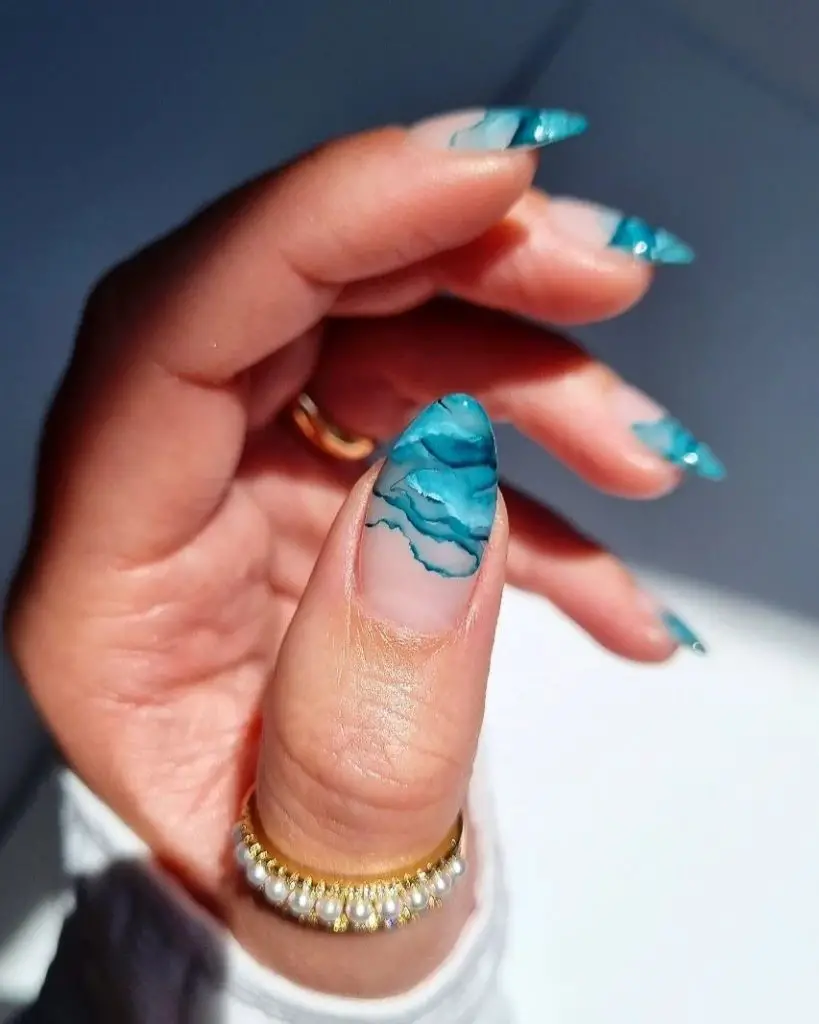
Oceanic marble
These nails are a work of art, reminiscent of the deep blue sea. The marble design in different shades of blue provides a fluid and trendy effect, while the glossy finish adds depth and movement.
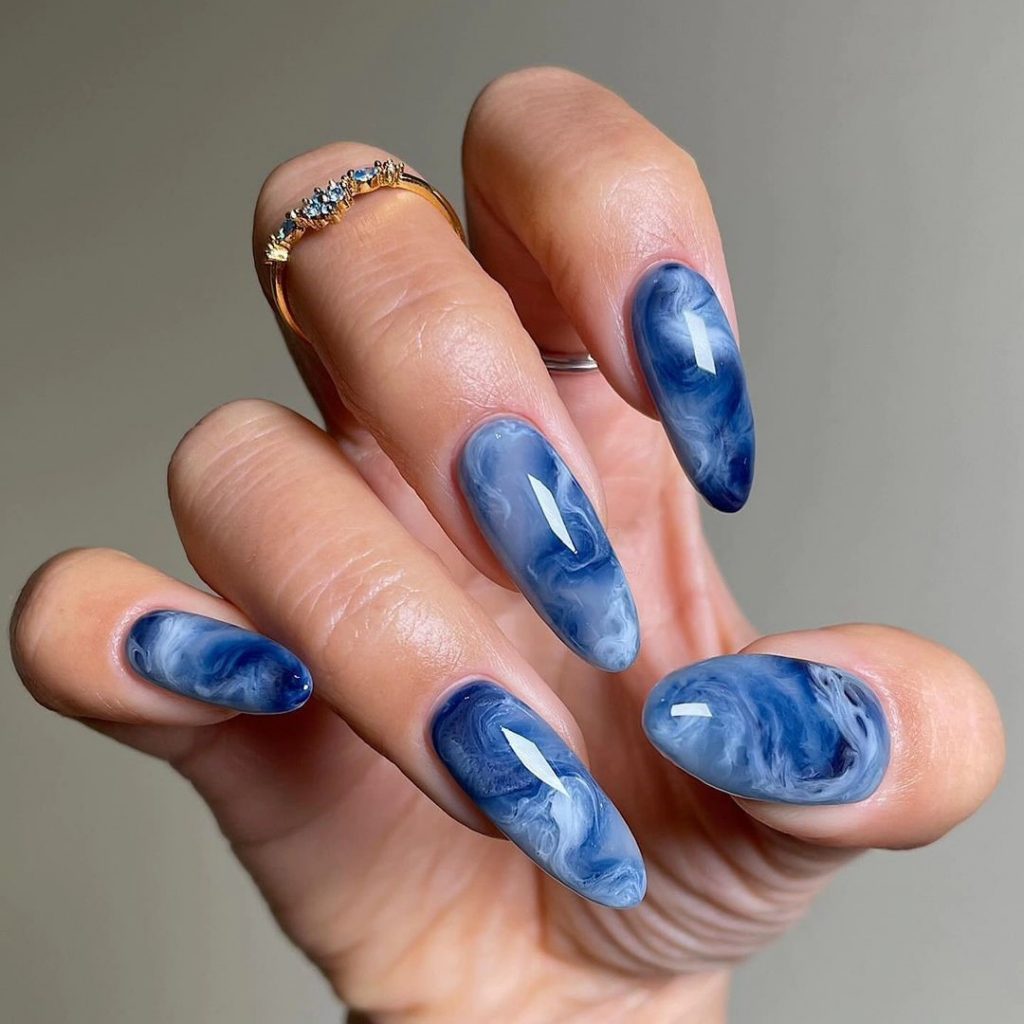
Materials required:
- Base layer: CND Stickey base layer
- Blue Polishes: A selection of blue shades from light to dark
- Marble tools: needle or toothpick
- Top Coat: Essie Good To Go Top Coat
DIY instructions: Coat your nails with a base coat to protect them. Dab blobs of different blue polishes onto the nail and use a needle to twist them into a marble effect. Work quickly before the paint dries to achieve the best results. Finish with a top coat for a glossy, smooth finish.
Coral waves
A perfect harmony of orange and pink, these nails are a summer sunset captured on your fingertips. The wavy pattern adds a playful twist to the otherwise simple nail, making it a fun choice for any summer outing.
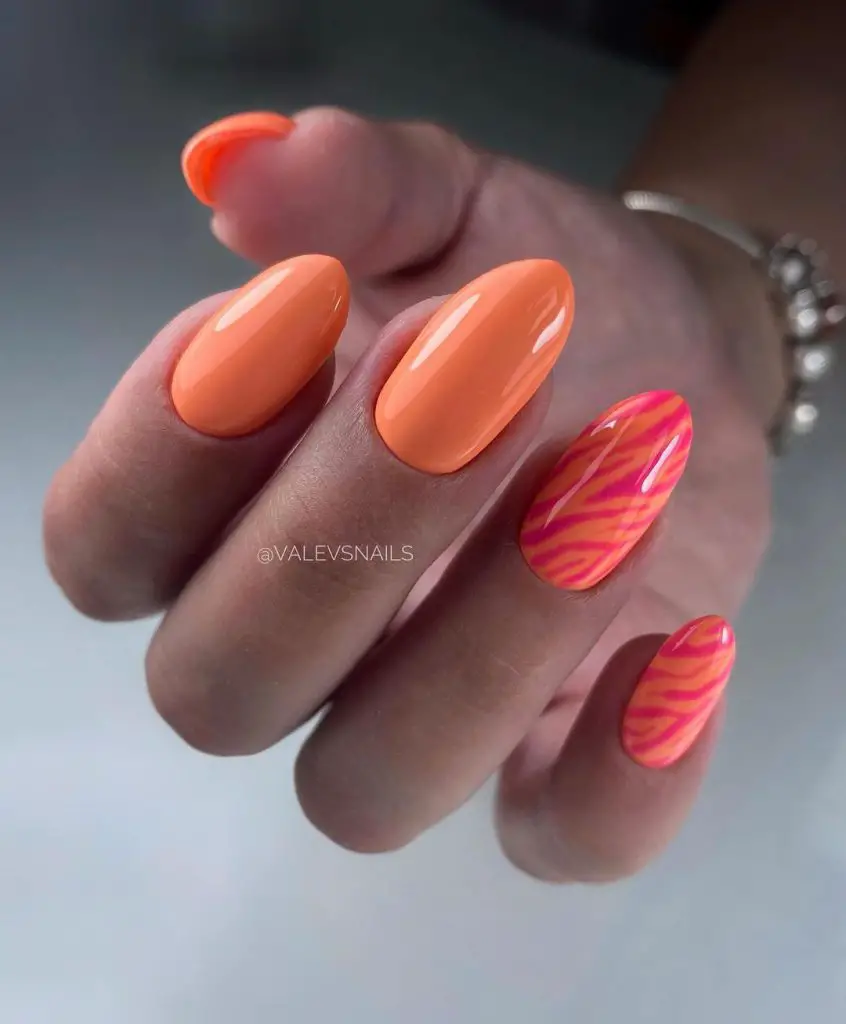
Materials required:
- Base layer: ORLY Bonder
- Orange Polish: China Glaze “Papaya Punch”
- Pink polish: ORLY “Beach Cruiser”
- Nail tape
- Top coat: Seche Vite Dry Fast Topcoat
DIY instructions: Protect your nails with a base coat. Paint the nails with the orange polish of your choice. Once that’s dry, use nail tape to map out wavy lines and fill them in with pink polish. Gently peel off the tape to reveal your design. Finish with a quick-drying top coat.
Fiery flowers
The vibrant red nails offer a classic summer look, but the real highlight is the accent nail with hand-painted flowers. This nail art embodies a trendy and beautiful summer garden party, with each stroke showcasing the meticulous art ideas.
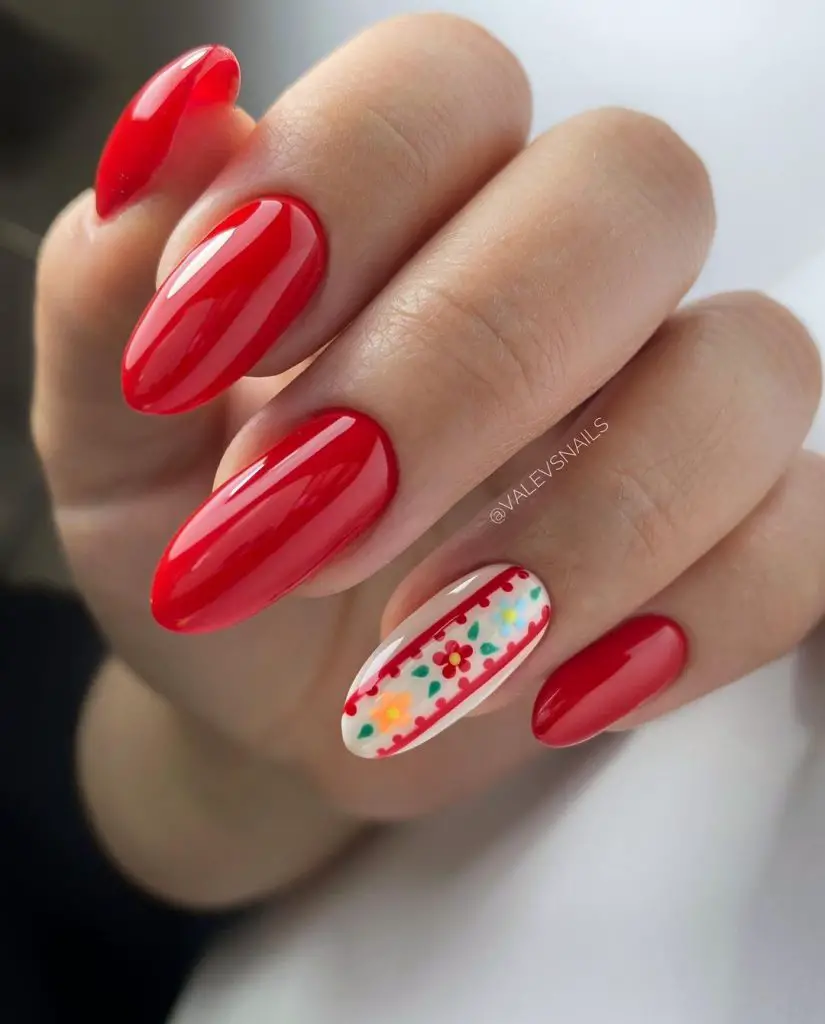
Materials required:
- Base Coat: OPI natural nail base coat
- Red polish: Essie “Geranium”
- White Polish: Sally Hansen “White On”
- Nail Art stickers with flowers or freehand with a detail brush
- Top layer: INM Out The Door Top layer
DIY instructions: Start with a base coat. Apply the red polish to all nails except the accent nail, where you apply white as a base. If you are using stickers, apply them once the base is dry. For freehand flowers, use a fine brush to paint small floral designs. Finish with a quick-drying top coat for a glossy finish.
Modern leopard print
Combining a classic leopard print with a modern matte finish, these nails strike the perfect balance between chic and trendy. The muted neutral base lets the black and gold polka dots pop, adding an edge to a simple casual look.
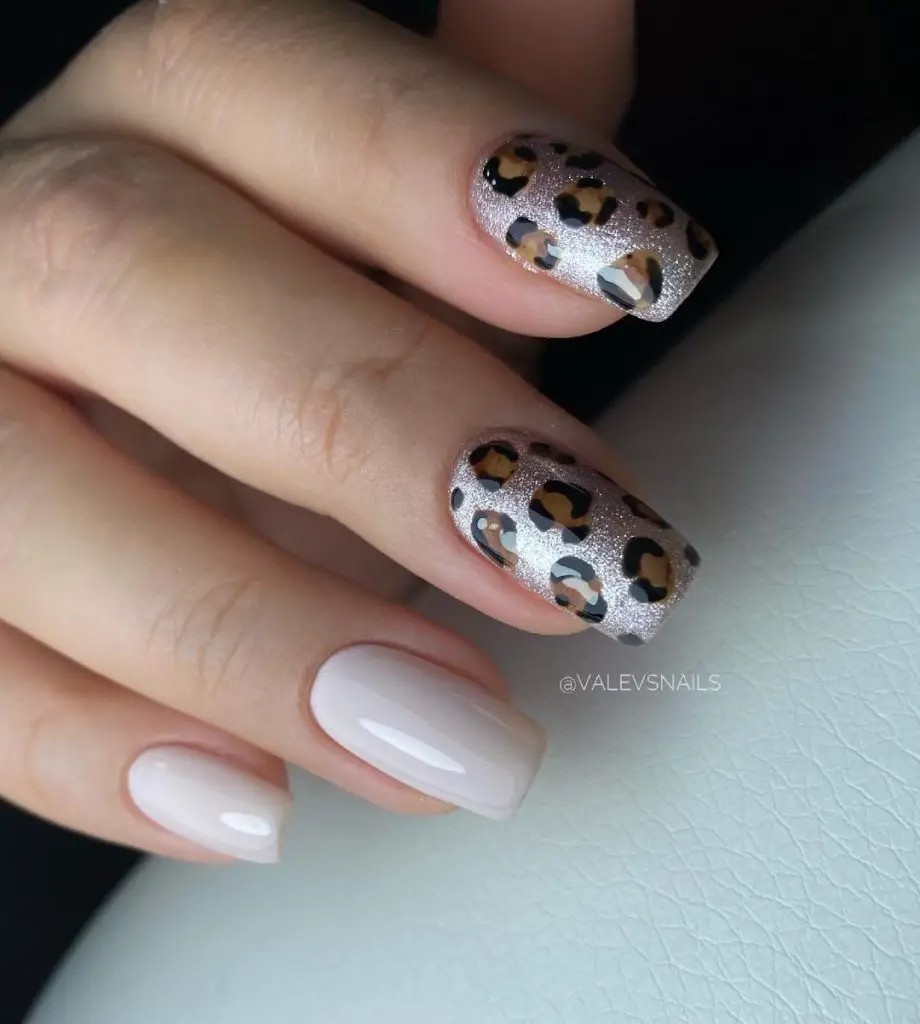
Materials required:
- Base layer: Butter London Nail Foundation
- Neutral Polish: Zoya “Taylor”
- Black Polish: OPI “Black Onyx”
- Gold polish: Orly “Glitz”
- Matte top coat: Essie Matte About You
DIY instructions: Apply your base coat for a smooth foundation. Paint all nails with the neutral nail polish as a base. For the leopard print, use a dotting tool to create irregular black spots, then add gold in the center of some spots for a hint of metallic. Let your masterpiece dry before applying a matte top coat to achieve that coveted soft-focus effect.
Botanical bliss
Inspired by the lush foliage of summer, these nails with their fresh green leaf design on a white base are for those who carry a garden with them wherever they go. The look is fresh, vibrant and full of life, perfect for the nature lover who wants to bring a touch of the outdoors into their style.
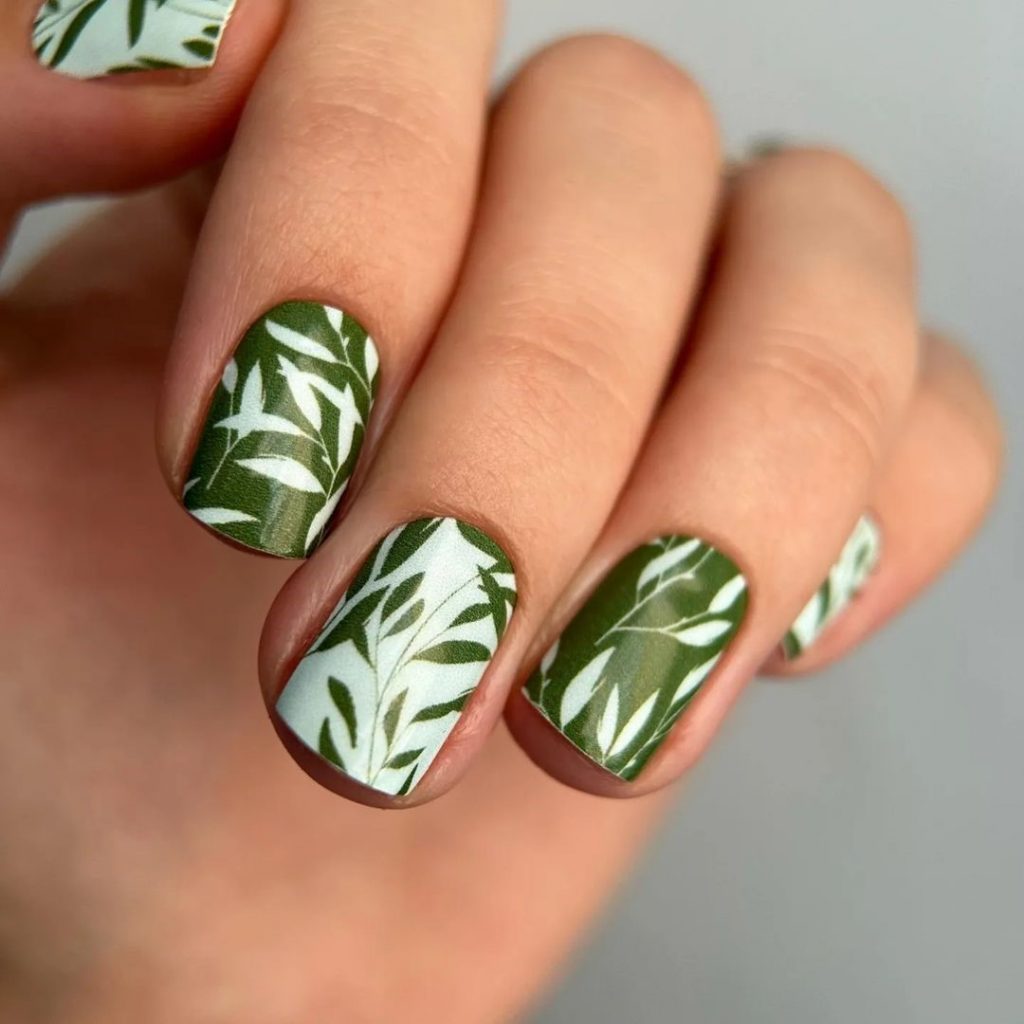
Materials required:
- Base layer: Essie “Grow Stronger”
- White Polish: OPI “Alpine Snow”
- Green Polish: OPI “Stay off the lawn!!”
- Stamp plate with leaf motif
- Stamping tools
- Top coat: Seche Vite Dry Fast Topcoat
DIY instructions: Apply your base coat to protect the nails. Then apply a layer of “Alpine Snow” for a clear base. Use the stamping tool and green nail polish with the leaf design plate to transfer the pattern onto your nails. Finish with a top coat to seal the design and add a glossy shine.
Abstract mosaic
This nail design is a playful mix of shapes and shades, with blue, red and soft pastel colours. It is a work of art reminiscent of modern abstract paintings, perfect for the bold and artistic soul ready to make a statement.
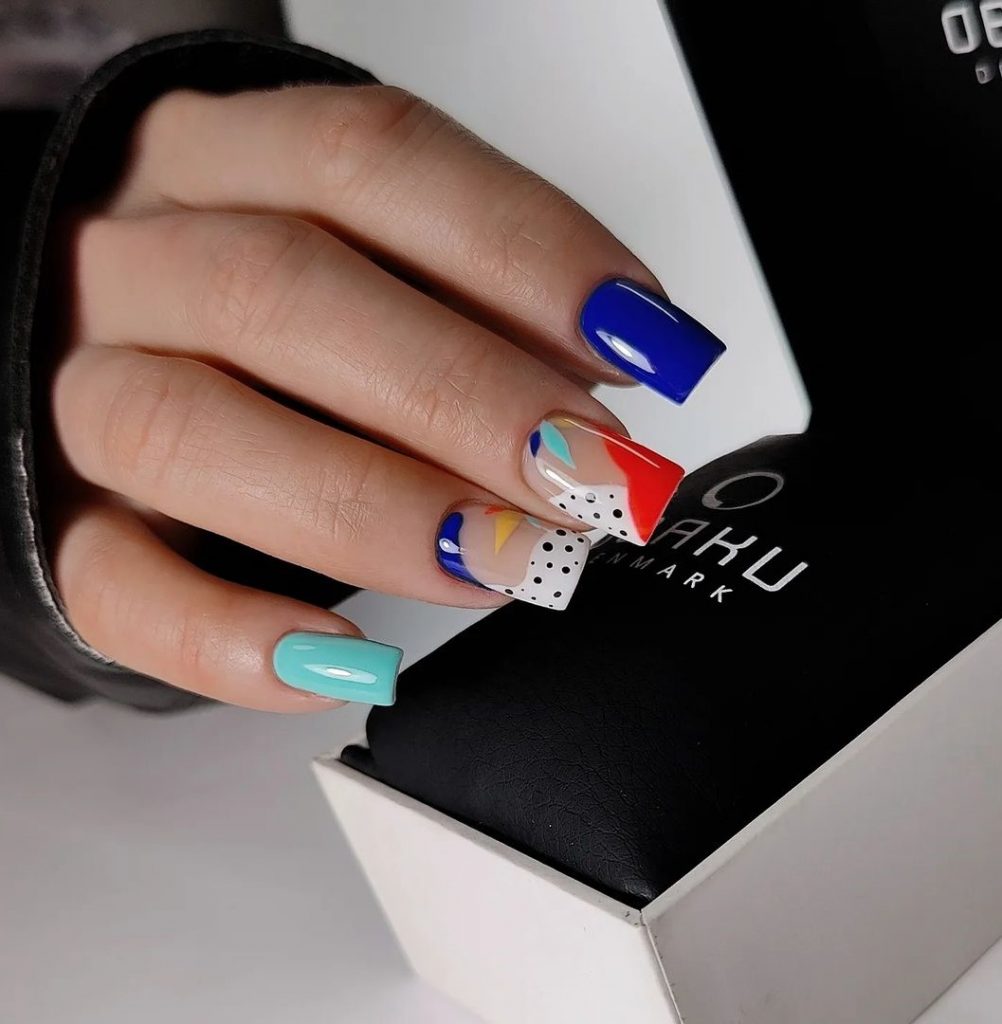
Materials required:
- Base layer: ORLY “Bonder”
- Blue Polish: Essie “Butler Please”
- Red polish: China Glaze “Red-y To Rave”
- Pastel polishes: Different shades for detailing
- Detailing brush
- Dotting tools
- Top coat: Butter London “Hardwear Shine UV Topcoat”
DIY instructions: After applying the base coat, paint the nails in solid blue and white for contrast. Create abstract shapes with red and pastel colors using a fine detail brush and dotting tools. The key is to keep it playful and spontaneous. Once you are happy with your design, apply a top coat to enhance the shine and ensure durability.
Classic French with a twist
A modern take on the classic French manicure, these nails combine a clean, fresh white tip with a nude base. The added silver line and crystals provide an elegant trendy update to the timeless style.
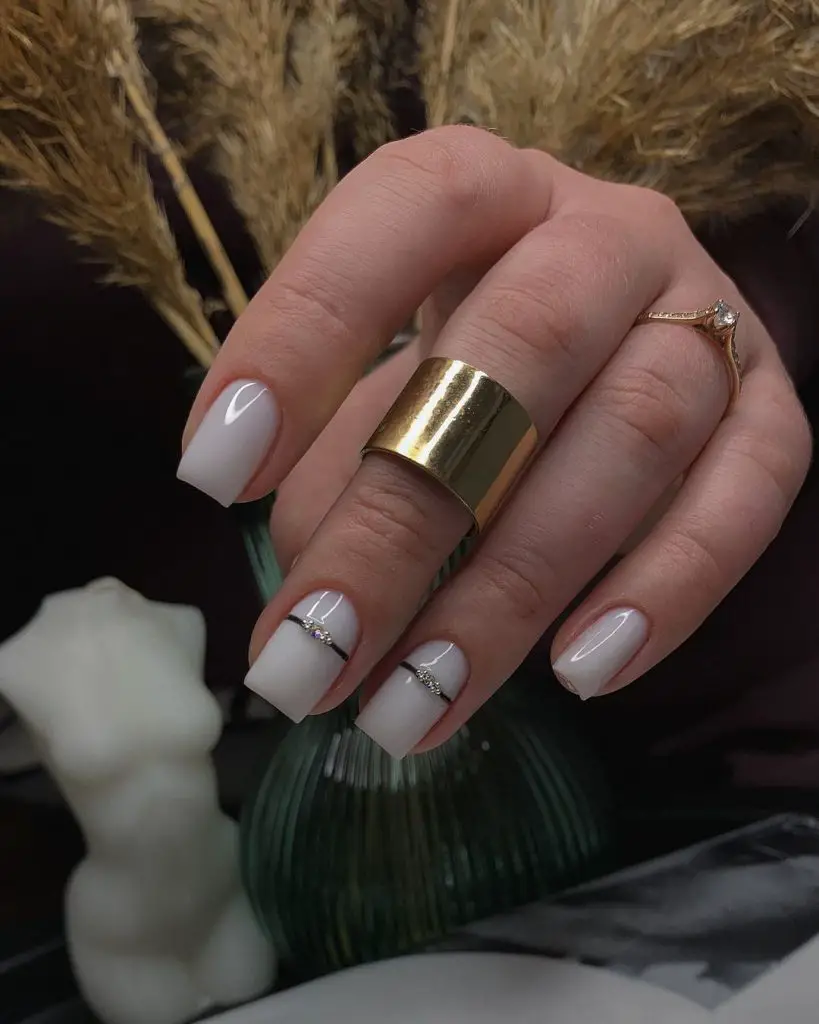
Materials required:
- Base layer: Deborah Lippmann “Hard Rock”
- Nude paint: OPI “Bubble Bath”
- White polish for tips: Essie “Blanc”
- Silver strip tape
- Rhinestones
- Top layer: INM “Out The Door”
DIY instructions: Start with a base coat to protect your nails. Apply a sheer nude polish as a base color. Once dry, whiten the tips with “Blanc.” Add a strip of silver tape to define the smile line and carefully place rhinestones for an extra touch of glamour. Seal everything with a quick-drying top coat.
Golden hearts
These French tips are the epitome of love and luxury and are sweetened with gold heart decorations. It is a delicate, romantic design that will beautifully complement any summer wedding or special date night.
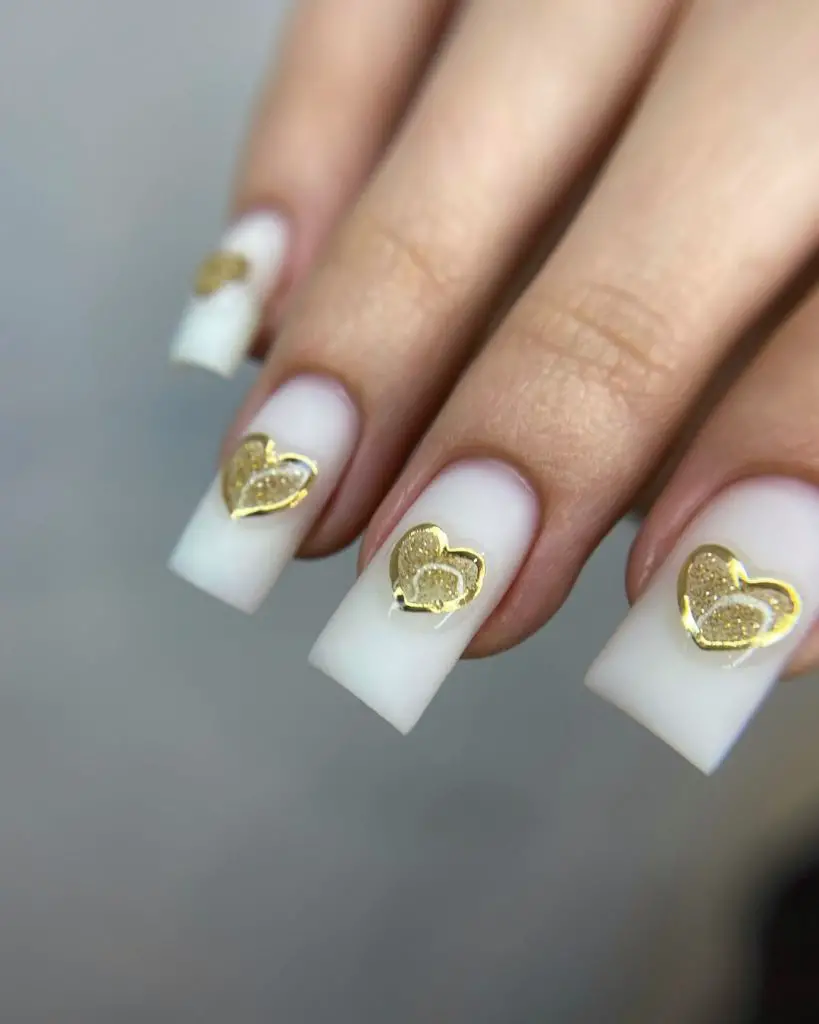
Materials required:
- Base layer: Sally Hansen “Double Duty”
- White lacquer for tips: OPI “Alpine Snow”
- Golden heart decorations
- Nail glue
- Top layer: Essie “Gel Setter”
DIY instructions: Prepare your nails with a base coat. Paint the tips with a fresh white polish. Once the tips are dry, use a dab of nail glue to add a gold heart to each nail. Apply a generous layer of top coat to ensure the hearts stay in place and get a durable gel-like finish.
Midnight purple
Dark and mysterious, these black nails with a single purple accent nail exude confidence and style. The glossy finish reflects the summer night sky and makes a powerful statement for evening events.
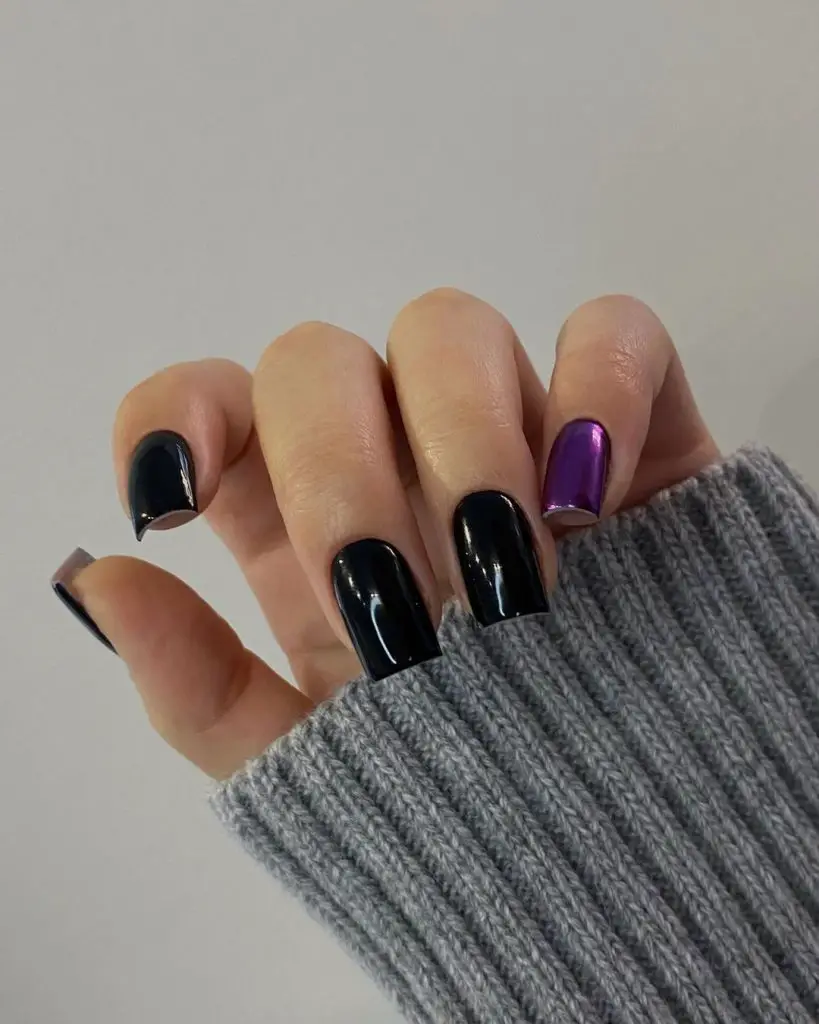
Materials required:
- Base coat: CND “Stickey”
- Black Polish: Essie “Licorice”
- Purple Polish: OPI “Do you have this color in Stockholm?”
- Top coat: OPI “Top coat”
DIY instructions: Start with a sturdy base layer. Apply two coats of “Licorice” to all but one nail, then use “Do You Have This Color in Stock-holm?” for a touch of purple on the accent nail.
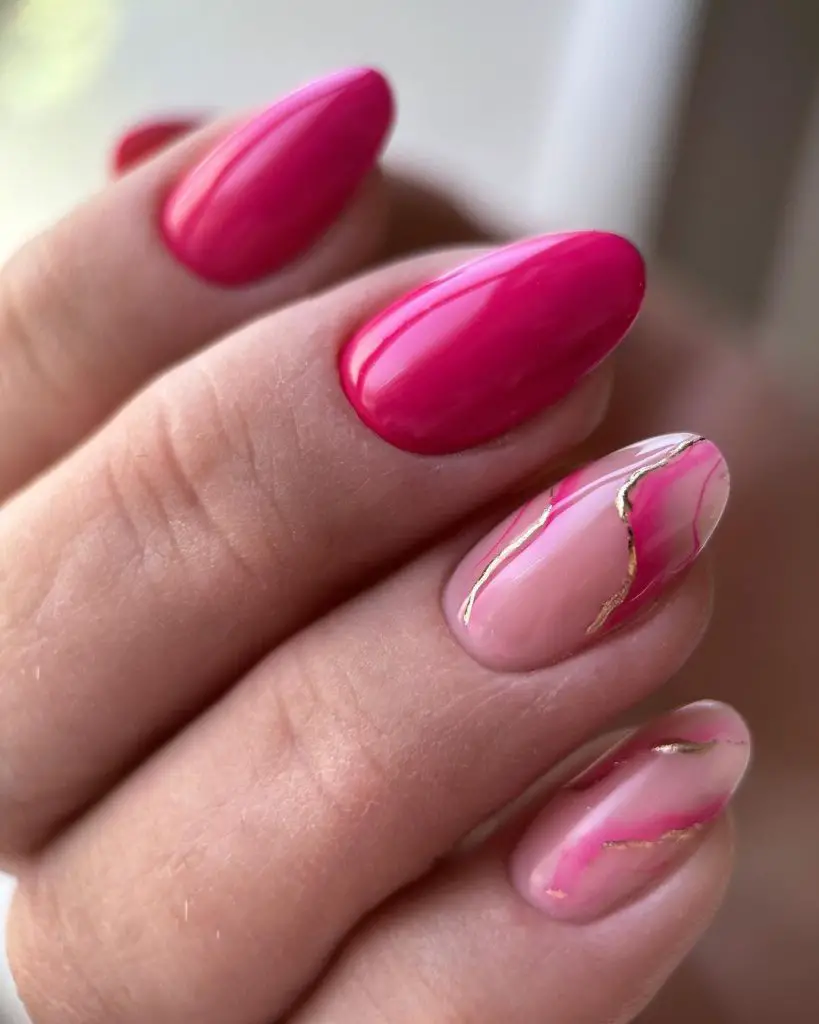
Timeless crimson
There’s something undeniably classic about a deep red manicure. It’s the kind of timeless elegance that never goes out of style, especially in summer when bright colors take center stage. This shimmering, rich crimson shade is both bold and seductive, perfect for a confident step into a summer soirée.
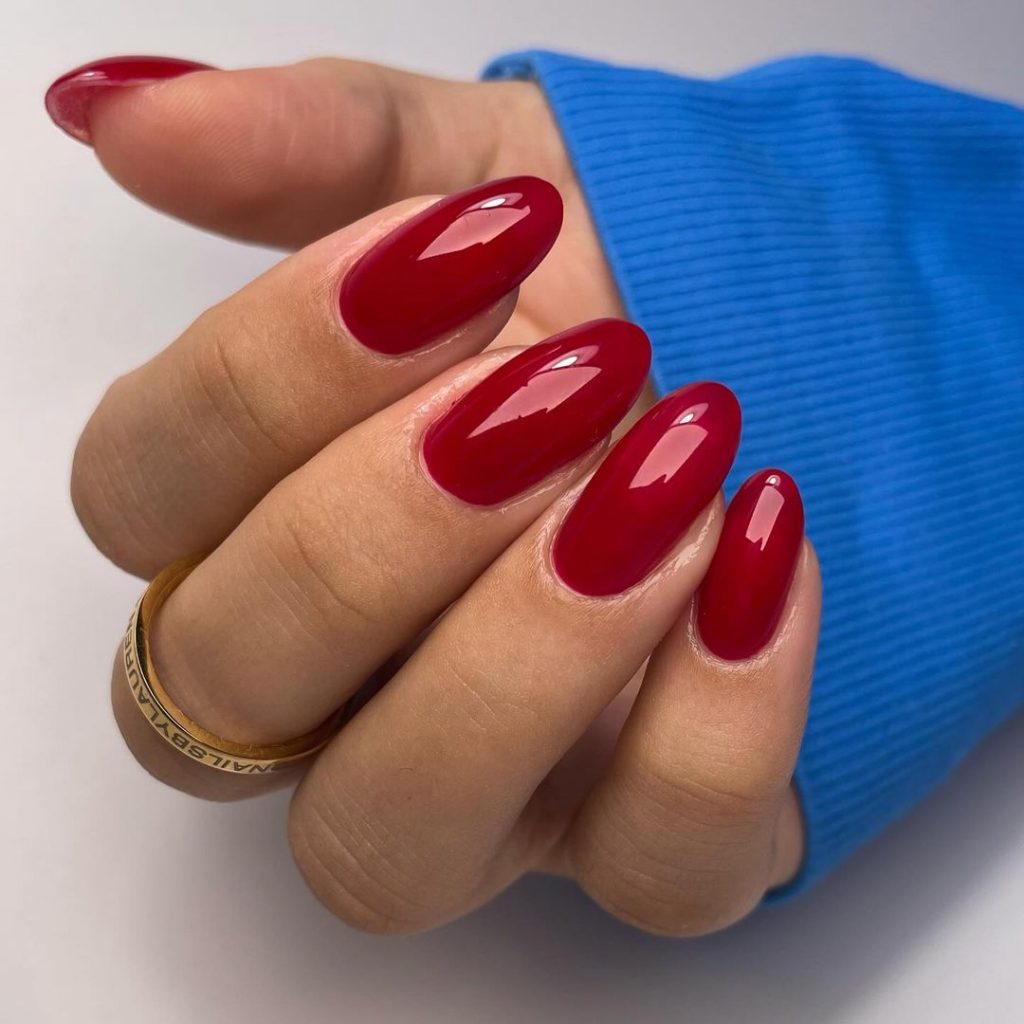
Materials required:
- Base Coat: Deborah Lippmann Gel Lab Pro Base Coat
- Red Polish: OPI “Big Apple Red”
- Top coat: Deborah Lippmann Gel Lab Pro Topcoat
DIY instructions: Start with the base coat to ensure a smooth application. Then apply two coats of “Big Apple Red”, the quintessential summer red. It is a color that is bold enough to make a statement and yet classic enough to wear for any occasion. Allow the paint to dry completely before finishing with a top coat for a glossy, long-lasting shine.
Save pin

Namie O, a talented writer at Willtiptop, conveys her passion for fashion and beauty in every word she writes. With a keen eye for detail and a deep insight into the latest trends, Namie’s articles and insights captivate readers and provide them with valuable knowledge and inspiration. Through her engaging and informative writing style, Namie aims to empower individuals to explore their style, experiment with beauty techniques, and embrace their unique sense of self.