Fall Nail Art 2025 25 Ideas: Stunning Designs to Elevate Your Autumn Look
Fall is here and with it comes the chance to freshen up your nail game with the latest trends and designs. If you’re looking for inspiration to keep your manicure on point this season, look no further. I’ve put together a selection of the most fascinating fall nail art for 2025. Let’s dive in and explore these chic designs that are perfect for any occasion.
Rich purple elegance
When it comes to fall nail art, rich and bold colors are a must. This deep purple manicure exudes sophistication and style. The glossy finish adds a touch of elegance, making it suitable for both casual outings and formal events. The square nail shape enhances the overall look and gives it a modern touch.
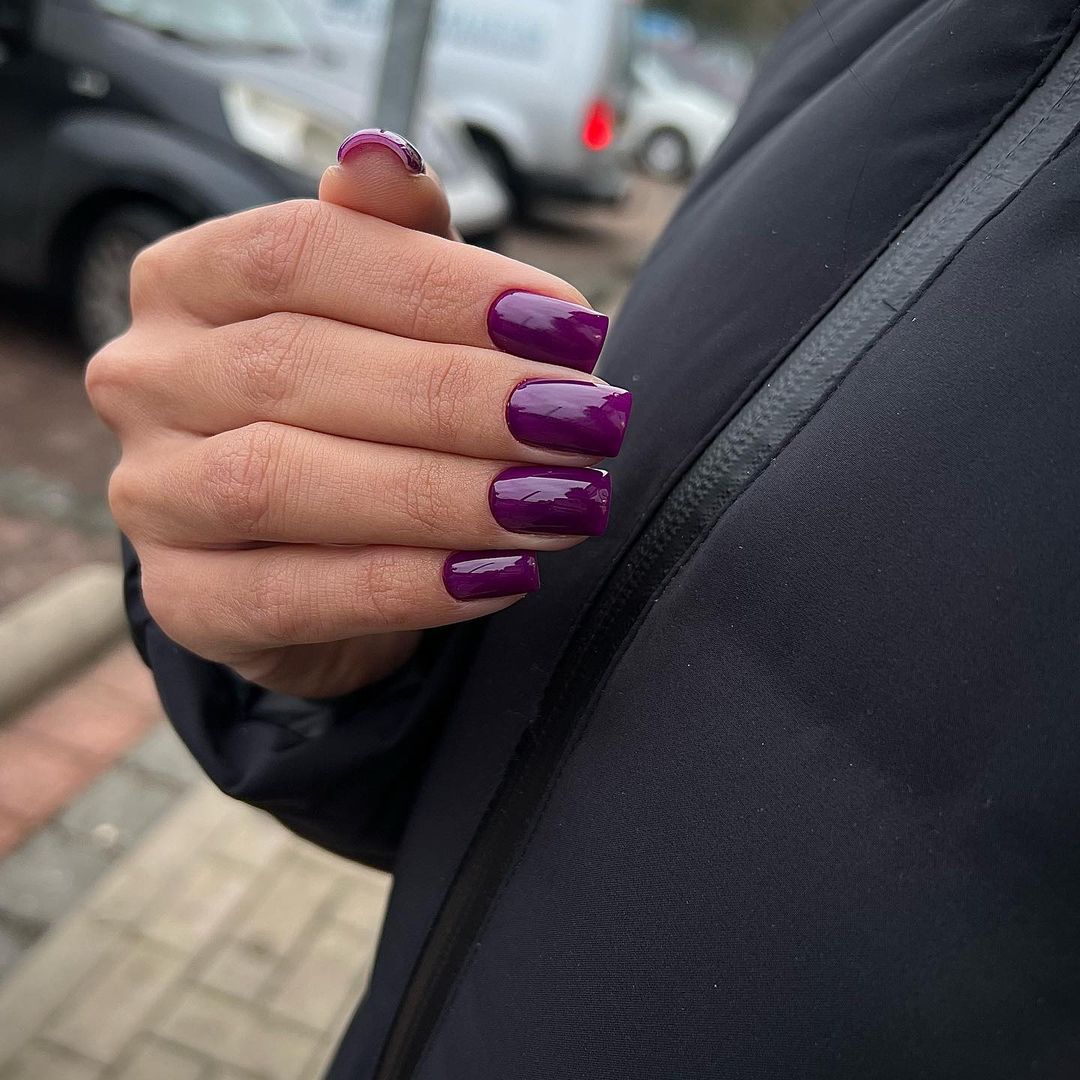
Consumables:
- OPI Nail Polish in “Lincoln Park After Dark”
- Seche Vite dry fast top coat
- Essie Gel Couture in ‘Rock the Runway’
Recommendations:
- Choose high-quality nail polishes to ensure a long-lasting and vibrant finish.
- A quick-drying top coat is essential to maintain the glossy shine and protect the color.
DIY instructions:
- Start with clean, filed nails and apply a base coat.
- Apply two coats of the deep purple polish, allowing each coat to dry thoroughly.
- Finish with a high gloss top coat for a glossy finish.
- For extra durability, reapply the top coat every few days.
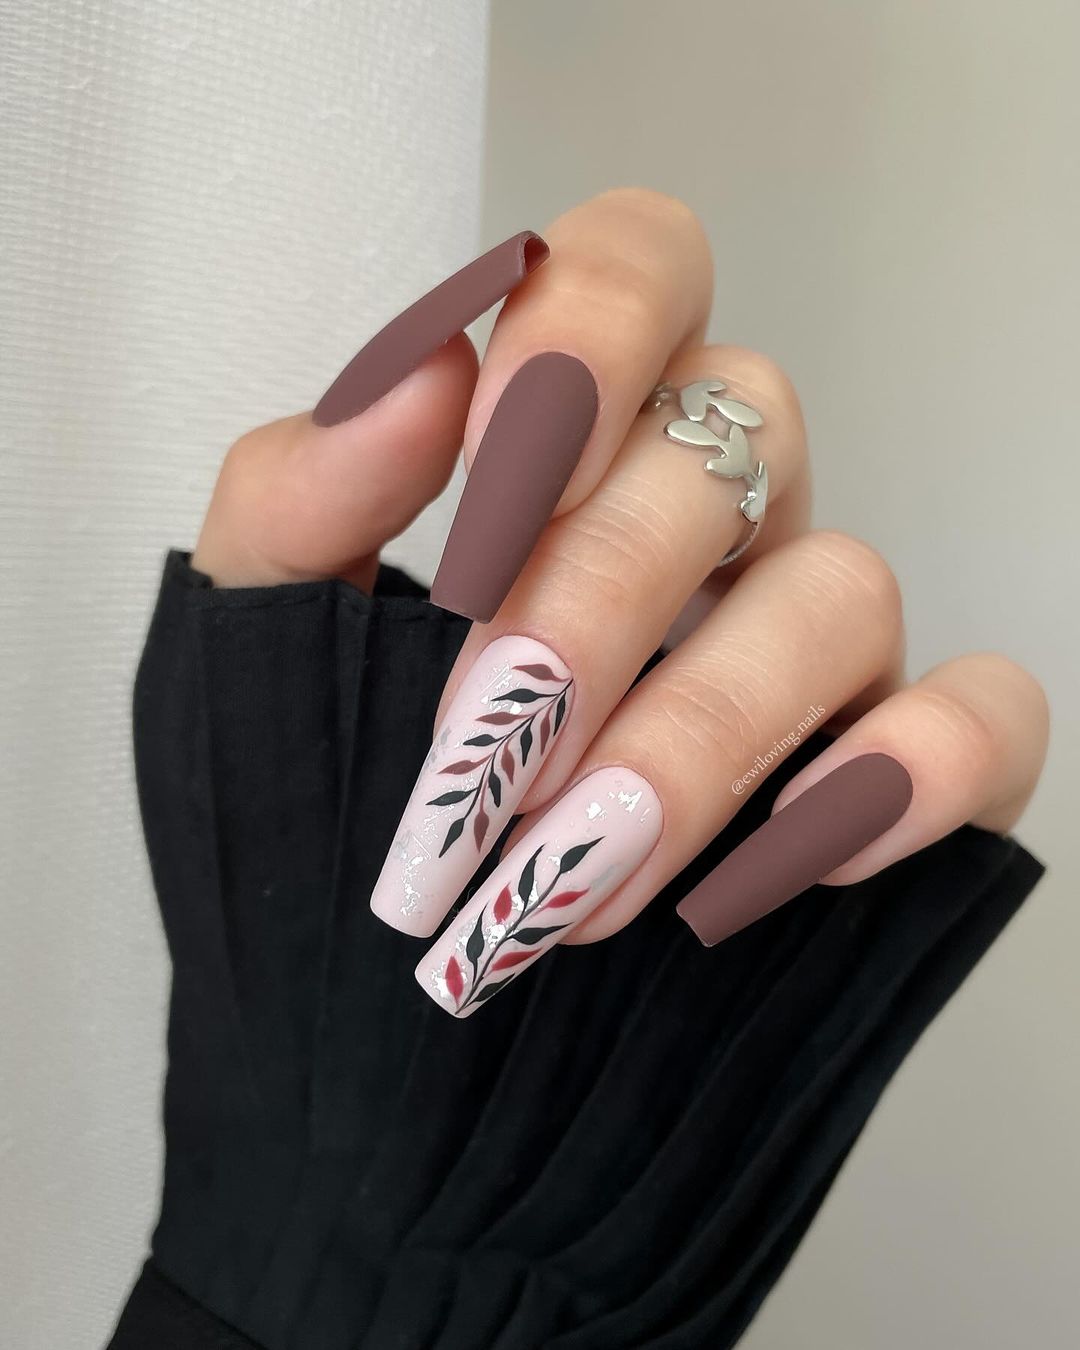
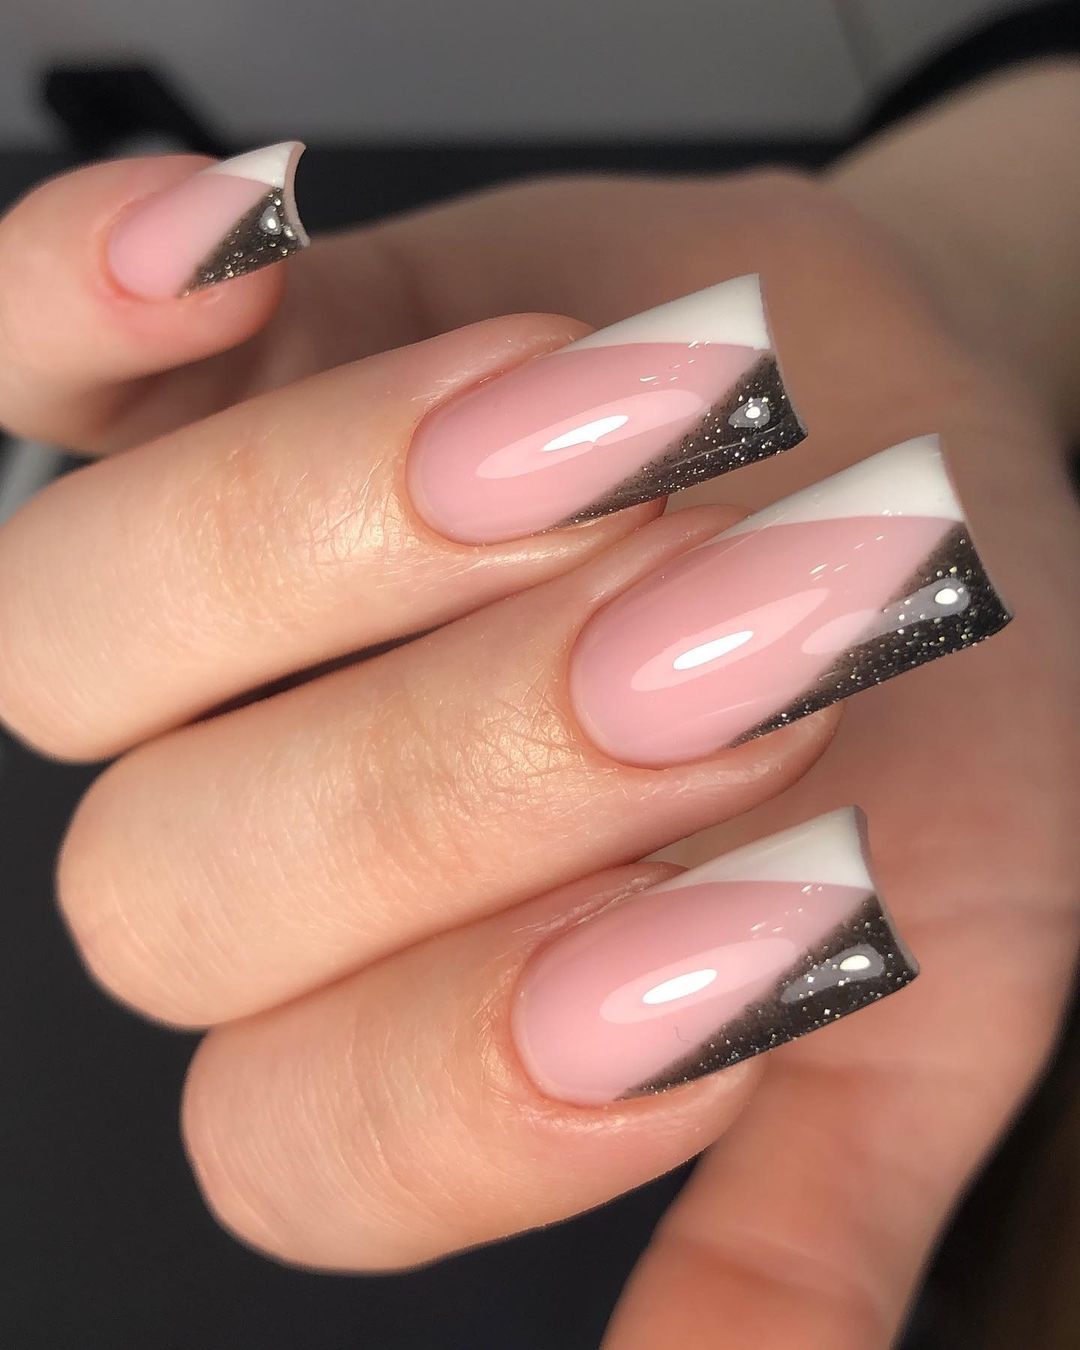
Matte and metallic fusion
Matte nails are a great addition to the usual glossy mani, and you can always mix it up by using a combination of both gloss and matte. This design combines a matte base with intricate metallic leaf patterns and a glitter accent nail, creating a stunning contrast that’s perfect for fall. The almond shape adds to the elegance and sophistication of the overall look.

Consumables:
- Zoya Matte Velvet Lacquer in “Dovima”
- Sally Hansen Miracle Gel in “Game of Chromes”
- Essie nail polish in “Summit of Style”
Recommendations:
- Use a matte velvet lacquer for a smooth, non-shiny finish.
- Use metallic and glitter elements to add dimension and flair.
- Consider an almond shape for a stylish and flattering silhouette.
DIY instructions:
- Start with a base coat to protect your nails.
- Apply two coats of the matte varnish to ensure an even application.
- Use a thin brush to create the leaf patterns with the metallic paint.
- Add the glitter polish to an accent nail for a touch of sparkle.
- Seal everything with a matte top coat to maintain the look.
Vibrant stripes and solid colors
This fun and colorful design features a mix of vibrant stripes and solid colors, perfect for adding a playful touch to your fall nails. The combination of nude, teal and rainbow stripes creates a unique and striking look that is sure to turn heads.
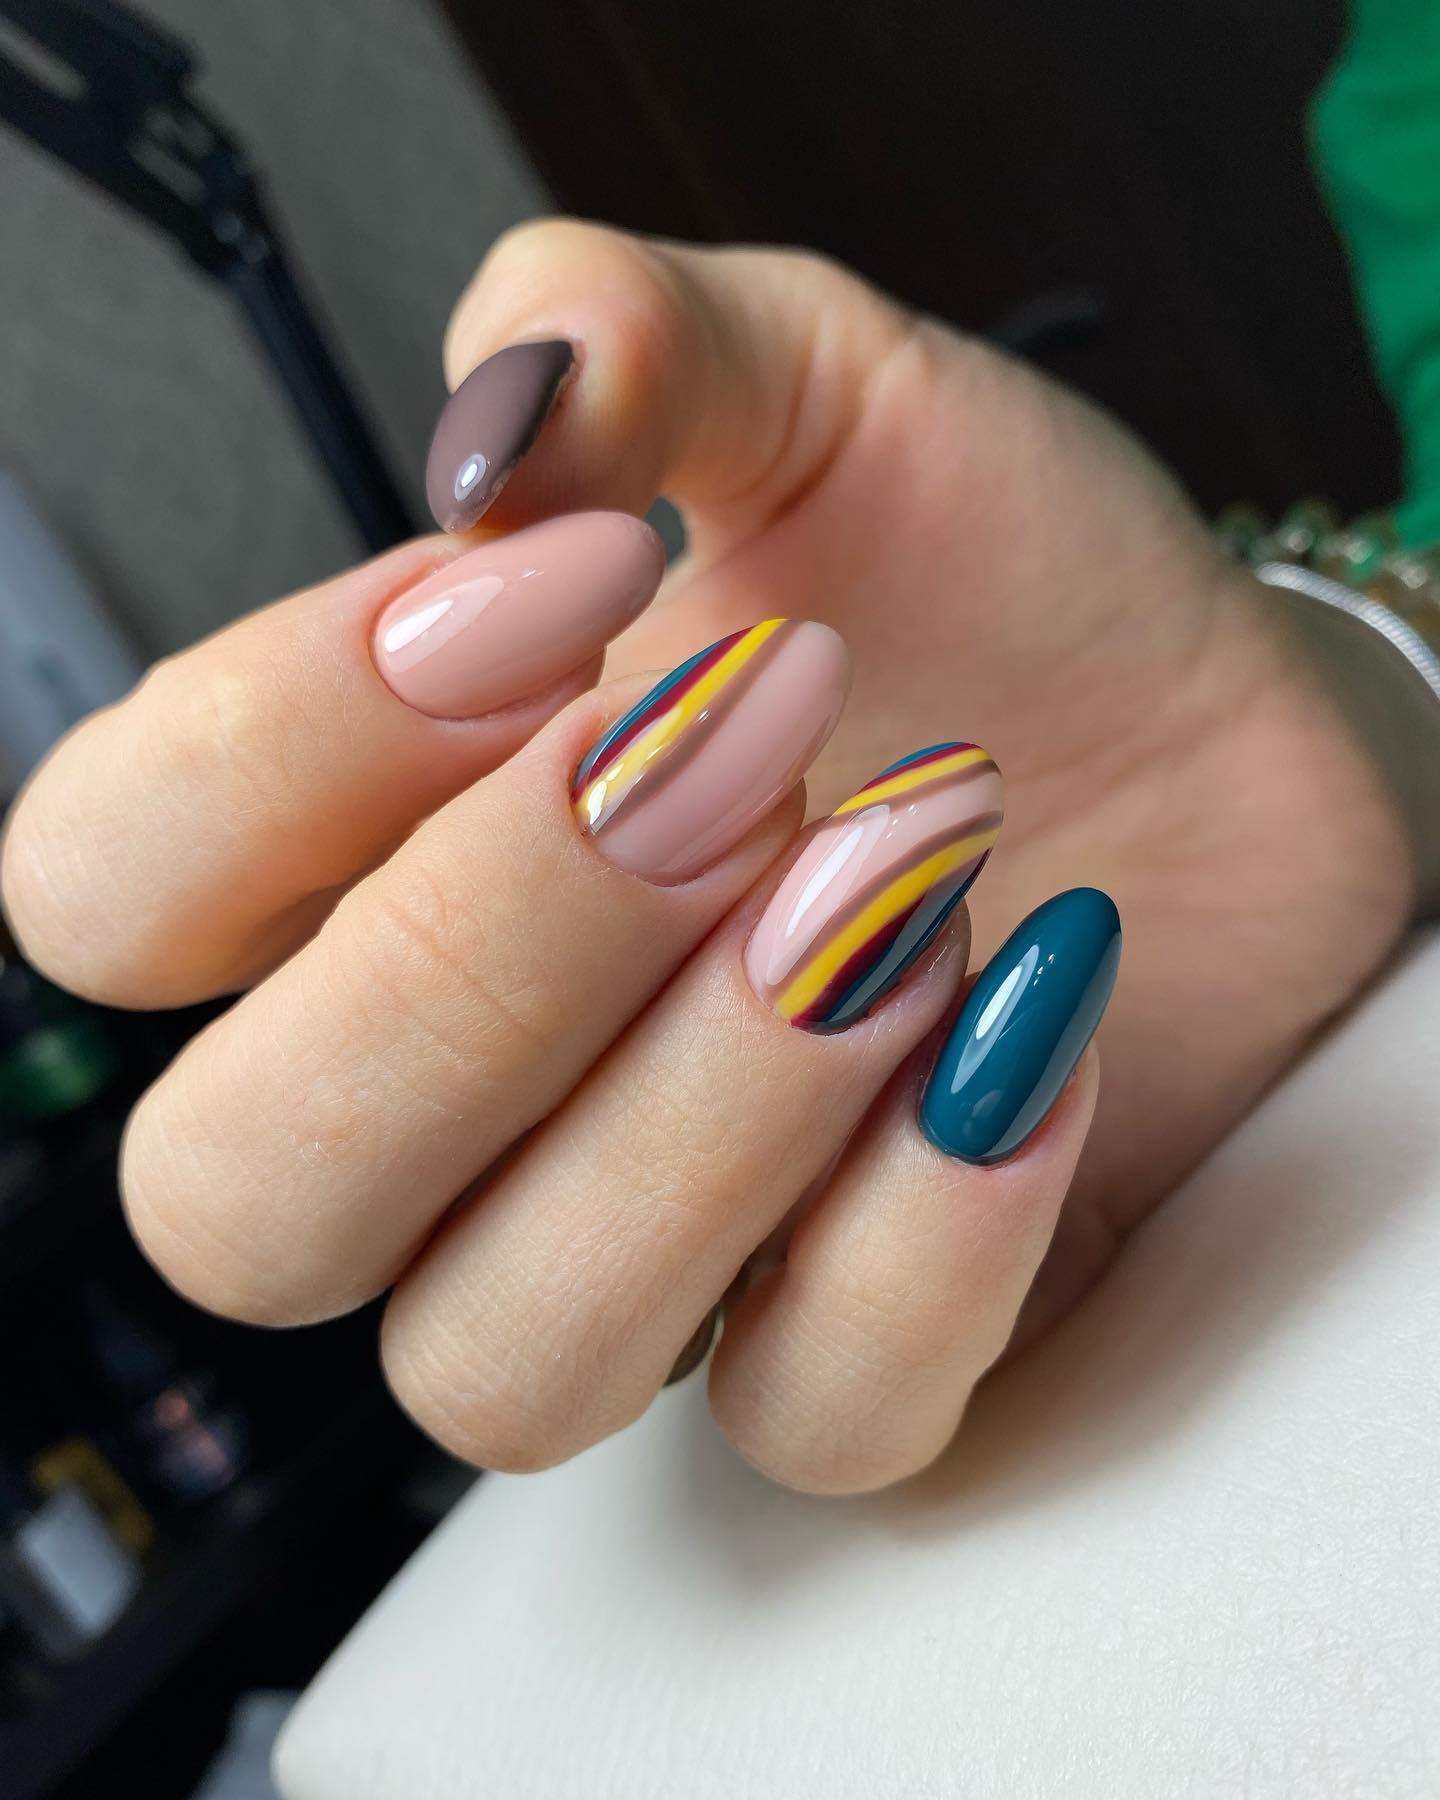
Consumables:
- OPI Nail Polish in “Bare My Soul”
- Essie Nail Polish in “Aruba Blue”
- Striping tape or Nail Art brushes
Recommendations:
- Choose a nude base to make the vibrant colors pop.
- Use striping tape or nail art brushes for precise and clean lines.
- A mix of solid and striped nails adds variety and interest.
DIY instructions:
- Apply a base coat to clean, prepared nails.
- Apply two coats of nude polish to all nails.
- Use striping tape or a nail art brush to create the stripes with the teal nail polish.
- Fill in the stripes with different colors for a rainbow effect.
- Finish with a high gloss top coat to seal and protect your design.
Subtle yellow sheen
For a softer, more subtle look, this yellow glitter design is perfect. The light yellow polish with a fine glitter layer creates a delicate and beautiful manicure that is perfect for every autumn day. The square shape keeps it classic and easy to wear.

Consumables:
- OPI Nail Polish in “Never a Dulles Moment”
- China Glaze nail polish in “Fairy Dust”
- Essie Gel Setter top coat
Recommendations:
- A light yellow base color is perfect for a soft, understated look.
- Fine glitter polish adds a touch of sparkle without being overpowering.
- Keep the nails square for a timeless and versatile shape.
DIY instructions:
- Start with a base coat to protect your nails.
- Apply two coats of the light yellow polish and let each coat dry.
- Apply the fine glitter polish over the yellow base.
- Finish with a gel top coat for extra shine and durability.
- Reapply the top coat every few days to maintain the shine.
Chic Burgundy and hearts
This chic design features a rich burgundy polish paired with a playful heart accent nail. The combination of dark and light shades creates a refined yet fun look. The round shape and glossy finish make it perfect for any occasion.

Consumables:
- OPI Nail Polish in “Malaga Wine”
- Essie nail polish in “ballet slippers”
- Dotting tool or Nail Art Brush
Recommendations:
- Burgundy is a classic autumn color that never goes out of style.
- Use a light pink polish for the heart accents to create contrast.
- A dotting tool or fine brush helps create precise heart shapes.
DIY instructions:
- Apply a base coat to clean, filed nails.
- Paint two coats of burgundy polish on all nails except the accent nails.
- Use the light pink polish and a dotting tool to create heart shapes on the accent nails.
- Finish with a glossy top coat to seal and protect your design.
- Touch up the top coat as necessary to maintain shine.
Elegant Olive Green
This olive green manicure exudes a serene yet bold autumn atmosphere. The glossy finish enhances the deep green hue, making it perfect for the fall season. The square shape adds a touch of sophistication and modernity to this simple yet striking design.

Consumables:
- OPI Nail Polish in “Suzi – The First Lady of Nails”
- Seche Vite dry fast top coat
Recommendations:
- Choose a high-quality olive green polish for a rich and even color.
- A glossy top coat is essential to give the manicure a sleek finish and to extend its durability.
DIY instructions:
- Start with a clean, filed nail and apply a base coat.
- Apply two coats of olive green polish and allow each coat to dry completely.
- Finish with a high-gloss top coat for a shiny, durable finish.
- Reapply the top coat every few days to maintain shine.
Fiery red and leopard print
This manicure combines striking red with a striking leopard print, creating a fun and cool look for autumn. The almond-shaped nails add a flattering and feminine touch to this bold design, perfect for those who like to make a statement.

Consumables:
- Essie nail polish in “Really Red”
- Sally Hansen Insta-Dri Nail Polish in “Black to Black”
- Leopard print nail art brushes or stencils
Recommendations:
- Use a vibrant red polish to ensure the color stands out.
- Nail art brushes or stencils help achieve accurate leopard print designs.
DIY instructions:
- Apply a base coat to your nails.
- Paint two nails with the red polish and three nails with a neutral base.
- Use the black polish and a fine brush or stencils to create the leopard print on the neutral nails.
- Finish with a gloss top coat to seal your design and add shine.
- Reapply the top coat every few days to keep your manicure looking fresh.
Lavender and floral accents
This design features a beautiful lavender base with delicate floral accents and gold foil accents. The soft colors and intricate details make it an ideal choice for a more subtle yet elegant fall manicure. The round nail shape contributes to the overall soft aesthetic.

Consumables:
- OPI Nail Polish in “Do You Lilac It?”
- Essie Nail Polish in “Blanc”
- Gold foil
- Nail art brushes
Recommendations:
- Choose pastel colors for a soft and refined look.
- Use gold foil and detailed brushes to create intricate floral accents.
DIY instructions:
- Start with a base coat on clean nails.
- Paint the nails with two layers of lavender polish.
- Add floral motifs with white lacquer and a fine brush and add gold foil accents.
- Finish with a top coat to protect your design.
- Reapply the top coat as necessary to maintain shine and durability.
Moss green with golden spots
This chic manicure combines a moss green base with subtle gold flecks, creating a nature-inspired look that’s perfect for fall. The short nail length keeps it practical, while the gold accents add a touch of glamour.

Consumables:
- Essie nail polish in “Sew Psyched”
- Gold foil or glitter
- Essie Gel Setter top coat
Recommendations:
- Choose a moss green paint for a unique autumn color.
- Use gold foil or glitter to add a subtle yet stylish touch.
DIY instructions:
- Apply a base coat to your nails.
- Paint two coats of moss green varnish and let them dry.
- Add gold flecks with foil or glitter and press them gently onto the nail.
- Seal with a top coat to protect and add shine.
- Maintain your manicure by reapplying the top coat every few days.
Marbled neutral colors
This design has a marble effect in neutral tones, creating a sophisticated and trendy look. The almond-shaped nails add elegance, making this a perfect choice for a chic fall manicure.

Consumables:
- OPI Nail Polish in “Taupe-less Beach”
- Essie nail polish in “Merino Cool”
- Small Nail Art Brushes
Recommendations:
- Use neutral tones to achieve a stylish marble effect.
- Nail art brushes are essential for creating the marbled look.
DIY instructions:
- Start with a base coat on clean, shaped nails.
- Apply a base color of taupe and let it dry.
- Use a fine brush to add swirls of the second color and blend gently to create a marble effect.
- Finish with a top coat to protect your design.
- Reapply the top coat regularly to keep your nails looking fresh and polished.


Namie O, a talented writer at Willtiptop, conveys her passion for fashion and beauty in every word she writes. With a keen eye for detail and a deep insight into the latest trends, Namie’s articles and insights captivate readers and provide them with valuable knowledge and inspiration. Through her engaging and informative writing style, Namie aims to empower individuals to explore their style, experiment with beauty techniques, and embrace their unique sense of self.