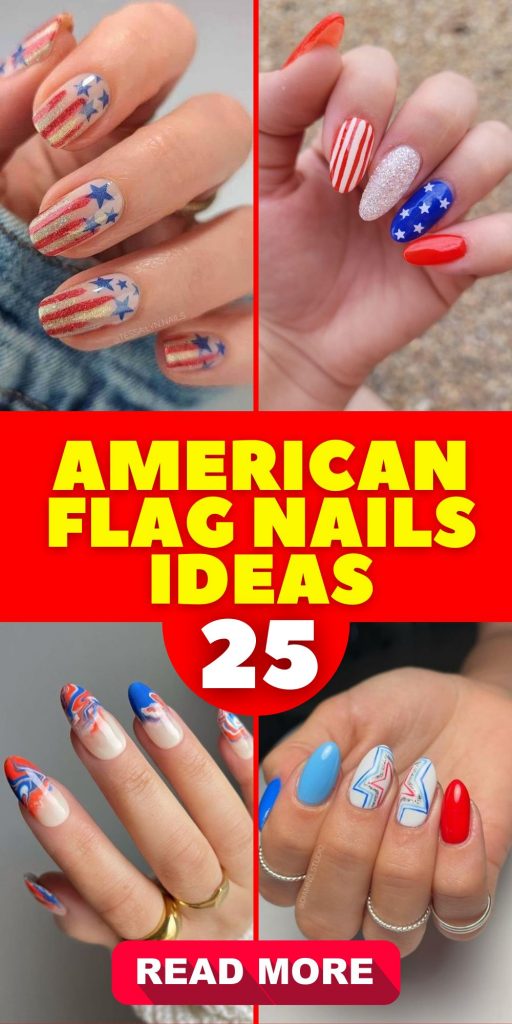
Stars, Stripes, and Style: Mastering the Art of American Flag Nail Designs 25 Ideas
Have you ever wondered how you can have a piece of American spirit at your fingertips? Whether you’re preparing for the 4th of July or simply showing your love for the USA, American flag nails have become a dynamic canvas for artistic expression and national pride. In this article, we dive deep into several designs that not only celebrate American heritage, but also showcase your personal style. From simple French tips with a pop of red, white and blue to elaborate acrylic art, let’s explore how these patriotic nails can make every day feel like Independence Day.
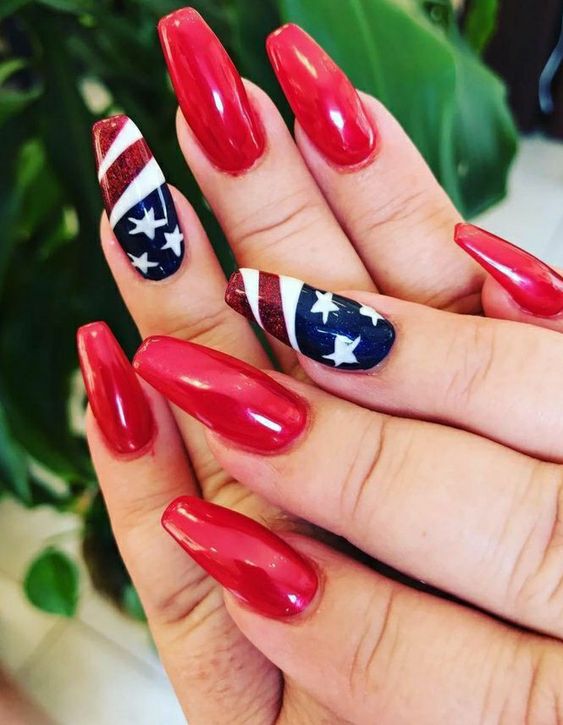
Classic stripes and stars
The first design features the quintessential American flag nails with a glossy finish that catches the eye. The nails alternate between precise horizontal red and white stripes and a deep blue field decorated with white stars. This manicure is an example of a simple yet elegant style that pays tribute to the flag in a very traditional way.
Materials needed for this manicure
- Red paint: OPI’s Big Apple Red
- White polish: Essie’s Blanc
- Blue paint: Pacific Blue by Sally Hansen
- Star stickers or a fine art brush for freehand stars
- Top coat for a glossy finish: Seche Vite Dry Fast Top Coat
DIY guide to achieve this look
Start by applying a base coat to protect your nails. Paint the thumb, middle and pinky fingers with red paint and add white stripes with a thin brush or strip tape. For the blue field, apply two layers of blue varnish on the index and ring fingers and then carefully place the star stickers or paint the stars by hand with white varnish. Seal everything with a glossy top coat for durability and shine.
Modern matte elegance
The second image shows a modern interpretation of American flag nails in a matte finish, offering a sophisticated and aesthetic appeal. The use of black matte paint as a background for the blue and red parts adds a contemporary touch, making this design not only patriotic but also fashionable.
List of essential products
- Matte black paint: China Glaze’s Liquid Leather Matte
- Matte red polish: Zoya’s Matte Velvet Red
- Matte blue paint: OPI’s Russian Navy Matte
- Matte top coat: Essie’s Matte About You
- Fine detailing brush for precision
Steps to create this matte look
Start with a clean, polished nail surface. Apply the matte black polish as a base to all nails. For the flag design, use a fine brush to add matte red and blue polishes in the shape of the American flag or as abstract blocks of color for a minimalist look. Finish with a matte top coat to improve texture and prevent chipping.
Sparkling freedom tips
This design creates a festive atmosphere with shimmering red and blue ombre over white tips, perfect for any Fourth of July party. It’s a playful yet cute approach that combines the traditional colors in a fun, youthful art style.
Recommended products and accessories
- White polish: White On by Sally Hansen
- Red glitter polish: ORLY’s Star Spangled
- Blue glitter polish: Dorothy from China Glaze Who?
- Sponge for ombre effect
- High-gloss top coat: INM Out The Door
Guide to this sparkling ombre effect
Paint your nails with two layers of white polish for a sturdy base. Once dry, use a sponge to apply the red and blue glitter polishes, lightly blending them where they meet in the center to create the ombre effect. Finish with a layer of high-shine top coat to seal in the glitter and add a brilliant shine.
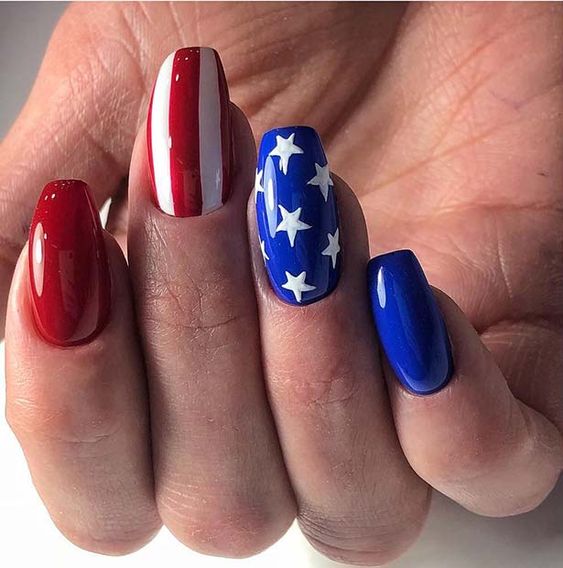
Classic stars and stripes
The quintessential American flag nails often feature bold stripes and pristine stars, embodying the essence of the American flag. This manicure uses a glossy red, white and blue palette to reflect our nation’s flag with a sophisticated touch. The precise alignment of the stripes and perfectly formed stars demonstrate the careful craftsmanship required. The use of a natural almond shaped nail enhances the elegance of the design, making it both a patriotic and stylish choice.
Materials list
- Base Coat: OPI natural nail base coat
- Red polish: Essie “True red”
- White Polish: Sally Hansen “White On”
- Blue Polish: China Glaze “Frostbite”
- Top coat: Seche Vite Dry Fast Topcoat
- Detailing Brush: Winstonia Fine Line Nail Art Brush
- Star stickers or stencils (optional)
DIY instructions
Start by applying a base coat to protect your nails. Paint your nails in alternating colors of red and white. For the blue part, choose your thumb or ring finger as an accent nail. Use the fine brush or a stencil to create white stars on the blue base. Allow each coat to dry completely before applying the next to avoid staining. Finish with a high gloss top coat to seal the design and add a vibrant finish.
Modern minimalist flag design
For those who prefer a more subtle nod to patriotic themes, a minimalist approach can be refreshingly stylish. This design features a single flag-inspired stripe over a translucent natural base, offering a chic and understated look. The use of natural tones mixed with thin stripes of red and blue creates a contemporary twist on the traditional flag colors, making it suitable for everyday use.
Materials list
- Base layer: CND Stickey base layer
- Pure pink polish: Zoya “Bela”
- Red strip tape
- Blue strip tape
- Top coat: Seche Vite Dry Fast Topcoat
DIY instructions
Apply a base coat to protect your nails, then apply two coats of clear pink polish for a clean, natural look. Once dry, apply thin striping tape over each nail to create the red and blue lines. Seal everything with a top coat for a smooth, durable finish.
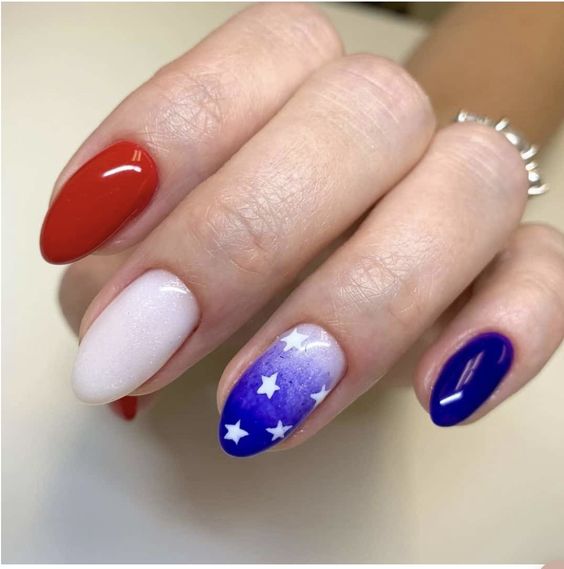
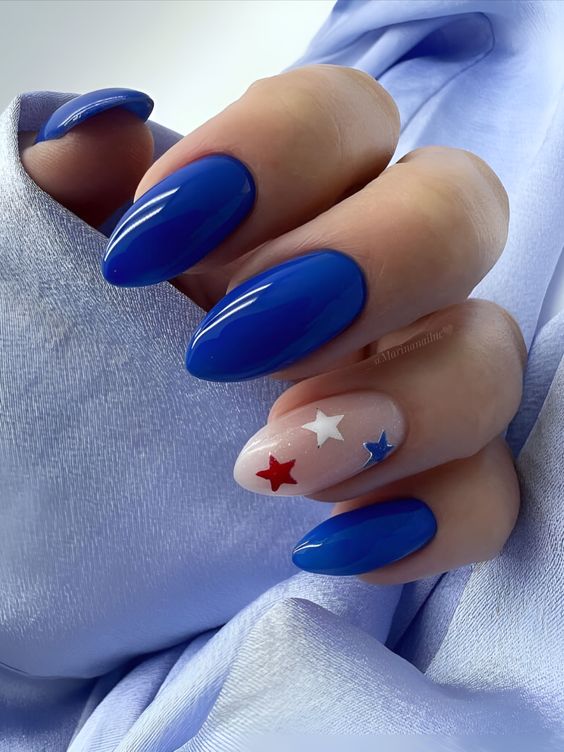
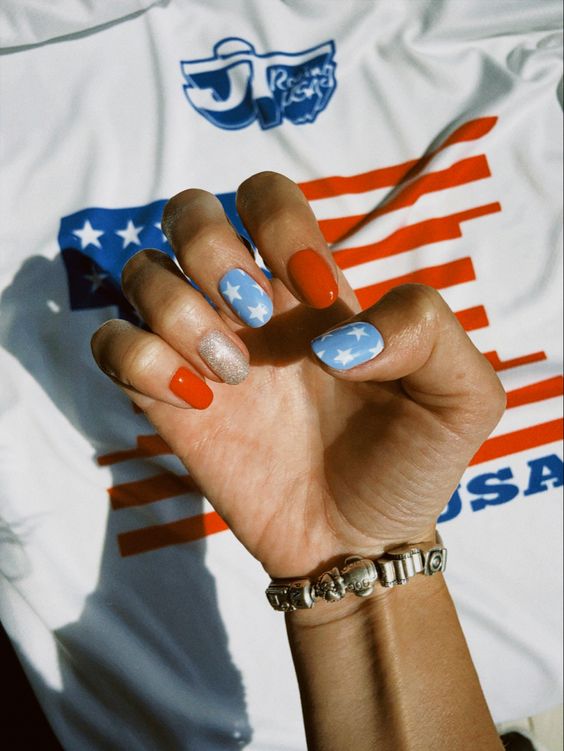
A gradient of patriotism
The design in this image gracefully captures the essence of American flag nails through a beautiful gradient effect. The nail starts with a sparkling white at the base and fades to a rich blue topped with pristine white stars, creating a heavenly look. This manicure is ideal for those who appreciate a subtle nod to patriotism combined with a French flair.
Essential products for this design
- White polish: Essie’s Marshmallow
- Blue polish: CND’s Blue Rapture
- Star stickers or white paint for stars
- Gradient sponge for a smooth transition
- Top layer for a durable finish: INM Out The Door
Creating the gradient effect
Apply a base coat to protect your nails. Paint the entire nail with the white polish as a base. Once dry, use a gradient sponge to apply the blue polish to the tip and blend out towards the center. Stick star stickers or dab small stars with a detail brush. Finish with a high-gloss top coat for a durable, shiny look.
Subtle and stylish
This image presents a minimalist approach with a bright, natural design base, accented by small red and blue stars. This design is perfect for anyone looking for simple and cute American flag nails that aren’t overwhelming, yet festive and suitable for occasions like the 4th of July.
List of consumables
- Clear coat or base: OPI’s Natural Nail Base Coat
- Red and blue nail art pens for precise star shapes
- Top Coat: Seche Vite Dry Fast Top Coat to seal the design
How to achieve this minimalist design
Start with a clean, prepared nail surface and apply a base coat. Once the base is dry, use nail art pens to draw small stars in red and blue on one or two accent nails. Apply a top coat to protect the design and add a glossy finish.
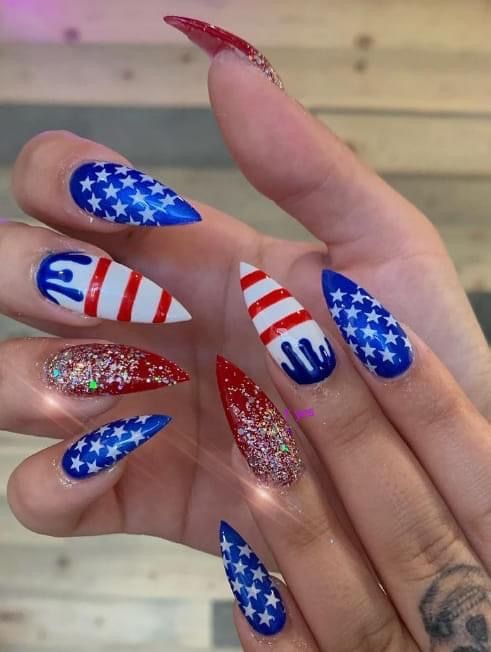
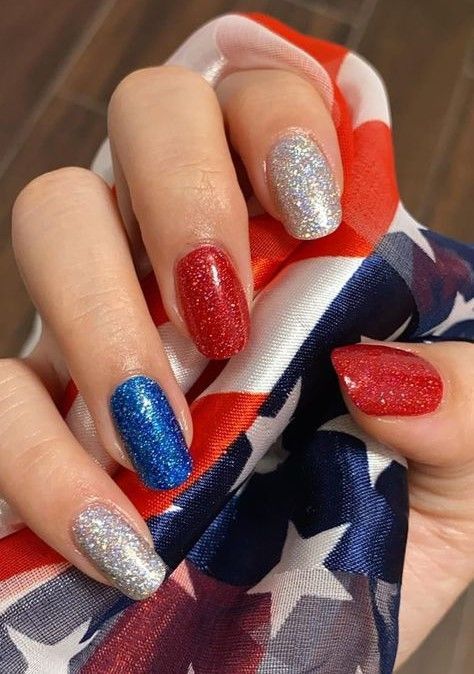
Glittering patriotic splendor
This image is all about celebration, with nails painted in vibrant red, dazzling blue and shimmering silver glitter. Perfect for 4th of July events, it combines cute and aesthetic atmosphere that shine brightly during fireworks and festivities.
Products needed
- Red glitter polish: ORLY’s Star Spangled
- Blue glitter polish: Dorothy from China Glaze Who?
- Silver glitter polish: Essie’s Set in Stones
- Top coat for sealing and shine
Step-by-step guide
Paint your nails with two coats of red on the thumb and little finger, blue on the ring finger and silver glitter on the middle and index fingers. Allow each coat to dry thoroughly before applying the next to avoid staining. Finish with a high-gloss top coat for extra shine and protection.
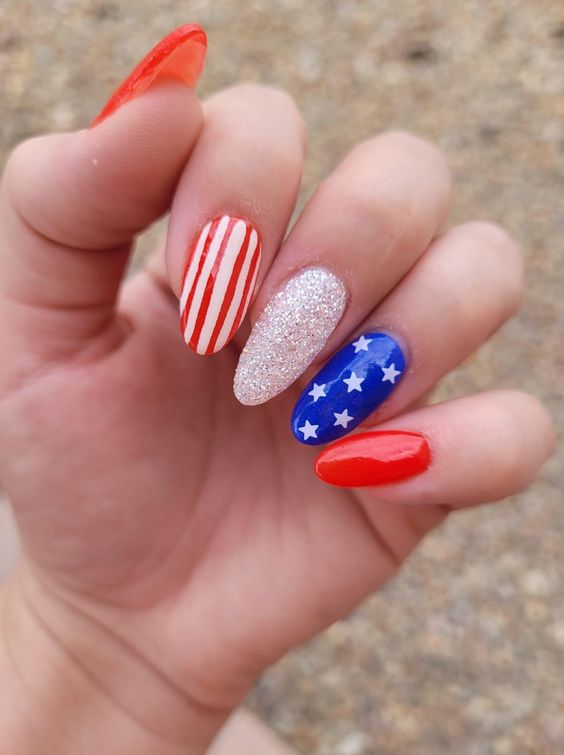
Striped and star sparkle
The ninth image shows a sophisticated take on the classic American flag nails, with alternating red and white stripes and a striking blue and white star design. This look is sophisticated yet impressive, perfect for expressing patriotism with a chic twist.
Essential for this look
- White polish: Essie’s Blanc
- Red polish: Red My Lips by Sally Hansen
- Blue polish: OPI’s Euro
- Striping tape for precise lines
- Small star stickers
Creating this look
Use striping tape to create clean lines for the red and white stripes. Apply the tape after the white base has dried and then paint with red. For the star nail, apply a blue base and use star stickers or a fine brush to create white stars. Finish with a clear top coat for longevity and shine.
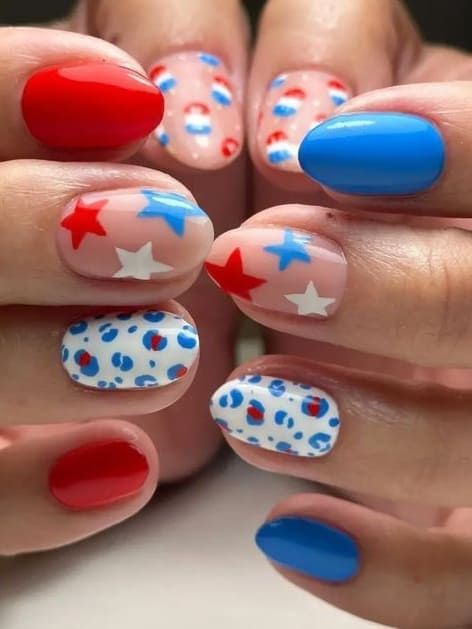
Playful summer vibes
The final image shows a playful and cute approach to American flag nails, with different patterns and styles on each nail, including stripes, polka dots and floral motifs. This manicure is ideal for lovers of a fun and eclectic style, perfect for summer picnics and casual outings.

Materials required
- Different colored polishes: red, white, blue and more
- Dot tools for dots
- Fine brushes for detailed art
- Top coat: Essie’s Good To Go
This is how you create this playful look
Experiment with different designs on each nail. Use a fine brush for detailed patterns such as stripes and flowers, and the point tools for dots. Apply a base color and place your designs on top. Finish with a top coat to ensure your playful manicure lasts!
Waves of freedom
This nail design captures the fluid and dynamic spirit of the American flag with wavy lines in red, white and blue, running across a brilliant white base. It’s an artistic representation of freedom, perfect for Designs’ 4th of July celebration.
Materials needed for this manicure
- White paint: OPI’s Alpine Snow
- Red polish: Essie’s Real Red
- Blue polish: Blue Me Away by Sally Hansen
- Detailing brush for wavy lines
- Top coat: Seche Vite Dry Fast Topcoat
DIY technique to achieve wavy lines
Start with a base of white polish for a clean canvas. Use a detail brush to draw wavy lines with blue and red polish so that each color flows smoothly into the next. Finish with a quick-drying top coat to seal the design and improve durability.
Star-spangled playfulness
Here the nails show a playful arrangement of stars and dots, where the traditional colors red, white and blue merge into a cheerful pattern. This design combines simplicity with a festive touch, ideal for a simple yet cute look.
List of consumables
- White polish: Essie’s Blanc
- Red paint: CND’s Wildfire
- Blue polish: OPI’s Euro
- Dotting tool for precise dots and stars
- Topcoat for a glossy finish
Step-by-step guide to making creations
Apply a base coat of white nail polish to all nails. Once dry, use a dotting tool to apply blue and red stars and dots randomly across the nails, creating a playful and casual atmosphere. Seal with a gloss top coat to prevent flaking and add shine.
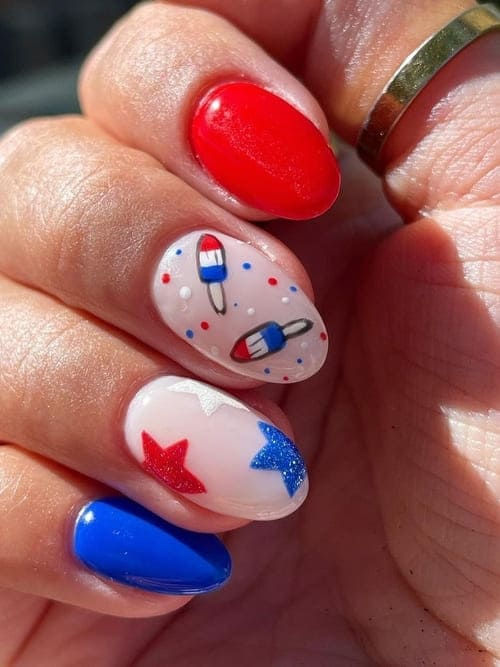
Patriotic pills and stars
This design features an unconventional mix of capsule shapes and stars on a clear base, incorporating red, white and blue in a new way. It’s a unique twist on American flag nails, suitable for someone looking for an aesthetic and western-inspired theme.
Required products
- Clear polish: Sally Hansen’s Hard as Nails
- Nail art pens: for detailed capsule and star shapes
- Top layer: INM Out The Door
Create this unique look
Start with a clear coat as a base. Use nail art pens to draw capsule shapes and stars in patriotic colors. This requires a steady hand and a little creativity. Finish with a top coat to ensure the design will last throughout your Independence Day celebrations.
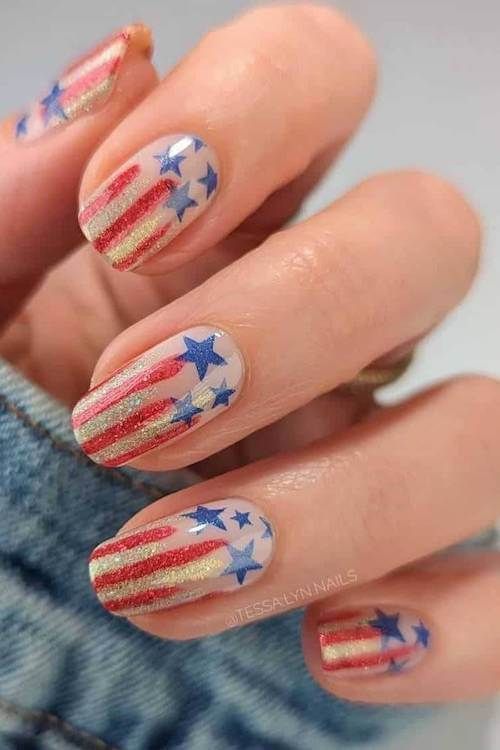
Striped elegance
This image shows a sophisticated approach to the flag theme with red and white stripes with glitter, complemented by blue stars on a white base. It’s an elegant yet festive choice that combines tradition with a touch of glamour.
Essential for this look
- White glitter polish: Essie’s Set in Stone
- Red paint: OPI’s Big Apple Red
- Blue polish: China Glaze’s Frostbite
- Striping tape for precise lines
- Star stickers
How to perfect this design
Use striping tape to achieve precise, glitter-infused red and white stripes. Apply a white glitter polish as a base and alternate with red stripes. For the accent nail, use a white base and apply blue nail polish for stars. A top coat adds shine and durability to this intricate design.
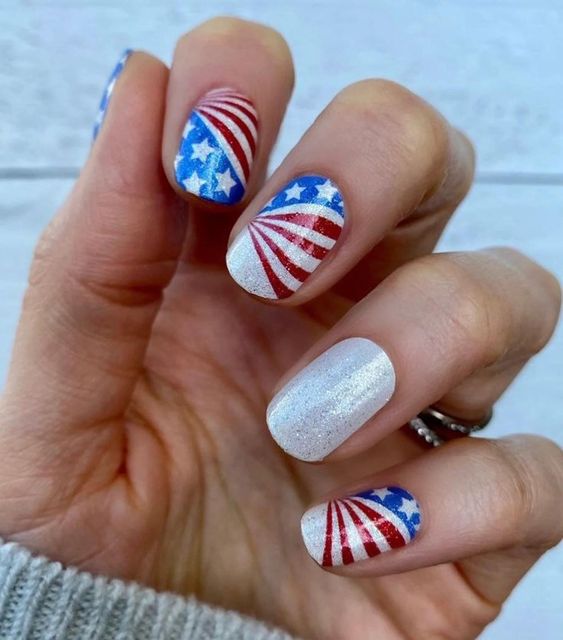
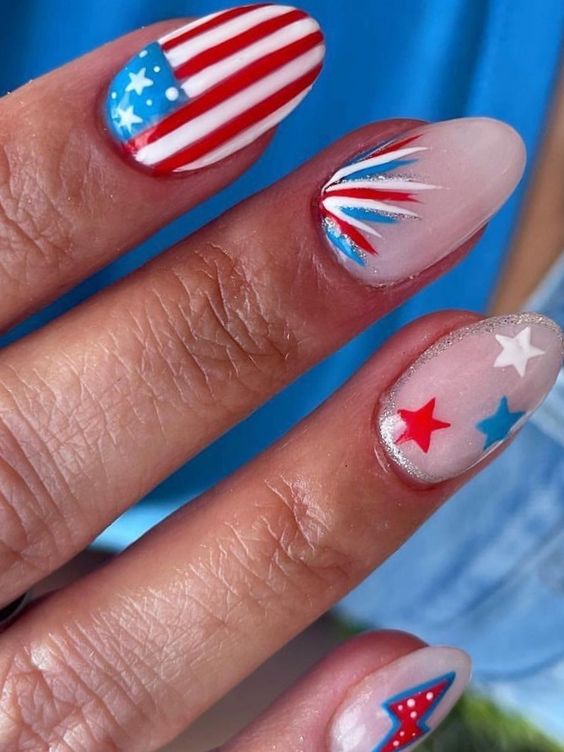
Festive variation
This nail design celebrates a variety of patterns, including waves, stars and stripes, using the classic red, white and blue palette. It’s a bold and festive way to show patriotism, perfect for 4th of July celebrations or any day when you want to feel especially American.

Products and techniques
- White paint: OPI’s Alpine Snow
- Red polish: Essie’s Geranium
- Blue paint: Pacific Blue by Sally Hansen
- Detailing brushes and striping tape for intricate patterns
- Top layer: Seche Vite for a durable finish
Creating this festive design
Paint each nail with a white base. Use striping tape and detail brushes to create varied designs on each nail: stripes, waves and stars. This is an opportunity to be creative and combine different techniques. Finish with a top coat to protect and secure your masterpiece.
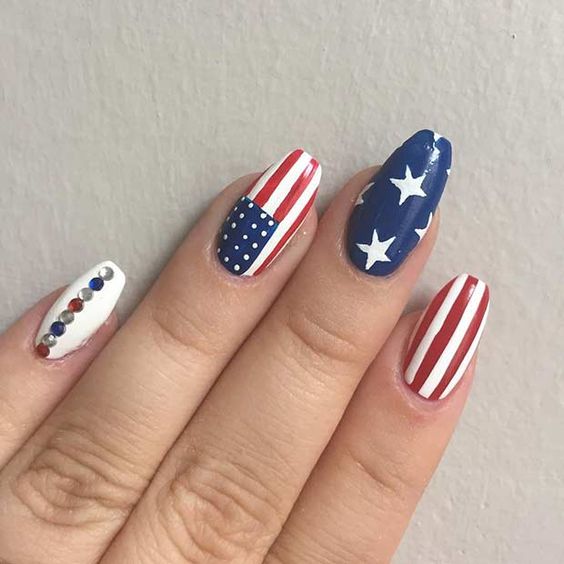
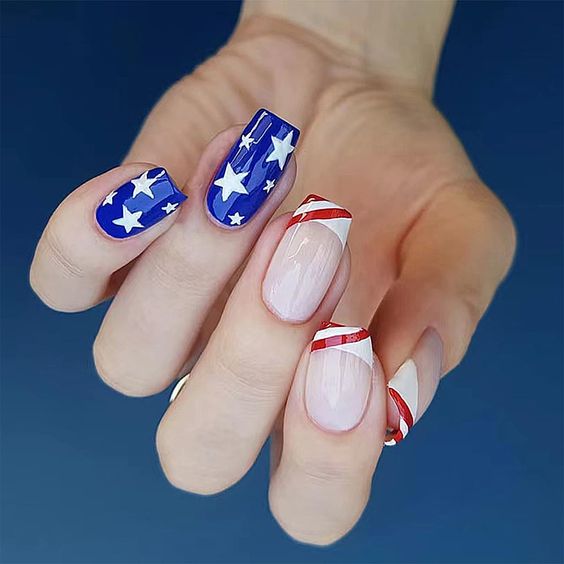
Clean and stylish stripes and stars
This nail design features a chic interpretation of the American flag, with clear and bright stripes on one nail and a constellation on a blue background on the other. The look is sophisticated yet bold, perfect for showing patriotism with a modern twist.
Materials needed for this manicure
- White polish: Essie’s Blanc
- Red paint: OPI’s Big Apple Red
- Blue paint: Pacific Blue by Sally Hansen
- Star stickers or a fine art brush for freehand stars
- Top coat for a glossy finish: Seche Vite Dry Fast Top Coat
DIY guide to achieve this look
Start by applying a base coat to protect your nails. Paint the thumb and little finger in vibrant red. For the striped nail, use white as a base and carefully apply red stripes with tape or a thin brush. Paint a blue base on the ring finger and add star stickers or manually paint white stars. Seal with a gloss top coat for durability and shine.
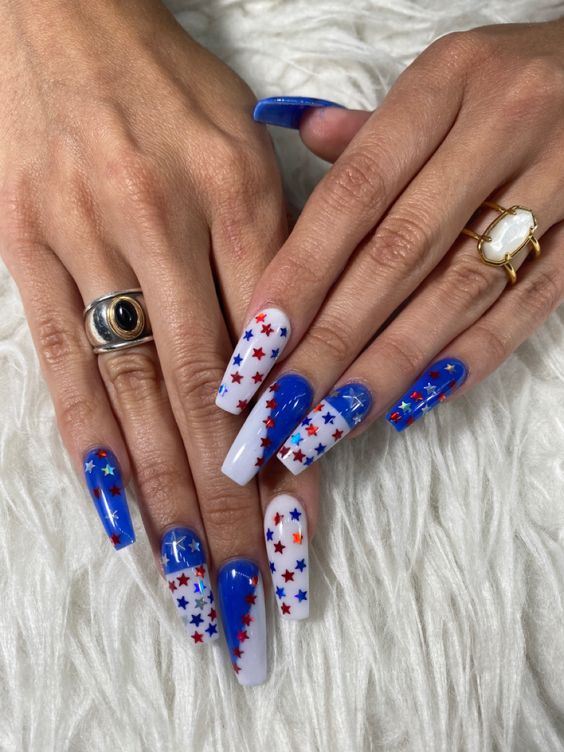
Playful patterns meet patriotic colors
This design combines solid colors with playful star patterns on a light base, creating a fun and youthful aesthetic. The combination of red, blue and white is traditional, but the version is fresh and trendy, suitable for both casual and festive occasions.
List of consumables
- Light base coat: OPI’s Put it in Neutral
- Red polish: China Glaze’s Red-Y to Rave
- Blue polish: Essie’s Butler please
- White polish for stars: White On by Sally Hansen
- Top layer: INM Out The Door
Steps to create this look
Apply a light base coat to all nails. For the solid colored nails, apply two layers of red or blue nail polish. Use a fine brush to draw stars and additional patterns on the accent nails with white nail polish. Finish with a top coat to improve the longevity and shine of the design.
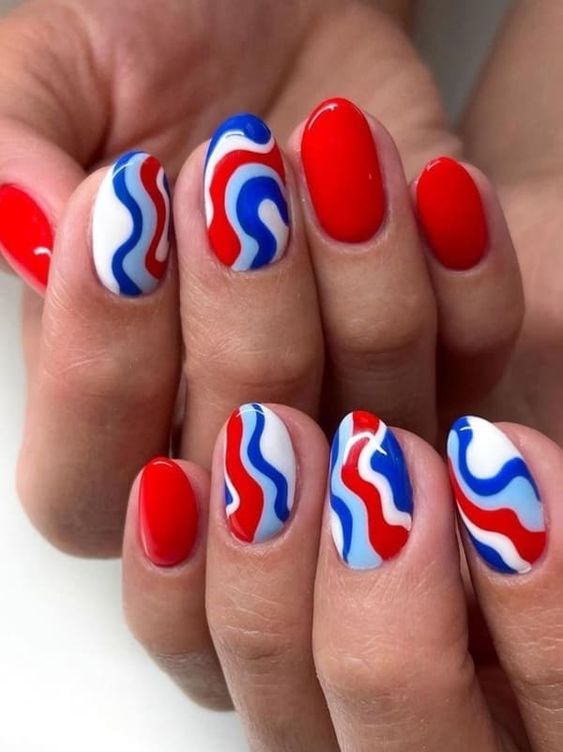
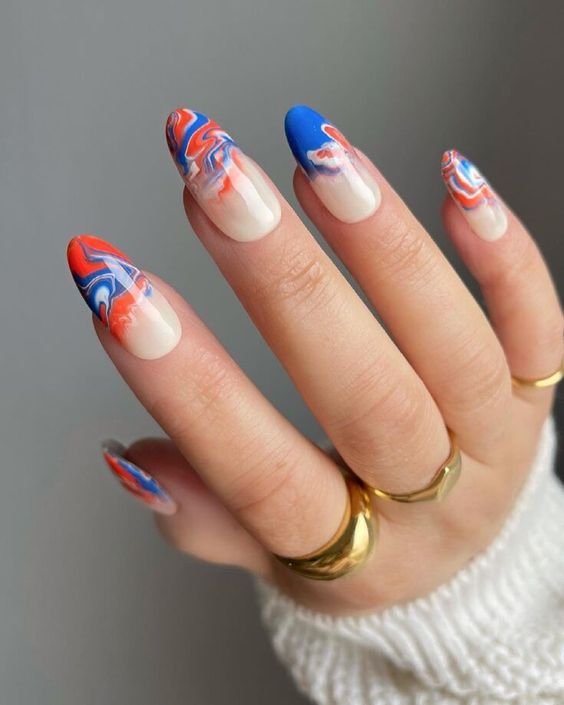
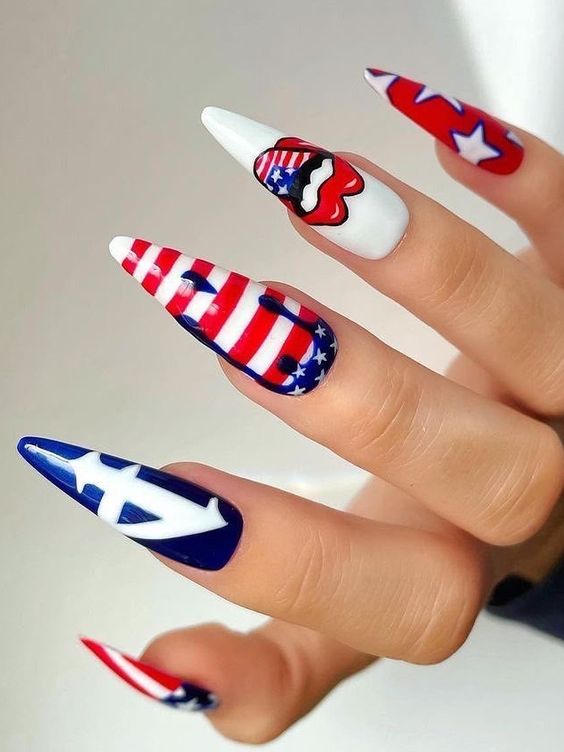
Abstract artistic expression
This design shows an abstract approach to the American flag with swirls of red, white and blue that mimic the fluidity of a waving flag. It is an artistic representation, perfect for those who like to combine fashion and art on their nails.
Required products
- White paint: OPI’s Alpine Snow
- Red polish: Essie’s Real Red
- Blue polish: Blue My Mind by Sally Hansen
- Detailing brushes for abstract lines
- Top coat: Seche Vite for a durable glossy finish
Create this abstract design
Start with a white base on each nail. Use detail brushes to apply swirls of red and blue to create a flowing, abstract pattern that reflects the movement of the flag. Each nail can be unique and add a personal touch to the design. Seal with a top coat for durability and shine.
Glitter and glamor on Independence Day
This nail set combines glitter textures with bold solid colors to create a festive and glamorous look. Using glitter adds a festive sparkle, ideal for Independence Day events or any day you want to shine.
Essential for this look
- Red paint: OPI’s Big Apple Red
- Blue polish with stars: Sally Hansen’s Starry Sapphire
- Silver glitter polish: Essie’s Set in Stones
- Striping tape for clean lines
- Topcoat for sealing and extra shine
How to perfect this glitter design
Apply solid red polish to some nails and blue with star effects to others. Use silver glitter polish as an accent nail or to add details to other designs. Use striping tape to ensure clean lines for geometric shapes or stripes. Finish with a top coat to ensure the glitter stays in place and enhances the overall sparkle.
Classic and clean patriotic design
This design offers a classic take on American flag nails, with neatly painted stripes and a clear base decorated with stars. It’s a sleek and elegant look, perfect for those who prefer a subtle yet patriotic manicure.
Materials required
- Clear Polish: OPI’s Natural Nail Base Coat
- Red polish: Essie’s Real Red
- Blue polish: China Glaze’s Frostbite
- White polish: Sally Hansen’s White On for stars and stripes
- Top layer: Seche Vite for a durable finish
Create this classic look
Start with a clear base on all nails. On selected nails, use red and white polish to create sleek stripes using striping tape. Apply a blue base to one or two accent nails and use white nail polish to manually add stars. Finish with a top coat to ensure a smooth, durable finish and add a glossy shine.
Bold and graphic
This nail design pushes the boundaries of traditional American flag nails with sharp, graphic patterns and a creative mix of the red, white and blue palette. Every nail tells a story, from stripes to stars, all encased in a glossy finish that demands attention.
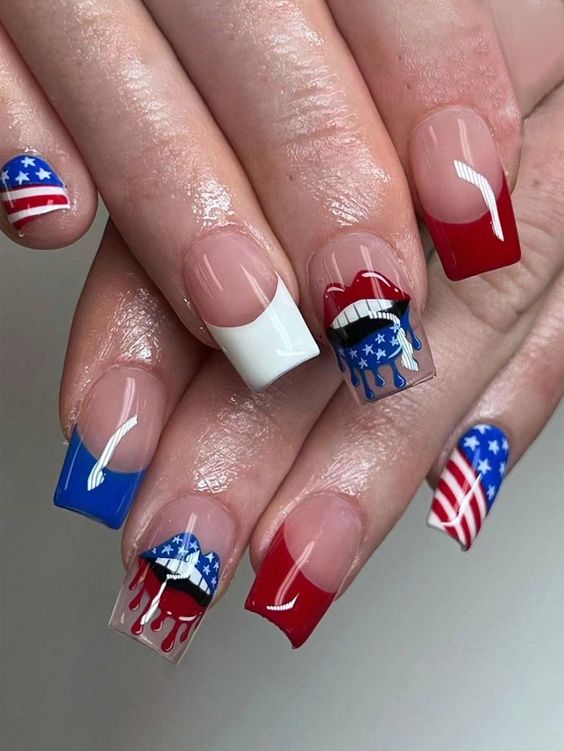
Materials needed for this manicure
- White paint: OPI’s Alpine Snow
- Red polish: Essie’s Real Red
- Blue paint: Pacific Blue by Sally Hansen
- Detailing brush for sharp lines and stars
- Top coat for a glossy finish: Seche Vite Dry Fast Top Coat
DIY guide to achieve this look
Start with a base coat to protect your nails. Use the white polish as a base for the striped nails and add red stripes with a fine brush or striping tape for precision. For the star nails, start with a blue base and add white stars with a detail brush. Seal all designs with a gloss top coat to improve durability and shine.
Geometric elegance
This design is a sophisticated mix of sharp geometric patterns and bright colors, making a modern statement. Perfect for anyone who wants to celebrate American holidays with a contemporary twist on American flag nails.
List of consumables
- White polish: Essie’s Blanc
- Red paint: CND’s Wildfire
- Blue polish: OPI’s Euro
- Striping tape for clean, geometric lines
- Top layer: INM Out The Door
Steps to create this geometric look
Apply a white polish as a base to all nails. Use striping tape to design different geometric patterns, then fill in the shapes as desired with red or blue paint. Carefully remove the tape and allow to dry before applying a top coat for a sleek finish.
Sparkling stars and stripes
Here, the nails feature a lavish use of glitter and rhinestones to accentuate the traditional American flag nails, creating a glamorous and festive look. It’s ideal for holidays or any occasion that calls for a little extra sparkle.
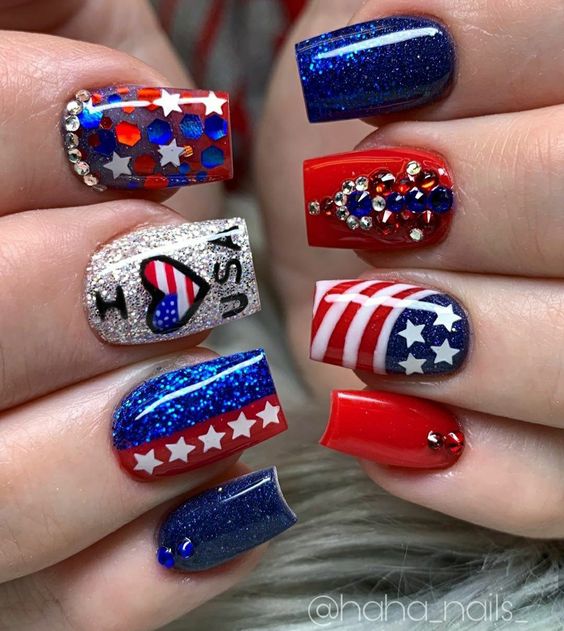
Required products
- Red glitter polish: ORLY’s Star Spangled
- Blue polish: China Glaze’s Frostbite
- Silver glitter polish: Essie’s Set in Stones
- Rhinestones in different sizes
- Top coat for sealing and shine
Create this glitter design
Start with a base coat of red glitter polish on some nails and solid blue on others. Add silver glitter accents or full coverage on select nails. Decorate with rhinestones to create a star effect or accentuate stripes. Finish with a strong top coat to keep everything in place.
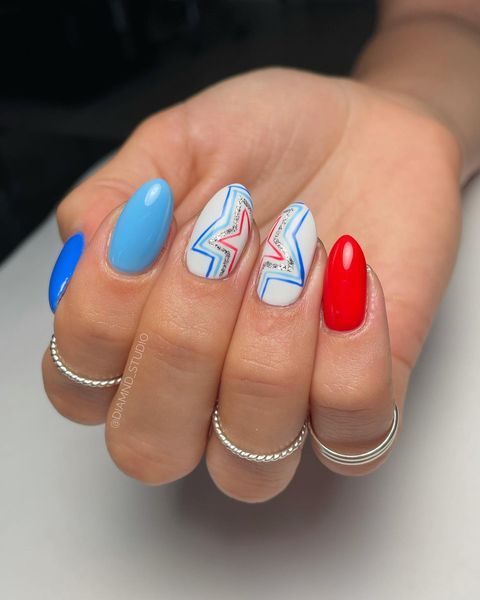
Sleek and streamlined
This design has a clean and streamlined look with bold, saturated colors and minimalist patterns. The use of negative space enhances the modern appeal of the nails, making them perfect for a stylish celebration of patriotic themes.
Essential for this look
- White polish: White On by Sally Hansen
- Red polish: Essie’s Geranium
- Blue polish: OPI’s Yoga-ta Get This Blue!
- Detailing brushes for precise application
- Top layer: Seche Vite for a durable finish
How to perfect this design
Use a base of white polish and use detail brushes to add red and blue accents in simple, clean patterns. Make effective use of the negative space by leaving parts of the nail unpainted or subtly painting it with pure nail polish. Seal with a top coat for a durable and glossy finish.
Patriotic Party
This nail design combines different elements of American iconography in a playful and eclectic way, from stripes and stars to blocks of color. It’s a celebration of freedom and fun, perfect for expressing personal style and patriotism.

Materials required
- Different colors of polish: red, white, blue
- Star stickers or a fine brush for freehand stars
- Striping tape for clean lines
- Top coat: Essie’s Good To Go
Create this playful look
Experiment with different designs on each nail. Use a fine brush for detailed patterns such as stripes and stars, and use striping tape for precision. Apply a base color and layer your designs over it in a creative way. Finish with a top coat to ensure your playful manicure stays vibrant and intact throughout the celebrations.
Save pin

Namie O, a talented writer at Willtiptop, conveys her passion for fashion and beauty in every word she writes. With a keen eye for detail and a deep insight into the latest trends, Namie’s articles and insights captivate readers and provide them with valuable knowledge and inspiration. Through her engaging and informative writing style, Namie aims to empower individuals to explore their style, experiment with beauty techniques, and embrace their unique sense of self.