Yellow Fall Nails 27 Ideas: Embrace the Season with Vibrant Hues
Fall is just around the corner, and what better way to welcome the season than with a fresh set of nails in vibrant yellow hues? Whether you’re a fan of bold, eye-catching designs or prefer something subtle and sophisticated, yellow nails are a fantastic choice for fall. But how do you choose the right shade and design? Let’s dive into the world of yellow fall nails and explore some stunning ideas you can try this season.
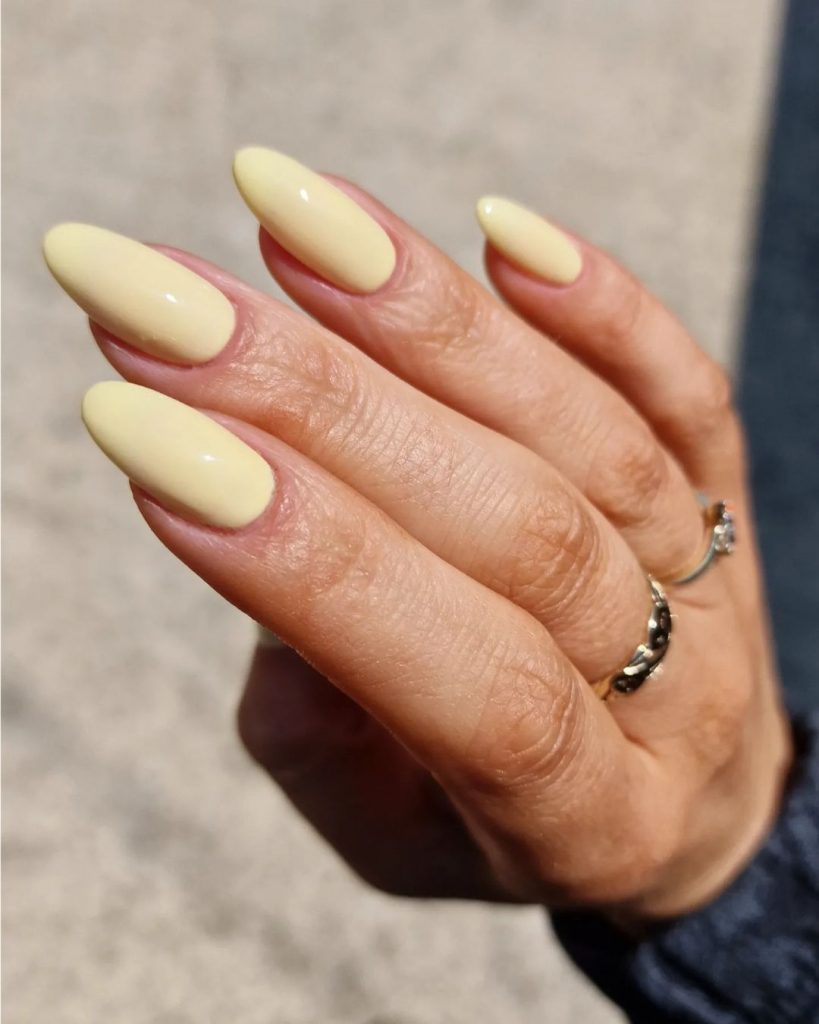
Light yellow elegance
Pale yellow nails are perfect for those who want a soft, delicate look that is still full of personality. This shade exudes a light, buttery feel that is both soothing and chic. The round nail shape adds to the overall elegance, making it suitable for any occasion.

Consumables:
- Light yellow nail polish (e.g. OPI’s “Don’t Tell a Sol”)
- Base coat (e.g. Essie’s “All In One Base”)
- Top coat (e.g. Seche Vite Dry Fast Top Coat)
How to create:
- Start with a clean nail base. Apply a base coat to protect your nails.
- Apply two to three coats of light yellow polish, allowing each coat to dry thoroughly.
- Finish with a top coat to lock in color and add shine.
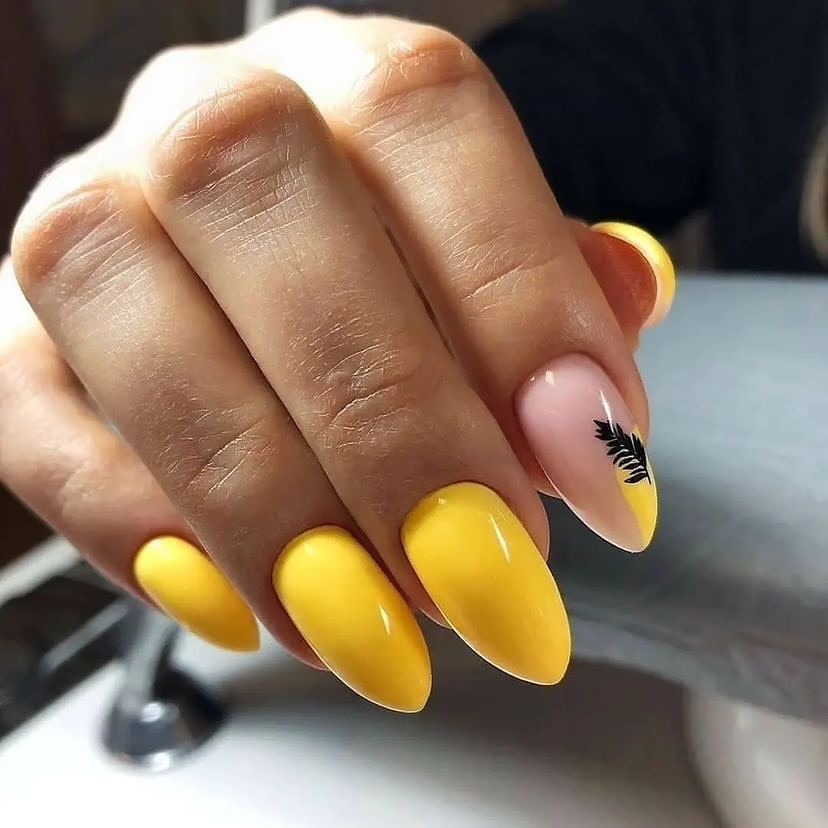
Striking yellow and black accents
This striking design features vibrant yellow nails with striking black accents, making a statement wherever you go. The almond shape adds a touch of sophistication, while the contrast between yellow and black creates a trendy and edgy look.
Consumables:
- Bright yellow nail polish (e.g. Sally Hansen’s “Mellow Yellow”)
- Black nail polish (e.g. Essie’s “Licorice”)
- Nail art brush or dotting tool
- Base coat (e.g. Orly’s “Bonder”)
- Top coat (e.g. Sally Hansen’s “Insta-Dri Top Coat”)
How to create:
- Apply a base coat to protect your nails and ensure that the nail polish adheres well.
- Paint your nails with two coats of bright yellow nail polish. Let it dry completely.
- Use a nail art brush or dotting tool to create black accents on one or two nails.
- Seal the design with a top coat for extra shine and durability.
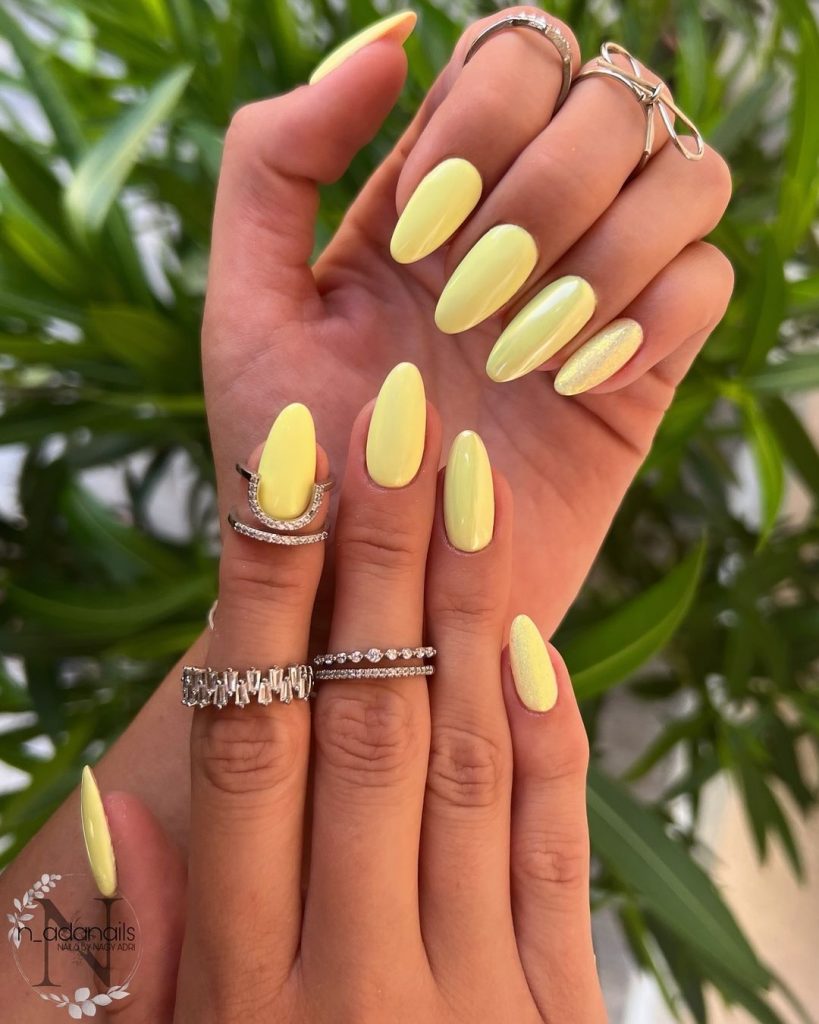
Shimmering yellow with subtle glitter
If you like a bit of sparkle, this shimmering yellow design is for you. The glitter adds a festive touch, making these nails perfect for special occasions or just to brighten up your everyday look.
Consumables:
- Shimmering yellow nail polish (e.g. “Sun-Kissed” from China Glaze)
- Fine gold glitter
- Base coat (e.g. Zoya’s “Anchor”)
- Top layer (e.g. “Northern Lights” by Out The Door)
How to create:
- Start with a base coat to prepare your nails.
- Apply two coats of glossy yellow polish and let each coat dry.
- While the polish is still a little sticky, sprinkle some fine gold glitter over it.
- Finish with a top coat to lock in the glitter and add a glossy finish.
Neon yellow nails with artistic flair
Neon yellow nails are all about making a bold statement. This design incorporates artistic elements, such as intricate patterns or abstract shapes, to take your manicure to the next level.
Consumables:
- Neon yellow nail polish (e.g. “Almost Famous” from Color Club)
- Nail art pens in black and white
- Base coat (e.g. OPI’s “Natural Nail Base Coat”)
- Top coat (e.g. Essie’s “Good To Go”)
How to create:
- Apply a base coat to your nails.
- Paint your nails with neon yellow polish and apply two coats for full coverage.
- Once dry, use nail art pens to draw patterns or shapes on your nails.
- Seal your artwork with a top coat to ensure it lasts.
Soft yellow with gold accents
This design has a soft yellow base with elegant gold accents. It is a perfect choice for those who want a sophisticated look that still captures the essence of autumn.
Consumables:
- Soft yellow nail polish (e.g. “Build Me Up Buttercup” by Deborah Lippmann)
- Gold foil or gold nail stickers
- Base coat (e.g. Butter London’s “Horse Power”)
- Top coat (e.g. CND’s “Vinylux Weekly Top Coat”)
How to create:
- Start with a base coat to protect your nails.
- Apply two coats of soft yellow polish and let each coat dry.
- Add gold foil or stickers to create accents on one or two nails.
- Finish with a top coat to set the accents and add shine.
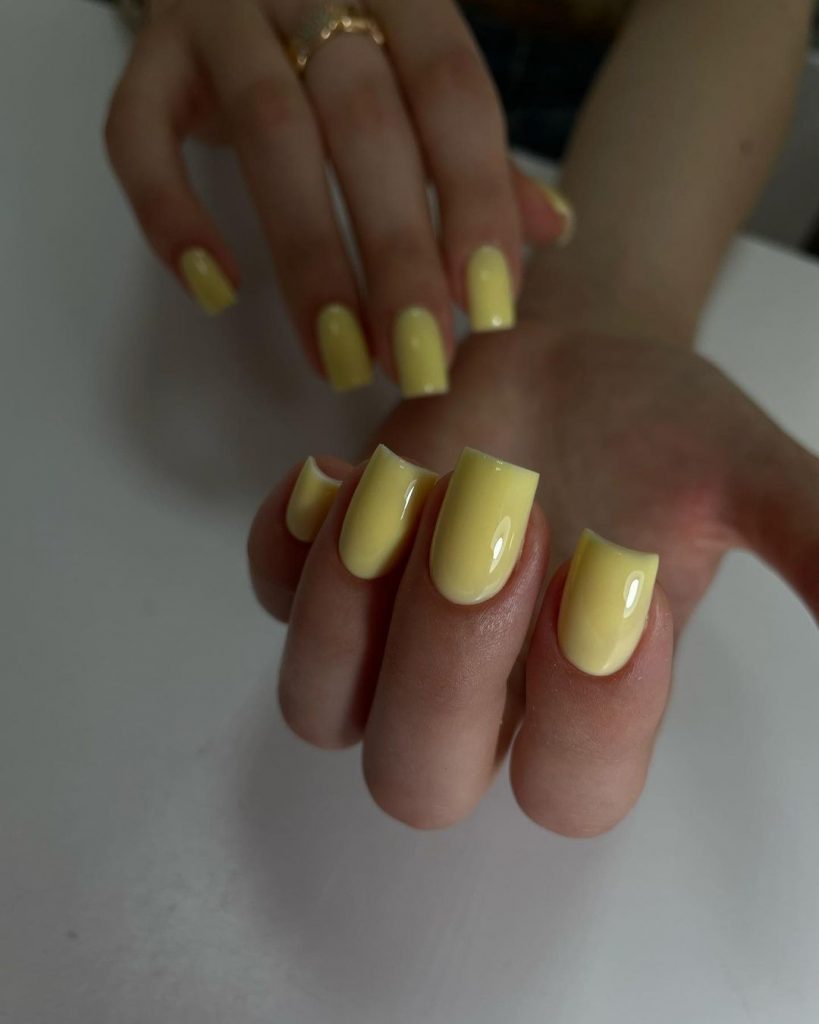
Soft yellow with almond shape
This soft yellow manicure is perfect for those who love understated elegance. The almond shape elongates the fingers and gives a refined and feminine touch. The smooth, glossy finish of the pale yellow paint adds a sophisticated charm, making it suitable for both casual and formal occasions.
Consumables:
- Soft yellow nail polish (e.g. Essie’s “Sunny Business”)
- Base coat (e.g. Orly’s “Bonder”)
- Top coat (e.g. Sally Hansen’s “Insta-Dri Top Coat”)
How to create:
- Start with a base coat so that your nail polish adheres well and lasts longer.
- Apply two coats of soft yellow polish, allowing each coat to dry completely.
- Finish the look with a top coat for a glossy finish and extra durability.
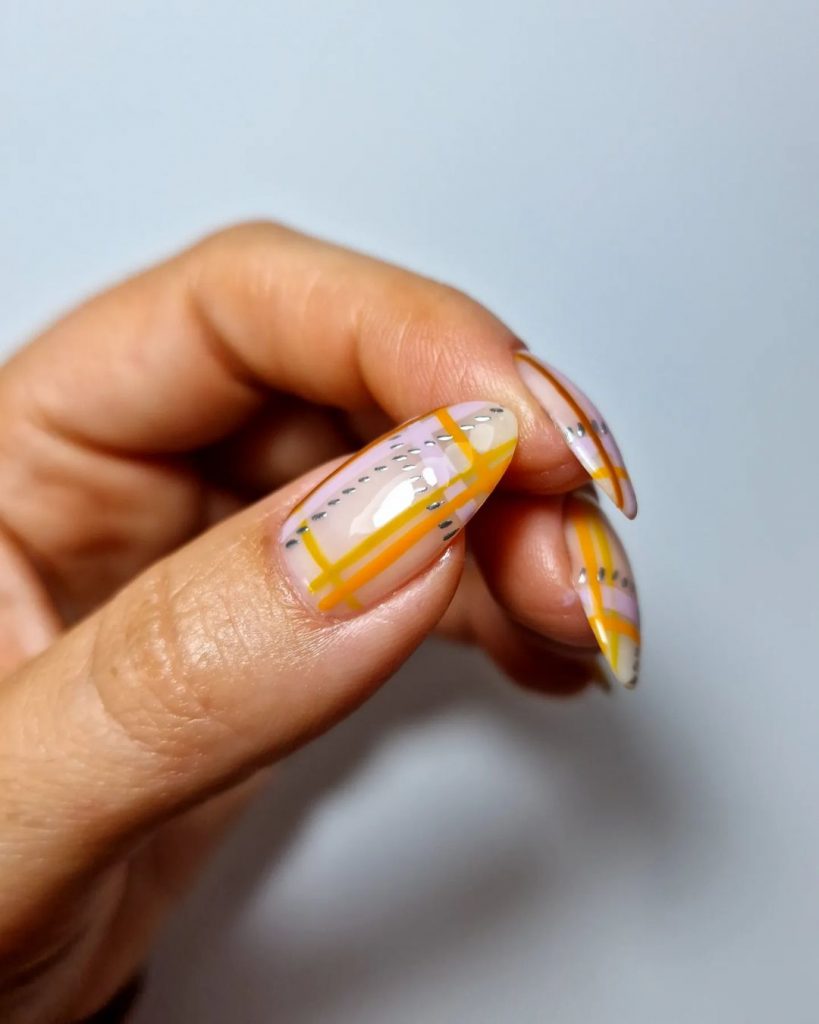
Checkered pattern in yellow and orange
This checkered pattern in yellow and orange is a fun and creative design that will stand out. The intricate lines and orange accents give it a playful yet sophisticated atmosphere. This design is perfect for autumn and captures the essence of the season with its warm colors and stylish pattern.
Consumables:
- Clear base coat (e.g. Essie’s “First Base”)
- Yellow nail polish (e.g. Sally Hansen’s “Mellow Yellow”)
- Orange nail polish (e.g. OPI’s “A Good Man-darin is Hard to Find”)
- Fine nail art brush or striping tape
- Top coat (e.g. Seche Vite Dry Fast Top Coat)
How to create:
- Apply a transparent base coat to protect your nails.
- Paint your nails with a yellow base. Let it dry completely.
- Use a fine nail art brush or striping tape to create the checkered pattern with orange nail polish.
- Finish with a top coat to protect the design and add shine.
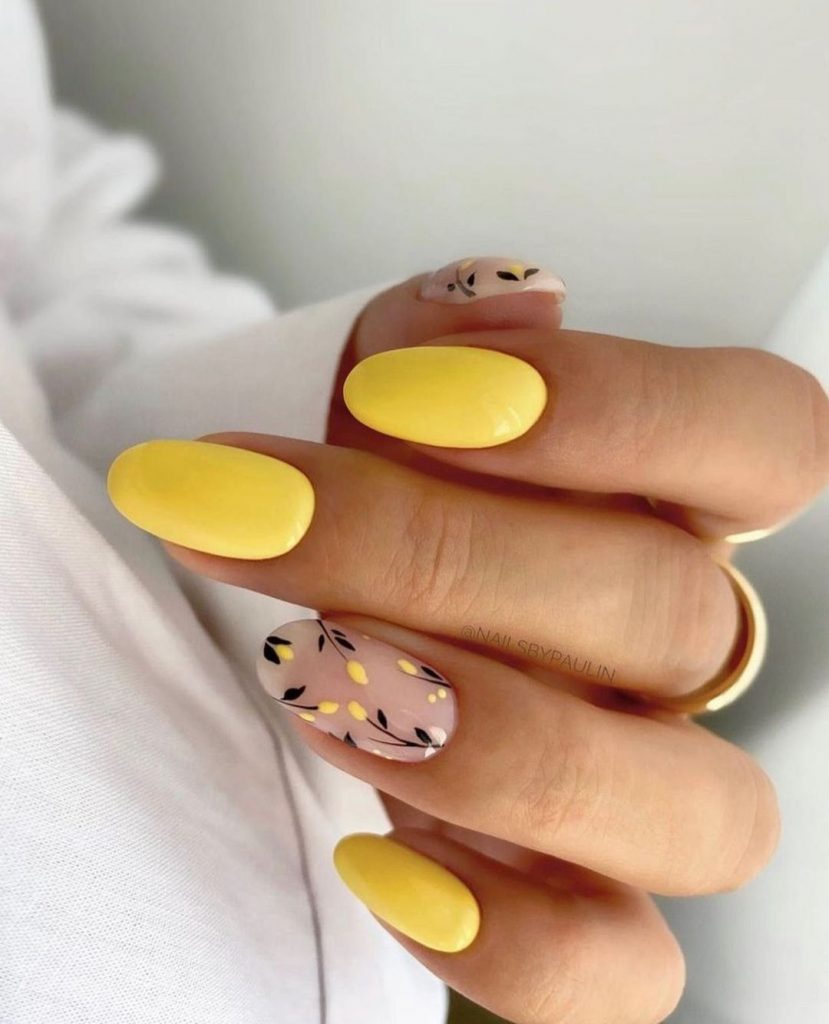
Yellow nails with flower accents
This design features vibrant yellow nails with delicate floral accents on one or two nails. The floral patterns add a touch of whimsy and elegance, making this manicure perfect for lovers of nature-inspired designs. The combination of plain yellow and detailed flowers creates a balanced and striking appearance.
Consumables:
- Bright yellow nail polish (e.g. Zoya’s “Pippa”)
- Black and yellow nail art pens for floral designs
- Base coat (e.g. Butter London’s “Horse Power”)
- Top coat (e.g. Essie’s “Good To Go”)
How to create:
- Apply a base coat to prepare your nails.
- Paint your nails with two coats of bright yellow polish and let each coat dry.
- Use nail art pens to draw floral patterns on one or two nails.
- Seal with a top coat to protect the design and add a glossy finish.
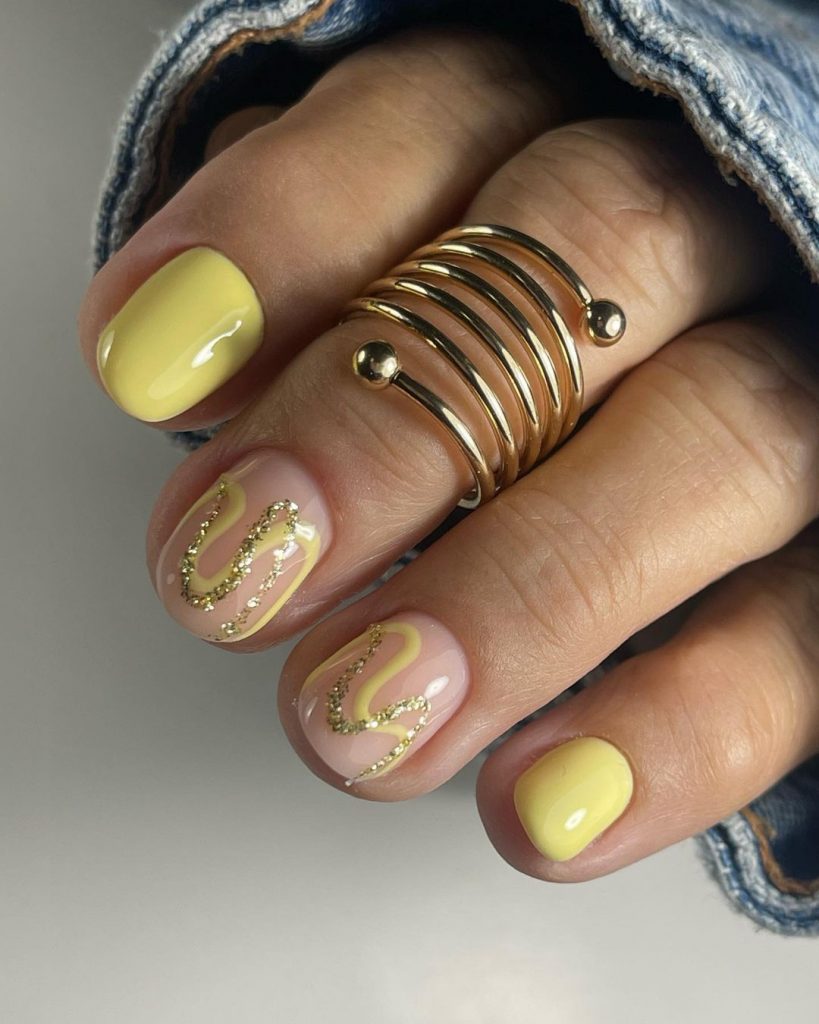
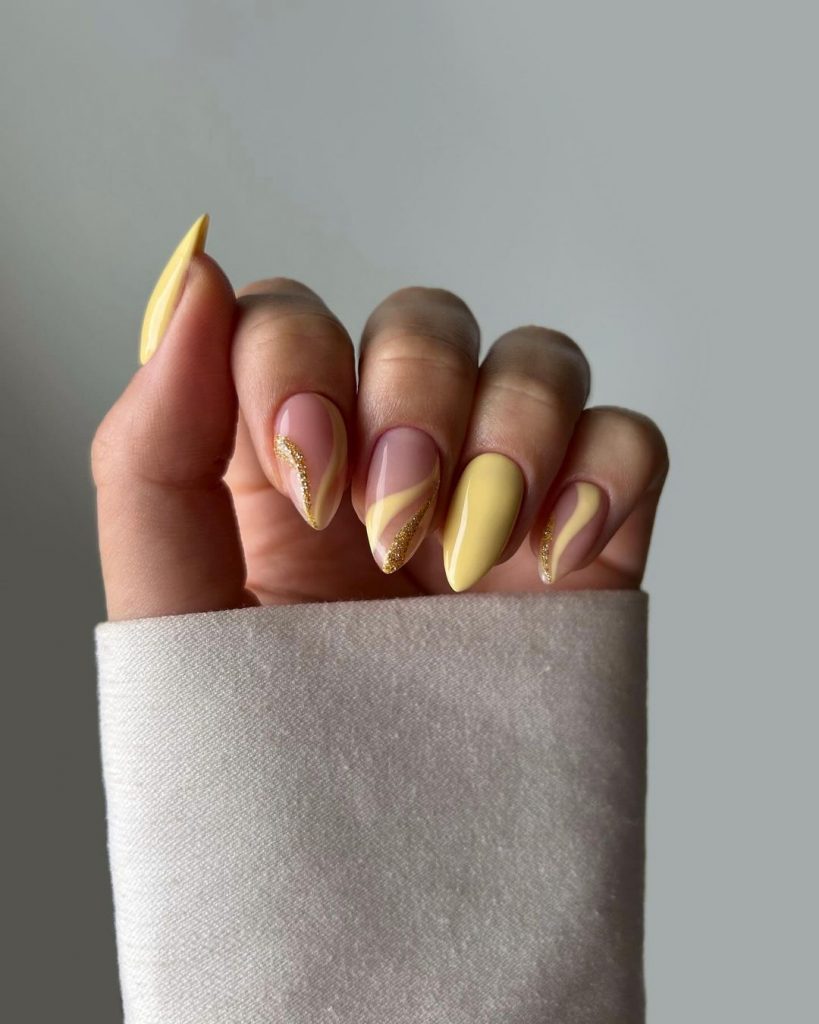
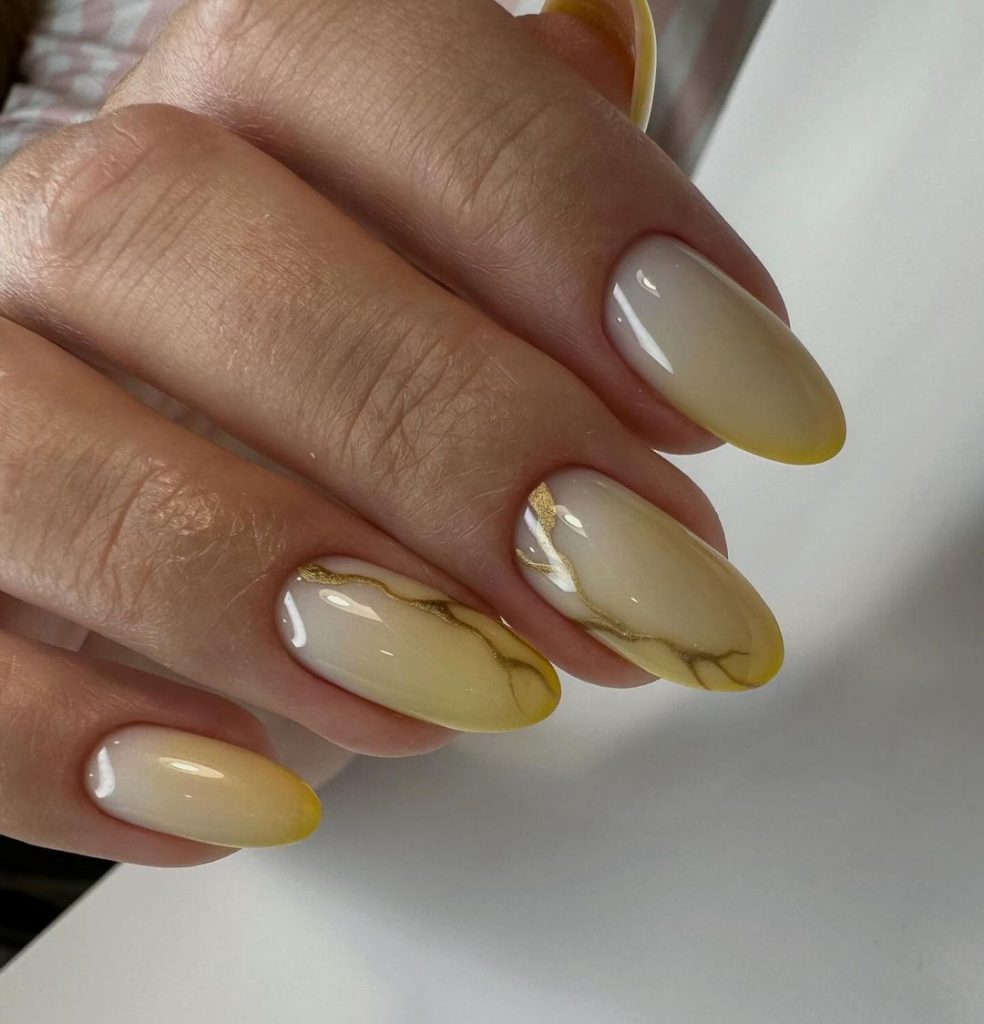
Yellow nails with gold swirls
This elegant design features yellow nails with gold swirl accents, giving it a luxurious and artistic flair. The gold swirls add a touch of glamour, making this manicure perfect for special occasions or when you want to feel extra chic.
Consumables:
- Soft yellow nail polish (e.g. “Build Me Up Buttercup” by Deborah Lippmann)
- Gold nail polish or gold foil
- Fine nail art brush
- Base coat (e.g. Zoya’s “Anchor”)
- Top coat (e.g. CND’s “Vinylux Weekly Top Coat”)
How to create:
- Start with a base coat to protect your nails.
- Apply two coats of soft yellow polish and let each coat dry.
- Use a fine nail art brush to add gold swirls to your nails.
- Finish with a top coat to secure the design and add shine.
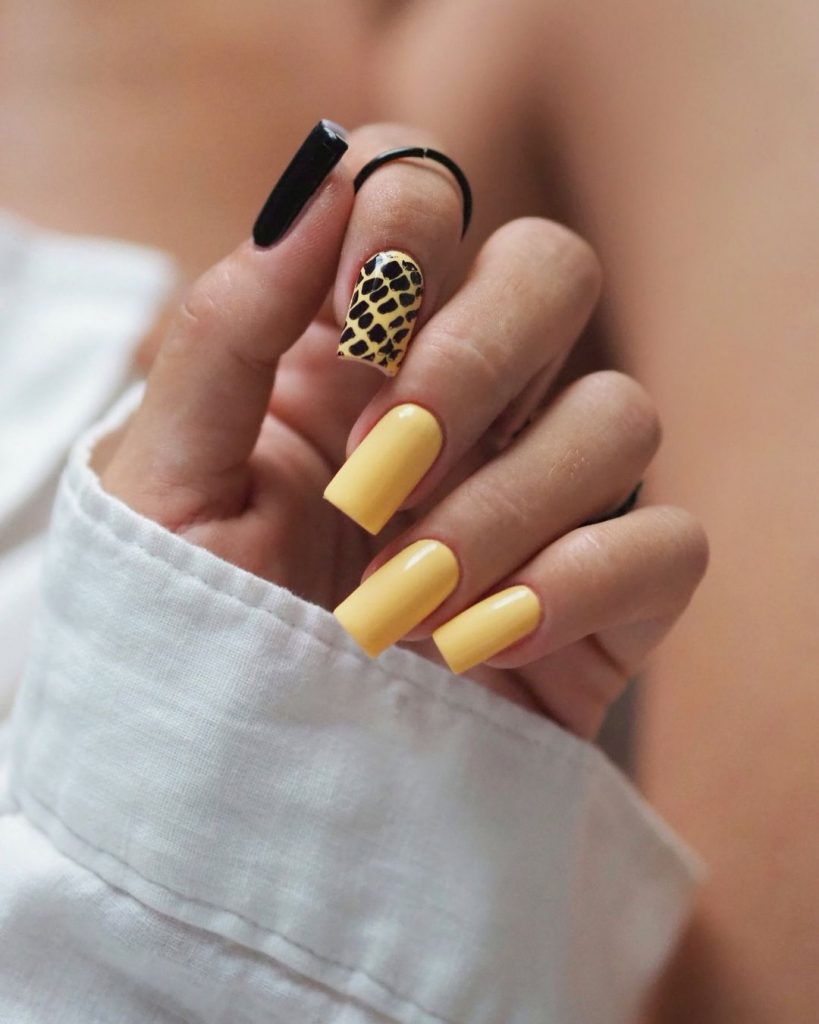
Yellow and black animal print
This striking and trendy design consists of yellow nails with an accent nail in black and yellow animal print. The combination of plain yellow and striking animal print creates a fun and edgy look, perfect for making a statement.
Consumables:
- Yellow nail polish (e.g. OPI’s “I Just Can’t Cope-Acabana”)
- Black nail polish (e.g. Essie’s “Licorice”)
- Fine nail art brush for animal print
- Base coat (e.g. Orly’s “Bonder”)
- Top coat (e.g. Seche Vite Dry Fast Top Coat)
How to create:
- Apply a base coat to protect your nails.
- Paint most of your nails with yellow nail polish and one or two with black nail polish.
- Use a fine nail art brush to create an animal print on the black accent nails with yellow polish.
- Finish with a top coat to protect your design and add a glossy finish.
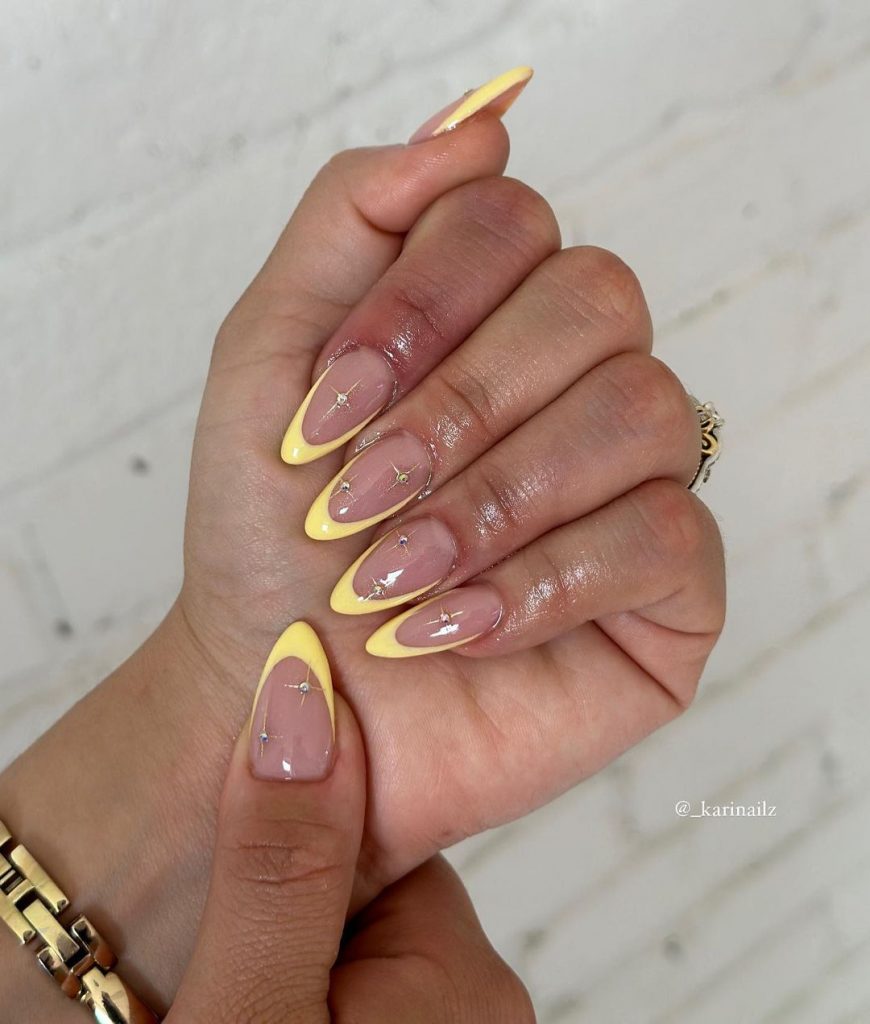
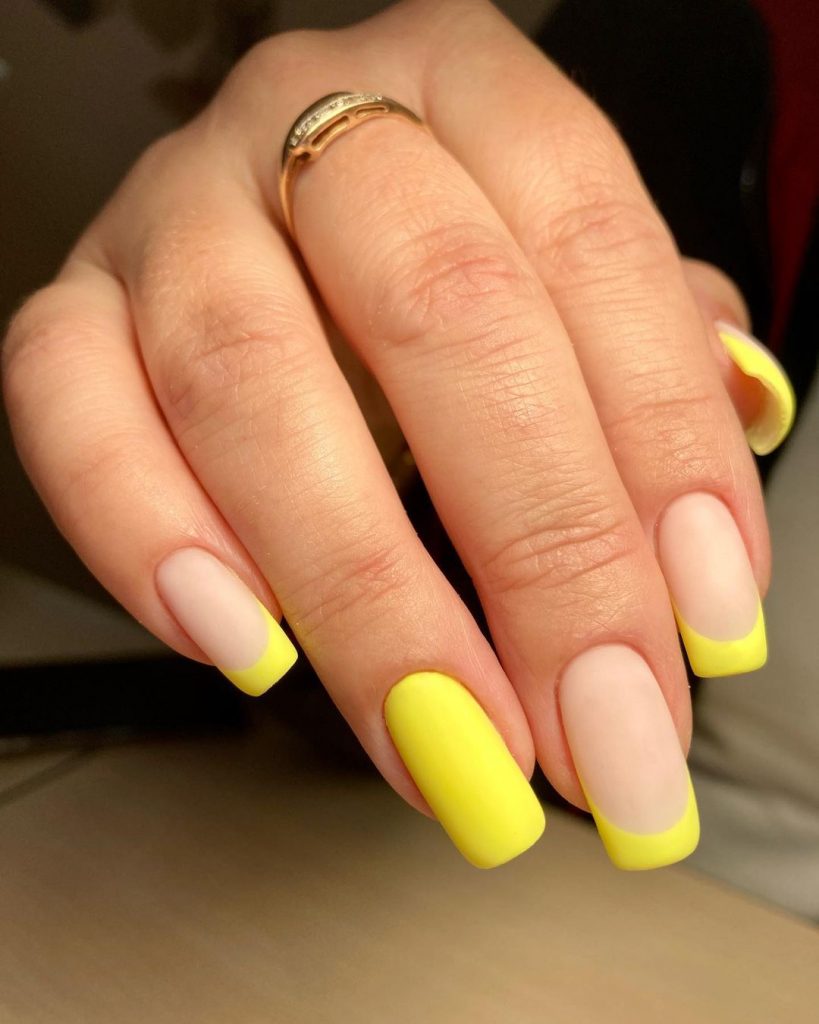
Matte yellow French tips
This modern take on the classic French manicure has a matte yellow tip on a nude base. The contrast between the matte finish and the natural nail bed provides a sleek and refined look. This design is perfect for those who want to add a pop of color without going overboard.
Consumables:
- Matte yellow nail polish (e.g. “Sunkissed” from China Glaze)
- Naked base coat (e.g. Essie’s “Mademoiselle”)
- Matte top coat (e.g. OPI’s “Matte Top Coat”)
How to create:
- Start with a nude base coat and let it dry completely.
- Use a fine brush or French tip guides to apply matte yellow nail polish to the tips of your nails.
- Finish with a matte top coat to ensure longevity and maintain the matte effect.
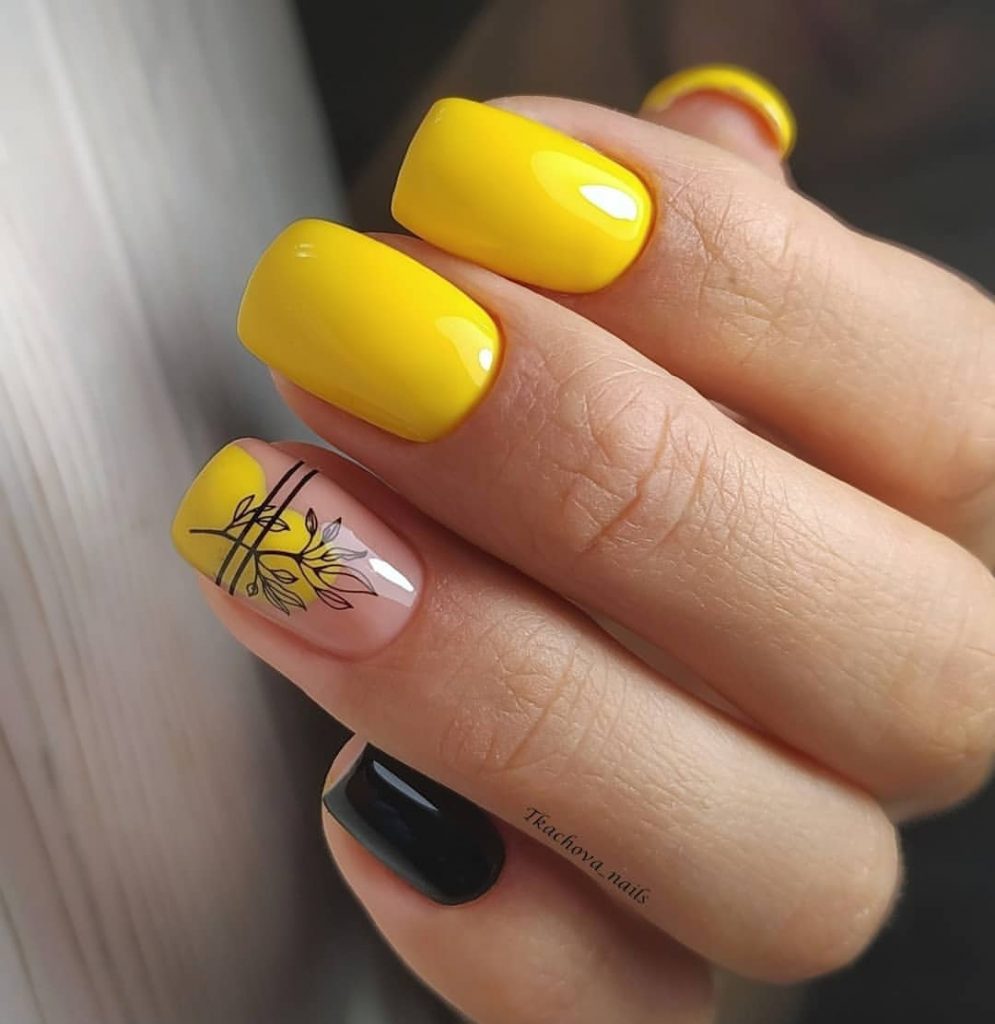
Yellow with floral art
This design combines bright yellow nails with delicate floral art on a pair of accent nails. The floral design features intricate details in yellow and black, creating a balanced and striking look. It is a perfect manicure to add a touch of nature-inspired elegance to your style.
Consumables:
- Bright yellow nail polish (e.g. OPI’s “I Just Can’t Cope-Acabana”)
- Black and yellow nail art pens for floral designs
- Base coat (e.g. Zoya’s “Anchor”)
- Top coat (e.g. Essie’s “Good To Go”)
How to create:
- Apply a base coat to prepare your nails.
- Paint most of your nails with bright yellow polish, leaving one or two nails for the floral design.
- Use nail art pens to draw intricate floral patterns on the accent nails.
- Seal the look with a top coat to protect the design and add a glossy finish.
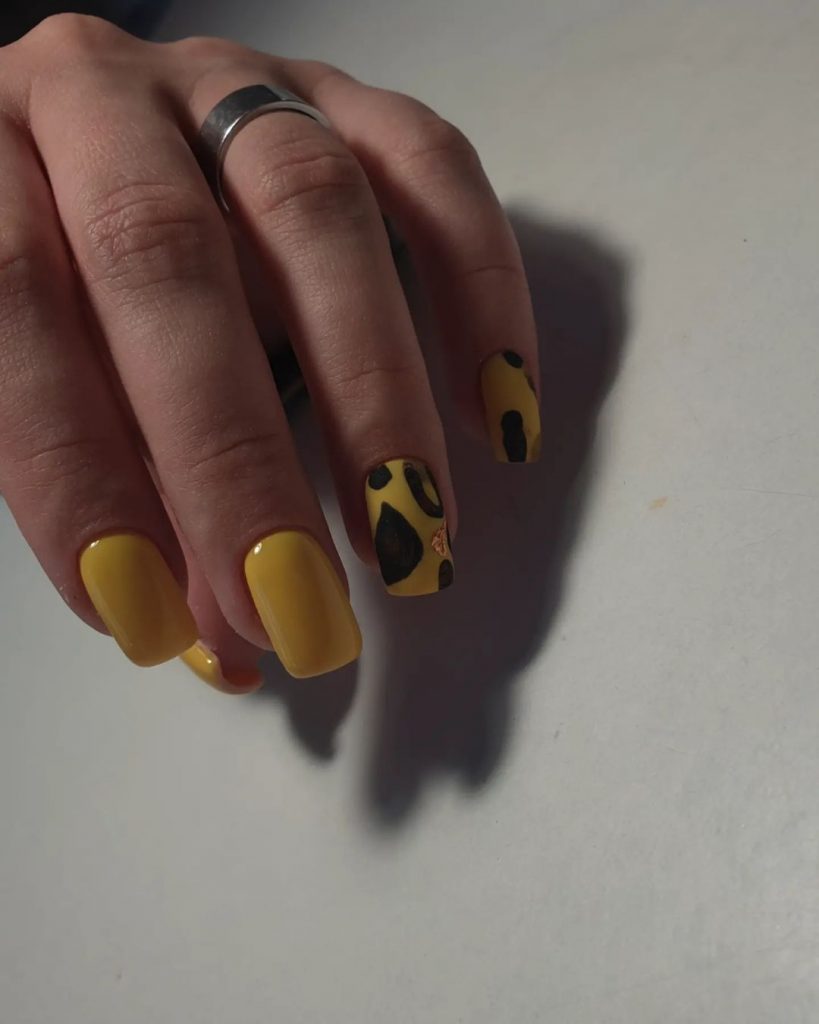
Yellow nails with leopard print
This trendy design features yellow nails with a black and yellow leopard print accent nail. The combination of plain yellow and striking animal print creates a fun and edgy look, perfect for making a statement this fall.
Consumables:
- Yellow nail polish (e.g. Sally Hansen’s “Mellow Yellow”)
- Black nail polish (e.g. Essie’s “Licorice”)
- Fine nail art brush for leopard print
- Base coat (e.g. Orly’s “Bonder”)
- Top coat (e.g. Seche Vite Dry Fast Top Coat)
How to create:
- Apply a base coat to protect your nails.
- Paint most of your nails with yellow nail polish and one or two with black nail polish.
- Use a fine nail art brush to create a leopard print on the black accent nails with yellow polish.
- Finish with a top coat to protect your design and add a glossy finish.
Yellow and orange marble effect
This marble effect combines yellow and orange tones, creating a warm and dynamic appearance. The color mix mimics the natural patterns of marble and adds a touch of luxury to your manicure. This design is perfect for those who want a unique and sophisticated look.
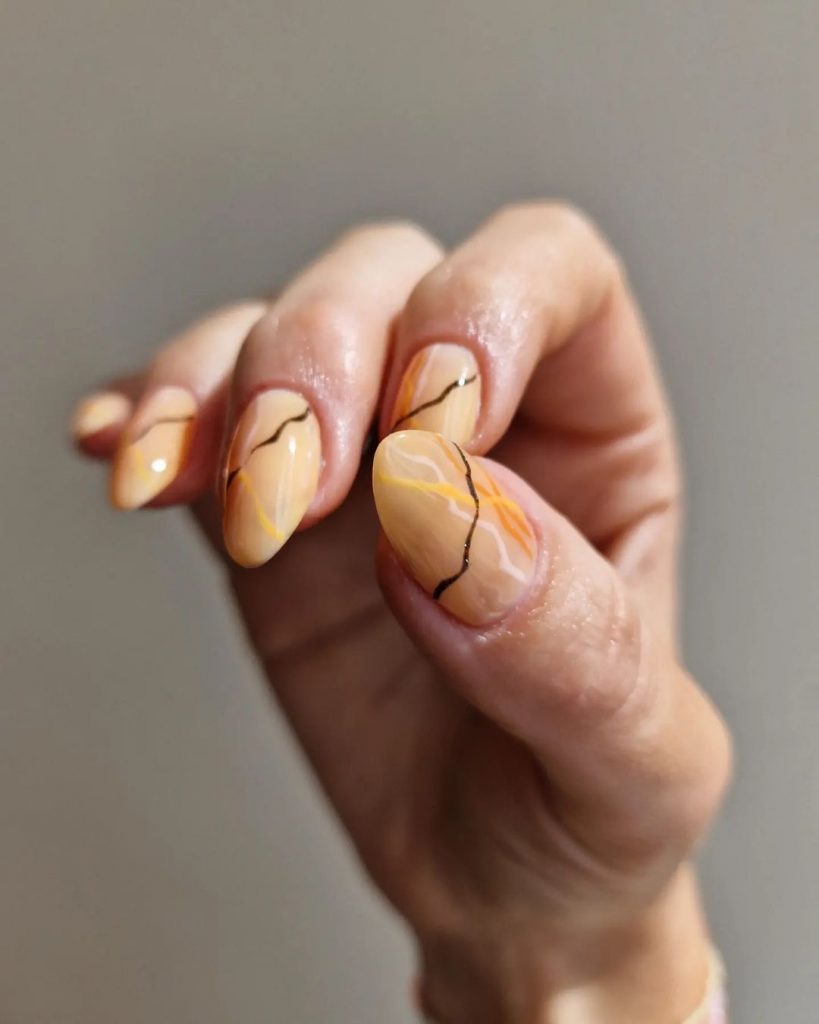
Consumables:
- Yellow nail polish (e.g. Zoya’s “Pippa”)
- Orange nail polish (e.g. OPI’s “A Good Man-darin is Hard to Find”)
- Black nail polish for fine lines
- Fine nail art brush
- Base coat (e.g. Butter London’s “Horse Power”)
- Top coat (e.g. CND’s “Vinylux Weekly Top Coat”)
How to create:
- Apply a base coat to your nails.
- Create a marble effect by swirling yellow and orange polishes together on a palette and then apply to your nails with a fine brush.
- Add fine black lines to enhance the marble effect.
- Finish with a top coat to seal the design and add shine.
Light yellow with glossy finish
This design features pale yellow nails with a high gloss finish. The square shape adds a modern touch, while the glossy finish provides a polished and elegant look. This manicure is versatile and perfect for any occasion, from casual to formal.
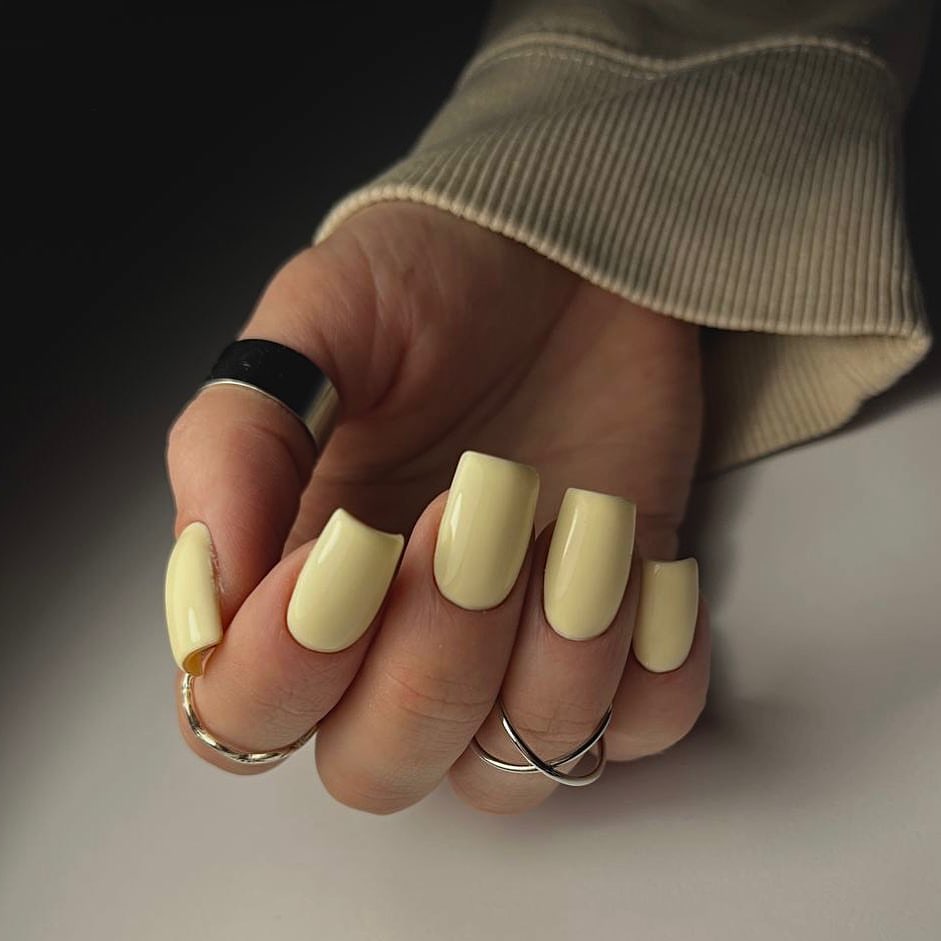
Consumables:
- Pale yellow nail polish (e.g. Essie’s “Sunny Business”)
- Base coat (e.g. Orly’s “Bonder”)
- Top coat (e.g. Sally Hansen’s “Insta-Dri Top Coat”)
How to create:
- Start with a base coat so that your nail polish adheres well and lasts longer.
- Apply two coats of light yellow polish, allowing each coat to dry completely.
- Finish the look with a top coat for a glossy finish and extra durability.
Yellow and leopard print nails
This design has a striking combination of yellow and leopard print. The leopard print adds a touch of wild flair, while the bright yellow paint keeps the look cool and trendy. The mix of patterns and solid colors creates a striking and fun manicure, perfect for making a statement.
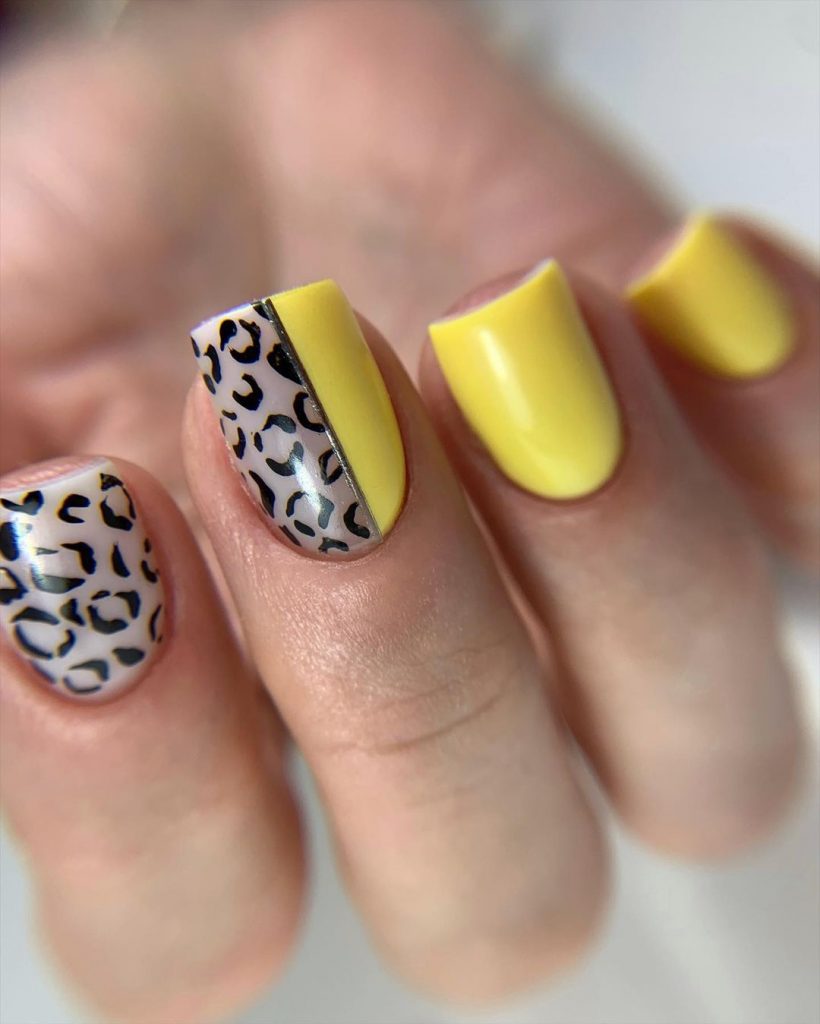
Consumables:
- Yellow nail polish (e.g. Essie’s “Hay There”)
- Nude base coat for leopard print (e.g. OPI’s “Be There in a Prosecco”)
- Black nail polish for leopard spots (e.g. Essie’s “Licorice”)
- Fine nail art brush or dotting tool
- Base coat (e.g. Orly’s “Bonder”)
- Top coat (e.g. Seche Vite Dry Fast Top Coat)
How to create:
- Apply a base coat to protect your nails.
- Paint most of your nails with yellow nail polish, leaving a few for the leopard print design.
- For the leopard print, apply the nude base coat and let it dry. Then use a fine brush or dotting tool to create black spots.
- Finish with a top coat to seal the design and add a glossy finish.
Yellow and naked French tips
This modern French manicure has a nude base with yellow tips. The addition of a small yellow accent on one nail adds a unique touch to this classic look. The subtle sparkle in the nude paint enhances the overall elegance of this design.
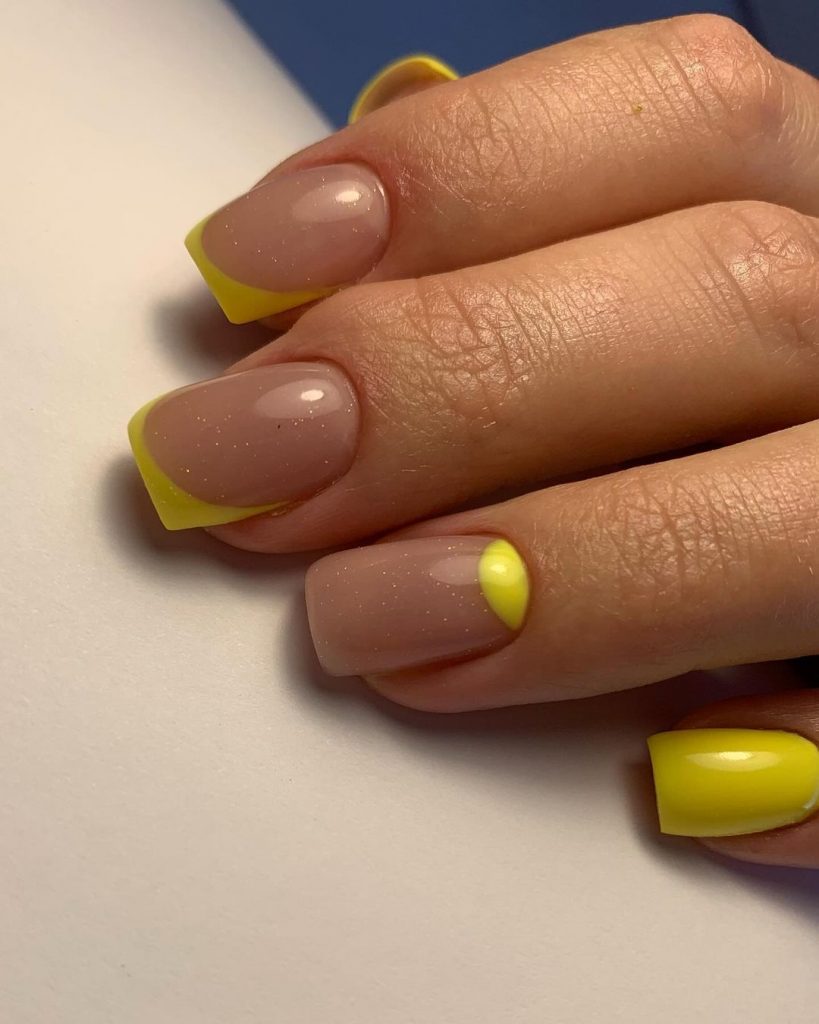
Consumables:
- Nude nail polish (e.g. Essie’s “Ballet Slippers”)
- Yellow nail polish (e.g. OPI’s “Sun, Sea, and Sand in My Pants”)
- Fine brush for French tips
- Base coat (e.g. Zoya’s “Anchor”)
- Top coat (e.g. Essie’s “Good To Go”)
How to create:
- Apply a base coat to prepare your nails.
- Paint your nails with a nude polish and let it dry completely.
- Use a fine brush to apply yellow tips and an accent to one nail.
- Seal with a top coat for a glossy and durable finish.
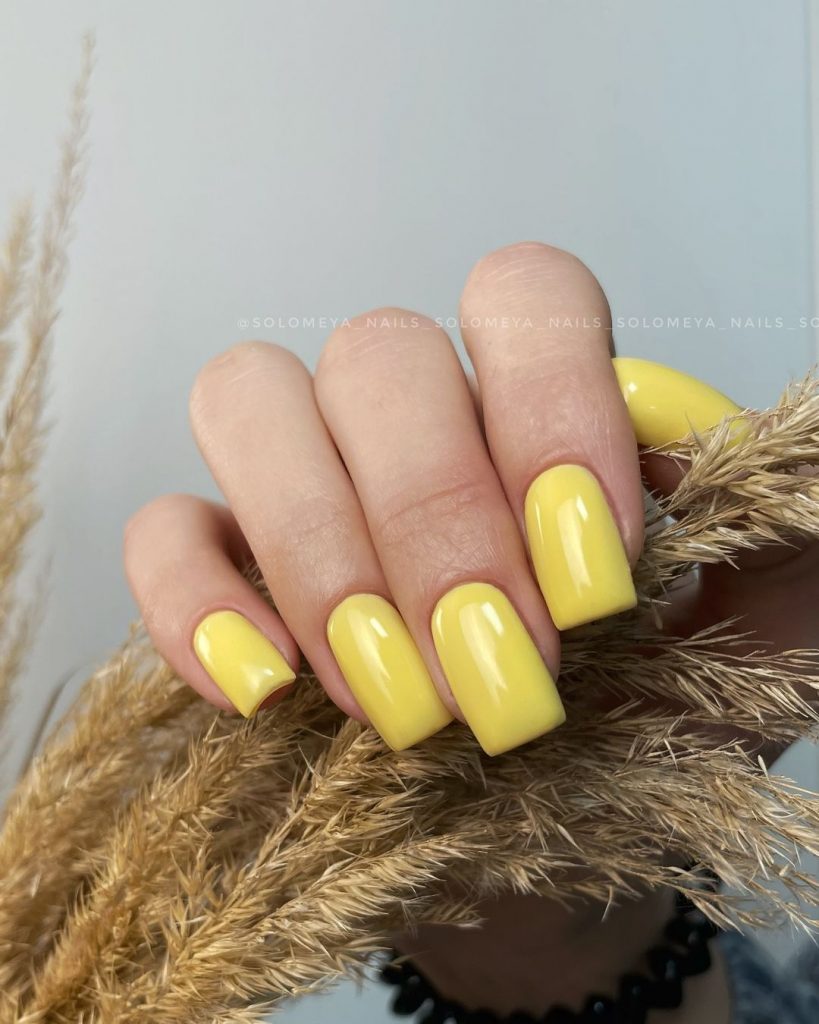
Shiny yellow square nails
This design features glossy yellow nails in a square shape. The bright yellow polish and high-gloss finish make this manicure vibrant and eye-catching. It’s a simple yet bold look that’s perfect for those who like to make a statement with their nails.
Consumables:
- Bright yellow nail polish (e.g. Sally Hansen’s “Mellow Yellow”)
- Base coat (e.g. Butter London’s “Horse Power”)
- Top coat (e.g. CND’s “Vinylux Weekly Top Coat”)
How to create:
- Apply a base coat to protect your nails.
- Apply two coats of bright yellow polish, allowing each coat to dry thoroughly.
- Finish with a top coat to add shine and durability.
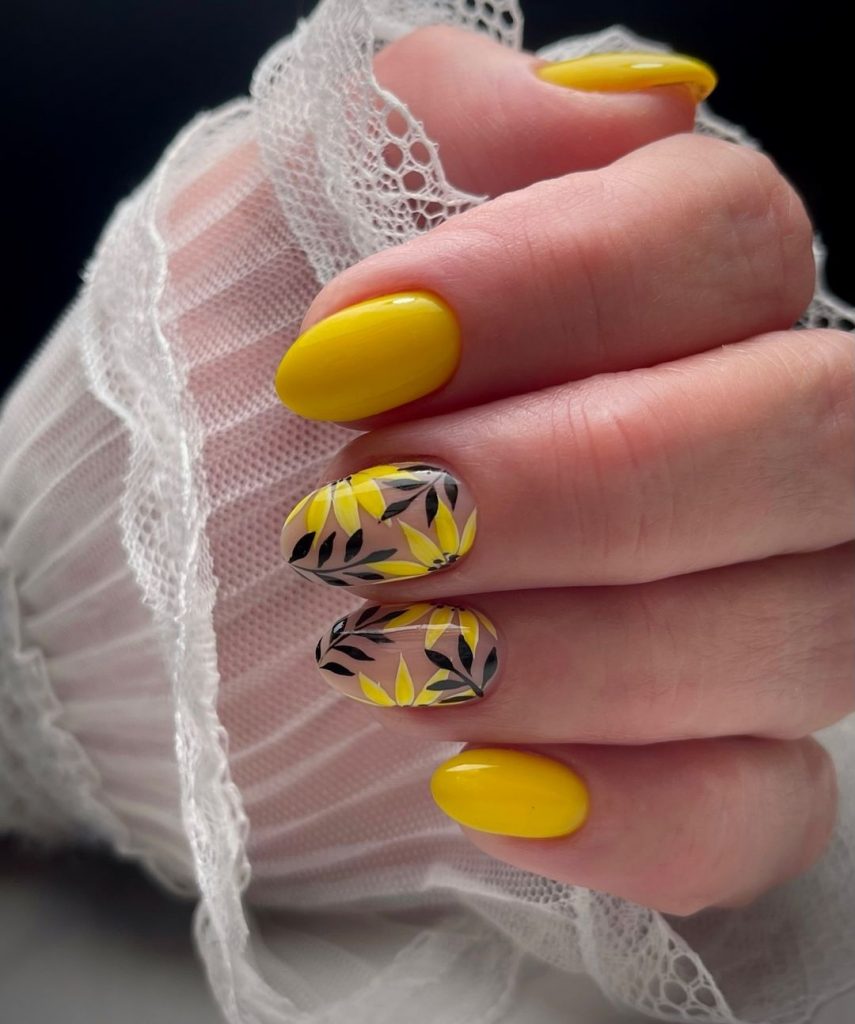
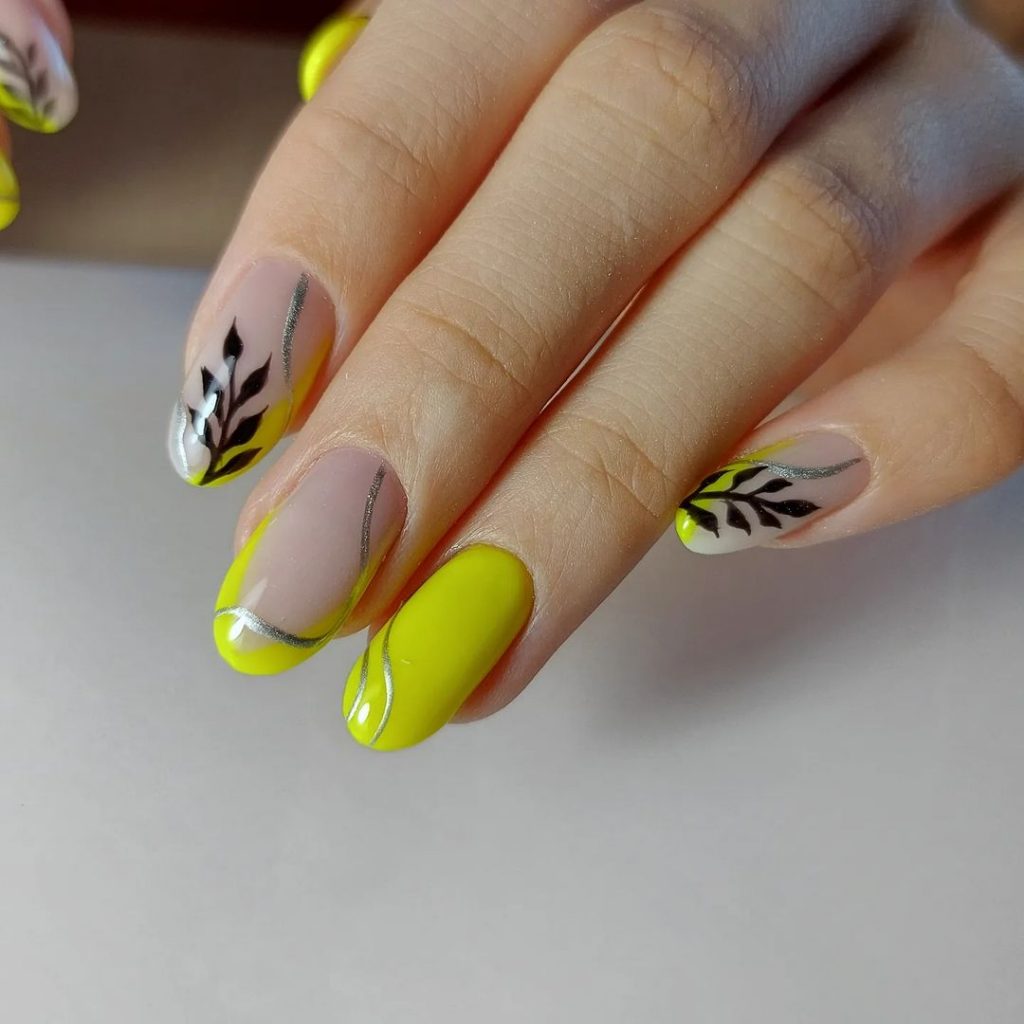
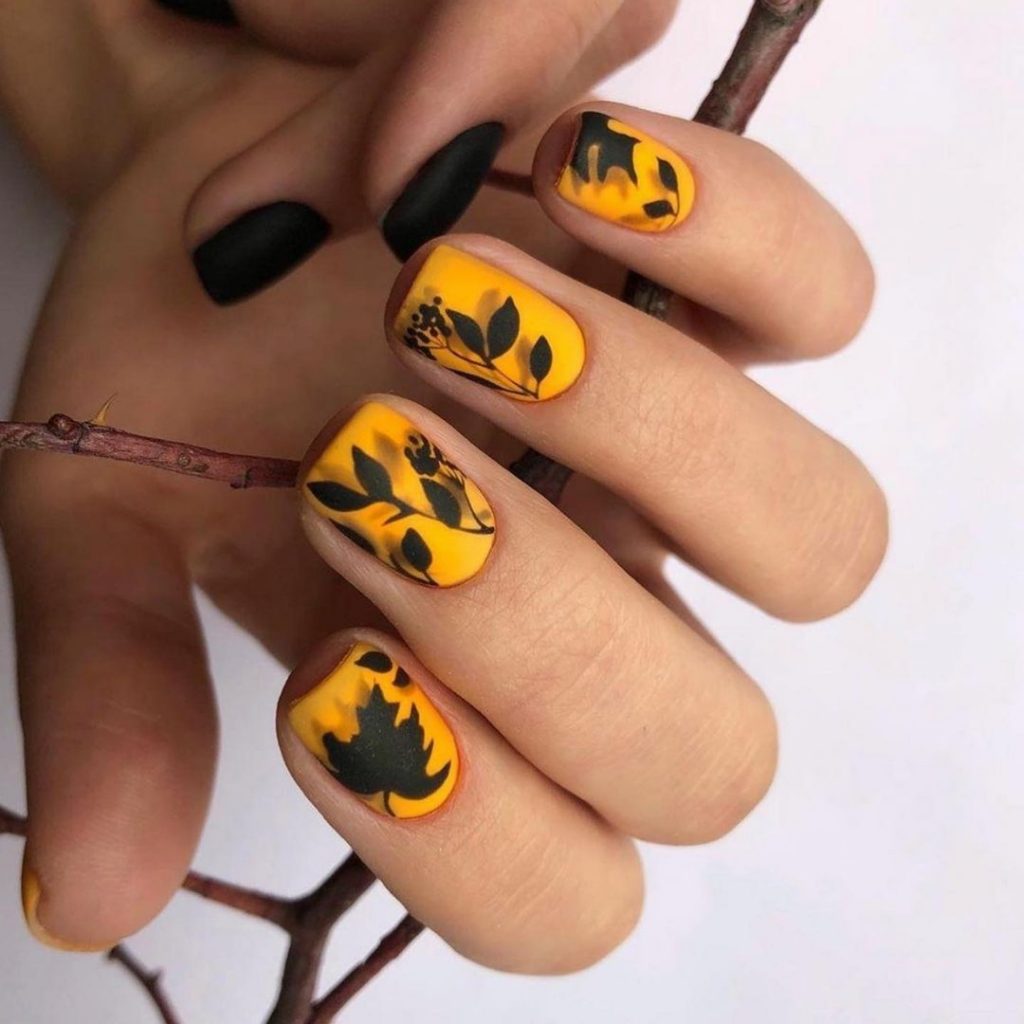
Yellow with leaf motif
This design combines vibrant yellow nails with delicate leaf designs on a pair of accent nails. The leaves are painted in black and silver, adding a sophisticated touch to the bright yellow base. It’s a perfect look for lovers of nature-inspired designs with a modern twist.
Consumables:
- Bright yellow nail polish (e.g. OPI’s “I Just Can’t Cope-Acabana”)
- Black and silver nail art pens for leaf designs
- Base coat (e.g. Orly’s “Bonder”)
- Top coat (e.g. Seche Vite Dry Fast Top Coat)
How to create:
- Apply a base coat to protect your nails.
- Paint most of your nails with bright yellow nail polish, but leave a few for the leaf design.
- Use nail art pens to draw delicate leaf patterns on the accent nails.
- Seal with a top coat to protect the design and add a glossy finish.
Yellow and black accent nails
This design features vibrant yellow nails with a black accent nail and a delicate floral design on one nail. The combination of colors and patterns creates a chic and sophisticated look, perfect for any occasion.
Consumables:
- Yellow nail polish (e.g. Sally Hansen’s “Mellow Yellow”)
- Black nail polish (e.g. Essie’s “Licorice”)
- Fine brush for floral design
- Base coat (e.g. Zoya’s “Anchor”)
- Top coat (e.g. Essie’s “Good To Go”)
How to create:
- Apply a base coat to prepare your nails.
- Paint most of your nails with yellow nail polish, one with black nail polish, and leave one for the floral design.
- Use a fine brush to create a delicate floral design on the accent nail.
- Seal with a top coat for a glossy and durable finish.
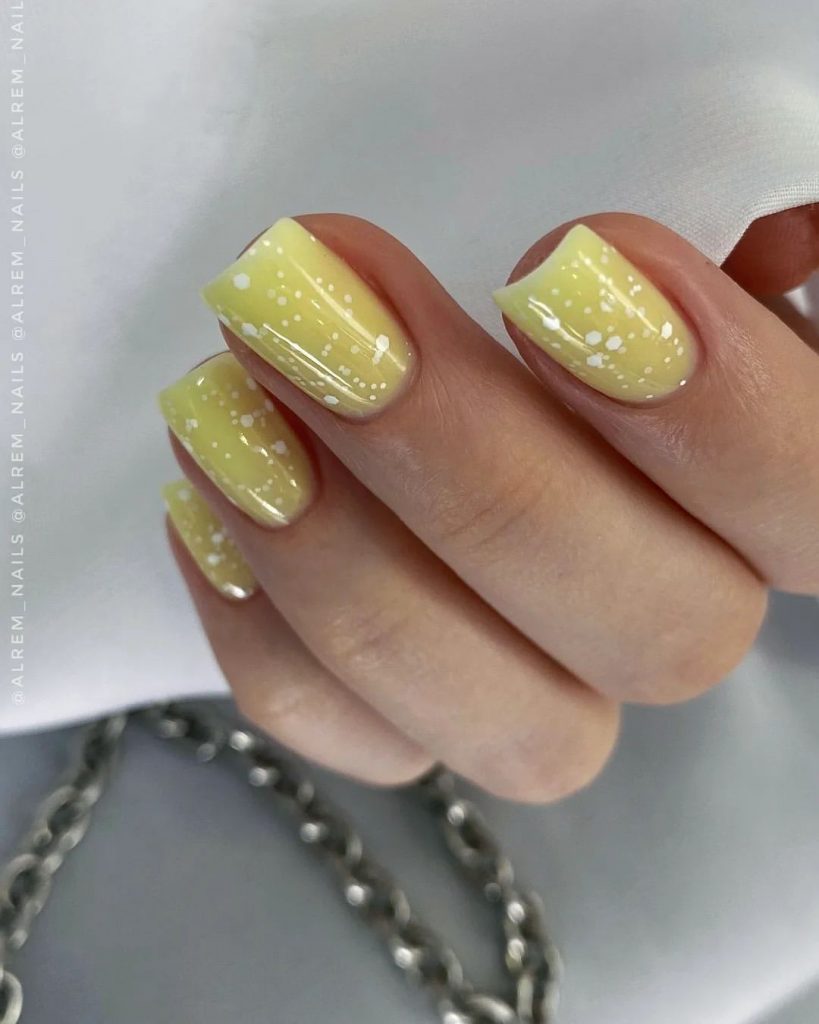
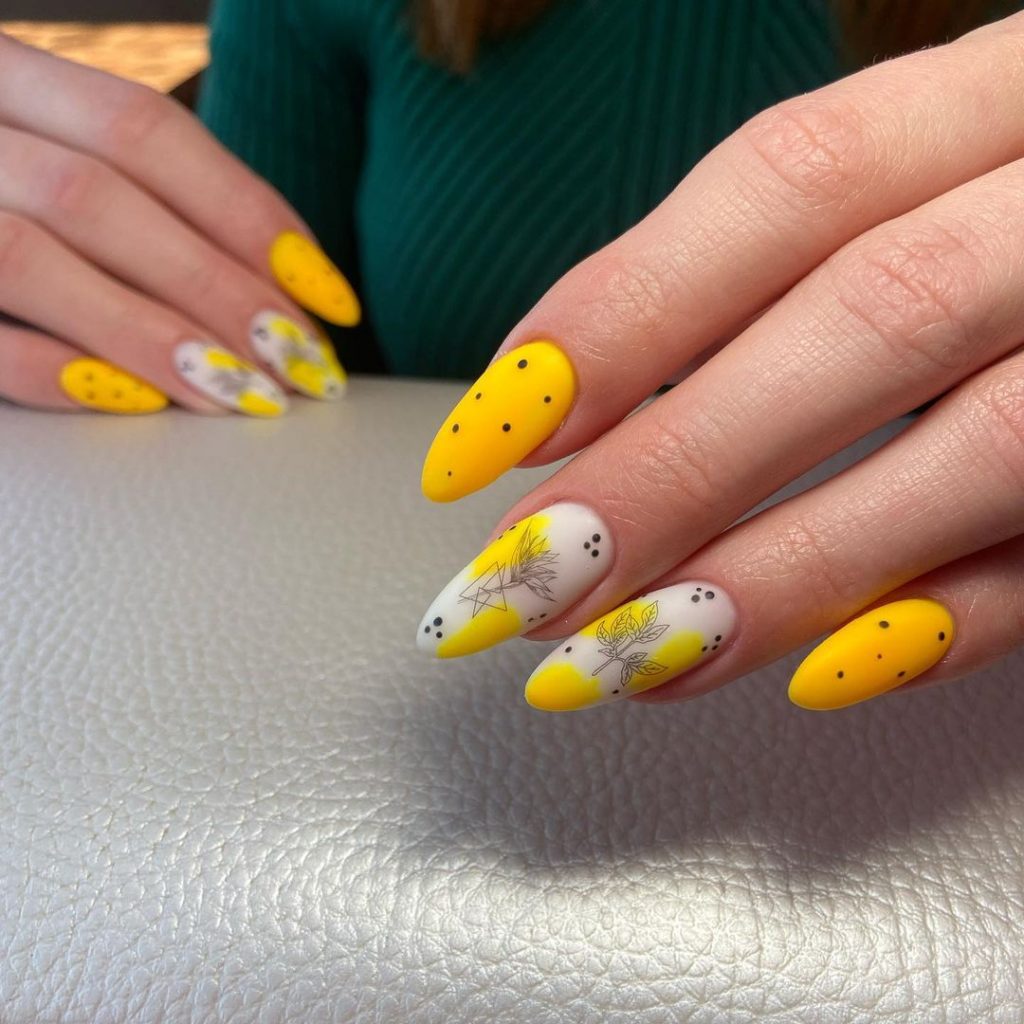
Light yellow with white splashes
This manicure has a delicate pale yellow base with a fun white splatter design. The white splashes add a playful and artistic touch to the subtle yellow, making this design perfect for those who love a creative yet understated look.
Consumables:
- Pale yellow nail polish (e.g. Essie’s “Sunny Business”)
- White nail polish (e.g. OPI’s “Alpine Snow”)
- Nail art brush or toothbrush for splatter effect
- Base coat (e.g. Orly’s “Bonder”)
- Top coat (e.g. Seche Vite Dry Fast Top Coat)
How to create:
- Apply a base coat to protect your nails.
- Paint your nails with two coats of light yellow polish and let each coat dry completely.
- Use a nail art brush or toothbrush dipped in white nail polish to create a splatter effect by moving the brush towards your nails.
- Finish with a top coat to seal the design and add shine.
Yellow with moon accents
This bright yellow manicure is accented with cute white moon shapes at the cuticles. The moon accents add a whimsical and heavenly element to the striking yellow base, making this design both playful and stylish.

Consumables:
- Bright yellow nail polish (e.g. Sally Hansen’s “Mellow Yellow”)
- White nail polish for moon accents (e.g. Essie’s “Blanc”)
- Fine brush or nail art pen for moon shapes
- Base coat (e.g. Zoya’s “Anchor”)
- Top coat (e.g. Essie’s “Good To Go”)
How to create:
- Apply a base coat to prepare your nails.
- Paint your nails with two coats of bright yellow polish and let each coat dry.
- Use a fine brush or nail art pen to draw small white moons at the base of each nail.
- Seal with a top coat to protect the design and add a glossy finish.
Shiny yellow square nails
These glossy yellow square nails are simple yet eye-catching. The bright yellow color combined with the square nail shape creates a cool and modern look, perfect for making a statement.
Consumables:
- Bright yellow nail polish (e.g. OPI’s “Sun, Sea, and Sand in My Pants”)
- Base coat (e.g. Butter London’s “Horse Power”)
- Top coat (e.g. CND’s “Vinylux Weekly Top Coat”)
How to create:
- Apply a base coat to protect your nails.
- Apply two coats of bright yellow polish, allowing each coat to dry thoroughly.
- Finish with a top coat to add shine and durability.
Yellow with botanical art
This design combines vibrant yellow nails with intricate botanical art on a pair of accent nails. The detailed black leaf patterns contrast beautifully against the yellow base, creating a nature-inspired look that is both elegant and trendy.
Consumables:
- Bright yellow nail polish (e.g. Zoya’s “Pippa”)
- Black nail art pen for botanical designs
- Base coat (e.g. Orly’s “Bonder”)
- Top coat (e.g. Seche Vite Dry Fast Top Coat)
How to create:
- Apply a base coat to protect your nails.
- Paint most of your nails with bright yellow nail polish, but leave a few for the botanical design.
- Use a nail art pen to draw intricate black leaf patterns on the accent nails.
- Seal with a top coat to protect the design and add a glossy finish.
Shiny yellow oval nails
These glossy yellow oval nails are bright and cheerful, perfect for adding a pop of color to your look. The smooth, glossy finish enhances the vibrancy of the yellow polish, making your nails stand out beautifully.

Consumables:
- Bright yellow nail polish (e.g. Sally Hansen’s “Mellow Yellow”)
- Base coat (e.g. Orly’s “Bonder”)
- Top coat (e.g. CND’s “Vinylux Weekly Top Coat”)
How to create:
- Apply a base coat to protect your nails.
- Apply two coats of bright yellow polish, allowing each coat to dry thoroughly.
- Finish with a top coat to add shine and durability.
Yellow and black leaf art
This striking design features a matte yellow base with detailed black leaf art. The contrast between the matte yellow and black design creates a bold and refined look, perfect for autumn.
Consumables:
- Matte yellow nail polish (e.g. “Sunkissed” from China Glaze)
- Black nail art pen for leaf designs
- Base coat (e.g. Zoya’s “Anchor”)
- Matte top coat (e.g. OPI’s “Matte Top Coat”)
How to create:
- Apply a base coat to protect your nails.
- Paint most of your nails with matte yellow nail polish and let each coat dry completely.
- Use a nail art pen to draw intricate black leaf patterns on the accent nails.
- Seal with a matte top coat to protect the design and maintain the matte effect.
Gold marble nails
This luxurious design has a soft yellow base with elegant gold marble accents. The delicate golden lines enhance the natural beauty of the yellow, creating a refined and timeless look. Perfect for those who like a touch of glamor in their manicure.
Consumables:
- Soft yellow nail polish (e.g. Essie’s “Hay There”)
- Gold nail polish or gold foil for marble effect
- Fine nail art brush
- Base coat (e.g. Butter London’s “Horse Power”)
- Top coat (e.g. CND’s “Vinylux Weekly Top Coat”)
How to create:
- Apply a base coat to protect your nails.
- Paint your nails with two coats of soft yellow polish and let each coat dry completely.
- Use a fine nail art brush to create delicate gold marble lines on a few accent nails.
- Finish with a top coat to seal the design and add shine.

Namie O, a talented writer at Willtiptop, conveys her passion for fashion and beauty in every word she writes. With a keen eye for detail and a deep insight into the latest trends, Namie’s articles and insights captivate readers and provide them with valuable knowledge and inspiration. Through her engaging and informative writing style, Namie aims to empower individuals to explore their style, experiment with beauty techniques, and embrace their unique sense of self.


