Olive Green Fall Nails 25 Ideas: The Ultimate Guide
As the leaves turn golden brown and the air becomes crisp, it’s the perfect time to give your nails a seasonal refresh that reflects the cozy charm of autumn. Among the many autumn-inspired shades, olive green stands out as a sophisticated yet earthy hue that perfectly captures the essence of the season. This muted shade strikes the ideal balance between bold and understated, making it a favorite color for anyone who loves a chic, nature-inspired aesthetic.


Olive green nails are incredibly versatile and pair beautifully with fall’s signature palette, think deep brown, warm orange and golden yellow. Whether you prefer a minimalist look with a plain matte finish or something more elaborate like metallic accents, ombré gradients or floral details, this shade will suit any style. It’s the kind of color that looks just as gorgeous with cozy sweaters and boots as it does with sleek, modern outfits, making it a must-try for this season.


In this article, we explore a variety of olive green nail designs that celebrate the richness and creativity of fall fashion. From simple and cute ideas to intricate art that will turn your nails into a real statement piece, there’s something for everyone here. So if you’re ready to take your manicure game to the next level and channel the beauty of the natural fall tones, let’s dive into the world of olive green fall nails!
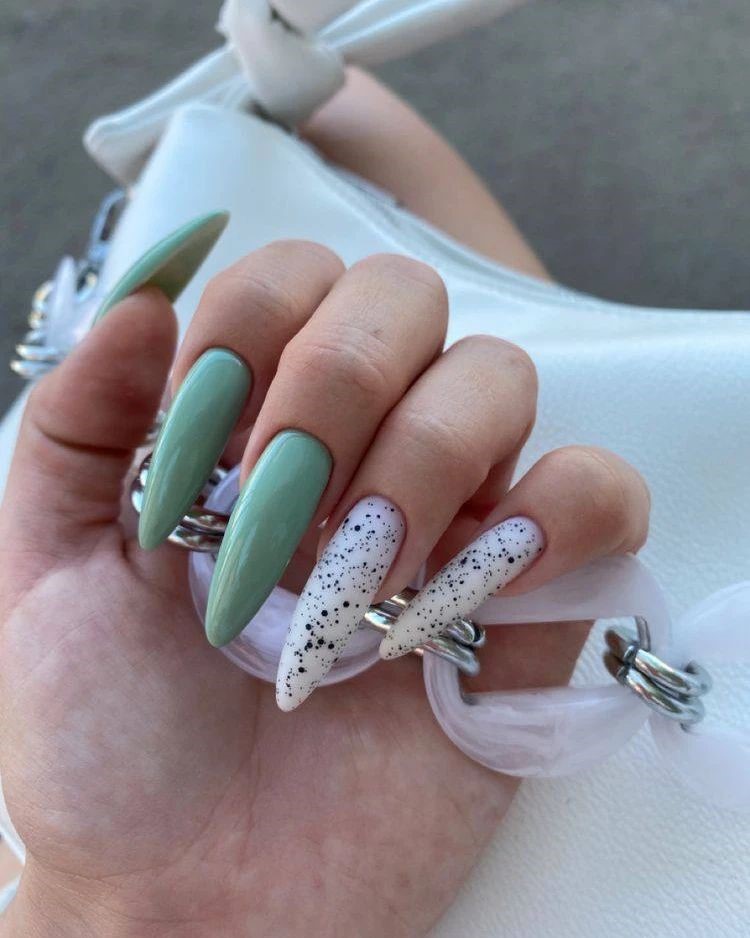
Speckled olive green and white nails
These beautiful acrylic nails have a combination of plain olive green and speckled white, creating a striking contrast. The almond shape elongates the fingers and adds a touch of elegance, making this design perfect for a trendy fall look.
Consumables:
- Olive green polish: Essie Fall For NYC
- White paint: OPI Alpine Snow
- Black speckled paint: China Glaze Whip It Good
- Base coat: Sally Hansen Hard As Nails
- Top coat: Seche Vite Dry Fast Topcoat
- Nail file: Tweezerman Professional
- Buffer: Onyx Professional 4-way nail buffer
DIY instructions:
- Preparation: Form your nails into an almond shape and polish the surface for a smooth application.
- Base: Apply a base coat to protect your natural nails.
- Color: Apply two coats of olive green nail polish to some nails and white nail polish to others, allowing each coat to dry completely.
- Speckle Effect: Apply the black speckle polish to the white nails for a unique, structured look.
- Topcoat: Finish with a glossy topcoat to seal the color and add shine.
- Tip: Make sure each coat is completely dry before applying the next for a smooth finish.
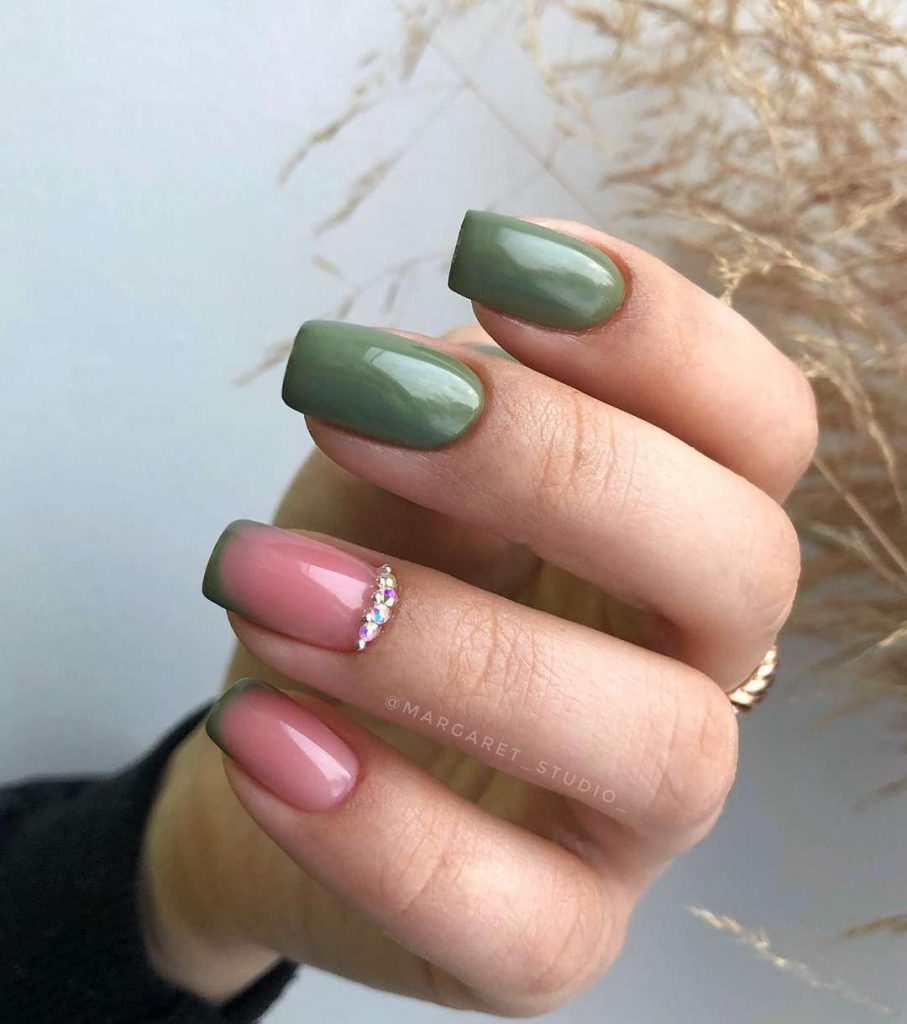
Olive green and pink gradient nails with rhinestones
This striking design combines olive green and pink in a gradient effect, accented with delicate rhinestones. The short square shape is both practical and stylish, making it a versatile choice for any occasion.
Consumables:
- Olive green polish: Zoya Jace
- Pink polish: OPI Bubble Bath
- Rhinestones: Swarovski Flatback Crystals
- Base layer: Orly Bonder Base layer
- Top coat: Glistening and shiny top coat
- Nail file: OPI Crystal nail file
- Nail glue: KISS Precision Nail Glue
DIY instructions:
- Preparation: File your nails into a short square shape and polish the surface.
- Base: Apply a base coat.
- Gradient: Create a gradient effect by applying pink polish at the base and olive green polish at the ends, blending the colors in the middle with a sponge.
- Rhinestones: Apply a small amount of nail glue to the area where you want to place the rhinestones and place them carefully with tweezers.
- Topcoat: Finish the design with a topcoat to add shine and durability.
- Tip: Use a makeup sponge to blend the colors together for a seamless gradient effect.
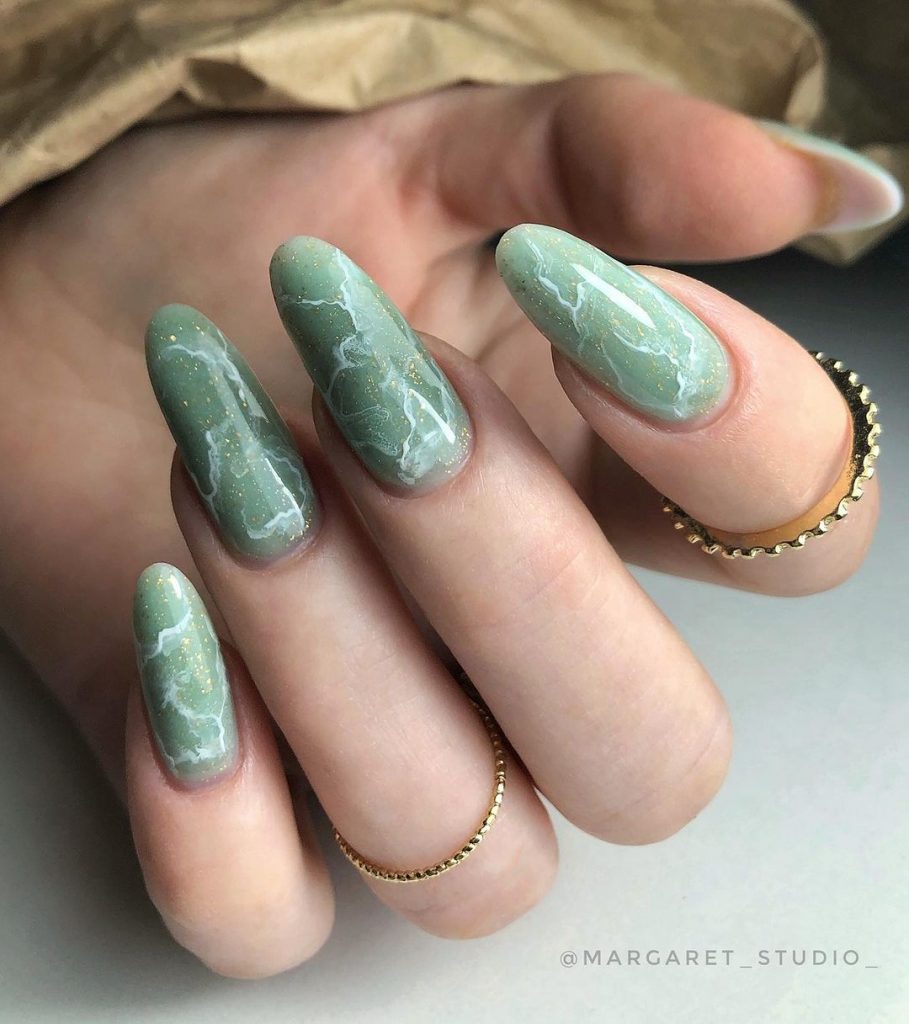
Marbled olive green nails
Marble nails are a unique and artistic design that never goes out of style. This version uses olive green as the base color, creating a stunning, sophisticated look.
Consumables:
- Olive green paint: China Glaze Central Parka
- White lacquer: Essie Blanc
- Gold glitter polish: Orly Luxe
- Nail art brush
- Base layer: Orly Bonder Base layer
- Top coat: Glistening and shiny top coat
- Nail file: Deborah Lippmann Smooth Operator
DIY instructions:
- Preparation: File your nails into the desired shape and polish the surface.
- Base: Apply a base coat.
- Marble effect: Apply a base of olive green nail polish. While still wet, add drops of white nail polish and swirl with a nail art brush to create the marble effect. Add a touch of gold glitter for extra flair.
- Topcoat: Finish with a topcoat to protect the design and add shine.
- Tip: Work quickly when creating the marble effect to prevent the paint from drying out before you achieve the look you want.
Geometric olive green nails
Geometric designs are a modern and stylish way to wear olive green nails. This design has sharp lines and contrasting colors for a cool look.
Consumables:
- Olive green polish: Zoya Jace
- Black polish: Sally Hansen Black Out
- White paint: OPI Alpine Snow
- Striping tape or nail art brush
- Base coat: Butter London Nail Foundation Priming Basecoat
- Top coat: Sally Hansen Insta-Dri Anti-Chip Topcoat
- Nail file: OPI Crystal nail file
DIY instructions:
- Preparation: shape and polish your nails.
- Base: Apply a base coat.
- Color blocking: Use striping tape to cut off parts of your nails. Paint different parts with olive green, black and white paint.
- Details: Add geometric lines and shapes with a nail art brush or more striping tape.
- Topcoat: Apply a topcoat to seal the design.
- Tip: For sharp lines, make sure the striping tape is firmly in place before painting and remove it before the paint is completely dry.
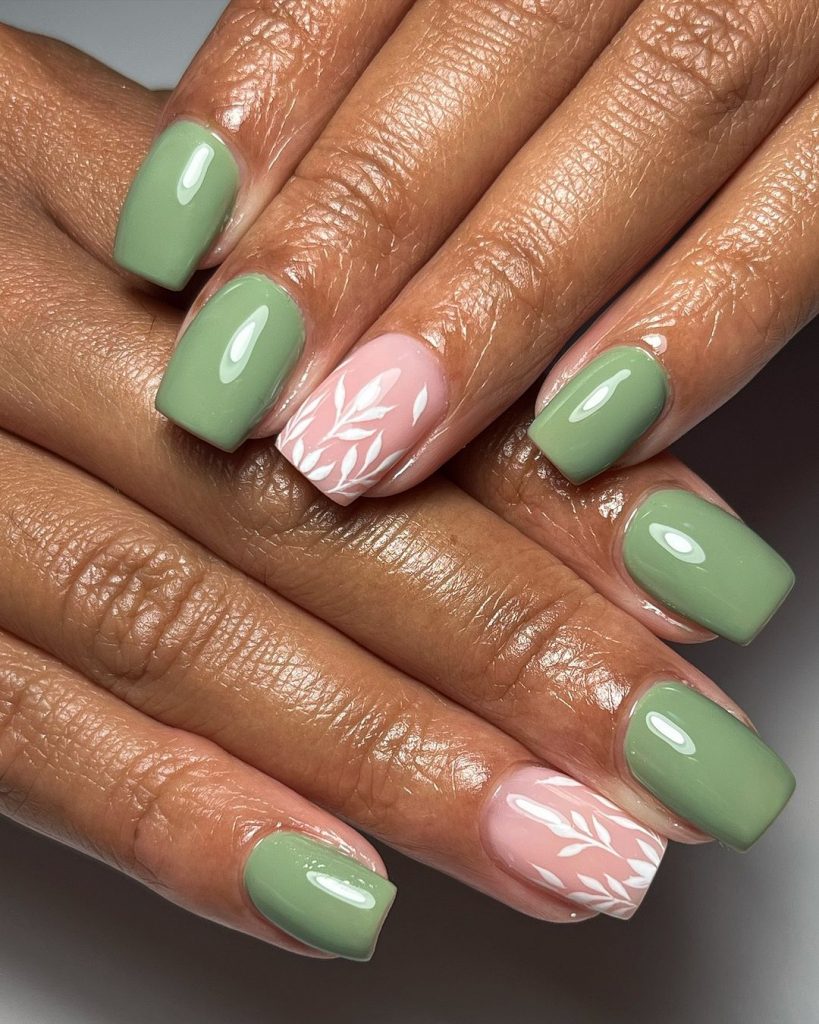
Floral olive green nails
Floral motifs on olive green nails add a touch of femininity and elegance, perfect for the fall season.
Consumables:
- Olive green polish: Essie Fall For NYC
- White paint: OPI Alpine Snow
- Flower nail stickers or nail art pen
- Base layer: CND Stickey base layer
- Top coat: Seche Vite Dry Fast Topcoat
- Nail file: Revlon Shape-N-Buff
DIY instructions:
- Preparation: Shape your nails and polish the surface.
- Base: Apply a base coat to protect your nails.
- Color: Apply two coats of olive green nail polish and allow each coat to dry completely.
- Floral Accents: Use a nail art pen or stickers to add floral designs to some accent nails.
- Top Coat: Seal with a top coat to protect the design and add shine.
- Tip: For a more professional look, use a fine brush to paint the flower details.
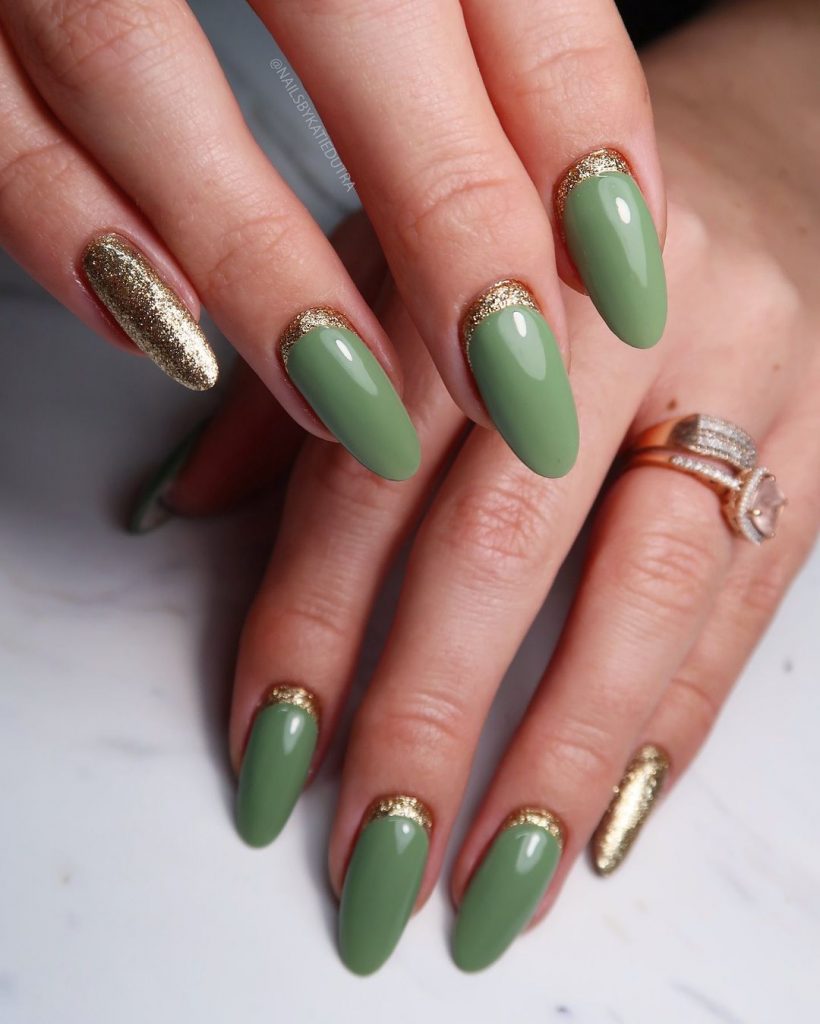
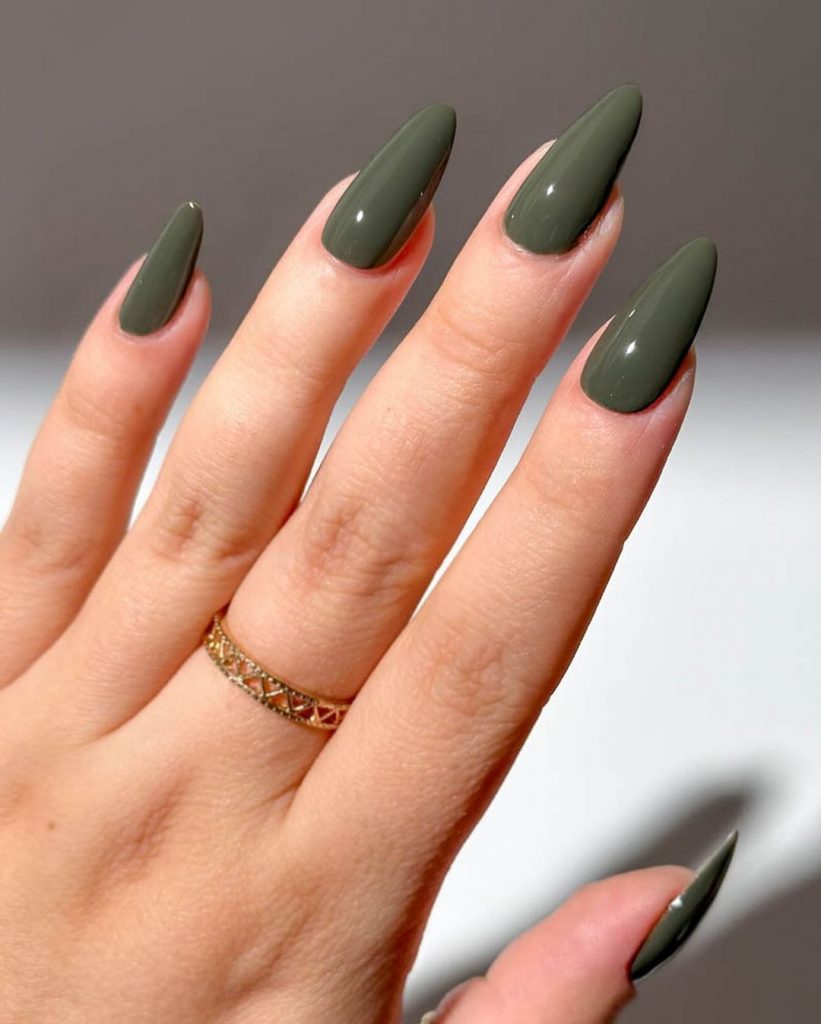
Gold tipped olive green nails
These nails combine a sturdy olive green base with a beautiful gold glitter tip, creating a luxurious and festive look. The almond shape adds elegance and makes the nails look elongated.
Consumables:
- Olive green polish: Essie Fall For NYC
- Gold glitter polish: Orly Luxe
- Base coat: Sally Hansen Hard As Nails
- Top coat: Seche Vite Dry Fast Topcoat
- Nail file: Tweezerman Professional
- Buffer: Onyx Professional 4-way nail buffer
DIY instructions:
- Preparation: File your nails into an almond shape and polish the surface to ensure smooth application.
- Base: Apply a base coat to protect your natural nails.
- Color: Apply two coats of olive green nail polish, allowing each coat to dry completely.
- Glitter Tips: Using a fine brush, apply gold glitter polish to the tips of your nails, creating a gradient effect.
- Top Coat: Finish with a top coat to seal in the color and glitter, for extra shine and protection.
- Tip: Clean the edges with a nail brush dipped in acetone for a perfect finish.
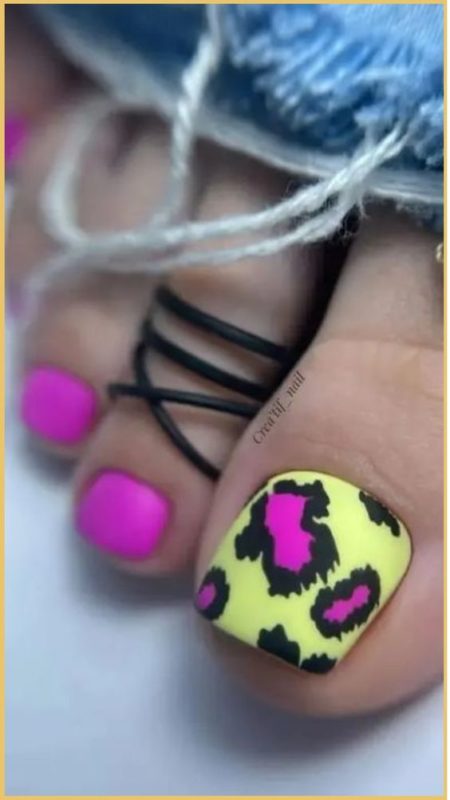
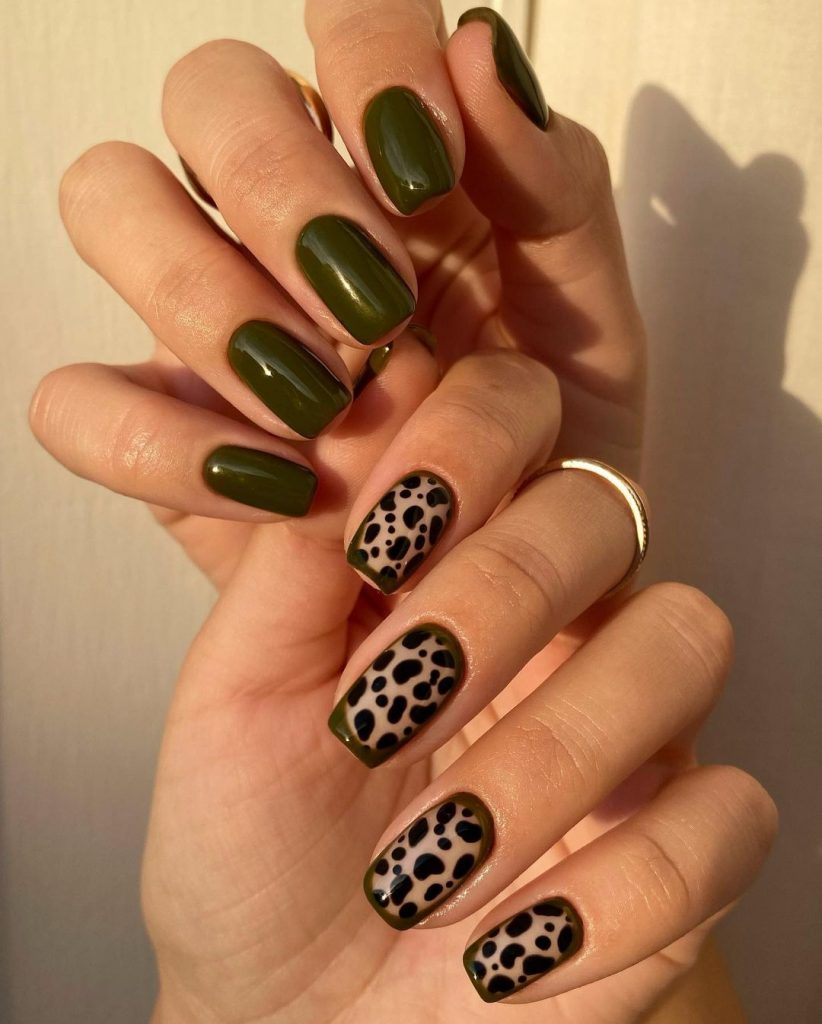
Olive green and animal print nails
These nails have a striking combination of olive green and animal print, perfect to make a statement this fall. The short square shape makes them practical and stylish.
Consumables:
- Olive green polish: Zoya Jace
- Black polish: Sally Hansen Black Out
- Nude polish: OPI Bubble Bath
- Base layer: Orly Bonder Base layer
- Top coat: Glistening and shiny top coat
- Nail file: OPI Crystal nail file
DIY instructions:
- Preparation: Shape your nails into a short square and polish the surface.
- Base: Apply a base coat.
- Color: Paint most of your nails with olive green polish, leaving a few for the animal print design.
- Animal print: For the animal print nails, apply a nude base and use a dotting tool or a fine brush to add black spots.
- Topcoat: Seal everything with a topcoat.
- Tip: Make sure the black spots are dry before applying the top coat to prevent stains.
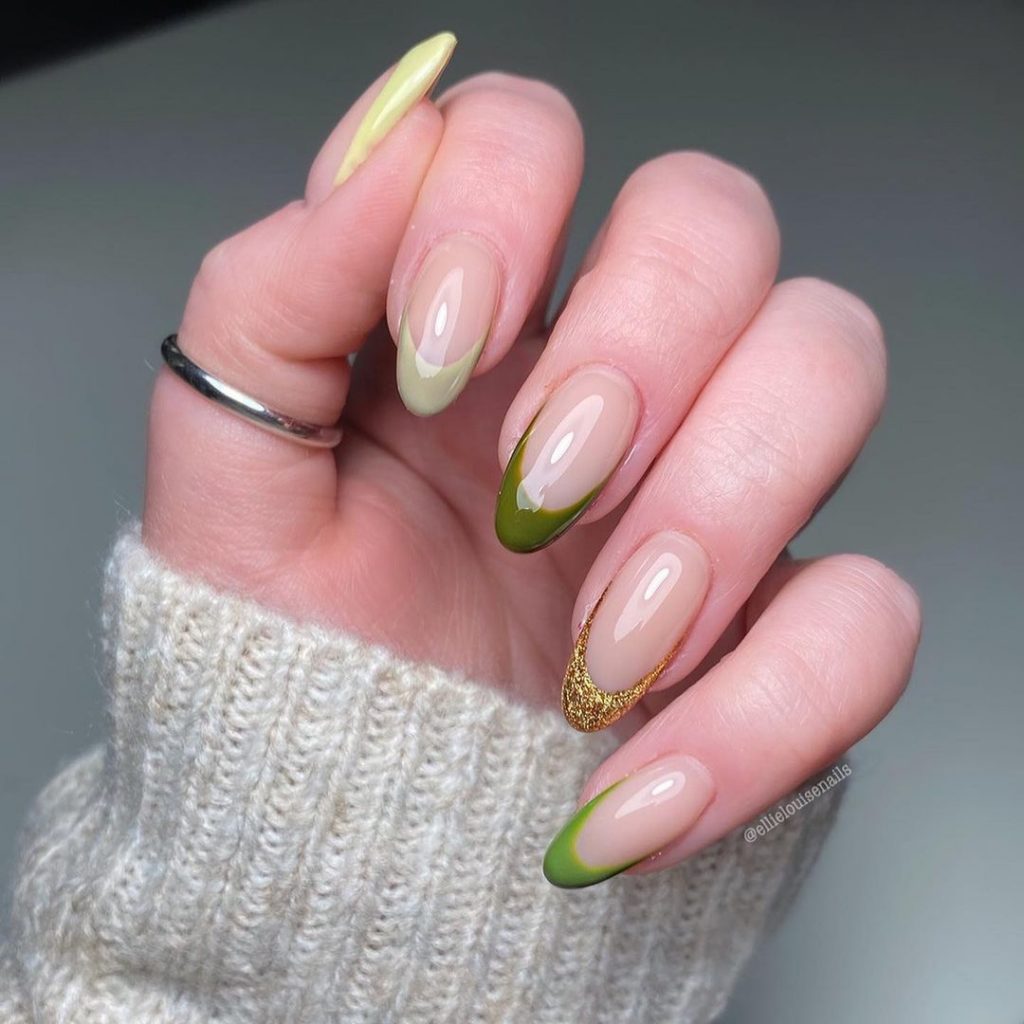
Green French tips with gold accents
This design puts a modern twist on the classic French manicure with olive green tips and gold accents, perfect for adding a touch of elegance to your look.
Consumables:
- Olive green paint: China Glaze Central Parka
- Gold glitter polish: Orly Luxe
- Light green polish: Essie Chillato
- Base coat: Butter London Nail Foundation Priming Basecoat
- Top coat: Sally Hansen Insta-Dri Anti-Chip Topcoat
- Nail file: Revlon Shape-N-Buff
DIY instructions:
- Preparation: Shape your nails and polish the surface.
- Base: Apply a base coat.
- French Tips: Use striping tape to create clean lines and paint the tips with olive green and light green polish.
- Gold Accents: Add gold glitter accents to some tips for a touch of sparkle.
- Topcoat: Apply a topcoat to seal the design.
- Tip: For perfect French tips, make sure the striping tape is firmly in place and remove it before the paint is completely dry.
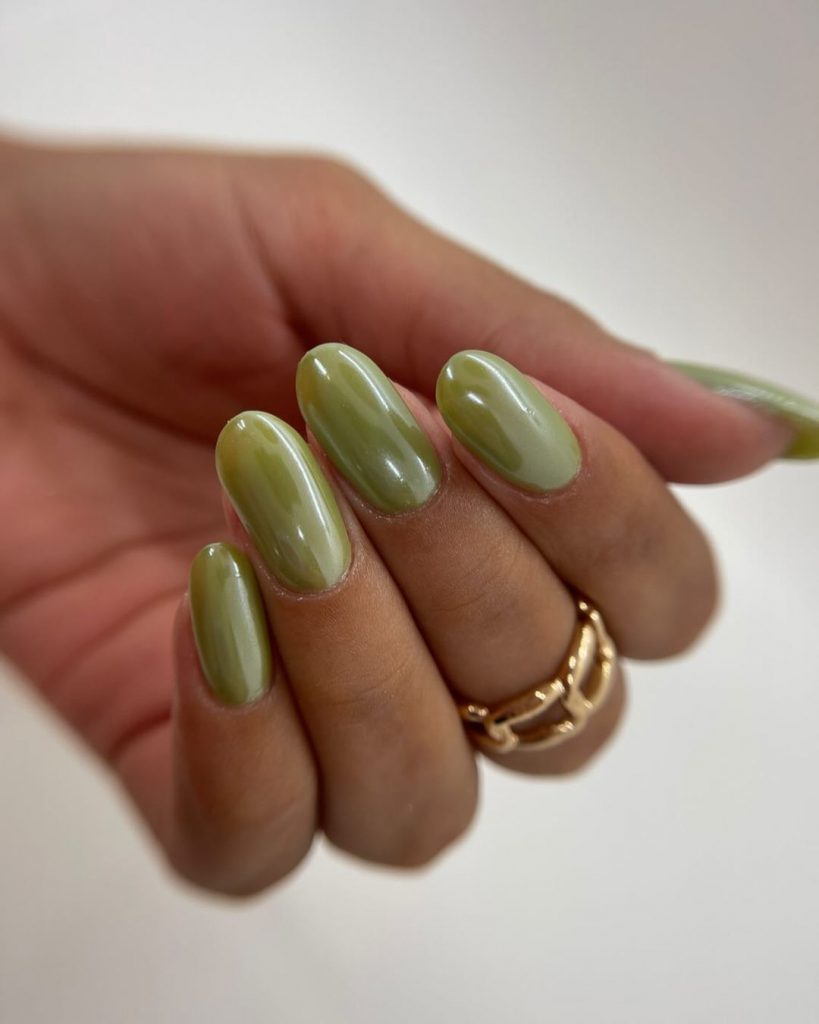
Shiny olive green nails
These nails are simple yet chic and have a glossy olive green finish that is perfect for any occasion. The oval shape adds a touch of elegance.
Consumables:
- Olive green polish: Essie Fall For NYC
- Base coat: Sally Hansen Hard As Nails
- Top coat: Seche Vite Dry Fast Topcoat
- Nail file: Tweezerman Professional
- Buffer: Onyx Professional 4-way nail buffer
DIY instructions:
- Preparation: File your nails into an oval shape and polish the surface.
- Base: Apply a base coat to protect your nails.
- Color: Apply two coats of olive green nail polish and allow each coat to dry completely.
- Topcoat: Finish with a glossy topcoat to add shine and protection.
- Tip: For a salon-like finish, make sure each coat is completely dry before applying the next.
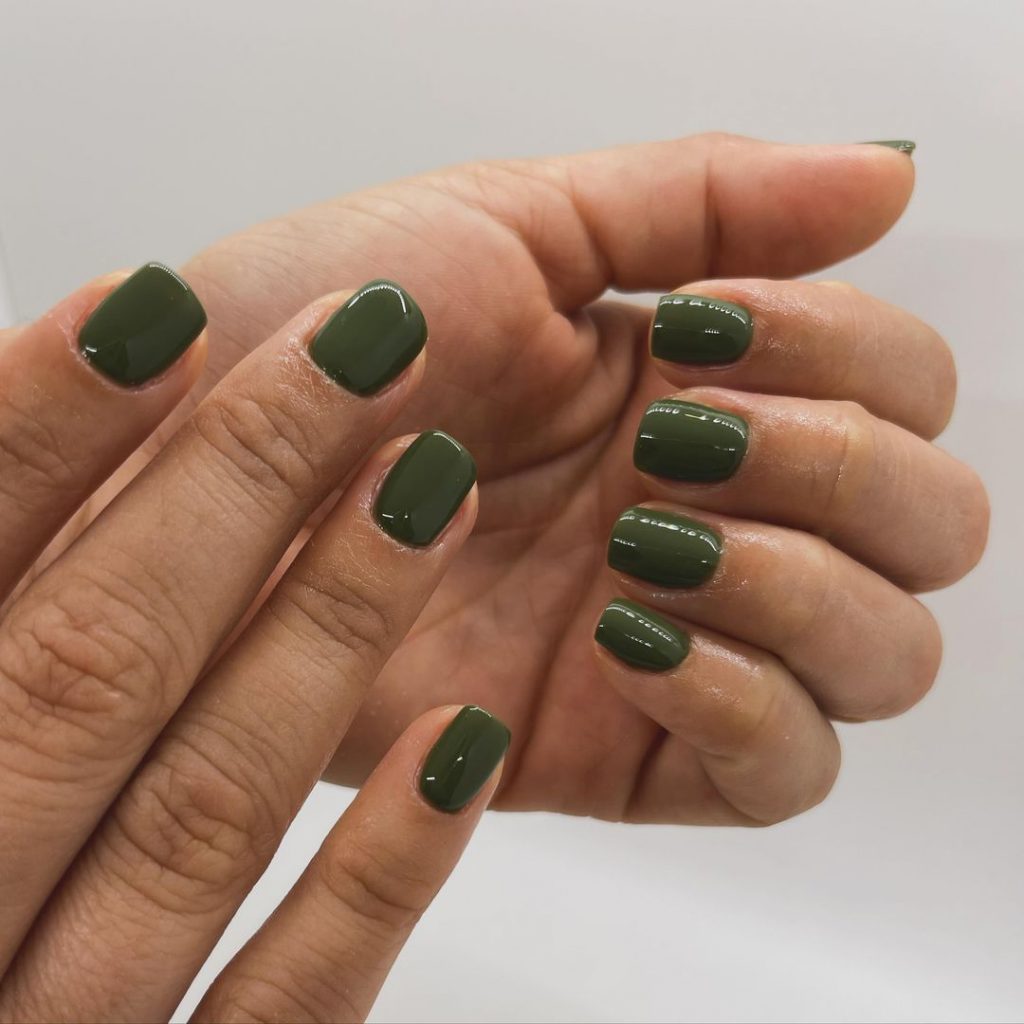
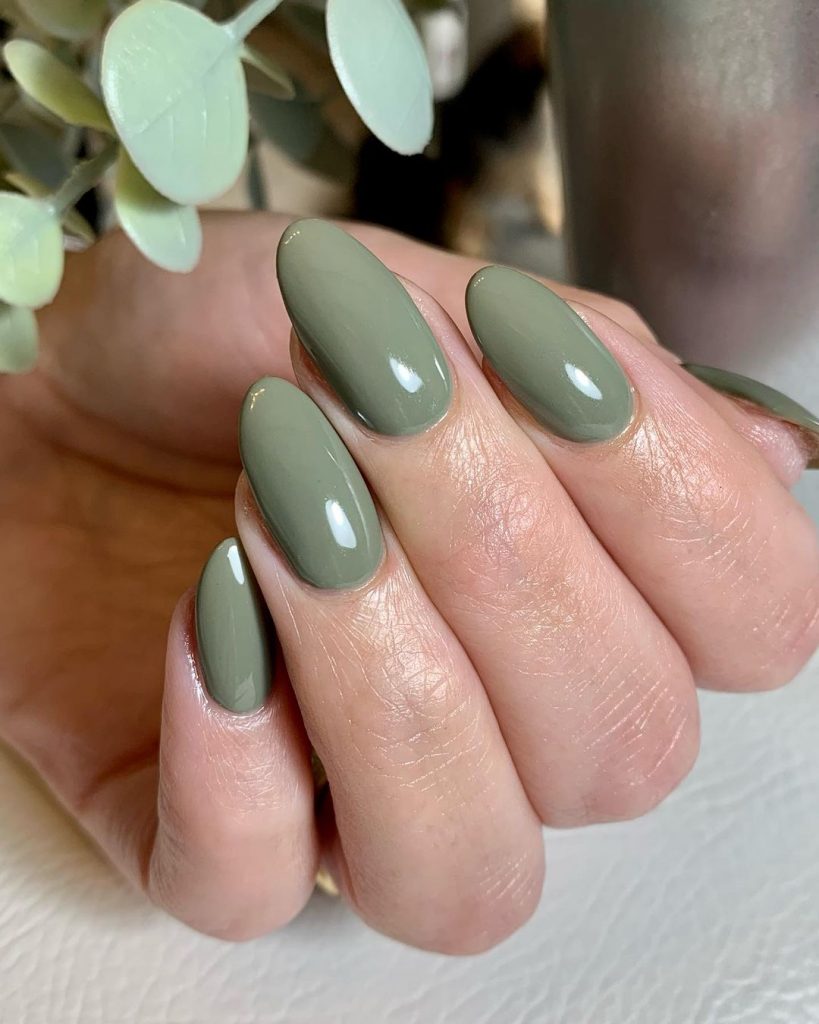
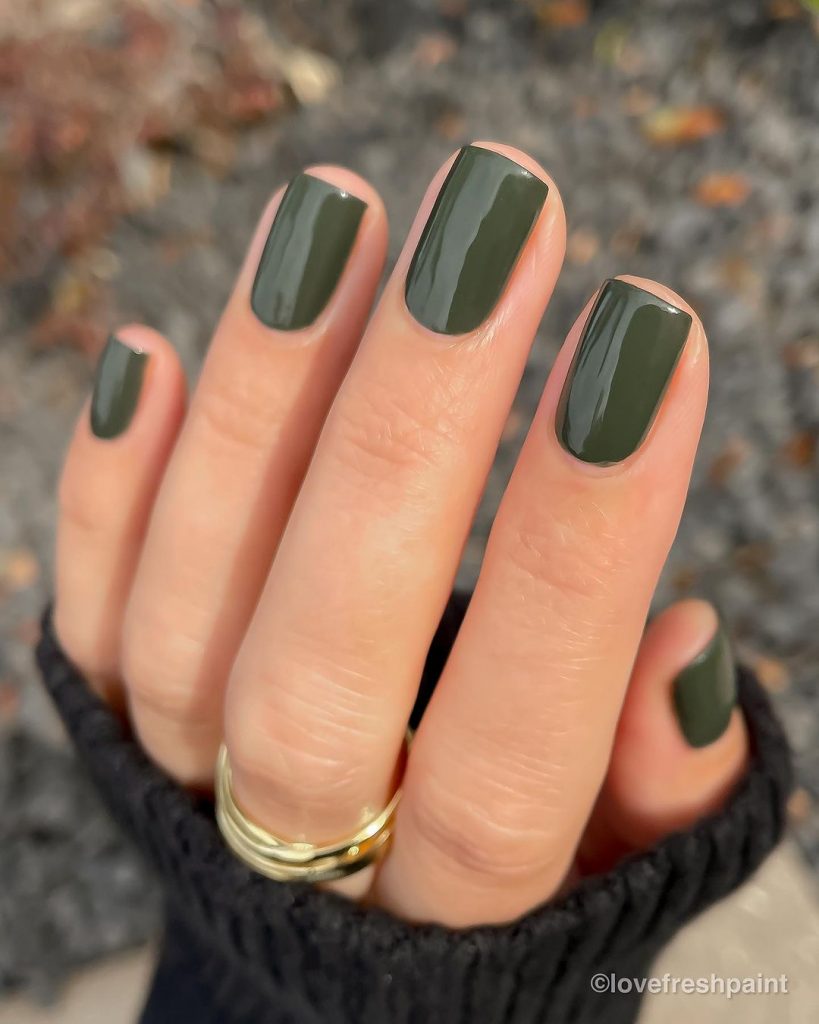
Dark olive green short nails
These short nails in a dark olive green shade are perfect for a subtle yet sophisticated fall look. The short square shape is practical and stylish.
Consumables:
- Dark olive green polish: OPI Stay Off the Lawn!
- Base layer: CND Stickey base layer
- Top coat: Seche Vite Dry Fast Topcoat
- Nail file: Deborah Lippmann Smooth Operator
DIY instructions:
- Preparation: Shape your nails into a short square and polish the surface.
- Base: Apply a base coat.
- Color: Paint your nails with two coats of dark olive green nail polish and let each coat dry.
- Topcoat: Seal with a topcoat for a glossy finish.
- Tip: For a smooth application, use thin coats of nail polish and allow it to dry completely between coats.
Shiny olive green nails
These nails have a glossy olive green finish that is both simple and chic. The short square shape is practical for everyday use yet looks polished and stylish.
Consumables:
- Olive green polish: OPI Stay off the lawn!
- Base coat: Sally Hansen Hard As Nails
- Top coat: Seche Vite Dry Fast Topcoat
- Nail file: Tweezerman Professional
- Buffer: Onyx Professional 4-way nail buffer
DIY instructions:
- Preparation: File your nails into a short square shape and polish the surface for a smooth application.
- Base: Apply a base coat to protect your natural nails.
- Color: Apply two coats of olive green nail polish and allow each coat to dry completely.
- Topcoat: Finish with a glossy topcoat to seal the color and add shine.
- Tip: For a salon-like finish, make sure each coat is completely dry before applying the next.
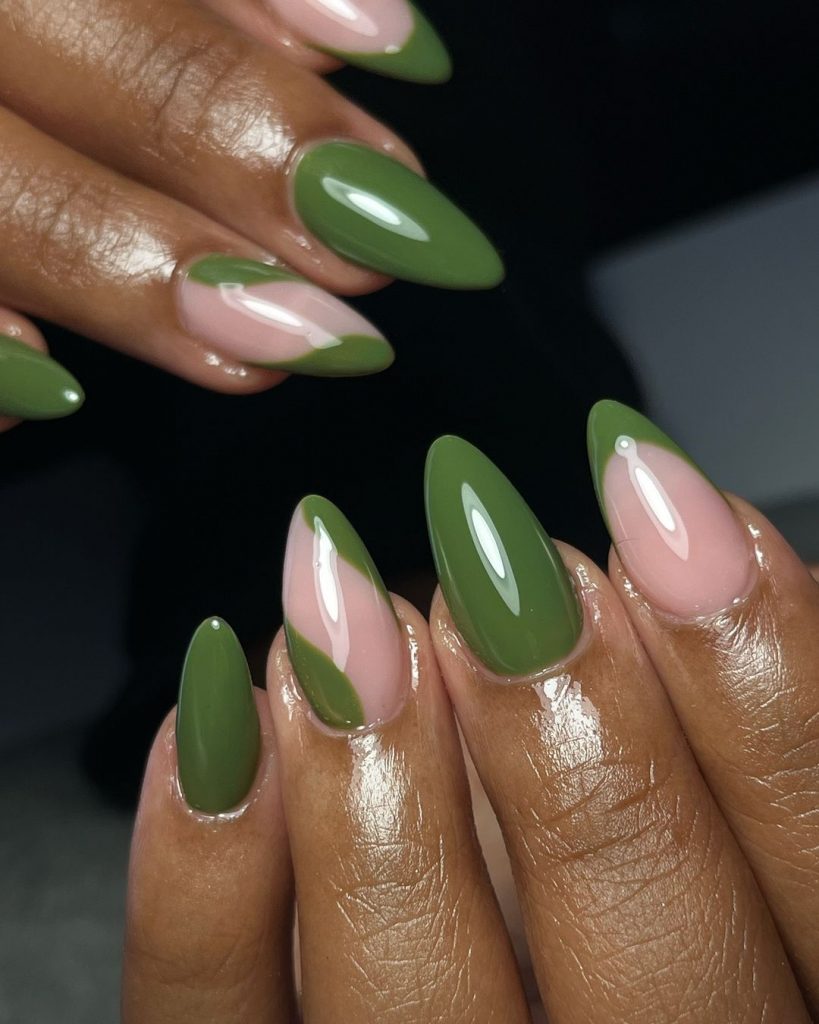
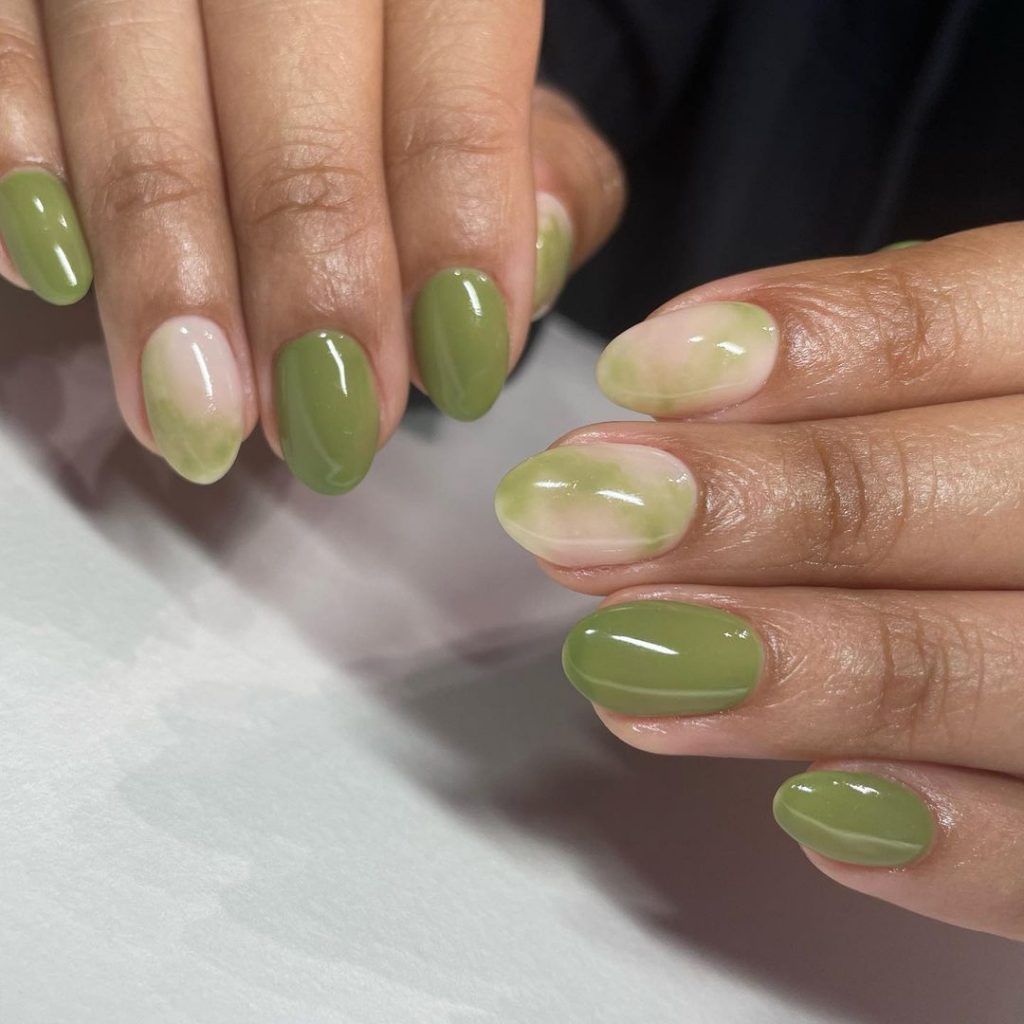
Olive green with watercolor effect
This design combines olive green nails with a delicate watercolor effect, perfect for adding a unique twist to your autumn manicure. The oval shape enhances the elegance of the design.
Consumables:
- Olive green polish: Essie Fall For NYC
- Transparent pink polish: OPI Bubble Bath
- Base layer: Orly Bonder Base layer
- Top coat: Glistening and shiny top coat
- Nail file: OPI Crystal nail file
DIY instructions:
- Preparation: Shape your nails into an oval shape and polish the surface.
- Base: Apply a base coat.
- Color: Apply a translucent pink nail polish as a base and then create the watercolor effect by adding drops of olive green nail polish and blending gently with a nail brush.
- Topcoat: Finish the design with a topcoat.
- Tip: Work quickly to fade the colors before they dry for the best watercolor effect.
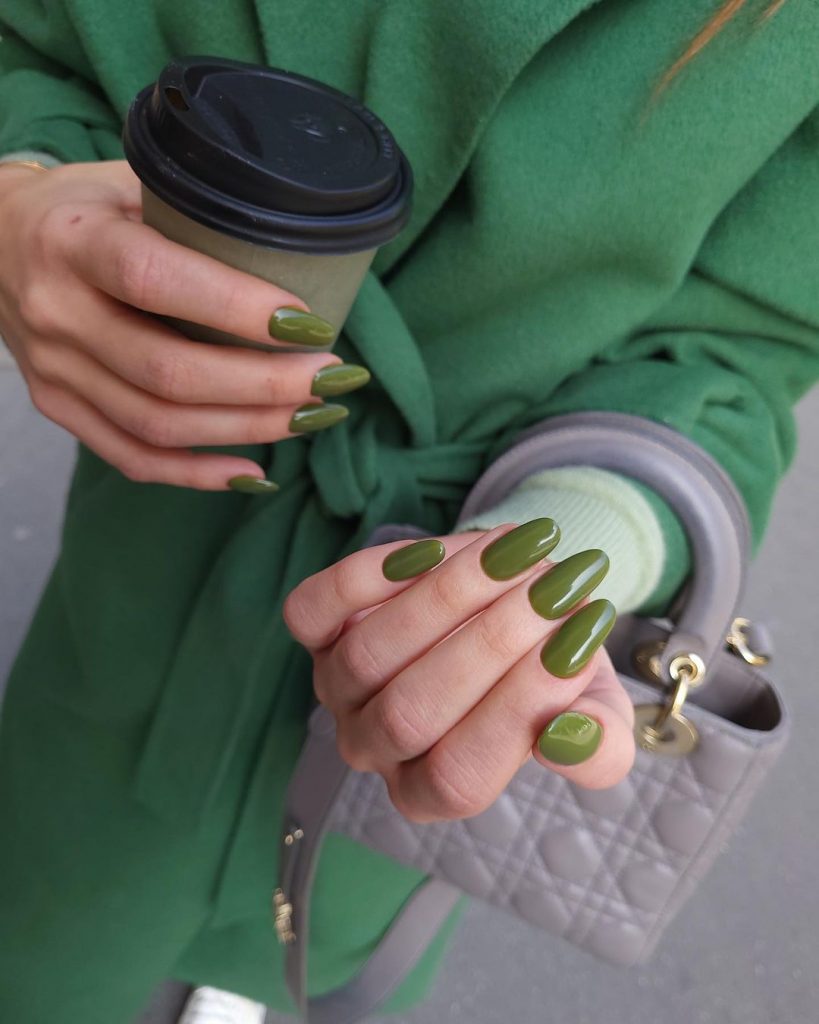
Olive green for on the go
These olive green nails are perfect for people who are always on the go. The glossy finish and almond shape provide a refined look that suits any outfit.
Consumables:
- Olive green paint: China Glaze Central Parka
- Base coat: Butter London Nail Foundation Priming Basecoat
- Top coat: Sally Hansen Insta-Dri Anti-Chip Topcoat
- Nail file: Revlon Shape-N-Buff
DIY instructions:
- Preparation: File your nails in an almond shape and polish the surface.
- Base: Apply a base coat to ensure longevity.
- Color: Apply two coats of olive green nail polish, allowing each coat to dry completely.
- Topcoat: Finish with a topcoat to add shine and protect the color.
- Tip: For a perfect almond shape, file your nails in one direction to prevent splitting.
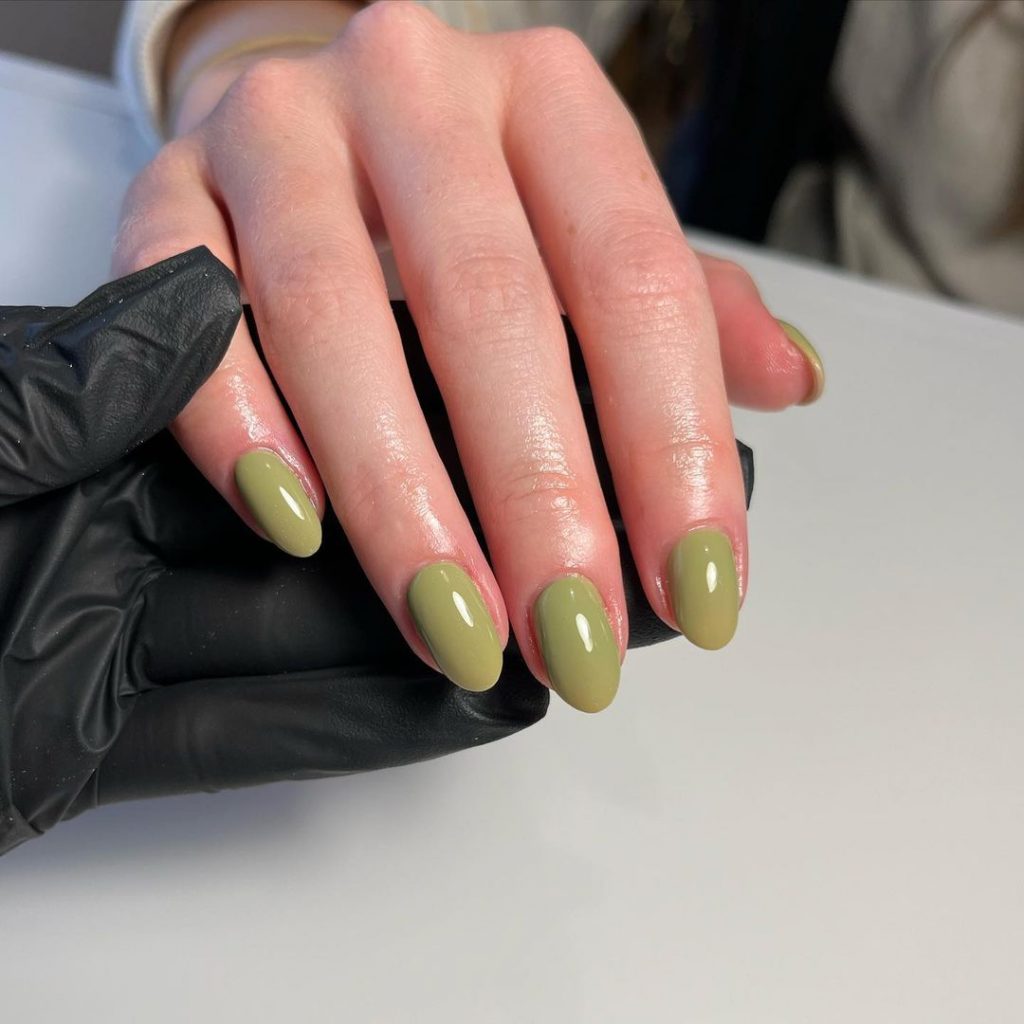
Subtle olive green nails
These nails have a subtle olive green color that is perfect for a minimalist look. The soft round shape is easy to maintain and looks elegant.
Consumables:
- Olive green polish: Essie Sew Psyched
- Base layer: CND Stickey base layer
- Top coat: Seche Vite Dry Fast Topcoat
- Nail file: Deborah Lippmann Smooth Operator
DIY instructions:
- Preparation: Shape your nails into a soft round shape and polish the surface.
- Base: Apply a base coat to protect your nails.
- Color: Apply two coats of olive green nail polish and allow each coat to dry completely.
- Topcoat: Seal with a topcoat for a glossy finish.
- Tip: Thin layers of polish prevent bubbles and ensure a smooth finish.
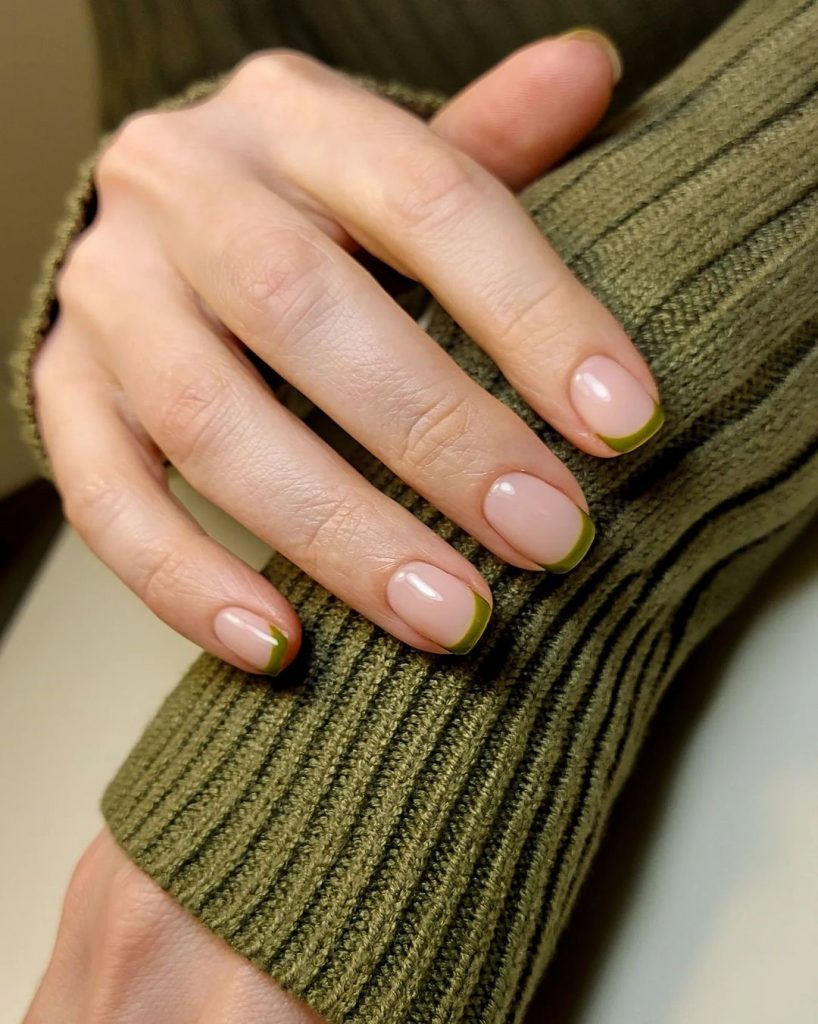
Olive green French tips
This modern version of French Tips combines olive green with a nude base, creating a sophisticated and understated look. Perfect for any occasion, this design is both trendy and timeless.
Consumables:
- Olive green polish: Zoya Jace
- Nude polish: OPI Bubble Bath
- Base layer: Orly Bonder Base layer
- Top coat: Glistening and shiny top coat
- Nail file: OPI Crystal nail file
DIY instructions:
- Preparation: Shape your nails into a soft square and polish the surface.
- Base: Apply a nude polish as a base layer.
- Tips: Paint olive green dots on each nail with a fine brush.
- Topcoat: Finish the design with a topcoat to add shine and durability.
- Tip: Use striping tape for a precise and clean French tip.
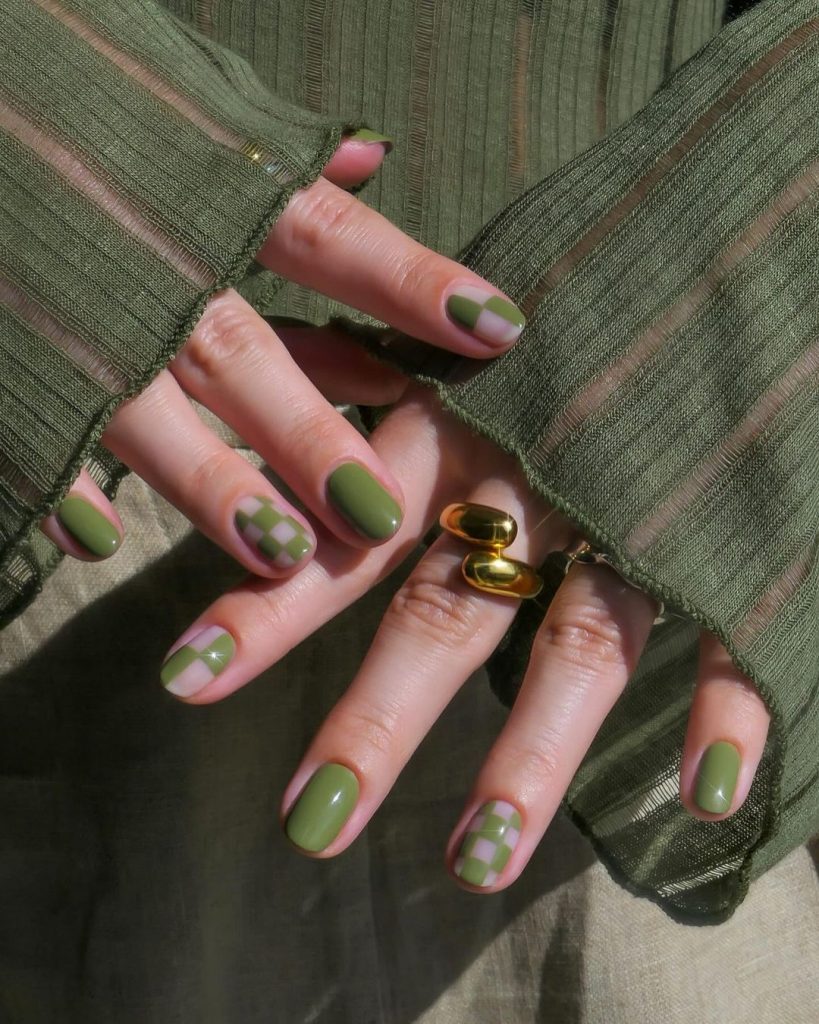
Checkered olive green nails
This design combines plain olive green with a checkered pattern, creating a playful yet refined look. The short square shape makes these nails practical and stylish for everyday use.
Consumables:
- Olive green polish: Essie Fall For NYC
- Nude polish: OPI Bubble Bath
- Base layer: Orly Bonder Base layer
- Top coat: Glistening and shiny top coat
- Nail file: OPI Crystal nail file
- Nail art brush or striping tape
DIY instructions:
- Preparation: File your nails into a short square shape and polish the surface.
- Base: Apply a base coat.
- Color: Paint most of your nails with olive green polish, leaving a few for the checkered design.
- Checkered pattern: For the checkered nails, apply a nude base and use a nail art brush or striping tape to create the checkered pattern with olive green.
- Topcoat: Seal everything with a topcoat.
- Tip: Make sure the diamond pattern is dry before applying the top coat to prevent stains.
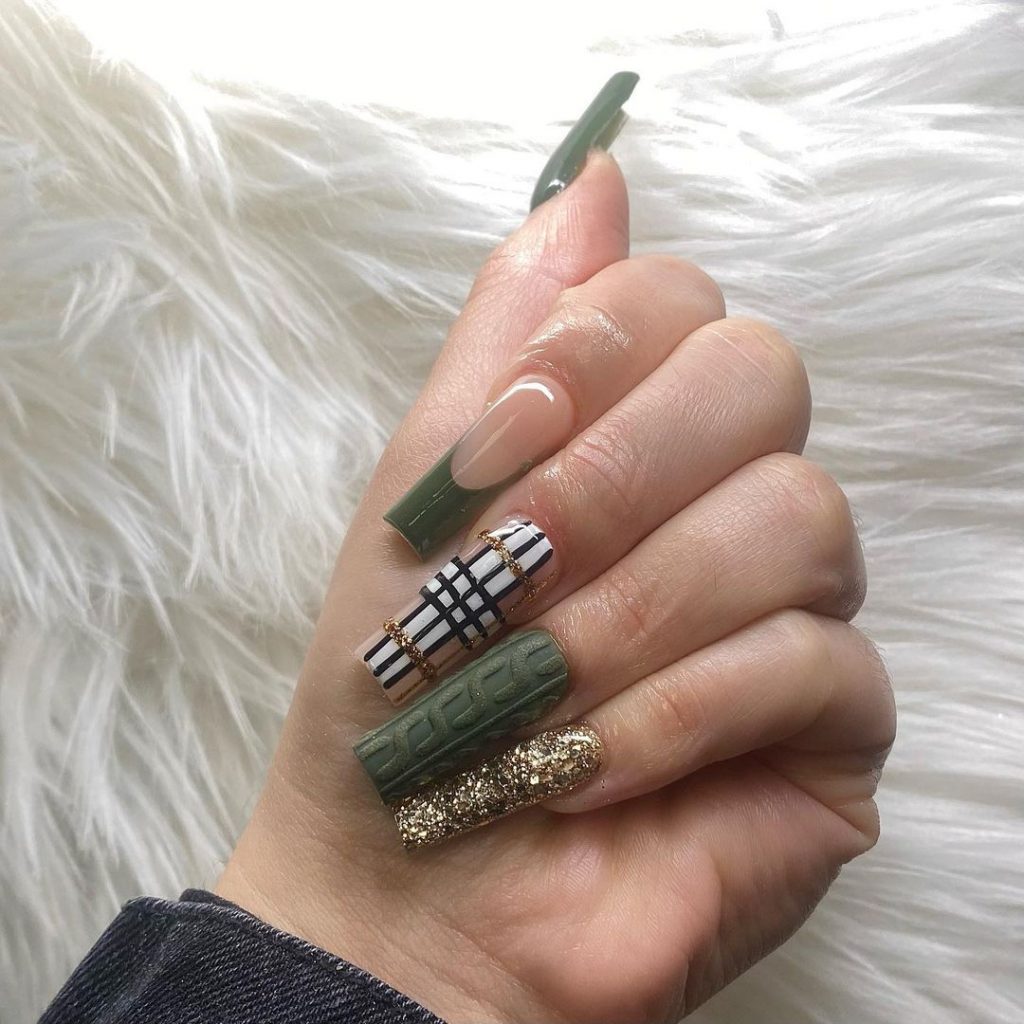
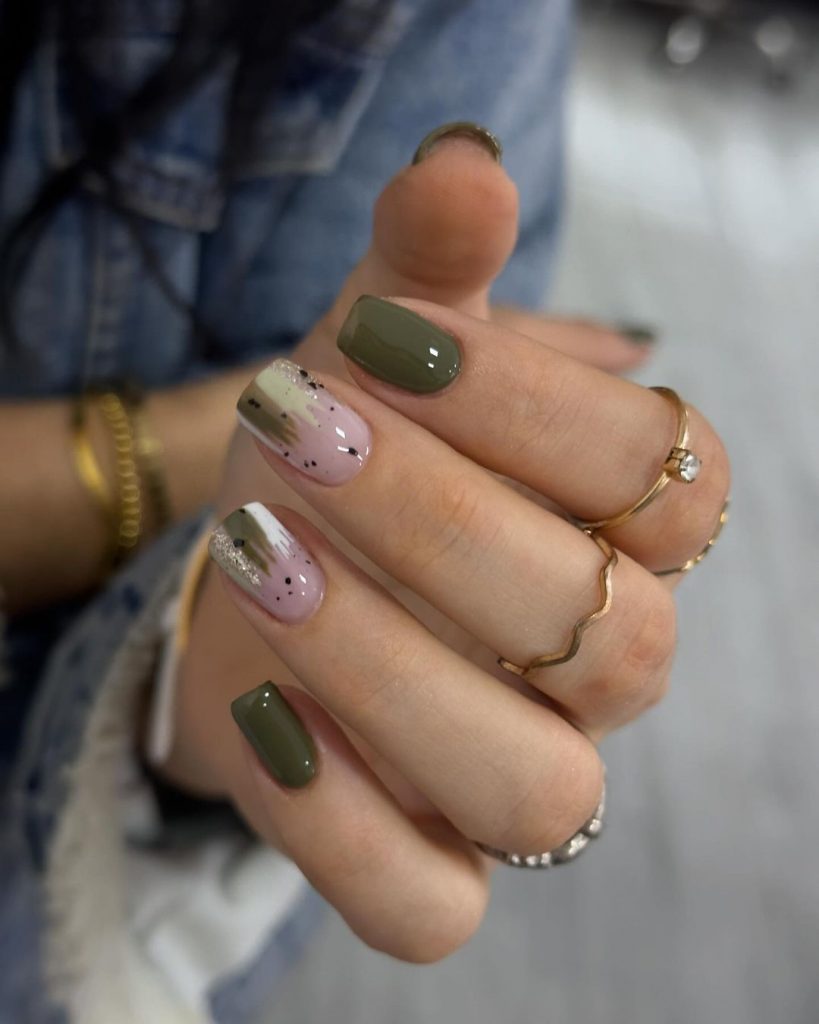
Mixed texture and pattern nails
This unique design features a mix of olive green, checked pattern, gold glitter and knitted texture, making it a striking choice for fall. The long coffin shape adds to the dramatic effect.
Consumables:
- Olive green polish: Zoya Jace
- White paint: OPI Alpine Snow
- Black polish: Sally Hansen Black Out
- Gold glitter polish: Orly Luxe
- Nude polish: OPI Bubble Bath
- Textured top coat or acrylic powder for a knitted effect
- Base coat: Butter London Nail Foundation Priming Basecoat
- Top coat: Sally Hansen Insta-Dri Anti-Chip Topcoat
- Nail file: Revlon Shape-N-Buff
DIY instructions:
- Preparation: Shape your nails into a long coffin shape and polish the surface.
- Base: Apply a base coat.
- Color and pattern: Paint each nail with different designs: solid olive green, checkered, gold glitter and knitted texture. For the checkered pattern, use striping tape or a fine brush to create the lines.
- Topcoat: Finish with a topcoat to protect each design.
- Tip: For the knitted effect, apply a textured top coat or mix acrylic powder with nail polish.
Solid olive green oval nails
These nails have a simple and chic solid olive green color in an oval shape. This design is elegant and perfect for any occasion.
Consumables:
- Olive green polish: Essie Sew Psyched
- Base layer: CND Stickey base layer
- Top coat: Seche Vite Dry Fast Topcoat
- Nail file: Deborah Lippmann Smooth Operator
- Buffer: Onyx Professional 4-way nail buffer
DIY instructions:
- Preparation: Shape your nails into an oval shape and polish the surface.
- Base: Apply a base coat to protect your nails.
- Color: Apply two coats of olive green nail polish and allow each coat to dry completely.
- Topcoat: Seal with a topcoat for a glossy finish.
- Tip: Thin layers of polish prevent bubbles and ensure a smooth finish.
Olive green and naked French tips
This modern take on French tips combines olive green with a nude base and silver glitter accents, creating a refined and understated look. Perfect for any occasion, this design is both trendy and timeless.

Consumables:
- Olive green polish: Zoya Jace
- Nude polish: OPI Bubble Bath
- Silver glitter polish: Orly Tiara
- Base layer: Orly Bonder Base layer
- Top coat: Glistening and shiny top coat
- Nail file: OPI Crystal nail file
DIY instructions:
- Preparation: Shape your nails into a soft square and polish the surface.
- Base: Apply a nude polish as a base layer.
- Tips: Paint olive green dots on each nail with a fine brush.
- Glitter Accents: Add a silver glitter line where the nude and olive green meet.
- Topcoat: Finish the design with a topcoat to add shine and durability.
- Tip: Use striping tape for a precise and clean French tip.
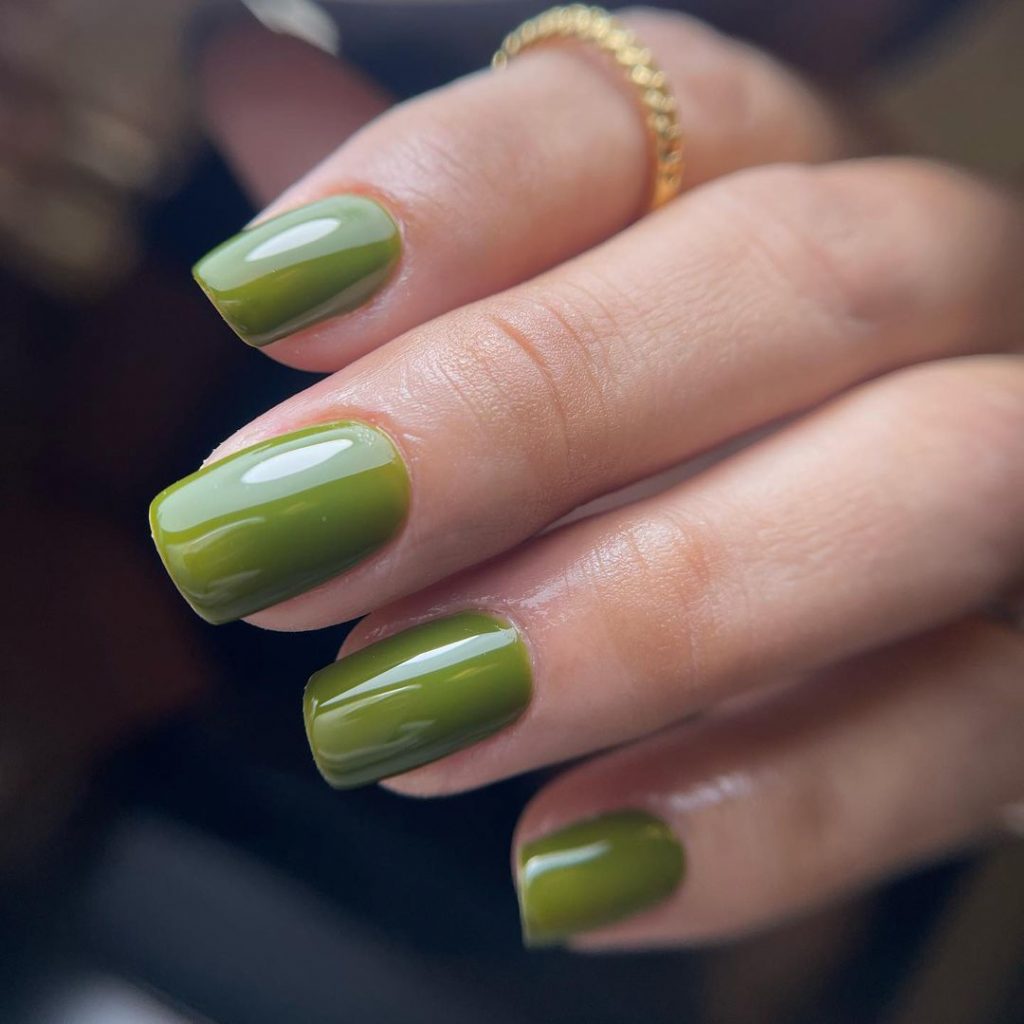
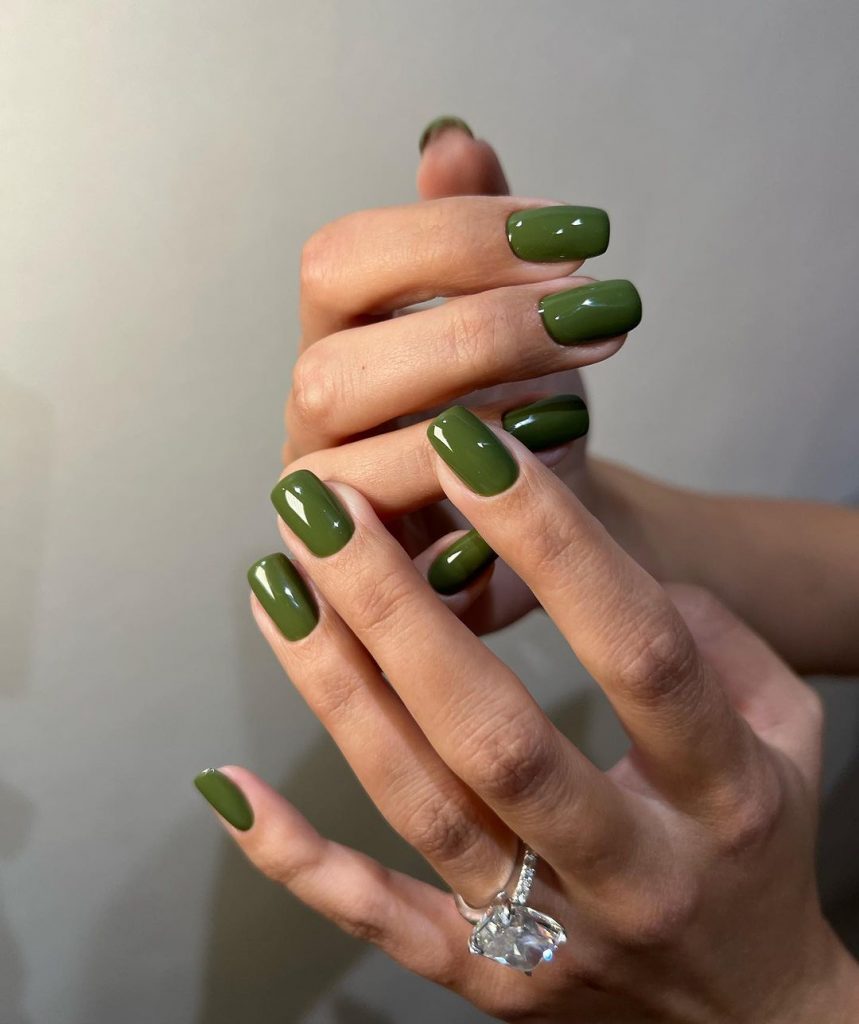
Shiny olive green nails with square shape
These nails have a glossy olive green finish in a classic square shape, perfect for a sleek and sophisticated look.
Consumables:
- Olive green polish: OPI Stay off the lawn!
- Base coat: Sally Hansen Hard As Nails
- Top coat: Seche Vite Dry Fast Topcoat
- Nail file: Tweezerman Professional
- Buffer: Onyx Professional 4-way nail buffer
DIY instructions:
- Preparation: File your nails into a square shape and polish the surface for a smooth application.
- Base: Apply a base coat to protect your natural nails.
- Color: Apply two coats of olive green nail polish and allow each coat to dry completely.
- Topcoat: Finish with a glossy topcoat to seal the color and add shine.
- Tip: For a salon-like finish, make sure each coat is completely dry before applying the next.
Classic olive green almond nails
These classic almond-shaped nails have a solid olive green color, perfect for a sophisticated and timeless look. The glossy finish adds a touch of elegance, making them suitable for both everyday use and special occasions.
Consumables:
- Olive green polish: Essie Sew Psyched
- Base layer: CND Stickey base layer
- Top coat: Seche Vite Dry Fast Topcoat
- Nail file: Deborah Lippmann Smooth Operator
- Buffer: Onyx Professional 4-way nail buffer
DIY instructions:
- Preparation: Shape your nails into an almond shape and polish the surface.
- Base: Apply a base coat to protect your nails.
- Color: Apply two coats of olive green nail polish and allow each coat to dry completely.
- Topcoat: Seal with a topcoat for a glossy finish.
- Tip: Thin layers of polish prevent bubbles and ensure a smooth finish.
Olive green with abstract art
This design features a mix of solid olive green nails and abstract art on a nude base, creating a trendy and artistic look. The combination of colors and patterns makes these nails a unique choice for fall.
Consumables:
- Olive green polish: Zoya Jace
- Nude polish: OPI Bubble Bath
- Black polish: Sally Hansen Black Out
- Gold glitter polish: Orly Luxe
- Nail art brush
- Base layer: Orly Bonder Base layer
- Top coat: Glistening and shiny top coat
- Nail file: OPI Crystal nail file
DIY instructions:
- Preparation: Shape your nails into a square shape and polish the surface.
- Base: Apply a base coat.
- Color and art: Paint some nails with olive green nail polish and leave some for the abstract art. Use a nail art brush to create abstract designs with black and gold glitter polish on the nude base.
- Top Coat: Seal with a top coat to protect the design and add shine.
- Tip: Clean the edges with a nail brush dipped in acetone for a flawless look.
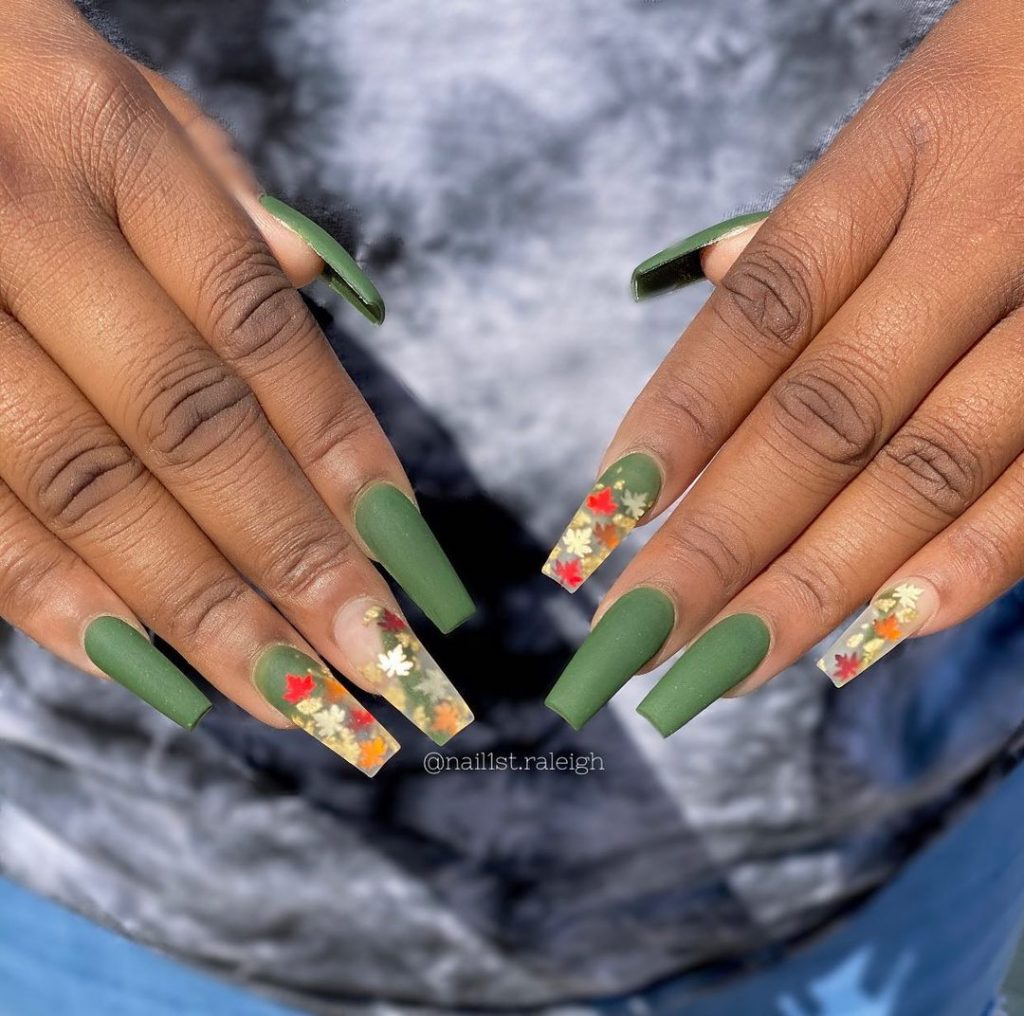
Olive green floral coffin nails
These nails combine olive green with bright tips with pressed flowers, creating a beautiful and natural look. The shape of the chest adds drama and elegance, making them perfect for fall.
Consumables:
- Olive green paint: China Glaze Central Parka
- Clearcoat: Essie Good to Go
- Pressed flowers or floral nail stickers
- Base coat: Butter London Nail Foundation Priming Basecoat
- Top coat: Sally Hansen Insta-Dri Anti-Chip Topcoat
- Nail file: Revlon Shape-N-Buff
DIY instructions:
- Preparation: Shape your nails into a coffin shape and polish the surface.
- Base: Apply a base coat.
- Color and flowers: Paint the nails with olive green polish, but leave the tips free. Apply the pressed flowers or flower stickers to the clear tips.
- Topcoat: Seal with a topcoat to protect the design.
- Tip: Use tweezers to place the flowers accurately.
Simple olive green short nails
These short square nails have a glossy olive green finish, perfect for a sleek and polished look. This simple design is ideal for those who prefer a minimalist style.
Consumables:
- Olive green polish: OPI Stay off the lawn!
- Base coat: Sally Hansen Hard As Nails
- Top coat: Seche Vite Dry Fast Topcoat
- Nail file: Tweezerman Professional
- Buffer: Onyx Professional 4-way nail buffer
DIY instructions:
- Preparation: File your nails into a short square shape and polish the surface.
- Base: Apply a base coat to protect your natural nails.
- Color: Apply two coats of olive green nail polish and allow each coat to dry completely.
- Topcoat: Finish with a glossy topcoat to seal the color and add shine.
- Tip: For a salon-like finish, make sure each coat is completely dry before applying the next.
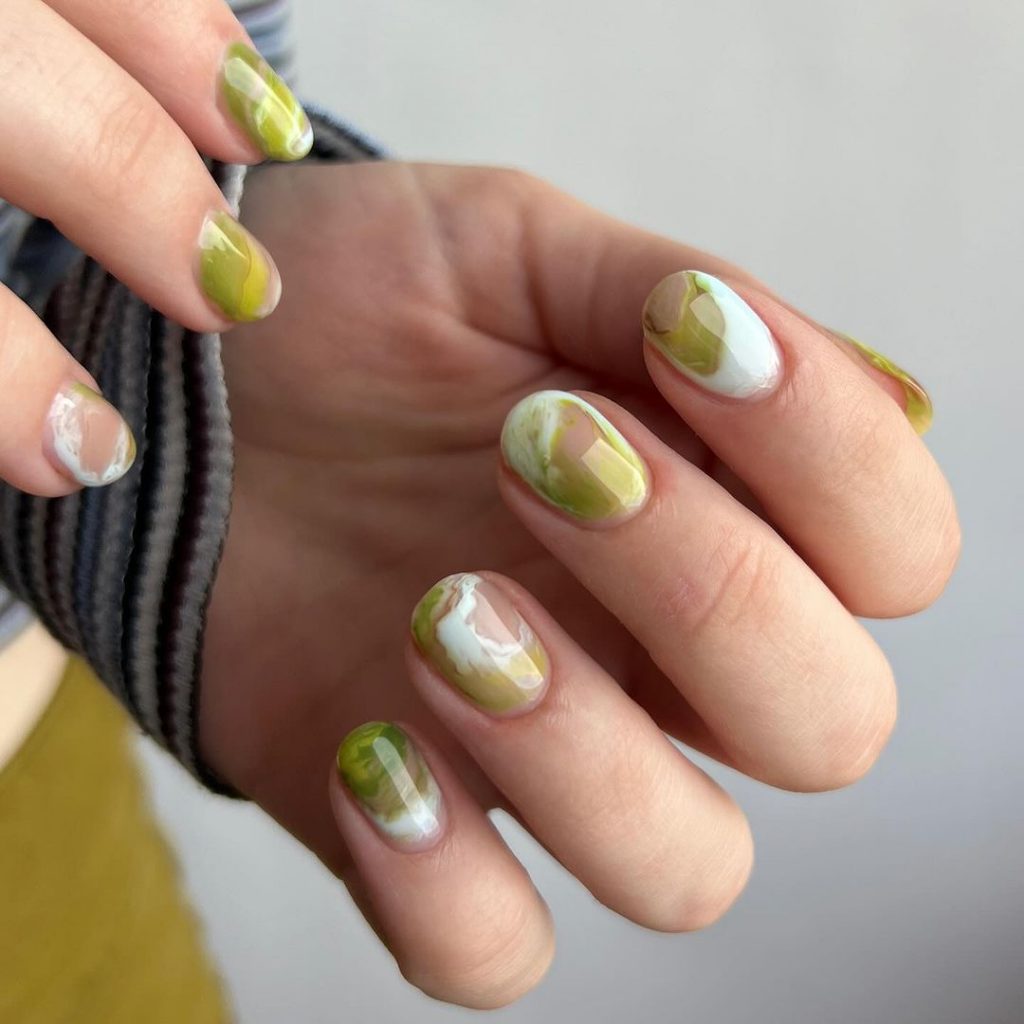
Olive green marble nails
These nails have a beautiful marble effect in the colors olive green and white, creating a unique and artistic design. The round shape gives a soft touch to this sturdy look.
Consumables:
- Olive green polish: Essie Fall For NYC
- White paint: OPI Alpine Snow
- Base layer: CND Stickey base layer
- Top coat: Glistening and shiny top coat
- Nail file: OPI Crystal nail file
- Nail art brush
DIY instructions:
- Preparation: Shape your nails into a round shape and polish the surface.
- Base: Apply a base coat.
- Marble effect: Apply a base of white lacquer. While still wet, add drops of olive green nail polish and use a nail art brush to swirl the colors together, creating a marble effect.
- Topcoat: Seal with a topcoat for a glossy finish.
- Tip: Work quickly to fade the colors before they dry for the best marble effect.

Namie O, a talented writer at Willtiptop, conveys her passion for fashion and beauty in every word she writes. With a keen eye for detail and a deep insight into the latest trends, Namie’s articles and insights captivate readers and provide them with valuable knowledge and inspiration. Through her engaging and informative writing style, Namie aims to empower individuals to explore their style, experiment with beauty techniques, and embrace their unique sense of self.