Snowflake Nails 21 Ideas 2025-2025: Winter’s Magical Nail Art Trends
When it comes to nail designs, winter provides a magical canvas for creativity. If you want to bring a little frost and sparkle to your fingertips, snowflake nails are the right choice for the 2025-2025 season. Whether you’re attending a party or just want to express your love for winter, these snowflake-inspired manicures are sure to take your style to the next level. But what makes these designs special? And how can you recreate these looks at home? Keep reading for the best snowflake nail ideas you’ll want to try this winter season.
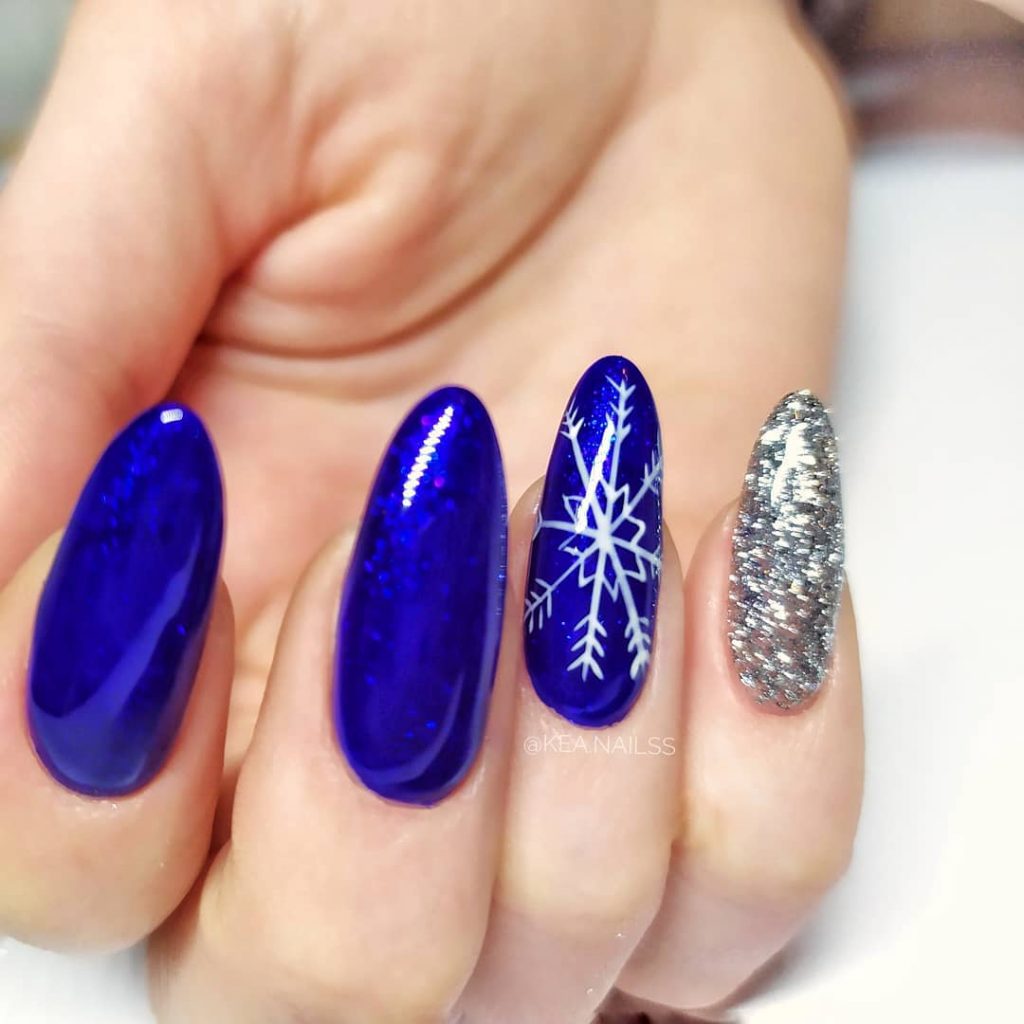
Bold blue elegance
Winter doesn’t get much more brutal than this. This snowflake nail design has a beautiful deep blue as the main color. Each nail is unique, from the simple yet striking blue on some fingers to the intricate white snowflake details on others. A single accent nail covered in silver glitter adds the perfect amount of sparkle to balance the design, making this a striking, perfect winter manicure. The almond shape gives a soft, elegant finish, while the cool tones are perfect for the snowy season.
Consumables needed:
- Deep blue gel polish (e.g. OPI “Russian Navy”)
- White nail polish for snowflakes (e.g. Essie “Blanc”)
- Silver glitter polish (e.g. Sally Hansen “Strobe Light”)
- Fine detailing brush for creating snowflake patterns
- Topcoat for long-lasting shine and protection
Recreation at home:
- Start with a base coat, followed by two coats of deep blue gel polish.
- Use a fine detailing brush to carefully paint delicate snowflake patterns on the desired nails with the white nail polish.
- For the glitter accent nail, apply two coats of silver glitter polish.
- Finish everything off with a high-gloss top coat to protect the design and add shine to the overall look.
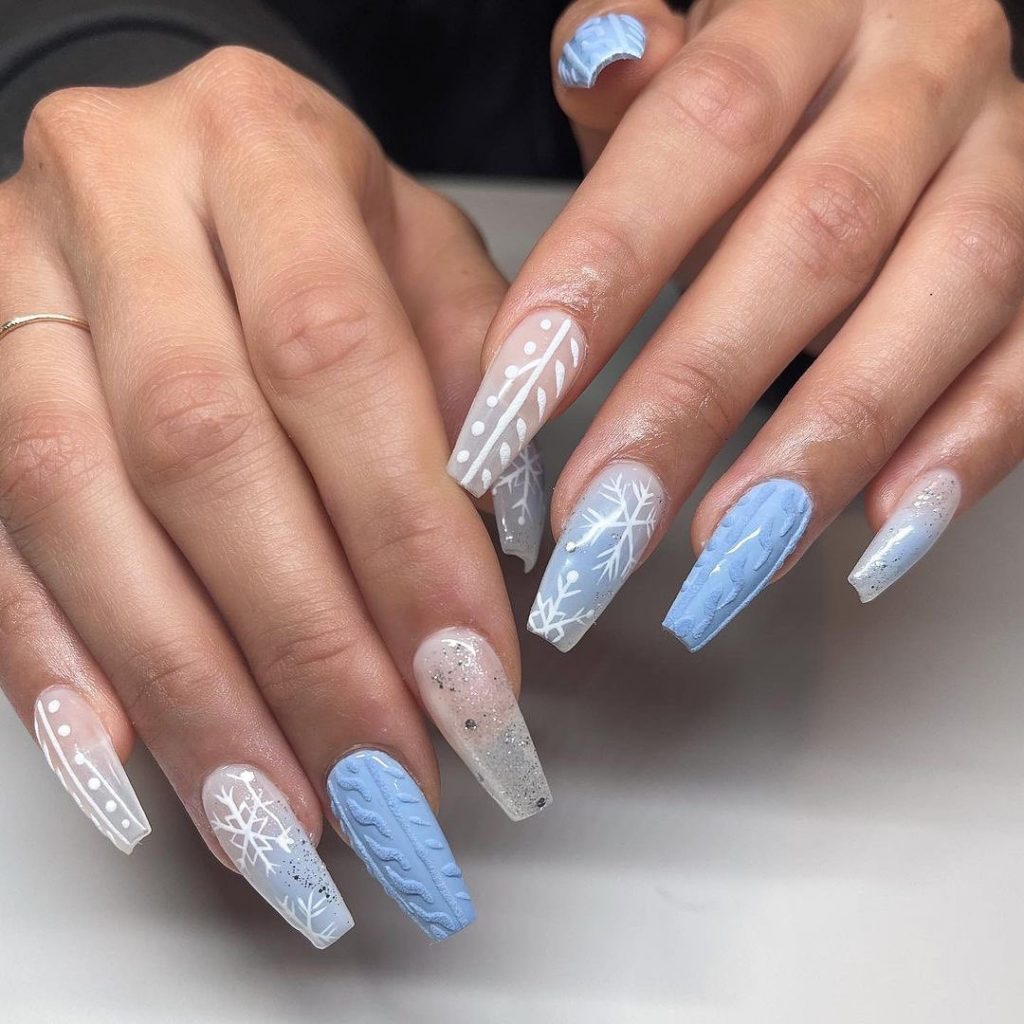
Icy snowflake magic
This manicure is the epitome of winter wonderland vibes. Featuring a mix of baby blue and white snowflake designs, this set is as cool as a crisp winter morning. On certain nails, the nails also have a sweater-like texture, which adds warmth and depth to the design. The soft, pastel blue contrasts beautifully with the stark white snowflakes, while subtle glitter accents keep the look festive but not overpowering. Perfect for anyone looking for a cute yet chic winter look.
Consumables needed:
- Baby blue gel polish (e.g. Gelish “Arctic Freeze”)
- White gel polish (e.g. OPI “Alpine Snow”)
- 3D gel for sweater texture (e.g. Mia Secret 3D Gel)
- Fine glitter dust for extra sparkle
- Nail art stamp set to create intricate snowflakes
Recreation at home:
- Apply a base coat, followed by two coats of baby blue nail polish on half of the nails and white on the other.
- Use the 3D gel to create a sweater pattern on selected nails by drawing vertical and horizontal lines in a knit-like design.
- Stamp or hand-paint snowflakes on your blue nails with a white polish and a fine brush.
- Sprinkle fine glitter over a few nails for a shiny finish and top it off with a shiny top coat.
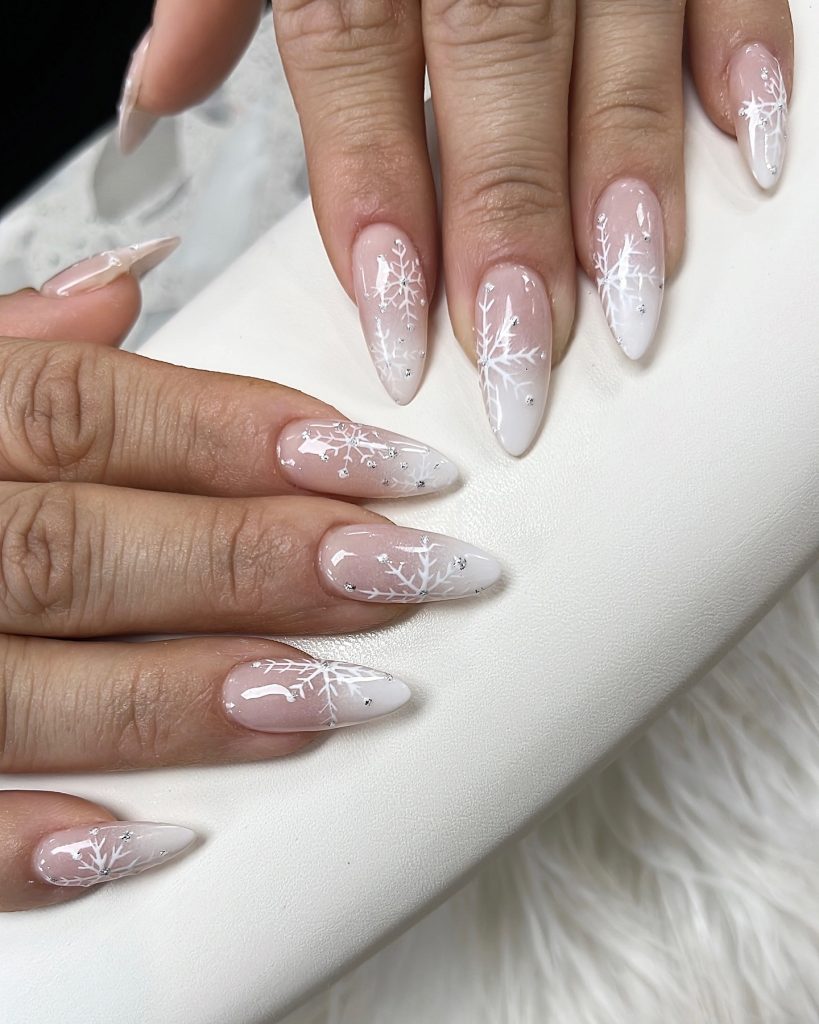
Frosted white and silver snowflakes
For those who prefer a more subdued look, this icy white and silver snowflakes manicure is the way to go. The neutral palette of bright and white with delicate snowflake art exudes elegance. With an emphasis on simplicity, this design looks minimalist yet sophisticated, making it perfect for formal winter events or everyday chic. The almond shape adds an extra touch of grace to the look. Small silver rhinestones have been added for a touch of glamour, making this design sparkle without being overpowering.
Consumables needed:
- Pure nude gel polish (e.g. Essie “Ballet Slippers”)
- White gel polish for snowflakes (e.g. Orly “White Tips”)
- Silver rhinestones for a touch of bling
- Dotting tool for precise snowflake details
- Topcoat for protection and shine
Recreation at home:
- Start with a sheer nude base color to create a clean and neutral look.
- Use a dotting tool or fine brush to hand paint snowflakes on a few nails with white nail polish.
- Attach small silver rhinestones to the center of the snowflakes for a glamorous touch.
- Finish with a glossy top coat to keep the design and rhinestones in place.
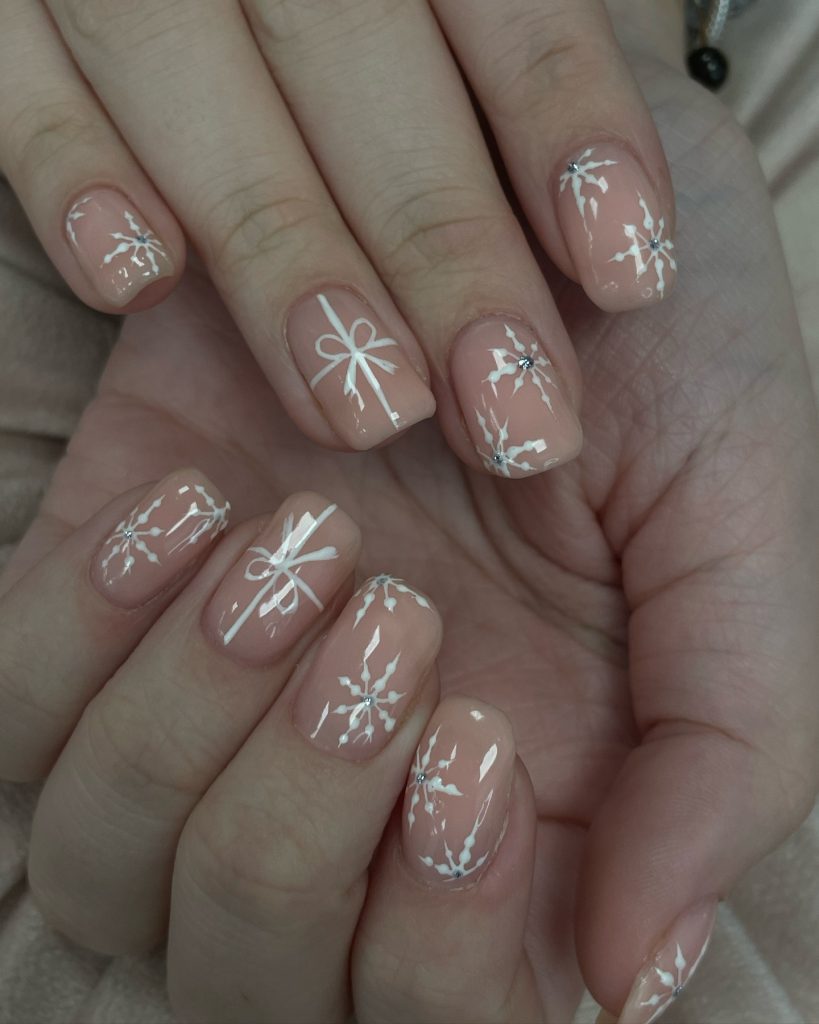
Festive gift-inspired nails
If you’re looking for a holiday-ready manicure, this nude snowflake design is a perfect choice. With intricate snowflake details and small gift box-inspired accents, this design is festive yet sophisticated. The short, square shape adds functionality, while the bright and white tones make it versatile enough to wear all winter season. Small rhinestones add a little extra glitter this holiday season, making these nails the perfect accessory for any winter event.
Consumables needed:
- Pure nude polish (e.g. Zoya “Jane”)
- White nail polish for snowflakes and bow accents (e.g. CND “Cream Puff”)
- Silver glitter lacquer for subtle accents (optional)
- Small rhinestones for extra bling
- Detailing brush for precise snowflake and bow designs
Recreation at home:
- Apply two coats of sheer nude polish for a clean base.
- Use a fine brush to draw snowflakes and small bows on each nail with white polish, placing a rhinestone in the center for a touch of elegance.
- Add a subtle silver glitter accent to the ends or around the designs to enhance the festive look.
- Seal the design with a high-gloss top coat for a flawless finish.
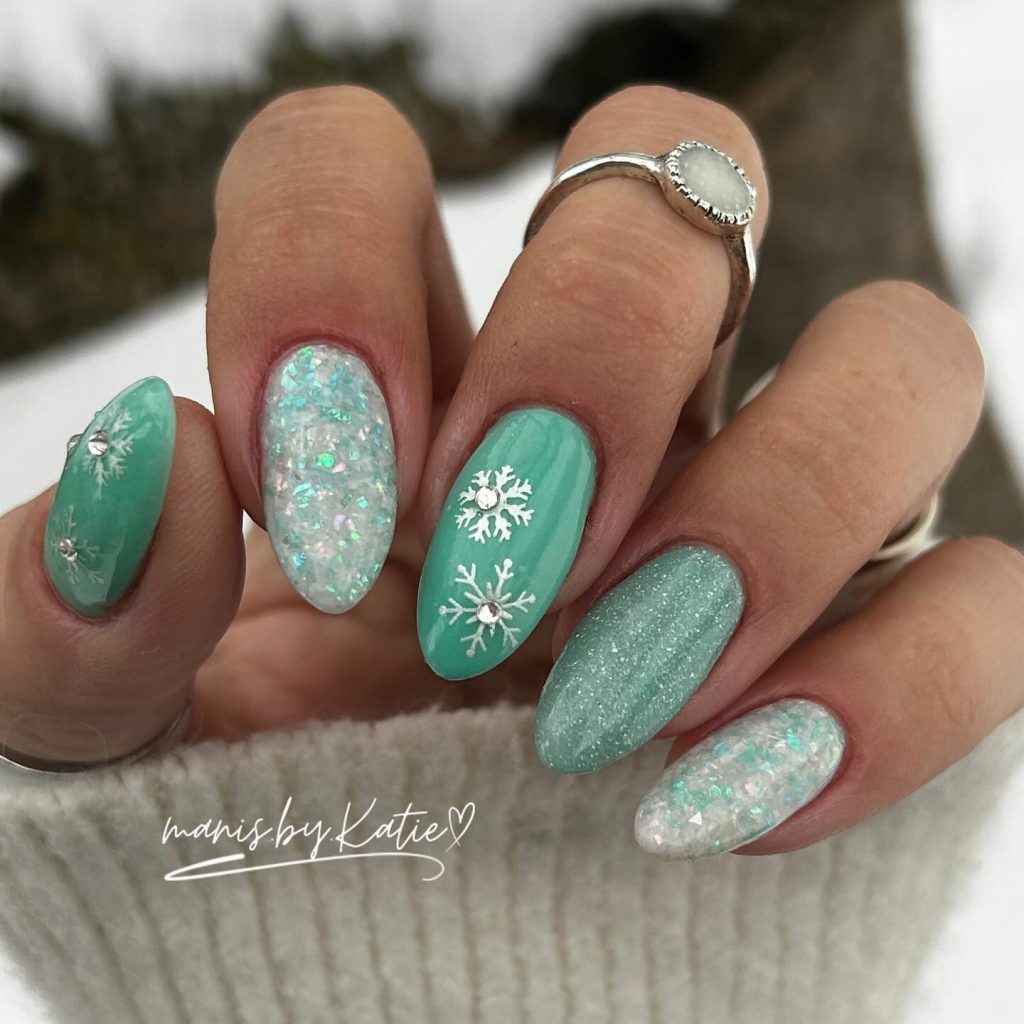
Minty winter freshness
Mint green meets winter sparkle in this whimsical snowflake manicure. Featuring soft, mint-colored nails adorned with white snowflakes, this design is perfect for anyone who wants to embrace a playful yet elegant winter look. A mix of chunky glitter and shimmer polishes create an icy effect, while a few nails are embellished with 3D snowflakes for extra texture. The almond shape of the nails makes the design look graceful and feminine.
Consumables needed:
- Mint green lacquer (e.g. China Glaze “Refresh Mint”)
- White gel polish for snowflakes (e.g. DND “White Lace”)
- Thick glitter polish for an icy sparkle (e.g. OPI “Snowglobe Trotter”)
- 3D snowflake stickers for extra texture
- Topcoat for a glossy, long-lasting finish
Recreation at home:
- Apply a mint green base to most nails, but leave a few for glitter or 3D accents.
- Carefully place 3D snowflake stickers on a few nails, or hand-paint snowflakes with white polish.
- Add a layer of thick glitter polish to selected nails to achieve a matte, wintery effect.
- Finish with a high-gloss top coat to set the design and give the nails a smooth, shiny appearance.
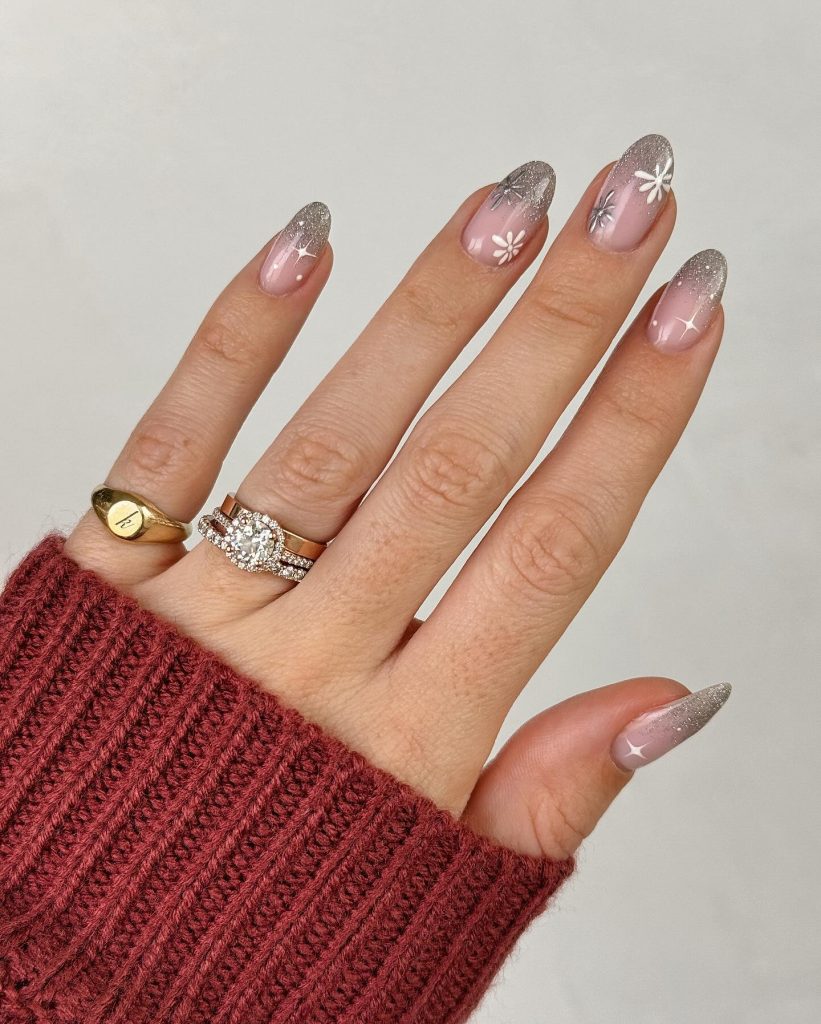
Silver-tipped snowflakes
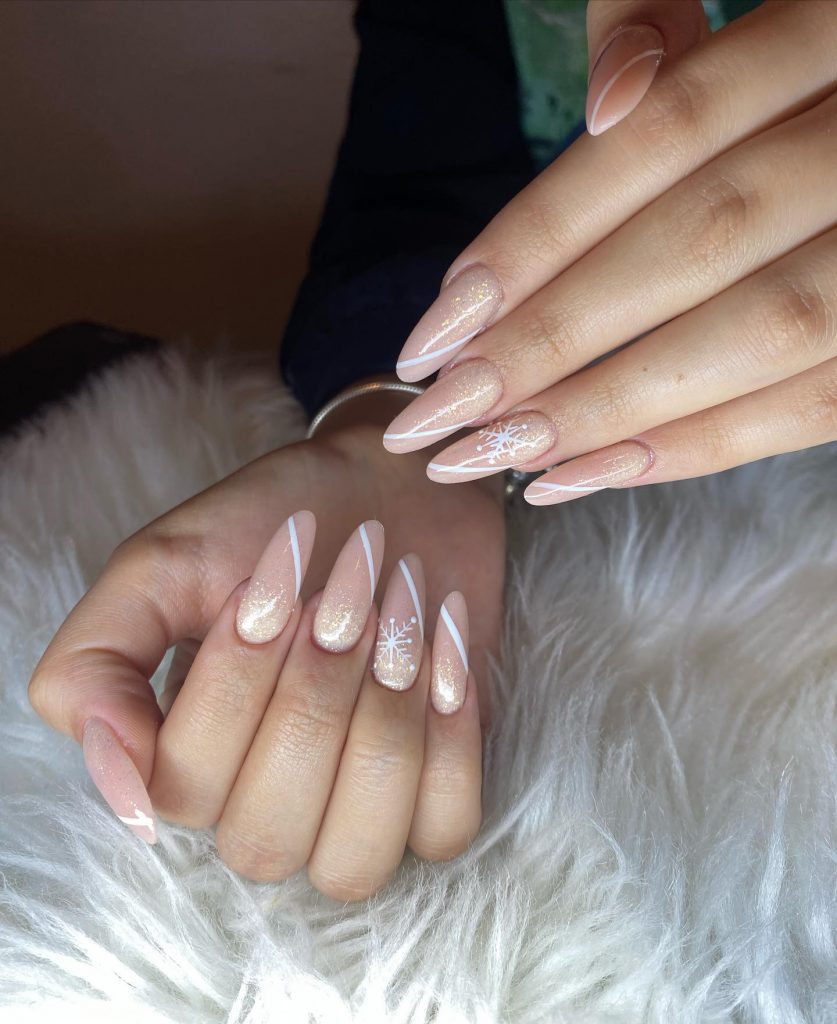
This manicure has a perfect blend of sophistication and sparkle. With a soft, pink-nude base and glittering silver tips, the design is accentuated by delicate white snowflake patterns on select nails. The transition from nude to silver at the ends gives a smooth ombré effect, making the manicure look both glamorous and winter-ready. The almond nail shape adds elegance, perfect for holiday events or a chic everyday winter look.
Consumables needed:
- Nude pink gel polish (e.g. Essie “Bare With Me”)
- Silver glitter polish (e.g. Zoya “Trixie”)
- White gel polish for snowflakes (e.g. DND “White Lace”)
- Fine detailing brush for intricate snowflake designs
- Topcoat for a long lasting glossy finish
Recreation at home:
- Start with a base coat and two coats of nude-pink polish.
- Apply silver glitter to the ends and blend it with the nude base for a subtle ombré effect.
- Use a fine brush to paint snowflakes on selected nails with white nail polish.
- Finish with a top coat to add shine and protect the design.
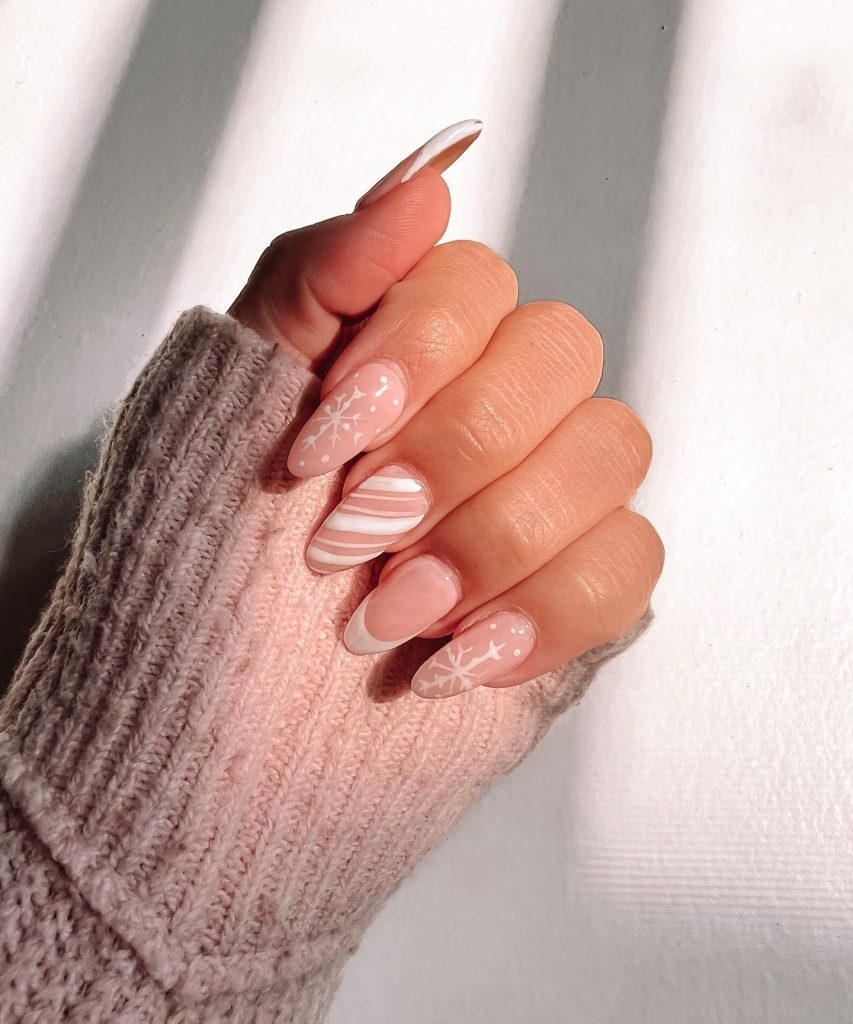
Pastel winter magic
Adding a playful touch to winter nails, this design combines soft pastel shades with intricate snowflake details. The variety of patterns, ranging from snowflakes to candy cane stripes, keeps the look fun and playful. The pastel pink base is soft and delicate, making it an excellent choice for those who prefer a more subtle winter nail look. The almond shape adds femininity, while the alternating designs make the overall manicure exciting.
Consumables needed:
- Pastel pink gel polish (e.g. OPI “Bubble Bath”)
- White paint for snowflakes and stripes (e.g. Sally Hansen “White On”)
- Fine striping brush for precise lines
- Dotting tool for snowflake details
- Topcoat for shine and durability
Recreation at home:
- Apply a pastel pink base color to all nails.
- Use a strip brush to create candy cane patterns on one or two nails, alternating with snowflake designs on the other.
- Use a dotting tool for small details, such as dots around the snowflakes.
- Apply a top coat to complete the look and add shine.
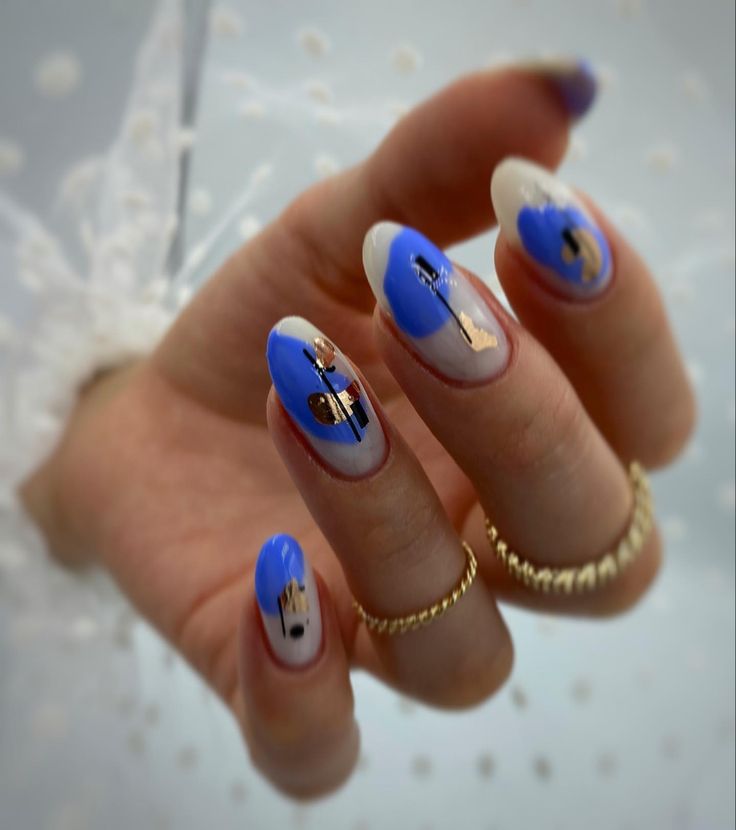
Navy blue and snowflakes
This manicure combines the boldness of navy blue with festive winter elements such as glitter and snowflakes. The deep navy blue base serves as the perfect backdrop for the white snowflakes and glitter accents, evoking a sense of winter night sky. The tree details add a festive Christmas feel, making this design ideal for the holidays. Short square nails make the design practical yet stylish.

Consumables needed:
- Navy blue gel polish (e.g. OPI “Russian Navy”)
- White paint for snowflakes (e.g. CND “Cream Puff”)
- Green glitter polish for tree accents (e.g. China Glaze “Emerald Sparkle”)
- Silver glitter polish for extra shine (e.g. Essie “Set in Stones”)
- Topcoat for long-lasting shine
Recreation at home:
- Apply navy blue nail polish as a base.
- Use a fine brush to paint snowflakes with white polish on selected nails.
- Add green glitter on a few nails to form Christmas tree shapes, followed by silver glitter on others for a festive touch.
- Seal the design with a top coat for durability and shine.
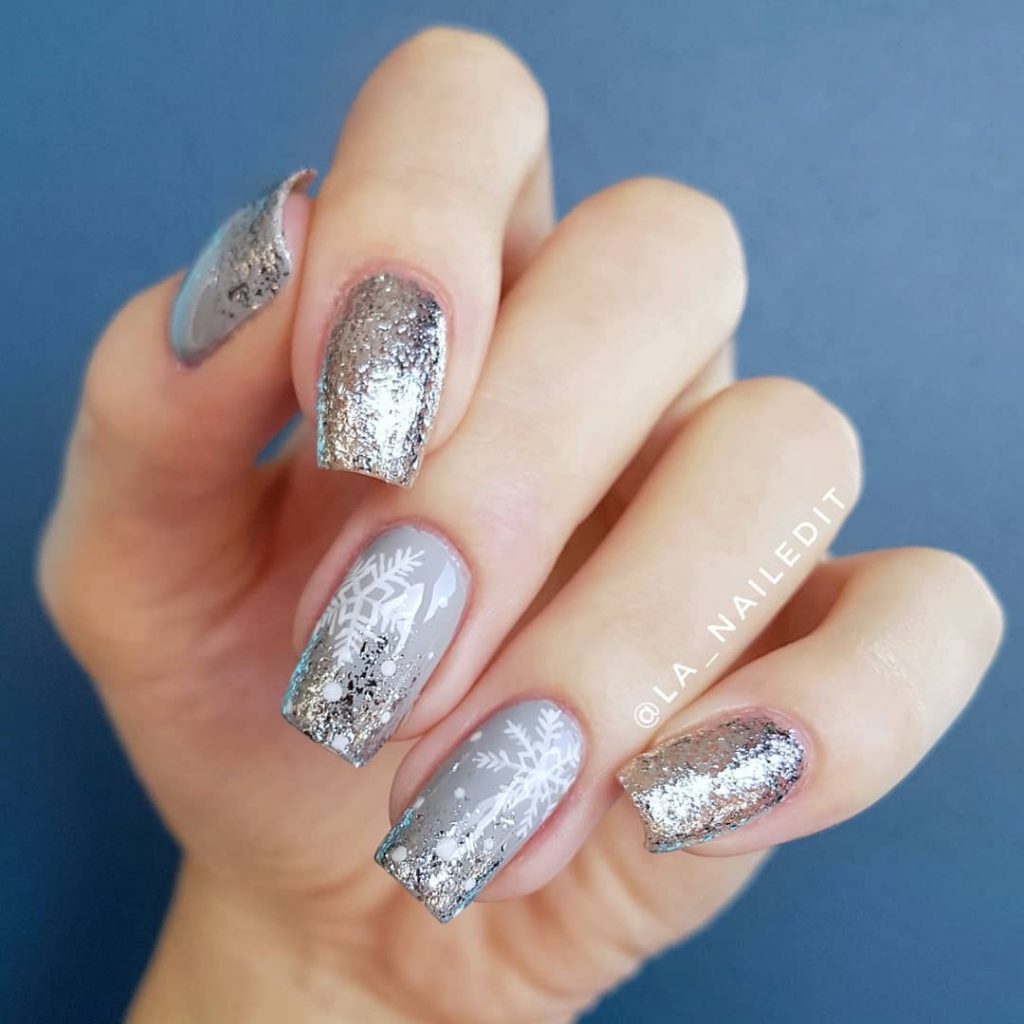
Icy silver glamour
If you like shine, this icy silver manicure is perfect for you. The combination of a cool gray base with silver glitter tips creates a glamorous yet wintery look. Snowflake stickers add a seasonal touch, while the square shape keeps the manicure modern and sleek. This design is great for those who want to stand out at holidays or events, as it combines elegance with festive charm.
Consumables needed:
- Gray gel polish (e.g. OPI “I Cannoli Wear OPI”)
- Silver glitter lacquer (e.g. Orly “Mirrorball”)
- White paint for snowflakes (e.g. Sally Hansen “White On”)
- Snowflake stickers for easy application
- Topcoat for a smooth and shiny finish
Recreation at home:
- Apply a gray base color to all nails.
- Use a fine brush to apply glitter to the ends, creating a matte effect.
- Add snowflake stickers to one or two nails for extra winter detail.
- Finish with a glossy top coat to complete the look.
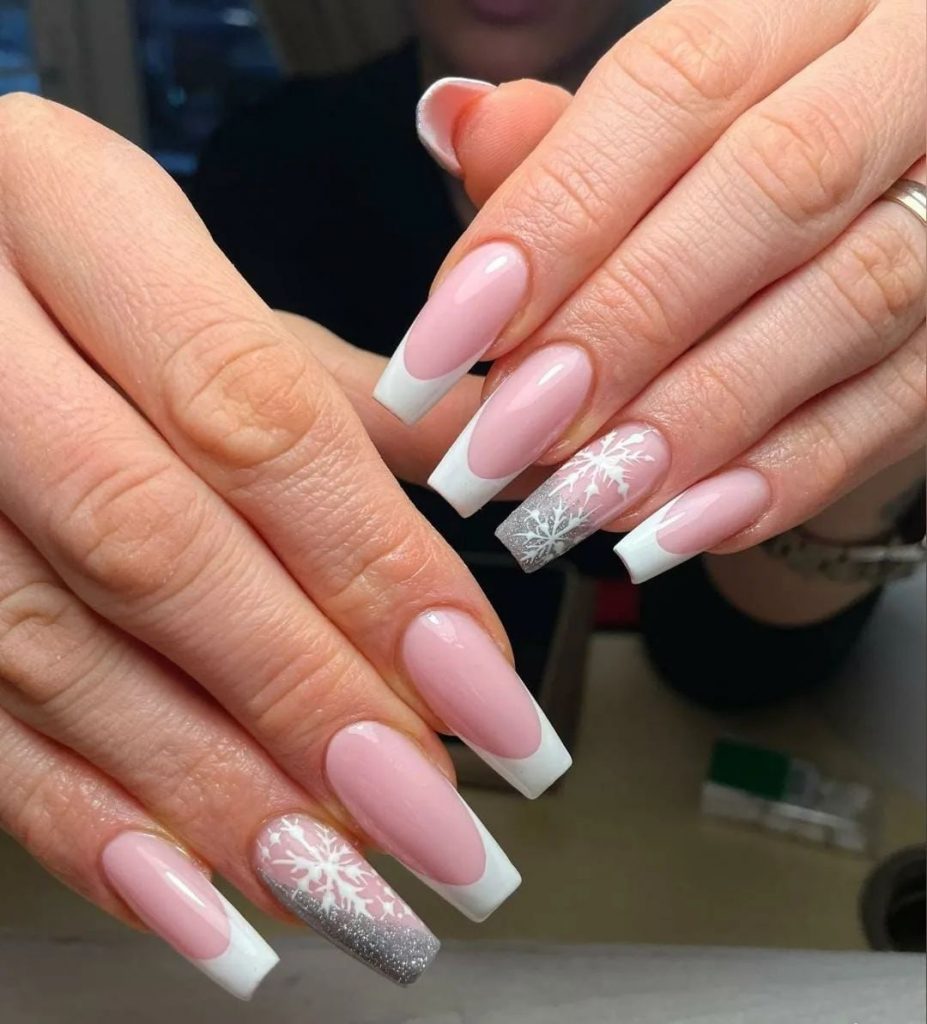
Pink French with a snowy twist
This wintery version of the classic French Tip manicure adds festive details, like snowflakes and silver glitter, for a touch of glamour. The light pink base keeps the design simple and elegant, while the French tips are in bright white. The snowflake accents on a pair of nails take the look to the next level, making it perfect for the holidays without being over the top. The combination of pink, white and silver creates a balanced and chic winter design.
Consumables needed:
- Light pink gel polish (e.g. Essie “Mademoiselle”)
- White lacquer for French tips (e.g. DND “White Lace”)
- Silver glitter polish for accent nails (e.g. Zoya “Cosmo”)
- Snowflake stickers or hand-painted details
- Topcoat for long-lasting shine and protection
Recreation at home:
- Start with a light pink base on all nails.
- Use white nail polish to create French tips on most nails.
- Apply silver glitter to one or two nails, followed by snowflake stickers or hand-painted details.
- Finish with a top coat for a glossy, long-lasting finish.
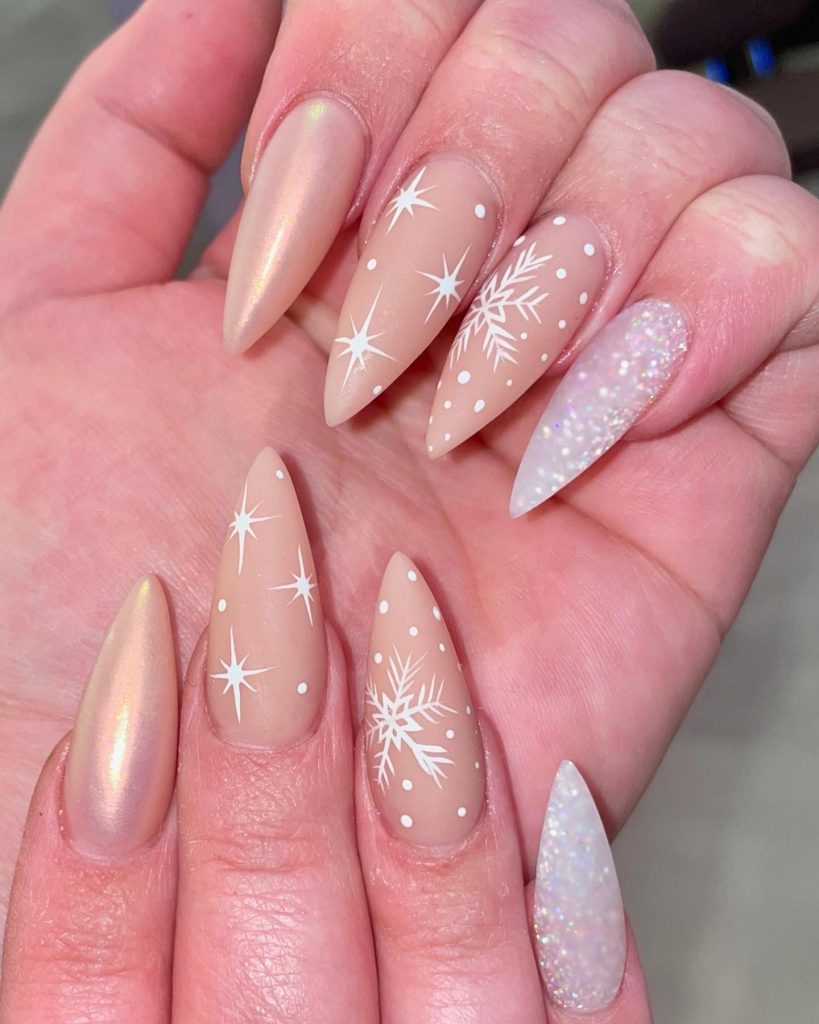
Shiny naked snowflakes
This design has a nude base with a subtle pearly sheen, perfect for a minimalist yet elegant winter look. The white snowflake details are strategically placed across the nails, while one accent nail is covered in a glitter finish, adding an icy touch. The almond shape of the nails gives this design a graceful, elongated look, making it ideal for anyone who wants a soft, understated holiday manicure.
Consumables needed:
- Nude base coat with gloss (e.g. OPI “Be There in a Prosecco”)
- White gel polish for snowflakes (e.g. DND “White Lace”)
- Silver glitter polish for the accent nail (e.g. Essie “Set in Stones”)
- Fine detailing brush for drawing snowflakes
- Topcoat for a glossy, long-lasting finish
Recreation at home:
- Start with a nude shimmer base on all nails.
- Use a fine detailing brush to create snowflake patterns with white polish.
- Apply a glitter polish to one accent nail for extra iciness.
- Complete the look with a top coat to seal the design and add shine.
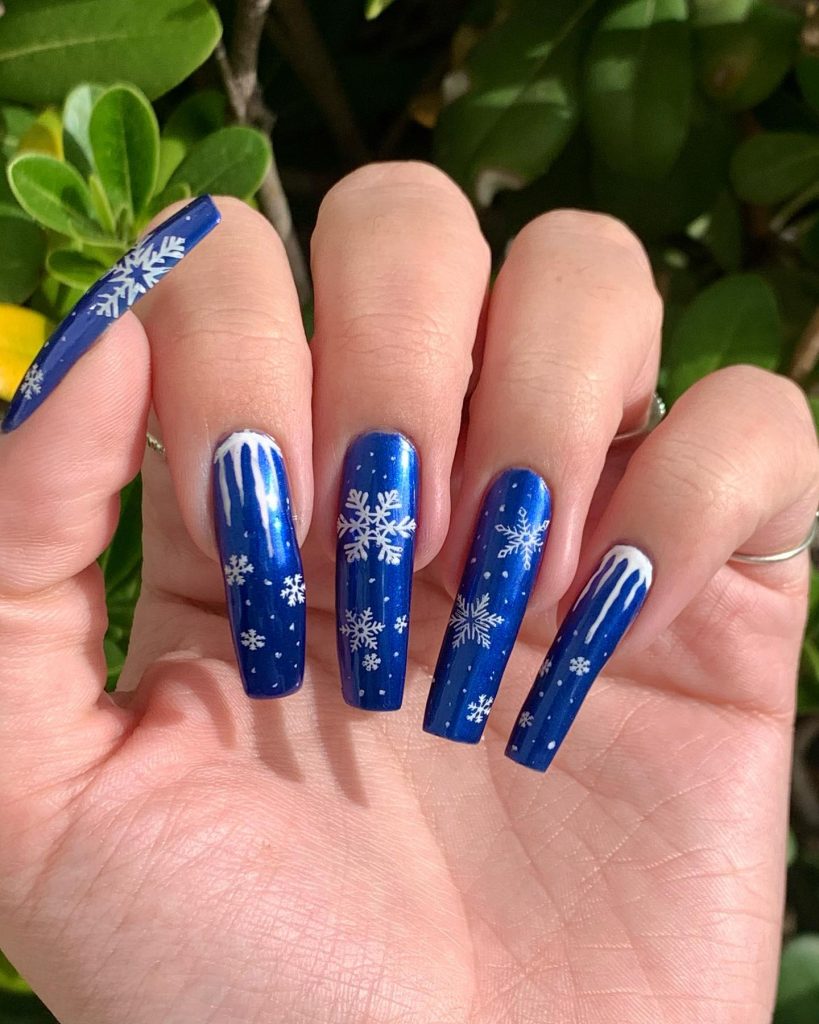
Bold blue snowflakes
This vibrant blue manicure is perfect for anyone who wants a bold winter look. The deep blue base forms the perfect contrast with the white snowflakes and icy details at the top. Long, square nails make the design stand out, while the dripping snow effect on the tips adds a creative touch. This look is perfect for those who want to embrace the holiday spirit in a playful and daring way.
Consumables needed:
- Blue gel polish (e.g. OPI “Yoga-ta Get This Blue”)
- White gel polish for snowflakes and drops (e.g. Sally Hansen “White On”)
- Dotting tool and detail brush for precision
- Topcoat for a shiny, protective layer
Recreation at home:
- Apply a striking blue base to all nails.
- Use a fine brush to paint snowflakes and the dripping snow effect with white paint.
- Add dots and smaller details with a dotting tool to perfect the look.
- Seal with a gloss top coat for durability and shine.
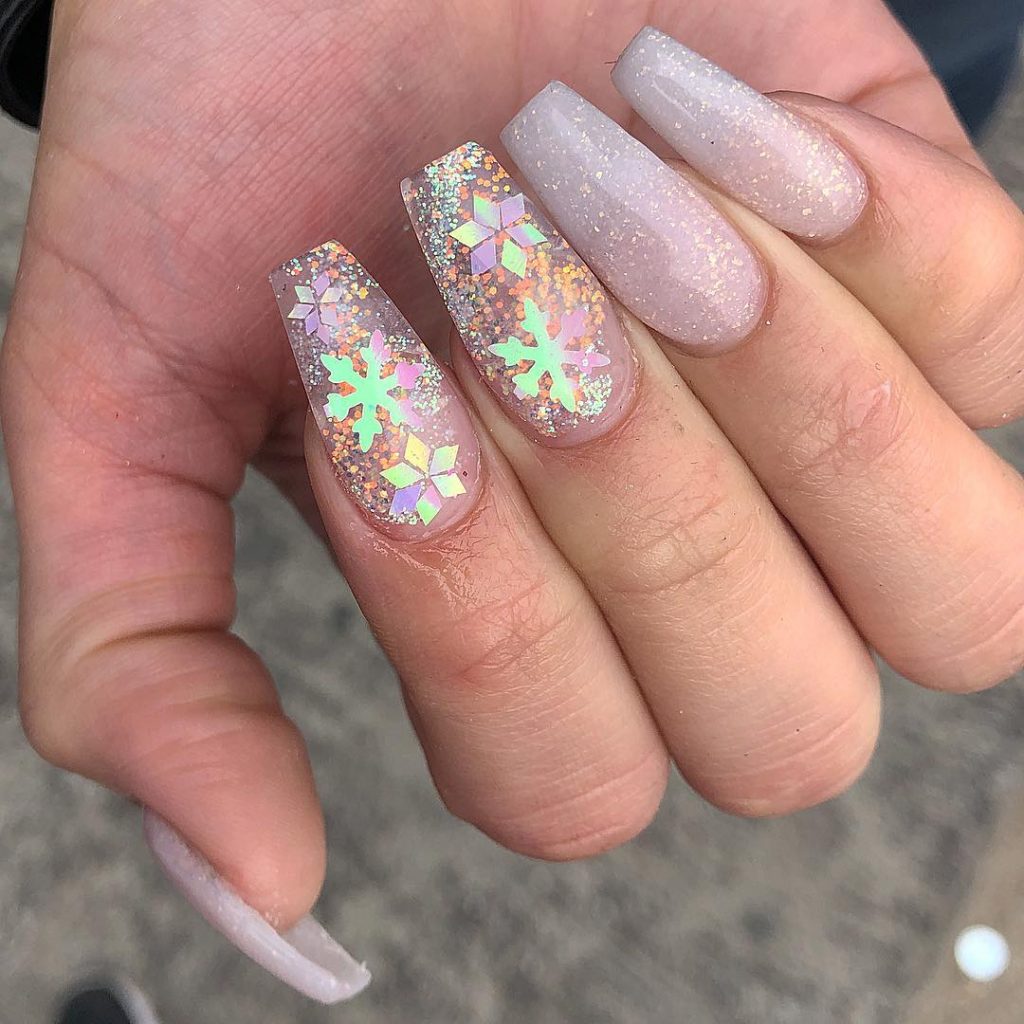
Iridescent glitter snowflakes
For a magical winter look, this iridescent snowflake manicure is nothing short of enchanting. With translucent glitter covering most nails, the design features holographic snowflakes that catch the light beautifully. The combination of shimmer, glitter and soft pastel shades creates a dream-like effect, making this an ideal choice for a snowy holiday aesthetic. The long, square shape adds drama to the overall look.
Consumables needed:
- Clear or translucent gel base (e.g. Essie “Sheer Fantasy”)
- Holographic glitter polish (e.g. OPI “Cosmic Glitter”)
- Snowflake nail stickers or holographic glitter shapes
- Top coat for sealing the glitter and decals
Recreation at home:
- Apply a transparent, translucent base to all nails.
- Add holographic glitter polish to selected nails for an icy shine effect.
- Place snowflake stickers or holographic glitter shapes on the accent nails.
- Finish with a high-gloss top coat to fix the design.
French pink with glitter accents
This beautiful combination of classic French tips with glitter and snowflake accents makes for a chic holiday manicure. The soft pink base keeps the look refined, while the glitter and snowflakes on one nail give it a festive touch. Perfect for the winter season, this design combines timeless elegance with a fun, seasonal twist.

Consumables needed:
- Soft pink gel polish (e.g. Essie “Ballet Slippers”)
- White varnish for French tips (e.g. OPI “Alpine Snow”)
- Pink glitter polish for accent nails (e.g. China Glaze “Diva Bride”)
- Snowflake stickers or hand-painted snowflakes
- Topcoat for a smooth, glossy finish
Recreation at home:
- Apply a soft pink base to all nails.
- Create a classic French tip with white nail polish on most nails.
- Add pink glitter to one accent nail, followed by snowflake stickers or hand-painted snowflakes.
- Finish with a glossy top coat for a long-lasting finish.
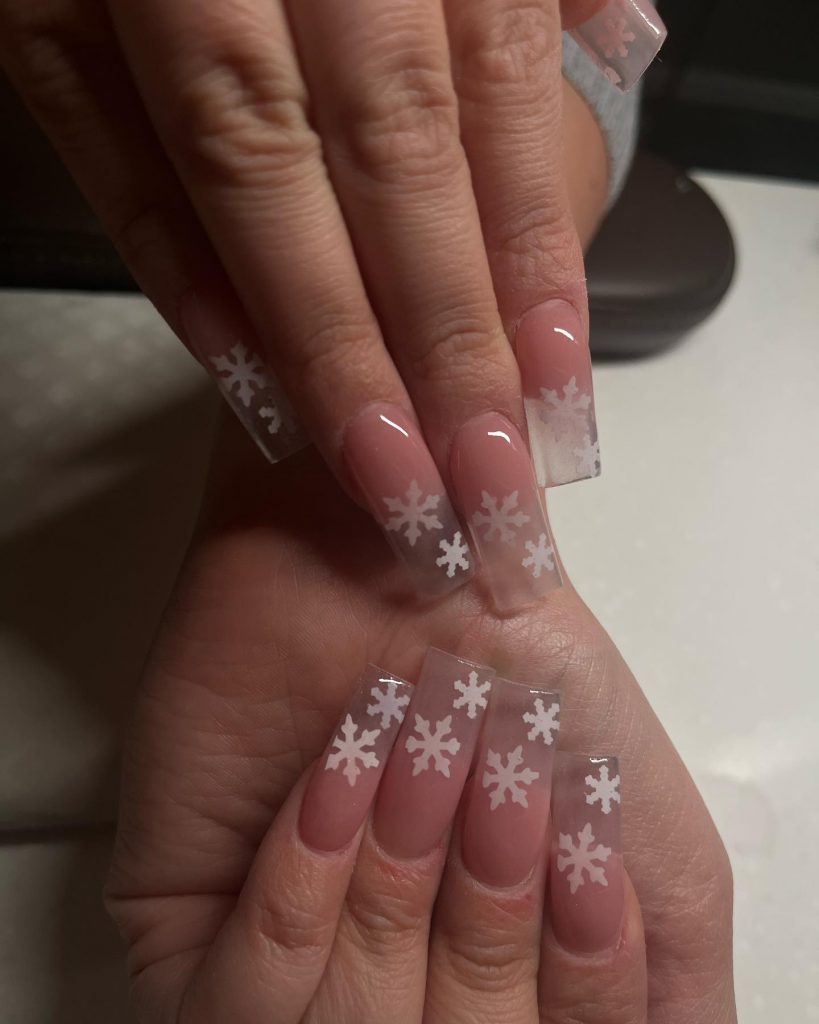
Clear snowflake tips
This minimalist design has a clear base with delicate white snowflakes on the ends. The sheer simplicity of the look makes it perfect for those who prefer understated winter nails. The long square shape adds a modern touch to the design, making it ideal for everyday use while still embracing the winter season. This manicure combines simplicity with just the right amount of festive details.
Consumables needed:
- Clear gel polish (e.g. Essie “Clear as Day”)
- White paint for snowflakes (e.g. Sally Hansen “White On”)
- Fine detailing brush for snowflake patterns
- Top coat for a high gloss finish
Recreation at home:
- Apply a transparent base coat to all nails.
- Use a fine brush to paint white snowflakes on the tips of each nail.
- Finish with a glossy top coat to seal the design and keep it looking fresh.
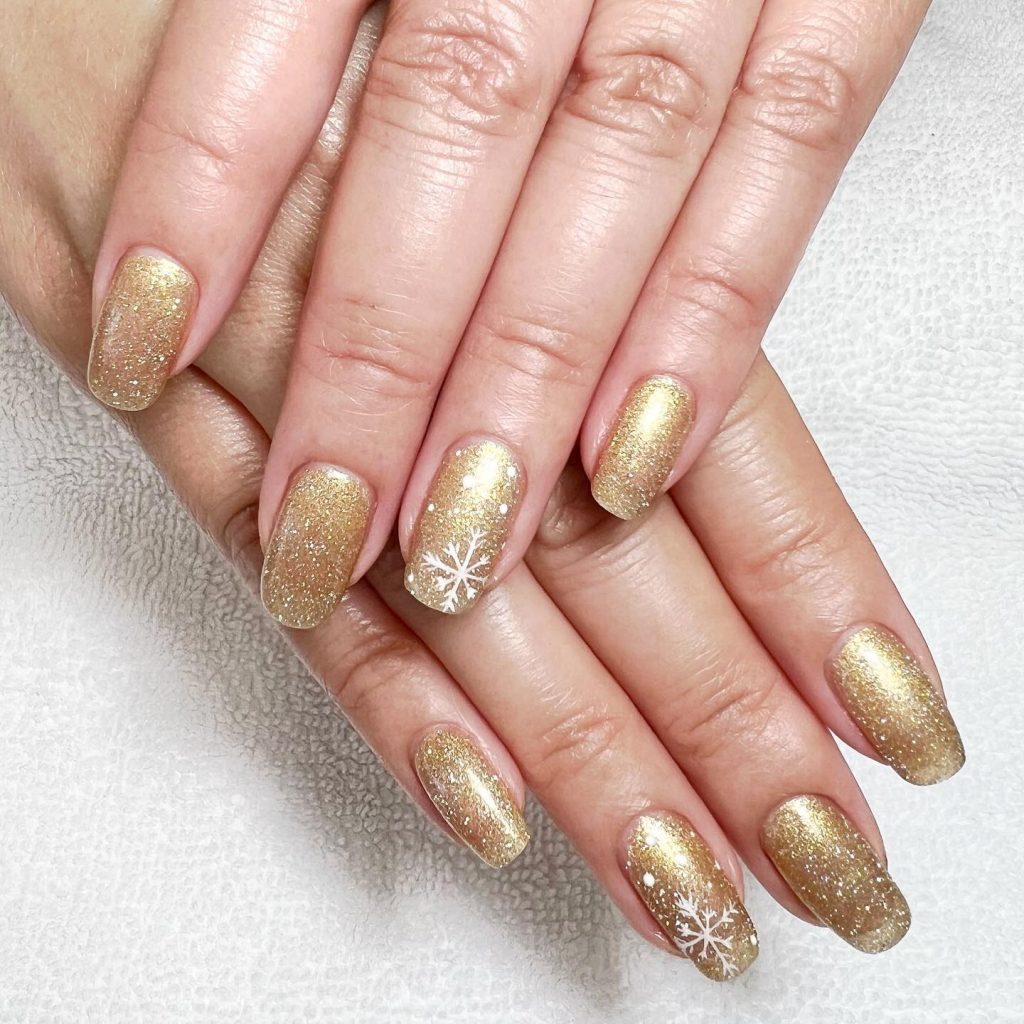
Golden snowflakes
For a more luxurious take on snowflake nails, this design features a gold glitter base with soft, white snowflakes as accents. The overall look is stylish and festive, perfect for holiday gatherings or New Year’s Eve parties. The short, square nails give this design a sophisticated, polished look, while the gold shimmer adds a touch of glamour.
Consumables needed:
- Gold glitter gel polish (e.g. OPI “Glitzerland”)
- White lacquer for snowflakes (e.g. DND “White Lace”)
- Fine detailing brush for precise snowflake work
- Topcoat for extra shine and durability
Recreation at home:
- Apply two coats of gold glitter polish for full coverage.
- Use a fine brush to paint delicate white snowflakes on one or two accent nails.
- Finish with a glossy top coat to protect the design and enhance the sparkle.
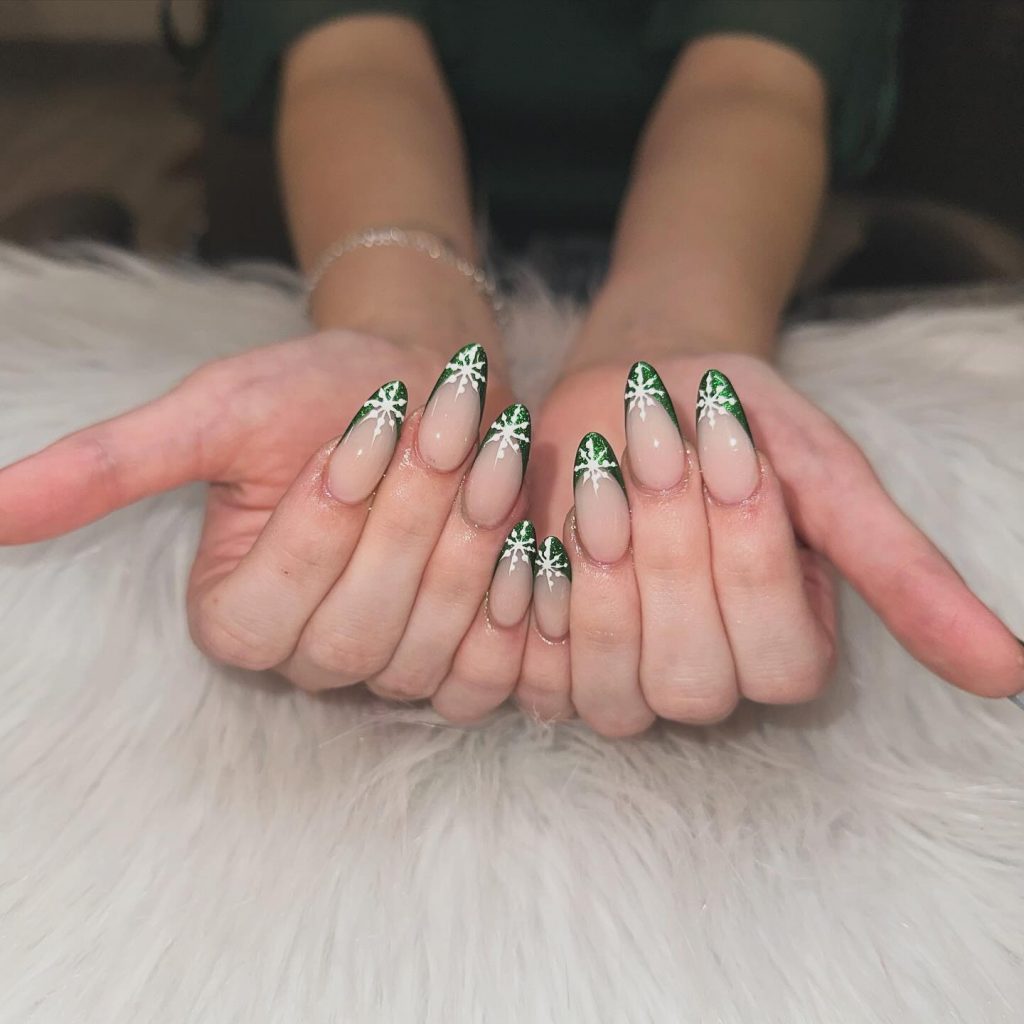
Green Christmas French Tips
This design is a festive twist on the classic French point. The almond shaped nails have a nude base with green glitter tips, finished with white snowflakes on each tip. The glitter creates a fun and festive atmosphere, while the snowflakes add a wintery touch, making this design a fantastic choice for the holidays.
Consumables needed:
- Nude base gel polish (e.g. OPI “Bare My Soul”)
- Green glitter polish for tips (e.g. China Glaze “Emerald Sparkle”)
- White gel polish for snowflakes (e.g. Essie “Blanc”)
- Fine detailing brush for creating snowflake patterns
- Top coat for extra shine
Recreation at home:
- Start with a nude base and let it dry.
- Apply green glitter polish to the ends in French tip style.
- Use a fine brush to paint snowflakes on the points with white lacquer.
- Seal the design with a glossy top coat to keep it looking fresh.
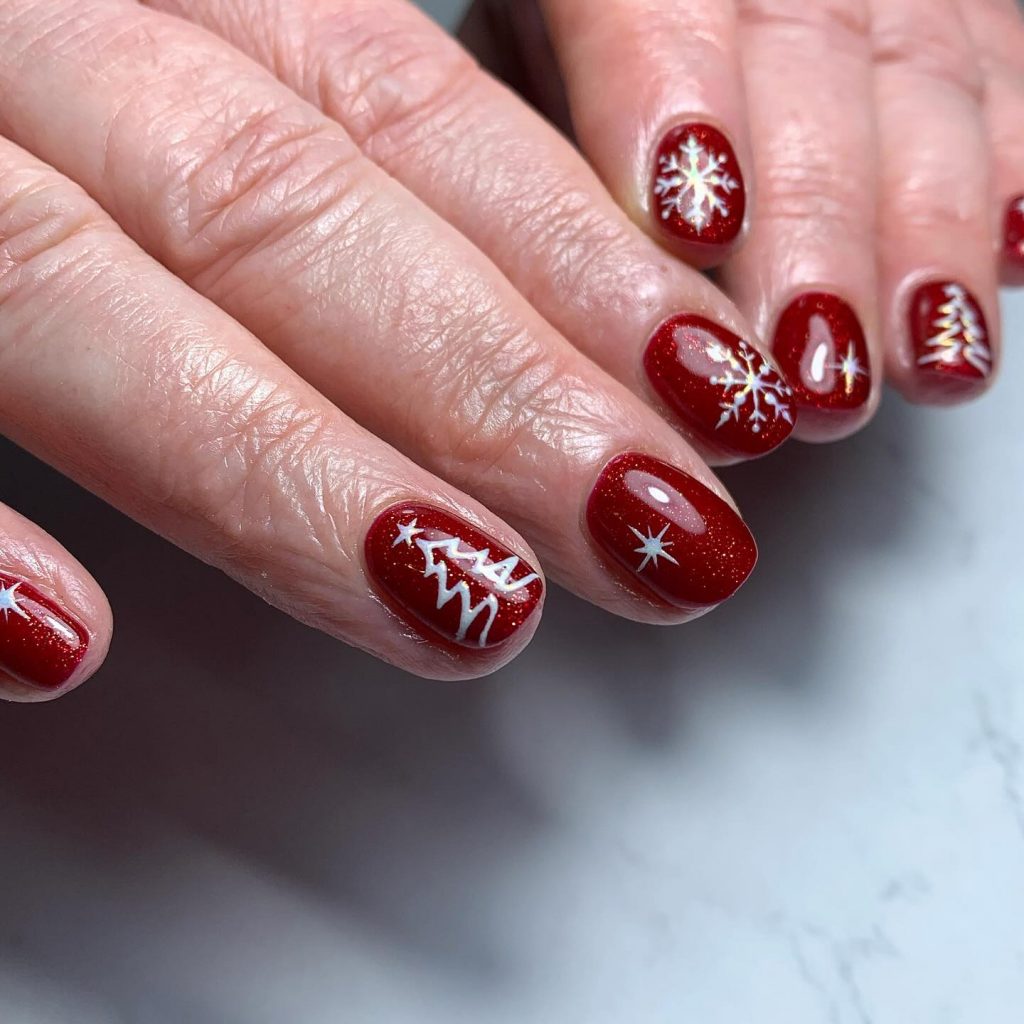
Red Christmas nails with snowflakes
This red winter manicure is perfect for the holidays. Featuring a deep, festive red base with white Christmas tree and snowflake accents, this design has a cheerful, seasonal look. The short, round nails keep it practical, while the glossy finish adds an elegant touch. This is a great Christmas nail idea for those who prefer a more classic look.
Consumables needed:
- Red gel polish (e.g. OPI “Big Apple Red”)
- White gel polish for snowflakes and trees (e.g. Sally Hansen “White On”)
- Dotting tool for small accent dots
- Topcoat for shine and protection
Recreation at home:
- Start with two coats of red polish as a base.
- Use a fine brush or dotting tool to paint snowflakes and Christmas trees white.
- Apply a glossy top coat to seal the design and add a smooth finish.
Nude and gold snowflake nails
This elegant design combines nude and gold in a chic winter look. The almond-shaped nails are decorated with gold glitter and white snowflake accents. This manicure is ideal for those who want a sophisticated yet festive nail design for the holidays. The subtle golden shimmer gives it a glamorous touch without being too overwhelming.
Consumables needed:
- Nude base gel polish (e.g. Essie “Topless & Barefoot”)
- Gold glitter polish for accents (e.g. Zoya “Solange”)
- White paint for snowflakes (e.g. CND “Cream Puff”)
- Fine detailing brush for precise snowflake designs
- Topcoat for a long-lasting finish
Recreation at home:
- Apply a nude base coat to all nails.
- Add gold glitter to some nails for a festive shine.
- Use a fine brush to draw white snowflakes on one or two accent nails.
- Finish with a high-gloss top coat to protect the design.
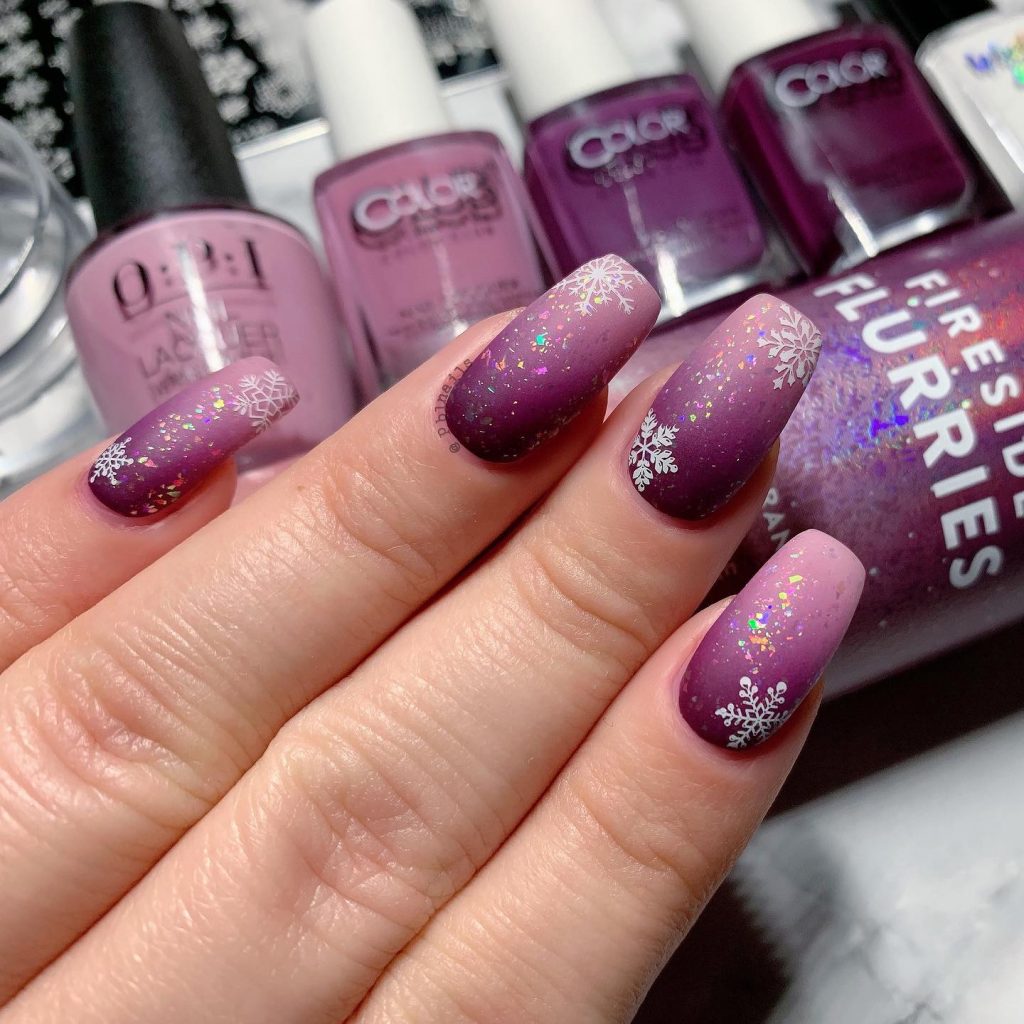
Purple Ombre with snowflakes
This ombre design combines shades of purple and pink, creating a beautiful winter gradient. The snowflake accents and holographic glitter take this design to the next level. Perfect for winter festivities or a chic everyday look, this manicure combines elegance with a playful touch. The long, round nails give it a modern look, while the colors add depth and intrigue.
Consumables needed:
- Pink and purple gel polish for ombre effect (e.g. OPI “Mod About You” and “Lincoln Park After Dark”)
- White lacquer for snowflakes (e.g. Essie “Blanc”)
- Holographic glitter top coat (e.g. ILNP “Mega”)
- Fine detailing brush for snowflake designs
Recreation at home:
- Mix pink and purple nail polish to create an ombre effect on any nail.
- Use a fine brush to paint delicate snowflakes on some accent nails with white nail polish.
- Apply a holographic glitter top coat to enhance the icy winter look.
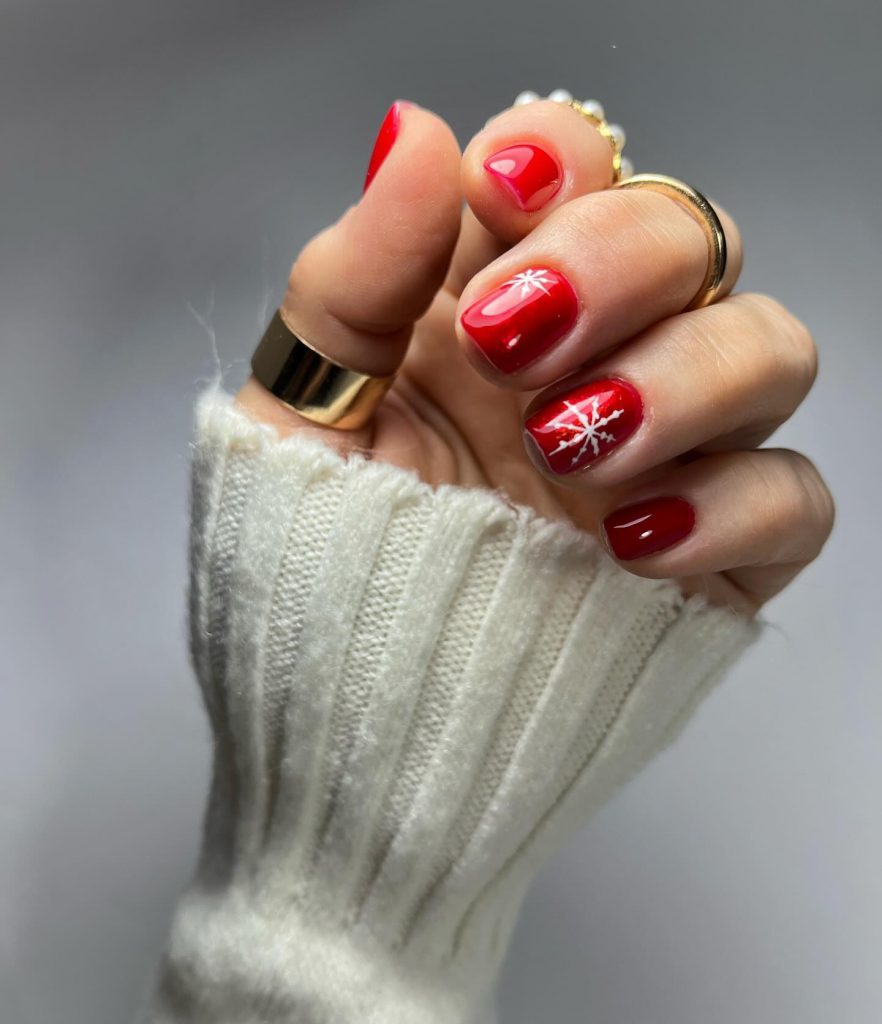
Red winter short snowflakes
A perfect example of short red nails done right, this design features a bright red base with delicate white snowflakes on two accent nails. This look is simple, but stands out with its striking colors and clean lines. It is a great option for those who prefer minimalist yet festive nails during the Christmas season.
Consumables needed:
- Bright red gel polish (e.g. OPI “I’m Not Real a Waitress”)
- White lacquer for snowflakes (e.g. DND “White Lace”)
- Top coat for extra shine
Recreation at home:
- Start by applying a red base coat to all nails.
- Use a fine brush to paint small white snowflakes on two nails.
- Seal the design with a gloss top coat for a polished finish.
Save pin


Namie O, a talented writer at Willtiptop, conveys her passion for fashion and beauty in every word she writes. With a keen eye for detail and a deep insight into the latest trends, Namie’s articles and insights captivate readers and provide them with valuable knowledge and inspiration. Through her engaging and informative writing style, Namie aims to empower individuals to explore their style, experiment with beauty techniques, and embrace their unique sense of self.